Search This Blog

Saturday, December 31, 2011

Best of 2011 - Wishing You a Happy New Year!

As a way to celebrate the past year, I thought I would put together a post that included some of the "best of"s of 2011.  It's been a crazy year with a lot of ups and downs, but I would not change any of it for the world.  I'm looking forward to what 2012 has to bring!

The top 3 recipes searched in 2011:


Jenn's Food Journey's top 3 recipes of 2011:


More top picks of 2011:


Here's wishing for a wonderful new year full of love and good food!
Ciao!
Jenn

***Remember, you still have time to enter my 2nd blogiversary vanilla bean giveaway.  Click HERE for all the yummy details***

One Year Ago:  Simple Marinated Chicken
 

Friday, December 30, 2011

Photo Friday - My Dad

Today I is my dad's birthday.  I feel like a complete shit because I have a card that I have been meaning to drop in the mail all week, but for some reason, I keep forgetting.  So, sorry dad - your card will be late - I figured sending him a blog-style birthday card would be the next best thing!

Happy birthday, dad - As always, I wish I could be there to celebrate with you - but know you are in my thoughts and always close to my heart.  I know being my dad has not always been easy, (I won't bring up all those pesky teenage years) but thank you for always being there for me.  Thank you for the encouragement you have given me throughout my life.  Thank you for letting me cry on your shoulder.  But most of all.. thank you for the love you give freely... it as helped make me the person I am.

Wishing you the best today and everyday - I love you, dad!!!!  Happy Birthday!!! xoxoxo

Now, on a less emotional note :)  Don't forget to enter my 2nd blogiversary giveaway for your chance to win more amazing IndriVanilla vanilla beans.  Click HERE for all the details.

And, of course, there is still Fire Day Friday, where I'm highlighting a favorite of mine - I've posted it here before - but - it's one of those "oldie but a goodie" recipe!


Oh.. and sorry for the lack of recipes lately.. starting Monday, I should be back to my normal routine.. or at least close to it :)  Enjoy your weekend and HAPPY NEW YEAR!!

Wednesday, December 28, 2011

The not so terrible 2's!!

Today is the 2nd blogiversary of Jenn's Food Journey!  It's been a crazy little ride over the past two years, and I have enjoyed every moment of it... good, bad, or indifferent!  What I loved the most is getting to know so many other bloggers.  They have brought inspiration and excitement into my life.  I have loved all my readers who are constantly encouraging me to keep going when things have felt a bit overwhelming.  I have loved the creations I have been able to come up with in my very own kitchen and that I have been able to share them so easily with all of you.

Because I love what I do and because I love all of you, I am hosting another giveaway.  This time, it's more vanilla beans!!  I mean, honestly, it's the most amazing gift I think I can give.  I have talked feverishly about these beans from IndriVanilla and I wish that everyone could sample these beauties - SO - with that said - all you have to do is leave a comment, right here and you are eligible for the great vanilla bean giveaway part 2!  Simple, right?  I will give you a second chance to win if you leave a comment on my facebook page too.  And, just for fun - if you mention this giveaway on YOUR blog, I'll give you another chance to win - all you have to do is leave me a link to the post where you mention it.

Three chances to win.. how can that be bad???

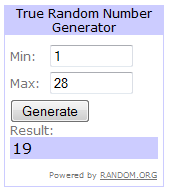
You have until 8:00pm pacific time on Tuesday, January 3rd to enter.  The winner will be picked by random.org and will be announced Wednesday morning (the 4th).  Good luck!


Saturday, December 24, 2011

HO! HO! HO! - Merry Christmas!!


I'm going to take a day or two away from blogging... Enjoy your loved ones, eat lots of good food, and I'll see you back here soon!

Friday, December 23, 2011

Sopapilla Cheesecake Bars

A few weeks ago, I received an email from my mom raving about these cheesecake bars she made.  She explained to me that they were so good, she and my dad devoured almost the whole pan.  Well, there was no way I was going to let my mom and dad enjoy something so scrumptious by themselves, so I thought I should probably try and make these to test how they really were.

So what was my thought on these bars?  They are DA BOMB!  Oh my goodness... you seriously could eat the whole pan.  They are decadent!!  And the worse part about them, they are so incredibly easy to make, you might not stop at just one pan!!

Now to save my butt from getting any larger just before Christmas, I decided to cut this recipe in half.  It made an 8 x 8 inch pan and it was perfect.  So don't feel like you HAVE to make the whole thing... unless you really, really want to... and you just might want to, trust me!

Oh.. I can't believe I almost forgot:  Have a Merry Christmas, everyone!!!

Sopapilla Cheesecake Bars
Recipe sent from my mom
Printable Recipe 
Ingredients:
2 (8oz.) cans crescent rolls
2 (8oz.) packages cream cheese, room temperature
1 cup granulated sugar
1 teaspoon vanilla
1 vanilla bean, split and seeded
1/4 cup melted butter
1/2 cup granulated sugar
1 teaspoon ground cinnamon

Directions:
Preheat oven to 350 degrees F.  Lightly grease a 9x13-inch baking dish.  Unroll one can of crescent rolls and lay flat in the bottom of the prepared dish. Stretch the rolls to cover the bottom of the pan and pinch any seams closed.

In a mixing bowl, combine cream cheese, 1 cup sugar, vanilla, and vanilla bean until combined and smooth.  Spread mixture over top of crescent roll.  Unroll the remaining can of crescent rolls and lay on top, stretching to cover and pinching seams closed.

Mix together remaining sugar and cinnamon.  Brush melted butter over top crescent roll.  Sprinkle on the sugar cinnamon mixture.  Bake for 30 minutes or until top is golden brown.  Let cool for approximately 20 minutes and then put in refrigerator to completely chill before cutting.  Enjoy!!

Thursday, December 22, 2011

Grilled Bourbon Chicken

This is another "cheater" recipe!  I'm loving these more and more lately.  Back in January of last year, I posted a recipe for a Bourbon Chicken (stir fry).  We loved it!!  I was going to put it back in the rotation this past week when I realized, crap, if I do that, I won't have anything to blog about... so I though - why not change it up a bit?  And with the simple change of grilling... it's a brand new dish!

Grilled Bourbon Chicken
Adapted from Blogchef.net
Printable Recipe 
Ingredients:
1/4 cup apple juice
1/3 cup light brown sugar
2 Tablespoons ketchup
1 Tablespoon cider vinegar
1/3 cup soy sauce
1 garlic clove, minced
1/4 teaspoon ground ginger
3/4 teaspoon red pepper flakes
2 large boneless, skinless chicken breasts (I cut mine into strips-no reason, just felt like having strips)

Directions:
In a bowl or measuring cup, mix together all ingredients except the chicken.  Reserve 1/4 cup of sauce for dipping if desired.  Season chicken with salt and pepper and place in a resealable bag.  Pour remaining mixture over, seal, and refrigerate for at least 2 hours.

Preheat grill to 375 degrees F.  Clean and oil grill grates.  Remove chicken from bag and discard the marinade.  Place chicken directly over the fire and grill for 8-10 minutes per side or until the chicken is cooked through.  Serve with reserved sauce if desired.  Enjoy!

One Year Ago:  Lemon Parmesan Sauce

Wednesday, December 21, 2011

Lasagna Roll Ups

 
Once again, my photo taking skills (or lack there of) take away from just how wonderful this dish really is.  But that's ok...I can give you my word that you will love this dish.  Well, if you like pasta dishes that is :)

I think I mentioned once that I had my own personal chef business for a while.  One of my favorite recipes to make for people was for Spinach Stuffed Lasagna Ruffles.  I didn't particularly love the name - I'm just not a ruffles sort of of girl - but it was a fantastic dish to prepare and freeze and have come out tasting damn near like it was right out of the oven.

While going through Stephen's (The Obsessive Chef) new cook book, A Cook's Book for Cooks, he had a recipe for Lasagna Roll Ups that was very (VERY) similar to the one I had made.  So, of course, I thought this was the perfect little homage to him.  A dish I've made before, but this time, making it more to his notes than to mine.  All I can tell you is if you have never made lasagna roll ups before... make them soon.  I made my own sauce, but to simplify things a bit, you can always use a jarred sauce... I won't tell!!

Lasagna Roll Ups
Inspired by Stephen, The Obsessive Chef
Printable Recipe 
Ingredients:
8 lasagna noodles, cooked according to package directions
1/2 lbs Italian sausage
1 Tablespoon tomato paste
28 oz can crushed tomatoes
pinch of granulated sugar
2 teaspoons dried oregano
1 teaspoon dried basil
garlic salt and pepper to taste
1 oz cream cheese, room temperature
1/3 cup ricotta cheese
1 Tablespoon parmesan cheese
1/4 teaspoon garlic powder
1/2 teaspoon oregano
4-6 large fresh basil leaves, chopped
1-2 cups shredded mozzarella cheese

Directions:
In a skillet, over medium heat, brown the sausage; drain any excess grease.  Add the tomato paste and stir until it's incorporated.  Add the crushed tomatoes, sugar, oregano, and basil; stir to combine.  Season with salt and pepper.  Bring to a boil, reduce heat, and simmer for 5-10 minutes.

Meanwhile, mix together the cream cheese, ricotta, parmesan, garlic powder, and oregano until well combined.  Gently fold in the basil leaves.

Preheat oven to 350 degrees F.  Spray a 9x13-inch baking dish with non-stick cooking spray.  Lay the noodles out on a flat surface.  Leaving a 1-inch area at one end of each noodle, spread about 1 Tablespoon (or more) of the cheese mixture on each noodle.  Roll the noodles up towards the clean side and place in prepared baking dish, seam side down.  (I cut my roll ups in half.. no reason why, just felt like they would be easier to eat that way)  Pour as much of the sauce as you want over the roll ups and top with shredded cheese.  Cover the pan with foil and bake for 20 minutes.  Remove foil and baking another 10-15 minutes or until the cheese is melted and bubbling.  Remove from oven and allow to sit for 5 minutes before serving.  Enjoy!

One Year Ago:  Christmas Pasta

Tuesday, December 20, 2011

Thick and Hearty Beer Cheese Soup

I enjoyed the creaminess of the Stove Top Chorizo Mac and Cheese I made back in October, so when I decided to make a beer cheese soup again, I decided to go with the evaporated milk way.  Well, it was definitely creamy.  THICK and creamy, trust me.  It was almost too decadent to eat... almost :)  I'd eat more of it right now, though, trust me.

If you are looking for a nice little soup for your Christmas eve dinner, or just any time you need a little warming up, look no further...this is the soup for you!

Thick and Hearty Beer Cheese Soup
Created by Jenn's Food Journey
Printable Recipes 
Ingredients:
2 Tablespoons unsalted butter
2 Tablespoon all purpose flour
1 (12oz) can evaporated milk
1 cup chicken broth
1 cup beer
2 teaspoons Worcestershire
1 teaspoon dry mustard
1/2 teaspoon kosher salt
1/4 teaspoon cayenne pepper
2 cups sharp cheddar cheese (spend a little money and get really good cheese)
1 cup cooked chicken, cubed

Directions:
In a large saucepan or soup pot, melt the butter over medium heat.  Stir in the flour.  Continue to stir until the flour becomes bubbly.  Slowly whisk in the broth and evaporated milk.  Bring just to a boil and add the beer, Worcestershire, mustard, salt and cayenne.  Let simmer for 15 minutes.  Slowly add the cheese, stirring constantly, until the cheese has melted.  Add the chicken and allow to simmer (do not boil) for another 3-5 minutes, or until the chicken is heated through.  Enjoy!


Monday, December 19, 2011

Christmas Goodies

I would have liked to have a week's worth of Christmas goodies to share with you like I did last year, but alas, time just got by me.  Can you believe it's less than one week until Christmas?? Wow, where id the time go?  I wanted to make a bunch of new candy and cookie recipes this year, but with the new house and work, alone, I seem to have very little time to spend in the kitchen.  So instead of leaving you with no Christmas goodie ideas this year, I'm just going to highlight the goodies I made last year.

Nothing wrong with bringing back the classics :)


Enjoy!
 

Friday, December 16, 2011

Photo Friday - Snow in the Desert

It has never snowed in the part of the valley that I live in, but I get to see the snow capped mountains from time to time.  Isn't it beautiful?  Most people think the desert is hot and dry and there are few things of beauty about it...... maybe this picture will change their minds?

Now I wish I could say I took this picture, but alas, I think we all know my photography skills are not that well refined!  Lucky for me, I stumbled on a picture that was posted by an awesome local photographer, Mike Olbinski.  He was kind enough to let me borrow his photo.  It has been very cold and rainy here in the valley, which leads to cold and snowy in the mountains.  I can see these mountains from my office and when the clouds broke Tuesday afternoon, we got an awesome view of this mountain range - Four Peaks.  I just wanted everyone to see the true beauty that lies within the desert.  So big thanks goes out to Mike for allowing me to share this photo with you!

And, don't forget to stop by Our Krazy Kitchen and check out my Fire Day Friday post... here's what you'll be missing if you don't:


Have a great weekend everyone!
Ciao!
Jenn

One Year Ago:  Guest Post - Crab Delights

Thursday, December 15, 2011

Angel Hair Pasta with Shrimp, Lemon, and Breadcrumbs

This is a simple dish that is probably a lot like some others I have showcased here... but that's ok... sometimes just the smallest change to a recipe can really make it a whole new dish.  Plus, I think you all know me pretty well by now.. you know I love pasta.. you know I love shrimp... so you know I loved this!

As always, if you don't like shrimp, substitute chicken.. or use a bunch of veggies instead.  You know what I always say.. this is just the canvas.. you can create the painting!!

Angel Hair Pasta with Shrimp, Lemon, and Breadcrumbs
Adapted from Martha Stewart
Printable Recipe 
Ingredients:
2 slices rosemary olive oil bread (you can use any kind of bread)
1 teaspoon olive oil
3/4 lbs angel hair pasta
20 large shrimp (21/25), peeled, deviened, and cooked
1 teaspoon lemon zest
3 Tablespoons lemon juice
2 Tablespoons basil olive oil (you can use extra virgin)
1 garlic clove, finely minced
3/4 cup cherry tomatoes, quartered

Directions:
Preheat oven to 350 degrees F.  In a food processor, pulse bread with 1 teaspoon olive oil until course crumbs form.  Spread on a rimmed baking sheet and season with salt and pepper.  Bake until golden, tossing occasionally, 6 to 8 minutes.  Remove from oven and allow to cool just a bit.

Meanwhile, cook pasta according to package directions.  Drain, reserving 1/4 cup of the pasta water, and return to pot.  Add the remaining ingredients and stir to combine. Add pasta water if needed to coat pasta more.  Sprinkle with breadcrumbs and serve immediately.  Enjoy!

One Year Ago:  Fish Sandwiches with Jalapeno Slaw

Wednesday, December 14, 2011

Tangerine Beef with Snow Peas

Easy to prepare.  Amazing flavor.  What more could you ask for in a dish, right?  Well, if you are looking for easy and flavorful, look no further.  This is the dish for you.  I do so love making stir-frys during the week.  They're light, they're quick, and when you sit down to eat, you aren't completely exhausted!  Another perfect dish for all those busy week nights!

Tangerine Beef with Snow Peas
Adapted from Williams-Sonoma
Printable Recipe 
Ingredients:
4 Tablespoons soy sauce, divided
4 Tablespoons Tangerine juice (or orange juice), divided
2 Tablespoons rice wine vinegar
2 Tablespoons hoisin sauce
1 garlic clove, finely minced
1/4 teaspoon sesame oil
1/4 teaspoon ground ginger
1/2 teaspoons cornstarch
1 lbs sirloin steaks, cut into strips
1 cup snow peas (or more if you want)
1 red pepper, diced
1 Tablespoon vegetable oil

Directions:
Mix together 2 tablespoons soy and 1 tablespoon tangerine juice.  Place the sirloin strips in a resealable bag and pour mixture over.  Seal and refrigerate for at least 1 hour.

Meanwhile, in a small bowl, mix together 2 tablespoons soy, 3 tablespoons tangerine juice, rice wine, hoisin, garlic, sesame oil, ginger, and cornstarch until well combined; set aside.

In a wok or large, deep non-stick skillet, heat the oil over medium high heat.  Add the beef and stir fry for 3 minutes.  Add the red pepper and snow peas and stir fry for another 3 minutes or until the veggies are just starting to get tender.  Add the sauce mixture, bring to a boil, and stir.  Remove from heat as soon as the sauce thickens.  Serve over rice.  Enjoy!

One Year Ago:  Lemon, Rosemary, and Balsamic Grilled Chicken

Tuesday, December 13, 2011

Curried Tilapia

It might not look the greatest, but this dish was delicious!  It was flavorful and light all at the same time.  But, I guess when you use curry in a dish, you are bound to get a little flavor, right?  I used a store bought curry powder, but if you are feeling really adventurous, feel free to make your own blend.... oh, and don't forget to share that recipe with me when you are done :)

Curried Tilapia
Created by Jenn's Food Journey
- Serves 2 -
Printable Recipe 
Ingredients:
2-3 tilapia fillets
1 cup snow peas
1 carrot, peeled and cut into match-sticks
1 red pepper, thinly sliced
2 jalapeno peppers, seeds removed, thinly sliced
1/2 cup coconut milk
1 teaspoon soy sauce
1-2 teaspoons curry powder (depending on taste)
1/8 teaspoon dried ginger
1/8 teaspoon Garam Masala
1 garlic clove, finely minced
salt and pepper to taste

Directions:
Season tilapia fillets with salt and pepper.  In a non-stick deep skillet, sprayed with oil, add the fish and cook over medium heat for 4-5 minutes or as soon as you get a nice browning on the fish.  Flip and add the snow peas and peppers.  Cook another 5-6 minutes, reducing heat of fish starts to brown too fast.  Meanwhile, mix together the remaining ingredients until well combined.  Pour over fish and allow to cook until the sauce is heated through.  Serve over rice.  Enjoy!

One Year Ago:  Cheddar Horseradish Soup

Monday, December 12, 2011

Creamy White Chicken Chili

 
First, a HUGE thanks to Mary at Barefeet in the Kitchen for the use of this photo.  I am the worse soup picture taker in the blogging world and Mary just happens to catch some pretty incredible looking photos.  So, big thanks to you, Mary, on allowing me to use your photo!

Now, about the chili:  The weather is getting quite chilly here in our part of the world.  Ok, so it's not snowing and it's not below zero, BUT, it reached a low of 30 degrees and that my friends, is COLD here in the desert.  So, it's soup and chili time!!  YAY!!!  And OMG this chili was so incredibly good!  I mean so good that Chris told me... and I quote... "This is the best chicken soup (chili) I have ever had!!"  I would have to agree.  This truly was one of the best chicken soup/chili I have in a very long time.  For me to say this is huge, by the way.  I am a red chili girl.  I usually stick my nose up to white chili.  In my defense it is because I have never had a white chili that has compared to the red ones I do so love.  Well, I may be a convert now.  Or at least with THIS particular white chili.  This will definitely become a regular in our house!

Creamy White Chicken Chili
Slightly adapted from Mary, Barefeet in the Kitchen
Printable Recipe 
Ingredients:
1 Tablespoon olive oil
1/2 sweet onion, finely chopped
1 garlic clove, finely minced
1 lb chicken breasts, cut into 1/2-inch pieces
3 cups chicken broth
1 (7oz) can chopped green chili
1 can great northern beans
1 teaspoon kosher salt
1/2 teaspoon cumin
1 teaspoon oregano
1/2 teaspoon white pepper
1/4 teaspoon cayenne pepper
1 cup sour cream
1/2 cup heavy cream

Directions:
In a large saucepan, over medium heat, heat the oil.  Add the onion and garlic and saute until they just become tender, about 2-3 minutes.  Add the chicken to the pan.  Cook until the chicken is no longer pink, about 5-8 minutes.  Add the broth, beans, chilis and spices.  Bring to a boil.  Reduce heat and allow soup to simmer for 30 minutes; stirring occasionally.

Add the sour cream and heavy cream to the pan and remove from heat.  Stir until everything is combined.  Serve immediately and enjoy!

One Year Ago:  Every Chip Cookie

Friday, December 9, 2011

Jalapeno Pesto Chicken (and the giveaway winner!)

This was the first meal I made for us when we moved into our new house!  It's taken me a bit of time to post it, but never late than never is what I always say!!  This is a fantastic recipe by one of my grilling idols.  I do not give Robyn the Grill Girl enough props (ok, ok, any props) and I apologize for that.  I think it's because I might actually be jealous of her. lol  Seriously, she's got an amazing set up, she's amazingly talented, she does grilling instructional videos.. I mean the list goes on and on and on :)  Or it could be that I'm intimidated by her abilities on the grill.  She is a true master and I worry that I will not be worthy.  Whichever personal issue that I may be faced with, I cannot go on any longer without at least mentioning her because, honestly, she really is who I want to be when I grow up!  If that's wrong, I don't wanna to be right!! haha!

In all seriousness, this recipe really is DE-licious!  It's spicy, it's wonderful, I don't know what else to say about it other then TRY IT.  Go now and do it if you can, you will not be sorry.. would I lie to you about anything?  Especially when it comes to grilling??  Of course not... so make this.... soon.  Oh, and don't forget to make a little sauce for your chicken.  Save at least 1 Tablespoon of your pesto - mix it with some mayo.. VIOLA!

Ok, Ok... I've wasted enough of your time, haven't I?  I know what you are all here for...

The winner of the great vanilla bean giveaway is:

#19 is Chris at Nibble Me This - Chris said:  "I would have to do some crazy version of creme brulee"  (I'm going to hold you to that, Chris)

Congratulations to Chris and a big thanks to everyone for the wonderful response this giveaway received!  I love that I've even seen some new readers.  Welcome to you all and of course, thank you to all my loyal readers.  You all make this incredibly fun.  And to be able to give away such a great product feels incredibly good.  Remember, all Whitney's vanilla beans are extremely well priced, so stop by IndriVanilla and order yours today!

Jalapeno Pesto Chicken
Recipe slightly adapted from Robyn the Grill Girl
- Serves 2 - 
Printable Recipe 
Ingredients:
2 boneless, skinless chicken breasts
2 limes, juiced and zested
1 cup fresh parsley leaves, loosely packed (you can use cilantro - Chris doesn't like cilantro so I used parsley instead)
3 jalapenos, stems removed, roughly chopped (if you want less heat, remove seeds too)
2 garlic cloves, quartered
3-4 Tablespoons olive oil
salt and pepper to taste
1/4 cup mayonnaise

Directions:
Add the lime juice, lime zest, parsley, jalapenos, and garlic to a bowl of a food processor.  Pulse until everything is pretty well chopped up.  Slowly add in the olive oil until it is fully incorporated and smooth.  Season to taste with salt and pepper.  Reserve 1 Tablespoon of pesto.  Pour remaining pesto over chicken and let marinate for at least 4 hours.

Meanwhile, in a small bowl add the mayo and the reserved sauce.  Stir to combine.  Cover and refrigerate until ready to use.

Preheat grill to 375 degrees F.  Oil the grill grates.  Place the chicken over the fire and grill for 6-10 minutes per side or until the chicken reaches an internal temperature of 160 degrees F.  Remove from grill and allow to rest for 5 minutes.  Serve with sauce.  Enjoy!

One Year Ago:  Grilled Spicy Chicken Masala

Thursday, December 8, 2011

Penne with Braised Beef Ribs

The pictures just don't do this meal justice - they aren't bad, mind you, but they just don't highlight what a wonderful little dish this is.  Yes, it takes a little time, but it's so worth it, trust me.  This is the perfect Sunday afternoon dish to make... throw it on the stove, go do some laundry, watch a few episodes of Diners, Drive-ins, and Dives.. and the next thing you know, you are having amazing dinner!

REMINDER:  Today is the last day to enter the great vanilla bean giveaway!  You have until 8pm (Pacific time) to enter.  Winners will be picked by random.org and will be announced tomorrow morning.  Clink on this LINK for more details.  Good luck!!

Penne with Braised Beef Ribs
Created by Jenn's Food Journey
Printable Recipe 
Ingredients:
1 Tablespoon vegetable oil
1/2 sweet onion, chopped
1 lb boneless beef country style ribs
salt and pepper
1 cup beef broth
1/4 cup red wine
28oz can crushed tomatoes
2 teaspoons parsley
2 teaspoons dried oregano
2 garlic cloves, finely minced
1/4 teaspoon granulated sugar
12oz whole grain penne pasta

Directions:
Preheat oven to 350 degrees F.

In a Dutch oven, heat the oil over medium heat.  Sear the meat on all sides.  Remove and add the onions.  Cook for 2-3 minutes; stirring occasionally.  Add the meat back into the pot along with the beef broth and wine.  Cover and place in oven.  Bake for 1 hour.  Lower temperature to 325 degrees F and continuing cooking for 1 hour.

Remove meat from the Dutch oven and skim off any excess fat.  With a submersion hand mixer, carefully puree what is left in the Dutch oven.  Place over medium heat and ad the crushed tomatoes, parsley, oregano, garlic, and sugar.  Stir to combine.  Add the meat and stir to coat.  Bring to a boil, reduce heat, and simmer for 30 minutes.

Meanwhile, cook the pasta according to package directions; drain.  Serve the sauce over the pasta and enjoy!

One Year Ago:  Baked Tilapia with Horseradish Dill Sauce

Wednesday, December 7, 2011

Sweet and Spicy Sauce

This sauce is exactly what you would assume it would be:  Sweet and Spicy!  It worked perfectly on a nicely baked piece of tilapia but would also work extremely well on chicken and/or pork.  This recipe only makes just over a 1/4 cup, so if you want more, double the recipe.  It was the perfect amount for Chris and I.. and a little, truly does go a long way.

***Remember to enter the great vanilla bean giveaway!  Click on this LINK to find out all the yummy details.  You have until Thursday, December 8th at 8pm Pacific time.. so hurry!!***

Sweet and Spicy Sauce
Created by Jenn's Food Journey
Prinbale Recipe 
Ingredients:
3 Tablespoon hoisin
1 Tablespoon rice vinegar
1 Tablespoon mirin
2 teaspoon soy sauce
1/4 teaspoon cayenne pepper
1/4 teaspoon minced garlic
dash of sesame oil

Directions:
In a small bowl, mix together all ingredients until well combined.  Serve over fish, chicken, or pork.  Enjoy!

One Year Ago:  Adobo Chicken

Tuesday, December 6, 2011

Chili Glazed Pork Ribs

I decided to do these ribs in the oven... and unfortunately, they were not fall off the bone delicious.  I am sure I did not back them slow enough or low enough.. but that's ok.. the flavor was still there and that made it at least blog worthy :)  And I promise, the recipe is updated so that you will get the right tenderness if you decide to make this.

***Don't forget to enter the great vanilla bean giveaway!  Click on this LINK to find out all the details.  Giveaway ends Thursday, December 8th at 8pm Pacific time.***

And if my giveaway isn't enough for you, check out the giveaway IndriVanilla has on their Facebook page.. more chances to win more vanilla beans is NOT a bad thing!!

Chili Glazed Pork Ribs
Adapted from the Food Network
Printable Recipe 
Ingredients:
1 rack pork ribs
1/2 Tablespoon salt
1 Tablespoon brown sugar
1/4 teaspoon garlic powder
1 teaspoon dried thyme
2 Tablespoons ancho chili powder
1/4 teaspoon black pepper
1/4 teaspoon cayenne
For the glaze (sauce) -
1/4 cup barbecue sauce
1 Tablespoon beer

Directions:
In a small bowl, mix together the salt, brown sugar, garlic powder, thyme, ancho, pepper, and cayenne.  Remove 1 Tablespoon of mixture and set aside.  Rub remaining mixture over both sides of the ribs and wrap in plastic wrap.  Place in refrigerator for 1 hour.

In a bowl, mix together the barbecue sauce, beer, and reserved rub mixture.  Set aside.

Preheat oven to 225 degrees F.  Line a rimmed baking sheet with aluminum foil and place a wire rack over it.  Spray with non-stick spray.  Place in oven and bake for 45 minutes.  Carefully remove from oven and brush with sauce mixture.  Cover with foil and return to oven.  Turn oven down to 200 degrees F and continue to bake for another 1.5 hours.  Remove from oven, remove the foil, brush with more sauce and return to oven for 30 more minutes or until the ribs can be picked up with a tong and "bend" at the ends.  Remove from oven and allow to rest for at least 5 minutes.  Cut and serve with any remaining sauce.  Enjoy!

One Year Ago:  Grilled Pork Chops with Chipotle Honey Sauce