I can't believe that summer is almost over. Actually, for some kids, who are back in school already, summer IS over. Weather-wise, at least here, summer has a ways to go. BUT, I am aware it's not that way in other parts of the country, so I figured, I better post this recipe before it's too late.
If you follow Mary's blog, Barefeet in the Kitchen, you'll know she has been on an ice cream making frenzy this summer. It was hard to keep up, I must admit. There was at least one recipe, however, that stood out amoung the rest of them and it was this one - Chocolate covered strawberry ice cream..... enough said, right??
The one thing I changed that I wished I had not was the chocolate chips. I was lazy and just left them in as chips, but Mary melted them and had this chocolate swirl that went through the ice cream. Next time, I will definitely take the extra time to do it. Otherwise, the ice cream was some of the best I have had!!!
Chocolate Covered Strawberry Ice Cream
Slightly adapted from Barefeet in the Kitchen
Printable Recipe
Ingredients:
4 oz cream cheese, softened
1/2 cup sour cream
1/3 cup sugar
1 teaspoon lemon juice
1 cup half and half
1 teaspoon vanilla
pinch of kosher salt
8 strawberries, washed and hulled
1/4 cup semi sweet chocolate chips
Directions:
Combine the cream cheese, sour cream, sugar, lemon juice, half and half, vanilla and salt in a blender. Blend until smooth. Add the strawberries and puree until smooth once again. Pour into ice cream machine and freeze according to manufacturer's instructions. Add the chocolate chips in the last three minutes of churning. Pour into freezer safe dishes and freeze overnight. Let stand at room temperature for at least 20 minutes before scooping and serving. Enjoy!
One Year Ago: Old School BBQ Chicken
Two Years Ago: White Chocolate Chip & Raspberry Swirl Ice Cream
Three Years Ago: Parmesan Orzo with Salmon
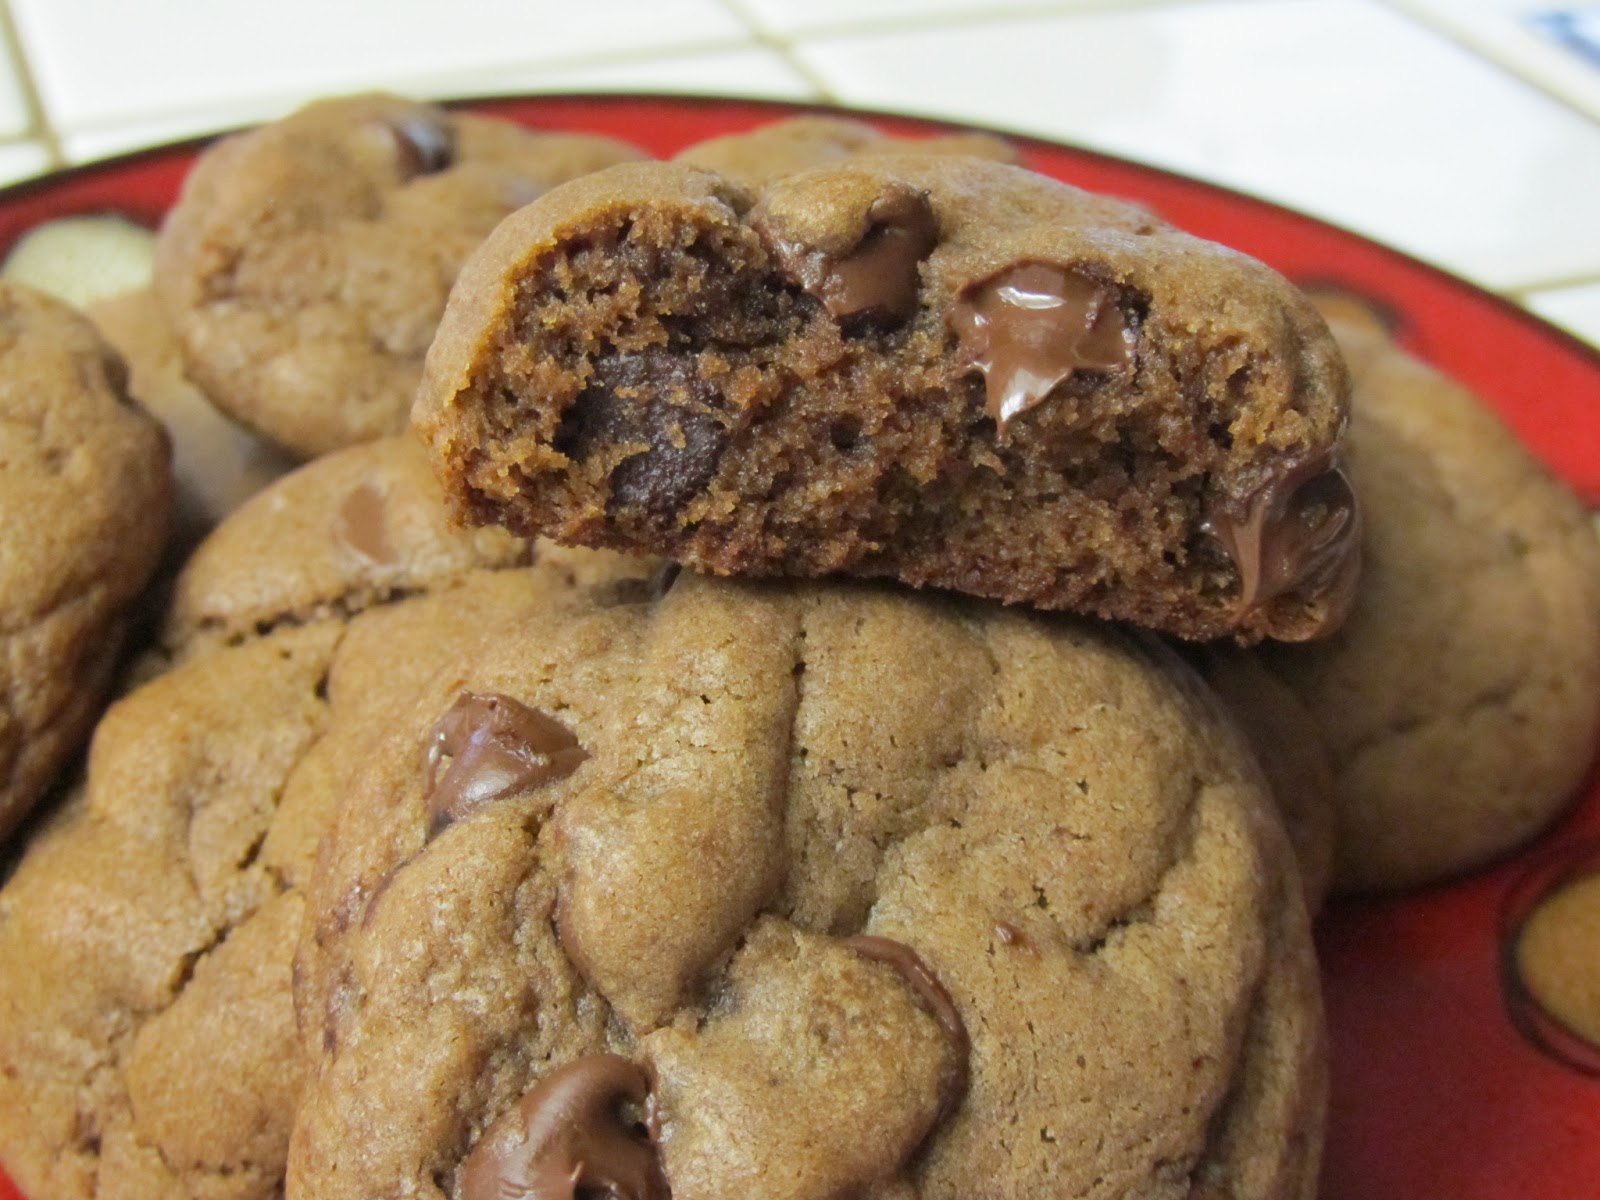
The only disappointing thing about these cookies (if you could actually say there was anything disappointing about these cookies!!!) was the lack of Kahlua flavor. Although, had I really thought about it before hand, I would have realized that I shouldn't have expected more Kahlua flavor as the recipe only calls for one tablespoon of that yummy, deliciousness. (way to use your head for more than a coat rack, Jenn)
Anywho... I think most of you know by now, I don't do a lot of baking and when I do, it usually tends to be cookies. So, the other day, when I was actually in the mood to do some baking, I looked my pantry over and saw a small bottle of Kahlua just staring at me... BEGGING me to use it... Well, as you all know, when an ingredient begs, one must never deny that ingredient..... sooooo this delicious treat was born!
Kahlua and Coffee Chocolate Chip Cookies
Adapted from Recipe Girl
Printable Recipe
Ingredients:
2 2/3 cup all purpose flour
1 teaspoon baking soda
1 teaspoon cinnamon
1/2 teaspoon salt
1/4 cup cocoa
1/2 Tablespoon instant coffee (original recipe calls for espresso powder)
1 Tablespoon Kahlua
1 cup unsalted butter, room temperature
1 cup packed brown sugar
1/2 granulated sugar
2 eggs
1 teaspoon vanilla
1-2 cups chocolate chips
Directions:
Preheat oven to 375 degrees F. In a bowl, whisk together the flour, baking soda, cinnamon, salt and cocoa; set aside.
In a small bowl or measuring cup, add the instant coffee and Kahlua; stirring to combine. Allow to sit and let the coffee granules dissolve.
In a bowl of a stand mixer with a paddle attachment, cream together the butter and both sugars until light and fluffy. Scrape down the sides and add the eggs, one at a time, beating until just incorporated. Add the vanilla and beat until just combined. With mixer on low, slowly add in the dry ingredients until just combined. Remove from stand mixer and fold in chocolate chips.
Drop by teaspoon or tablespoon full, two inches apart, onto a cookie sheet. Place in oven and bake 8-10 minutes, or until slightly browned on the edges. Remove and allow to cool for 5 minutes. Finish cooling completely on a wire rack. Store in airtight container for up to 5 days. Enjoy!
One Year Ago: Smoked Balsamic Pork Ribs
Two Years Ago: Jalapeno Cheddar Grilled Chicken
Three Years Ago: Caramelized Chicken Breasts with Garlic Rice
Just like last year, this Christmas baking season got away from me. Working 50+ hour weeks can do that to a person, though. I barely have time to make dinner any more, never mind making the time to do anything special on the weekends, I'm usually far too burned out. So my apologies for, once again, not having any goodies to share with you. If you are interested in seeing Christmas goody posts, CLICK HERE for some past recipes. Otherwise, I can at least share with you a fantastic cookie recipe I did end up trying this weekend. I actually ended up with just a little extra time and I was surprisingly in the mood to bake, so I reached deep into my "must try" cookie file and found this delicious little concoction from Andrea the Kitchen Witch. These cookies were extremely simple to make and, ooooh my woooooord, were they ever decadent!!! I can't believe it took me almost two years to finally make these!
Death by chocolate? Is there truly any better way to go???
Death by Chocolate Cookies
Very slightly adapted from Andrea the Kitchen Witch
- Makes about 3 dozen -
Printable Recipe
Ingredients:
1 stick (1/2 cup) unsalted butter, softened
3 Tablespoons vegetable oil
1/2 cup packed brown sugar
1/2 cup granulated sugar
1/2 cup cocoa powder (I used natural unsweetened)
1 egg
1 Tablespoon vanilla extract
1 1/2 - 2 cups all purpose flour
1 teaspoon baking soda
1/2 teaspoon kosher salt
1/2 cup milk chocolate chips
1/2 cup semi-sweet chocolate chips
Directions:
Preheat oven to 350 degrees F.
In a bowl of a standing mixer, with the paddle attachment, cream together the butter and vegetable oil until light and fluffy. Add both sugars and cream again until light and fluffy. Add the cocoa powder and mix until just blended together. Scrape down the sides of the bowl and add the egg and vanilla. Mix until blended together, scraping down the sides at least once. Add the flour (start with 1 cup and add until the batter is no longer wet), baking soda and salt. Slowly mix until well combined. Remove bowl from stand mixer and fold in the chocolate chips with a spatula.
Scoop batter onto cookie sheet and bake for 10-11 minutes. You want the bottom and edges to be slightly crispy. It's hard to tell when they are done due to the dark color, so use your timer. Allow to cool slightly before moving to a wire rack to cool completely. Enjoy!
One Year Ago: Christmas Goodies
Two Years Ago: Guest Post - Crab Delights
Reese's Pieces have to be one of my favorite candies! I have loved them since the first time I tried them... which, by the way.... and this is totally going to date me... was right after I saw the preview for E.T. - Oh, I may have had them before that, but honestly, that is when I really remember loving them. That love affair has lasted a number of years.... sooooo, when I just happened to grab a large bag of Reese's Pieces at the store (how the heck did those end up in the basket???) I wanted to do something other than completely devour them in one sitting.... so I decided on cookies that I could completely devour in one sitting instead :) These .... were.... AWESOME!!!!!
Reese's Pieces Peanut Butter Cookies
Recipe from Hersheys.com
Printable Recipe
Ingredients:
1 stick (1/2 cup) unsalted butter, room temperature
1/2 cup granulated sugar
1/2 cup packed light brown sugar
1/2 cup creamy peanut butter
1 egg
1 teaspoon vanilla extract
1 cup all purpose flour
1/2 teaspoon baking soda
1/4 teaspoon salt
1 cup Reese's Pieces candies
Directions:
Preheat oven to 350 degrees F.
Beet butter, both sugars, peanut butter, egg and vanilla in a bowl of a stand mixer (using the paddle attachment) until light and fluffy. In another bowl, stir together the flour, baking soda and salt; gradually add to peanut butter mixture, beating until well blended. Remove from stand mixer and fold in candies. Drop by tablespoon onto ungreased cookie sheets.
Bake 10 to 12 minutes, or until the edges are lightly browned; remove from oven. Cool slightly; remove from pan to wire rack to cool completely. Makes 2 dozen cookies.
One Year Ago: Chili Glazed Pork Ribs
Two Years Ago: Grilled Pork Chops with Chipotle Honey Sauce
The other day I was craving something chocolatey. Oh, we had chocolate candy in the house, but I wanted something more cake like. I searched the pantry for a few items, made sure I had some cream cheese and decided I'm make a couple of delicious little mini cakes. I found some Mayan cocoa that was just screaming to be used and this wonderful little treat was invented. Mayan cocoa has a hint of cinnamon and cayenne pepper in it, so these little cakes had a bit of a kick to them... hence the frosting... I mean it only made sense to add the frosting to help "cool" them off :)
Mayan Cocoa Mini Cakes with Vanilla Bean Frosting
Created by Jenn's Food Journey
- Makes 6 mini cakes -
Printable Recipe
Ingredients:
1/4 cup Mayan Cocoa powder
1/2 cup hot water
1/2 cup plus 2 1/2 Tablespoons all purpose flour
1 teaspoon baking powder
1/8 teaspoon salt
1/4 cup unsalted butter, room temperature
1/2 cup granulated sugar
1 egg
1 teaspoon vanilla extract
Vanilla Bean Frosting -
2 Tablespoons cream cheese, room temperature
1/4 - 1/2 cup powdered sugar
1 vanilla bean, split and scrapped
1/2 teaspoon vanilla extract
Directions:
In a measuring cup or bowl, add the cocoa powder and hot water. Stir to combine and set aside. In another bowl, sift together 1/2 cup of flour, baking powder and salt; set aside.
Preheat oven to 375 degrees F. Spray 6 muffin tins with non-stick cooking spray. In a bowl of a stand mixer, using the paddle attachment, add the butter and sugar. Cream together on low to medium low setting until light and fluffy. Scrape down the sides and add the egg and vanilla extract. Mix together until just combined. Slowly add in the cooled chocolate mixture and mix until everything is combined. Pour into the prepared muffin tins and place in oven. Bake 15-20 minutes or until a toothpick inserted in the center of the cakes comes out clean. Remove and allow cool.
To make the frosting - with a hand mixer, mix together the cream cheese, vanilla bean and vanilla extract. Add the powdered sugar a little at a time until you achieve your desired thickness and sweetness (I wanted mine to be sort of a glaze instead of a thick frosting). Once cakes are cooled, frost and enjoy!
One Year Ago: Beef Roast
Two Years Ago: Grilled Chicken with Bacon and Balsamic Glaze
It's been a while since I've posted an ice cream recipe. Oh, don't get me wrong, I have made ice cream since that last time, I just haven't gotten a good picture of it or made anything different. I thought it was about time to change that, though, especially since the rest of the country is starting to cool down. I wanted to get this in before the summer is over for most of you. Although we are in no danger of that happening any time soon around here. The desert is still hot and dry and it doesn't feel like fall is around the corner at all! Oh well.. that's why there is ice cream, right? To help us forget (at least for a short time) how hot it really is!
Cookies and Cream Ice Cream
Created by Jenn's Food Journey
Printable Recipe
Ingredients:
1 14oz can sweetened condensed milk
2 Tablespoons vanilla extract
4 cups heavy cream
1 vanilla bean
18-20 roughly chopped chocolate cream sandwich cookies (Oreos)
Directions:
In a large bowl, mix together the condensed milk, vanilla and heavy cream. Slice the vanilla bean in half lengthwise and scrap out the seeds into the cream mixture. Stir to combine. Cover and place in refrigerator for at least 2 hours.
Pour the mixture into a freezer bowl of an ice cream maker and follow manufacturers instructions. Add cookies in last 5-10 minutes of cycle. Move to freezable containers and store in freezer for up to 1 month. Enjoy!
One Year Ago: Chorizo Chipotle Pasta
Two Years Ago: Beer Brined Pork Chops with Cheddar
How do you take something wonderful and decadent and make it even more wonderful and decadent? Well, all you need to do is ask Paula Deen! That woman can come up with some of the most sinful meal ideas ever! This one included! It's simple, decadent, and perfect for adults and children. The perfect summer grilled dessert!
Grilled Chocolate Chip Cookie S'mores
Adapted from Paula Deen
- Serves 2 -
Printable Recipe
Ingredients:
4 chocolate chip cookies (these can be store bought and the larger the better)
1 Hershey's chocolate bar (ok, so you are only going to use like 6 squares...go ahead and eat the rest, I won't tell)
1/4 cup mini marshmallow
2 squares of aluminum foil
Directions:
Preheat grill to 325 degrees.
Place one cookie on each piece of foil. Top with 3-4 squares of the chocolate bar (depends on how chocolatey you want it) and then the marshmallows. Top with remaining cookie. Wrap foil around the cookie and place on the grill until warmed through and melted, about 5-6 minutes. Carefully remove from grill and foil packaging. Enjoy!
One Year Ago: Cucumber, Tomato and Feta Salad
Two Years Ago: Super Fudgy Brownies
I don't usually do anything fancy or fun for St. Patrick's day... heck, I can't even remember the last time I went out and had a green beer on St. Patty's day... but this year I had an abundance of Guinness that neither Chris or myself were going to drink, so I tried to figure out a few ways to make good use of the said beer. So the Triple Chocolate Guinness Cookie was born! Ok, ok, this recipe was born before that, but my idea to make a cookie with the beer was born at that moment at least. After a quick bit of searching, I found this recipe and thought.. hhhmmmm... not just chocolate but TRIPLE chocolate AND beer cookies.... Yea, I think I need to make these. (p.s.. plan ahead for these babies.. they take longer than you would think to make)
So in honor of St. Patrick's day, I give you............
Triple Chocolate Guinness Cookies
Adapted from The Galley Gourmet
Printable Recipe
Ingredients:
2 (12oz) bottles of Guinness extra stout
1/2 cup packed brown sugar
2 3/4 cup all purpose flour
1/3 cup unsweetened cocoa powder
1 teaspoon instant coffee or espresso powder
1 teaspoon baking powder
1 teaspoon baking soda
1 teaspoon salt
1 cup unsalted butter, room temperature
1 cup granulated sugar
1/2 cup packed brown sugar
2 large eggs
1 Tablespoon vanilla extract
1 cup dark chocolate chips
1 cup milk chocolate chips
Directions:
In a medium saucepan over medium high heat, add the Guinness and 1/2 cup of brown sugar. Bring to a boil, stirring occasionally. Continue to cook on medium until thick and syrupy - about 40-50 minutes. Set aside to cool.
In a medium bowl, whisk together the flour, cocoa, instant coffee, baking powder, baking soda, and salt. Set aside.
In a bowl of a standing mixture fitted with a paddle attachment, cream the butter and the remaining sugars together until light and fluffy, about 3 minutes. Add the eggs, once at a time, until combined. Scrape down the sides of the bowl and add the vanilla. Mix until combined. With the mixture on low, gradually add the cooled beer syrup, mixing until just combined. Gradually add the dry mixture until no more flour is visible. Remove from mixing stand and fold in chocolate chips. Cover the bowl with plastic wrap and let sit in refrigerator for about 30 minutes to an hour. (Dough will keep in the fridge for up to 3 days).
Preheat the oven to 350 degrees F. Scoop out tablespoon portions of the cookie dough and place on baking sheet spaced about 2-3 inches apart. Bake the cookies until the edges are just set, about 10-12 minutes, rotating the baking sheet half way through. Allow the cookies to cook on the baking sheet for 2 minutes, than transfer to a wire rack to cool completely. Enjoy!
One Year Ago: Smoked Pork Butt
Two Years Ago: Poblano Chicken
On the weekends, especially during the winter, I tend to get into a bit of a baking mood. Now, because I don't consider myself much of a baker, the things I make are usually very simple, like cookies and brownies. Lately, I've been on a cookie binge. So last weekend, when I was trying to think of something yummy to make, I came across this recipe for Double Chocolate Chip Cookies from Martha Stewart. Normally, I am not one to try a Martha recipe as I've had so many of them not turn out right. But of course, how can you go wrong with a cookie recipe, right? And especially one for chocolate CHOCOLATE chip cookies!
Chocolate Chocolate Chip Cookies
Ever so slightly adapted from Martha Stewart
Printable Recipe
Ingredients:
1/2 cup unsalted butter, room temperature
1/2 cup granulated sugar
1/2 cup brown sugar
1 large egg
1 teaspoon vanilla extract
1 1/2 cups all purpose flour
1/4 cup unsweetened cocoa powder
1/2 teaspoon baking powder
1/2 teaspoon baking soda
1/2 teaspoon salt
1 cup milk chocolate chips
Directions:
Preheat oven to 350 degrees F. Cream the butter and sugars int a large bowl with an electric mixer (I used my standing mixer) on high speed. Lower to medium speed and add the egg and vanilla. Sift together the flour, cocoa, baking soda, baking powder, and salt. On low speed, add the dry mixture to the butter mixture. Beat until fully incorporated. Fold in the chocolate chips.
Form dough into approximately 1 1/2-inch balls. Place on baking sheets, 2 inches apart. Bake until the centers are just set, about 10-12 minutes. Let cook on sheets for 5 minutes, then transfer to wire rack to finish cooling. Enjoy!
One Year Ago: Sriracha Chicken Wings
Two Years Ago: Lemon Tuna Pasta with Basil & Zucchini
Aren't they awesome? I know the lovely and talented Ginny and just wanted to take a moment to show her off. I don't know exactly where all my readers are reading from, BUT, if you happen to live in Iowa, specifically around the Ely - Iowa City - Coralville - North Liberty - Cedar Rapids area, you need to seriously consider having Ginny make your next celebration cake!
Check out more great cakes and how to contact her on her website HERE or find her on Facebook HERE - and when the time comes and you see her on a Food Network cake challenge, you can tell everyone you saw her here first!! :)
One Year Ago: Baked Penne with Chorizo
Two Years Ago: Bourbon Chicken
Let me just say this: These cookies might not make you want to marry whoever made them for you, but they might make you want to marry the actual cookie!!! Oh, wow, these were absolutely fantastic cookies... I usually have my one, maybe two (if I really stretch it) favorite chocolate chip cookie recipes and I don't venture far from them - but these... yea, these will definitely end up as my number two chocolate chip cookie recipe. And trust me, that is saying a lot!
I Want to Marry You Cookies
Slightly adapted from Mary at Barefeet in the Kitchen
Printable Recipe
Ingredients:
1 cup butter, room temperature
1 1/4 cups brown sugar (I used light)
1/2 cup granulated sugar
1 egg plus 1 egg yolk
1 teaspoon vanilla
1 vanilla bean, split and scraped
2 cups all-purpose flour
1 cup old fashioned rolled oats
1/2 teaspoon baking soda
1/2 teaspoon kosher salt
1/4 teaspoon cinnamon
1 cup milk chocolate chips
1 cup white chocolate chips
Directions:
In a bowl of a standing mixer, cream the butter and both sugars together with the paddle attachment on medium speed until light and fluffy, about 3-5 minutes. Scrape sides down with a rubber spatula. With the mixer running on low, add the egg and mix until just incorporated. Add the egg yolk and mix until just incorporated (don't forget to scrape down the sides!!). Add the vanilla and vanilla bean and mix just until combined.
In another bowl, mix together all the dry ingredients and add it to the wet ingredients, mixing until combined. Fold in the chocolate and white chocolate chips. Roll, by hand, into 24 medium size balls or 50-60 smaller ones. Chill for an hour.
Preheat the oven to 325 degrees F. Remove cookies from the refrigerator and place on baking sheets, about 2 inches apart. Bake 8-12 minutes, depending on how big you make them, or until cookies are just set and slightly brown on the edges. Remove from the baking sheet and cool on a wire rack. Enjoy!
One Year Ago: Chicken Braciole with Alfredo Sauce
Two Years Ago: Red Velvet Cake with Cream Cheese Frosting
A few weeks ago, I received an email from my mom raving about these cheesecake bars she made. She explained to me that they were so good, she and my dad devoured almost the whole pan. Well, there was no way I was going to let my mom and dad enjoy something so scrumptious by themselves, so I thought I should probably try and make these to test how they really were.
So what was my thought on these bars? They are DA BOMB! Oh my goodness... you seriously could eat the whole pan. They are decadent!! And the worse part about them, they are so incredibly easy to make, you might not stop at just one pan!!
Now to save my butt from getting any larger just before Christmas, I decided to cut this recipe in half. It made an 8 x 8 inch pan and it was perfect. So don't feel like you HAVE to make the whole thing... unless you really, really want to... and you just might want to, trust me!
Oh.. I can't believe I almost forgot: Have a Merry Christmas, everyone!!!
Sopapilla Cheesecake Bars
Recipe sent from my mom
Printable Recipe
Ingredients:
2 (8oz.) cans crescent rolls
2 (8oz.) packages cream cheese, room temperature
1 cup granulated sugar
1 teaspoon vanilla
1 vanilla bean, split and seeded
1/4 cup melted butter
1/2 cup granulated sugar
1 teaspoon ground cinnamon
Directions:
Preheat oven to 350 degrees F. Lightly grease a 9x13-inch baking dish. Unroll one can of crescent rolls and lay flat in the bottom of the prepared dish. Stretch the rolls to cover the bottom of the pan and pinch any seams closed.
In a mixing bowl, combine cream cheese, 1 cup sugar, vanilla, and vanilla bean until combined and smooth. Spread mixture over top of crescent roll. Unroll the remaining can of crescent rolls and lay on top, stretching to cover and pinching seams closed.
Mix together remaining sugar and cinnamon. Brush melted butter over top crescent roll. Sprinkle on the sugar cinnamon mixture. Bake for 30 minutes or until top is golden brown. Let cool for approximately 20 minutes and then put in refrigerator to completely chill before cutting. Enjoy!!
I've been wanting to make this pie since I first saw it on the Taste of Home website. The problem is, if I make a pie, it's just Chris and I and... well... frankly... we'll eat the whole thing. No, not in one sitting, but still, we end up eating a whole pie. I feel bad that in 3 or 4 days (or less depending on the size of each slice), I've eaten half a pie.. it just feels wrong (yet oh so right) - so, I don't make a lot of pies, hence why it took me so long to make this :)
The nice thing about the holiday season is that I don't guilt myself about eating half a pie in a matter of days. So, when Chris suggested making a dessert of some kind for Thanksgiving, I immediately said.. Peanut Butter Pie!!! Mmmmmmmm!!! He happily agreed.
Now, had I been thinking proactively, I probably would have added some vanilla bean into the pie mixture, but for some reason I had it in my mind to make vanilla bean whipped cream and didn't think past that. That's ok, the pie was incredibly fantastic and the homemade whipped cream was just the icing on the cake... or the whipped cream on the pie in this case, I guess you could say. The pie is simple, the whipped cream is simple, there is no excuse NOT to make this.
What? What's that you say? You say you can't make it because you don't have vanilla beans? Well, check out IndriVanilla for all your vanilla bean needs. With that said, I also want to thank Whitney from IndriVanilla for opening my eyes to some amazing vanilla beans. I am so grateful for the samples she sent me and I can't wait to use all of these up so I can buy more!! (Thanks so much Whitney!!)
Peanut Butter Pie with Vanilla Bean Whipped Cream
Pie recipe courtesy Taste of Home, Whipped cream recipe created by Jenn's Food Journey
Printable Recipe
Ingredients:
3/4 cup creamy peanut butter
4 oz cream cheese, softened
1 cup powdered sugar
1 (8oz) carton frozen whipped topping, thawed
1 9-inch graham cracker pie crust
For the Whipped Cream -
1/2 cup heavy whipping cream
1 vanilla bean, split and scraped
3-4 Tablespoons powdered sugar (you may want to use more or less depending on taste and consistency you desire)
Directions:
In a large bowl, beat the peanut butter, cream cheese, and 1 cup powdered sugar together until smooth. Fold in whipped topping; pour into pie crust. Chill for at least 4 hours.
To make the whipped cream - add the whipping cream and vanilla bean to a bowl. Beat in the powdered sugar one tablespoon at a time until you get the right flavor and consistency. Serve on top of pie. Refrigerate any leftovers. Enjoy!
One Year Ago: Pots de Creme
I cheated... yes, that's right, you caught me. I have posted this recipe for sugar cookies before.... BUT, in my defense, I did not use vanilla bean in them - Hence, the cheating re-posting :)
These are truly the easiest (and best) sugar cookies I have made. I got this yummy recipe from Andrea the Kitchen Witch and decided that when I made them this time, I would not only use the vanilla extract, but I would use a fresh vanilla bean too... just to make them that much more vanilla-y (and yes that is a word in my book, thank you!).
If I had more time over the weekend, I would have made a wonderful vanilla bean frosting to top these, but alas, I did not get that far. If you wanted to make it, feel free, I would have made a cream cheese frosting using 1 vanilla bean, 4-6oz cream cheese, and powdered sugar (until you get the desired consistency and sweetness)... this frosting is not needed of course, it just would have made these delicious little cookies even better!
Vanilla Bean Sugar Cookies
Adapted from Andrea the Kitchen Witch
Printable Recipe
Ingredients:
1 1/4 cup granulated sugar (I used vanilla sugar)
2 sticks (1 cup) unsalted butter, softened
2 egg yolks
1 Tablespoon vanilla extract
1 vanilla bean, split and scraped
2 1/2 cups all purpose flour
1/2 teaspoon cream of tartar
1 teaspoon baking soda
1/4 teaspoon salt
1/4 cup granulated sugar (for rolling)
Directions:
Cream the butter and sugar together in a stand mixer with the paddle attachment until very light and fluffy, about 5 minutes on medium speed.
Scrape down the sides and add the vanilla and vanilla bean. Mix until incorporated. Add the egg yolks one at a time, beating well between each addition and scraping sides of bowl and paddle after each addition.
Mix the flour, baking soda, cream of tartar and salt together in a bowl. Slowly add the dry ingredients to the wet ingredients, scraping down the sides after each addition.
Preheat the oven to 350 degrees. Scoop balls of dough and roll into sugar, coating all sides. Place balls of dough on cookie sheet and bake for 11 minutes or until just set. You do not want these to brown, brown means they will not be soft and chewy in the middle. Let cool on cookie sheet for 2 minutes and then move to wire rack to finish cooling. Enjoy!
One Year Ago: Kung Pao Chicken
One thing I so thoroughly enjoy about food is the memories that it can spark. I love taking a bite of something and having it transport me back to my childhood or to lazy days on the beach in Hawaii. Take this recipe for example: After making this, I was transported back to many a summer days as a kid. Playing Star Wars and ghost in the grave yard with my sister and cousins at my grandma's house. The gum tree, mud pies, mulberry bushes, the swimming pool at the country club..... well, this list could go on and on.
This is a dessert that my grandma used to and my mom still makes. It's a recipe that has been in my family for quite sometime now and I have been given the ok to share it with all of you! It's so absolutely perfect for these hot summer days. It's light, it's frosty, it refreshing and it's down right delicious! Hope you enjoy it as much as we have! (by the way, the pictures don't do this dessert justice...I promise you!!)
Frosty Strawberry Squares
Recipe courtesy my mom, via my grandma, via our cousin Karen
Printable Recipe
Ingredients:
1 cup sifted flour
1/4 cup packed brown sugar
1/2 cup chopped walnuts
1/2 cup melted butter
2 egg whites
1 cup granulated sugar
2 cups sliced strawberries
2 Tablespoons lemon juice
1 cup whipping cream
Directions:
Preheat oven to 350 degrees F. Mix together the flour, sugar, walnuts and melted butter. Place in a shallow pan or baking dish and bake for 20 minutes, stirring occasionally. Remove from oven and allow to cool.
Once cooled, sprinkle 2/3 of the crumbs into a 9 x 13-inch pan.
In a large bowl, combine the egg whites, sugar, strawberries, and lemon juice. Beat on high speed for about 10 minutes. (I used a hand mixer, just like my mom and grandma, but you can use your stand mixer for this if you want)
Meanwhile, in a separate bowl, whip cream; fold into strawberry mixture. Spoon combined mixture over crumbs. Top with remaining crumbs. Cover and freeze for 6 hours or more before serving. (This makes a lot of bars - too much for just Chris and I - so I cut the recipe in half and put it in the a 8x8-inch pan and it made 9-12 bars depending how large you cut them.) Enjoy!
One Year Ago: Roasted Garlic Rigatoni with Peppers and Basil
Can you believe, out of all the grilled recipes I have posted, I have yet to post a grilled dessert? I know it's hard to believe, but it's absolutely, 100% the truth.
Well, let me tell you, this is was a great dessert to start out with. Ok, so pound cake isn't the lightest of desserts, but sometimes you just have to throw caution to the wind and go for it!! This is simple, sweet, and light. A perfect end to a great grilled summer meal.
Grilled Pineapple Pound Cake Delight
Created by Jenn's Food Journey
- Serves 1-2 -
Printable Recipe
Ingredients:
2 thick slices of pound cake (store bought or homemade)
butter, room temperature
2 slices of pineapple rings
1-2 Tablespoons slightly melted Nutella (or chocolate sauce/syrup)
Whipped topping or Cool Whip
Directions:
Preheat your grill to 350 degrees F. Butter both sides of each piece of pound cake. Place the pineapple rings over the fire and grill about 5-6 minutes per side. Place the butter pound cake over the fire and grill about 3-4 minutes per side or until golden brown and toasted. Remove both from grill.
To assemble dessert: Place the grilled pound cake on a plate and top with pineapple ring. Drizzle Nutella over top and add a dollop of Cool Whip. Drizzle more Nutella over top if desired and serve. Enjoy!
One Year Ago: Spaghetti with Hot Italian Sausage
My absolute favorite candy in the whole wide world is Reese's Peanut Butter Cups. There is just something about peanut butter and chocolate that I have always loved. I love to savor every last bite of those delicious little cups. It's probably the one candy that I eat ever so slowly. I guess you could say that I have a love affair with the candy. I could probably even be bought, bribed, conned, whatever, with them... I'm just sayin'
So, when Chris requested peanut butter cup ice cream, who was I to deny him this little bowl of joy??
I didn't want to do the usual vanilla ice cream though, so I made up a little of the fudge sauce from the Simple Fudge Ripple Ice Cream recipe I politely stole borrowed from Jean at Delightful Repast and turned the every day vanilla into a deliciously light chocolate ice cream! (when I say light, I mean in color, not in calories!!) Add in little pieces of my all time favorite candy and... well... it's a large little bowl of heaven!
Chocolate Peanut Butter Cup Ice Cream
Created by Jenn's Food Journey
Printable Recipe
Ingredients:
1 can (14oz) sweetened condensed milk
1 Tablespoon vanilla
1 1/2 cups half and half
2 cups heavy cream
1/4 - 1/2 cup fudge sauce (depends on how chocolatey you want your ice cream), homemade or store bought
1 - 8oz bag of mini Reese's peanut butter cups (minus a few that I had to taste first.. just to make sure they were the real thing... you never know), chopped
Directions:
Combine sweetened condensed milk, vanilla, half and half, and cream in a large bowl or measuring cup (for easy pouring) and mix well. Cover and chill for at least 3-4 hours.
Pour chilled mixture into the bowl of an ice cream maker and process according to manufacturer's instructions. Add the fudge sauce after 15 minutes. Add the peanut butter cup pieces in the last 5 minutes of churning. Scoop into a plastic container, seal tightly, and let set in refrigerator for a few hours before serving. Enjoy!
One Year Ago: Strawberry Cheesecake Ice Cream
The pictures do not do this ice cream justice. Oh, they aren't BAD, but they aren't good either. If you want to see an absolutely fantastic photo of this scrumptious ice cream, please visit Jean's site - Delightful Repast. She takes much better photos then I do, trust me! :)
Despite my photo challenges, this ice cream was DELICIOUS!!! YUM - YUM and double YUM! That's about all you can say. The fudge sauce is homemade and the only chocolate it uses is cocoa powder, it uses everything I had in my pantry (YAY!)...that's why I could not pass this one up, I had everything on hand!
The only thing I did differently from Jean's original recipe was adding chocolate chips. And, really, it didn't need them, I just had a small amount of them and thought I should use them. Waste not want not...
Simple Fudge Ripple Ice Cream
Ever so slightly adapted from Jean at Delightful Repast
Printable Recipe
Ingredients:
1 cup 2% milk
2/3 cup granulated sugar
2 teaspoons vanilla extract
pinch of salt
2 cups heavy whipping cream
1/2 cup chocolate chips or chunks (optional)
For the fudge sauce -
1/2 cup granulated sugar
1/4 cup unsweetened cocoa powder
pinch of salt
1/3 cup water
1/4 teaspoons vanilla extract
2 Tablespoons unsalted butter
Directions:
In a large bowl or 2 quart measuring cup, whisk together the milk, sugar, vanilla, and salt until the sugar is dissolved. Stir in the heavy cream. Cover and refrigerate for at least 2 hours or overnight.
Meanwhile, at least 2 hours before making the ice cream, make the sauce. In a medium sauce pan, whisk together sugar, cocoa, salt, and water. Cook over medium heat, stirring constantly, until mixture comes to a boil; continue cooking for 1 minutes. Remove from heat and stir in vanilla and butter until butter is melted. Let cook at room temperature, then chill for about 30 minutes before using. If you chill it too long, you'll need to wait for it to warm up a bit because it needs to be thin enough to drizzle into "ripples".
Put child ice cream mixture into ice cream maker and process according to manufacturer's instructions. Add the chocolate chips in the last few minutes of the processing.
Transfer a quarter of the soft ice cream to a freezer safe airtight container, drizzle on some of the sauce. Repeat three more times (you will have sauce left over for drizzling on the ice cream when you are ready to serve it). Place in freezer until ice cream is firm. Drizzle with any remaining sauce. Enjoy!
One Year Ago: Chocolate Chocolate Chip Ice Cream