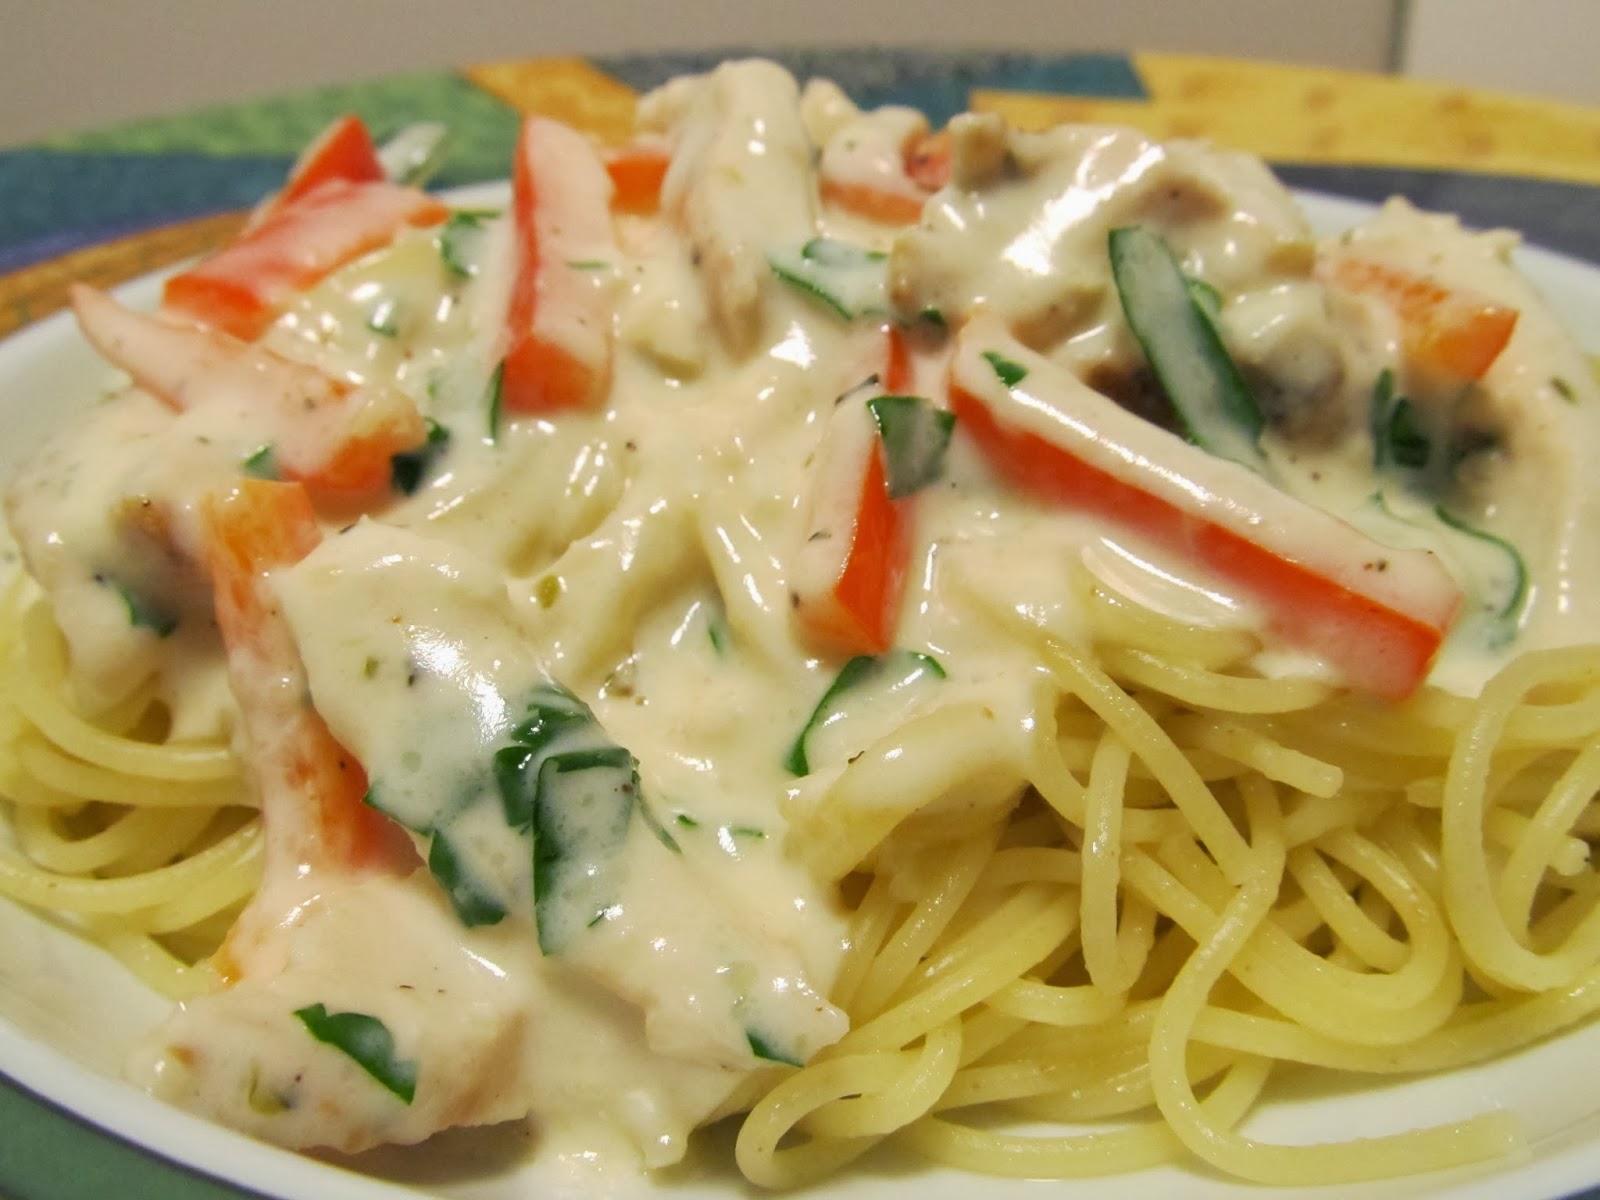
With my pregnancy, I have not been able to really eat any fish other than Salmon. Don't get me wrong, I love salmon, so this is not a bad thing. BUT, isn't it funny when you are told to stay away from certain things that those are the things you crave more than before? Ask me what I would rather be eating and I couldn't really tell you, but still, I know I would love to make a nice piece of Halibut or even my beloved tilapia right now. Okay, so there are a ton of people that would tell you I could still eat those things, but with this being my first child, I might be being a tiny bit over cautious... so judge me, it's okay :)
ANYWAY... I digress.... This simple way to prepare salmon was excellent. I mean it was so good, I didn't even have to have a sauce with it. That's right folks, you heard it straight from the self proclaimed sauce queen's mouth... no sauce is required with this recipe. It is perfect as is!! So good that while I'm writing this, I wish I had a piece baking in the oven right now!!! YUM!!!
Parmesan Baked Salmon
Created by Jenn's Food Journey
- Serves 2 -
Printable Recipe
Ingredients:
2 Tablespoons mayonnaise
1 teaspoon whole grain mustard
1 Tablespoon grated parmesan cheese
1/8 teaspoon cayenne pepper
1/4 teaspoon lemon juice
3 Tablespoons Panko breadcrumbs
olive oil
salt and pepper
2 Salmon filets
Directions:
Preheat oven to 375 degrees F.
Mix together the mayo, mustard, parmesan, cayenne and lemon juice until well combined. Mix the panko with just enough olive oil to moisten them a bit (about 1/2-1 teaspoon) and season with salt and pepper. Place the salmon on a wire rack that has been set in a sheet pan and sprayed with non-stick cooking spray. Top each filet with the mayo/mustard mixture and then top with panko. Place in oven and bake 15-20 minutes or until the fish flakes easily with a fork. Serve immediately and enjoy!
Favorite Recipe of the Day from Past Years: Sriracha Honey Cashew Chicken
Search This Blog
Monday, January 6, 2014
Wednesday, January 1, 2014
Happy New Year!!!
HAPPY NEW YEAR From Jenn's Food Journey!!!!
Hope everyone had a wonderful Christmas and that you're all ready for a brand new year!! I'll be back on Monday with a new recipe, but couldn't resist the chance to wish you all a happy start to 2014!!
Wednesday, December 18, 2013
Holiday Treats
I have decided to take a break over the next few weeks... I'll hopefully, come back fresh and creative after the first of the year..... Until that time, here are some treats to help you get through the holiday season!
Breakfast Ideas:
Appetizer Ideas:
Dinner Ideas:
Dessert Ideas:
Merry Christmas and Happy New Year from Jenn's Food Journey!!!!
Monday, December 16, 2013
Mustard Cream Sauce
What can I say about this sauce? I mean I have posted a lot of sauce recipes and they are all so extremely good.... This one is no exception!! I could have eaten it with a spoon, but decided against it and served it along side a wonderful piece of baked salmon. Actually, I topped the salmon with a little of the sauce, then topped it with some panko and THEN served it with some of this delicious sauce. And it was perfect!!!
Mustard Cream Sauce
Adapted from Food Network Magazine
Printable Recipe
Ingredients:
1/4 cup mayonnaise
1 teaspoon heavy cream
1 teaspoon lemon juice
1 Tablespoon whole grain mustard
1 1/2 teaspoons mustard powder
1/8 teaspoon Worcestershire sauce
salt and pepper
Directions:
In a small bowl, mix together all ingredients until well combined. Season with salt and pepper. Cover and refrigerate until ready to use. Can be made up to three days in advance. Serve with chicken, fish, shrimp, pork or french fries! Enjoy!
One Year Ago: Death by Chocolate Cookies
Two Years Ago: Christmas Goodies
Three Years Ago: Guest Post - Crab Delights
Mustard Cream Sauce
Adapted from Food Network Magazine
Printable Recipe
Ingredients:
1/4 cup mayonnaise
1 teaspoon heavy cream
1 teaspoon lemon juice
1 Tablespoon whole grain mustard
1 1/2 teaspoons mustard powder
1/8 teaspoon Worcestershire sauce
salt and pepper
Directions:
In a small bowl, mix together all ingredients until well combined. Season with salt and pepper. Cover and refrigerate until ready to use. Can be made up to three days in advance. Serve with chicken, fish, shrimp, pork or french fries! Enjoy!
One Year Ago: Death by Chocolate Cookies
Two Years Ago: Christmas Goodies
Three Years Ago: Guest Post - Crab Delights
Wednesday, December 11, 2013
Chicken Biscuit Pie
One of Chris' favorite meals is chicken pot pie. I have never been a fan of chicken pot pie, so I have actually only made it once for him... and it was just for him, and it was VERY early on in our relationship. After that... he may have eaten one, but it wasn't from my kitchen!! A couple weeks ago, I was scanning through my new Food Network magazine, when I ran across a recipe for turkey biscuit pie. Sort of a spin on the old pot pie... this was done in a cast iron skillet and used a biscuit topping and, to my surprise, looked AMAZING!! So, I thought what the heck, let's make Chris happy and feed my little sudden craving all at the same time... it's a win win situation in my book!! I'm so glad I tried it.. it was delicious!! My chicken mixture got a little thick, which I didn't mind, the one thing I don't like about pot pies is sometimes they can be too soupy. And, of course, I took a short cut and used Bisquick mix to make the biscuits. Despite those little differences, I was very happy with the dish and so was Chris, so as I suspected... it was definitely a WIN WIN!!
Chicken Biscuit Pie
Adapted from Food Network Magazine
Printable Recipe
Ingredients:
2 chicken breasts, cubed and cooked
2 Tablespoons unsalted butter
1 large carrot, peeled and chopped
2 stalks celery, chopped
1/2 sweet onion, diced
2 teaspoons chopped thyme
salt and pepper
1 Tablespoon whole grain mustard
3 Tablespoons flour
1 1/2 cup chicken broth
1/4 cup milk
For the biscuits-
1 1/2 cups Bisquick mix
1/2 milk (maybe more.. sorry I didn't measure)
Directions:
Preheat oven to 375 degrees F.
In a cast iron skillet, over medium heat, melt the butter. Add the carrots, celery, onion and thyme. Season with salt and pepper. Cook, stirring occasionally, for 7-8 minutes or until the veggies are tender. Stir in the mustard then sprinkle in the flour. Cook for 2 minutes. Whisk in broth and milk. Add the chicken. Reduce heat to simmer and cook until the sauce thickens, about 3 minutes. Remove from heat and season to taste with salt and pepper.
Make the biscuits by mixing the Bisquick and milk together until combined. Drop dough in randoms areas on top of the chicken mixture. Place skillet into oven and bake until the biscuits are golden brown, about 10-15 minutes. Carefully remove from the oven and allow to cool for a few minutes before serving. Enjoy!
One Year Ago: Cornflake Crusted Tilapia
Two Years Ago: Jalapeno Pesto Chicken
Three Years Ago: Every Chip Cookie
Chicken Biscuit Pie
Adapted from Food Network Magazine
Printable Recipe
Ingredients:
2 chicken breasts, cubed and cooked
2 Tablespoons unsalted butter
1 large carrot, peeled and chopped
2 stalks celery, chopped
1/2 sweet onion, diced
2 teaspoons chopped thyme
salt and pepper
1 Tablespoon whole grain mustard
3 Tablespoons flour
1 1/2 cup chicken broth
1/4 cup milk
For the biscuits-
1 1/2 cups Bisquick mix
1/2 milk (maybe more.. sorry I didn't measure)
Directions:
Preheat oven to 375 degrees F.
In a cast iron skillet, over medium heat, melt the butter. Add the carrots, celery, onion and thyme. Season with salt and pepper. Cook, stirring occasionally, for 7-8 minutes or until the veggies are tender. Stir in the mustard then sprinkle in the flour. Cook for 2 minutes. Whisk in broth and milk. Add the chicken. Reduce heat to simmer and cook until the sauce thickens, about 3 minutes. Remove from heat and season to taste with salt and pepper.
Make the biscuits by mixing the Bisquick and milk together until combined. Drop dough in randoms areas on top of the chicken mixture. Place skillet into oven and bake until the biscuits are golden brown, about 10-15 minutes. Carefully remove from the oven and allow to cool for a few minutes before serving. Enjoy!
One Year Ago: Cornflake Crusted Tilapia
Two Years Ago: Jalapeno Pesto Chicken
Three Years Ago: Every Chip Cookie
Monday, December 9, 2013
Speedy Shrimp and Red Pepper Pasta
Although being pregnant has not made me dislike any foods... most foods sound amazingly delicious to me right now... it has brought on a sense of not wanting to cook as much. Or maybe it's the fact that I don't have much imagination anymore. Either way, I am searching even more and more for simple meals. And these days, they need to be not only simple, but healthy for me. Honestly, I could eat a meal of mac and cheese and french fries each and every night... and I'm sure the baby wouldn't mind either... but I'd also be about 300 pounds and I really don't want that just yet :) So, when I came across this recipe on the What to Expect website, I knew it had to be something I made... and soon!! This truly is speedy and although it's nothing extremely special, it is filling and delicious and perfect for a weeknight meal!
Speedy Shrimp and Red Pepper Pasta
Adapted from What to Expect
Printable Recipe
Ingredients:
8 oz whole grain penne
1/2 lb medium shelled and deveined shrimp
salt and pepper
garlic powder
1 red bell pepper, thinly sliced
1/4 cup low sodium chicken broth
1 cup cherry tomatoes, quartered
1 Tablespoon grated parmesan cheese, plus more for serving
fresh basil leaves, chopped
Directions:
Place the shrimp in a shallow dish and season liberally with salt, pepper and garlic powder. Toss to coat.
Cook pasta according to package directions; drain.
Meanwhile, spray a non-stick skillet with oil or cooking spray and heat over medium heat. Add the shrimp and cook 3 minutes per side. Remove from pan. To the same pan, add the red pepper; seasoning with salt and pepper. Cook for 3 minutes or until they are just softened. Remove from pan. Add broth to pan and bring to a boil. Add tomatoes and parmesan cheese. Allow to simmer for 3 minutes. Add the shrimp and red pepper back to the pan and cook for a minute or two until the shrimp is heated through. Toss the sauce with the pasta and season with salt and pepper to taste. Sprinkle with fresh chopped basil and serve. Enjoy!
One Year Ago: Reese's Pieces Peanut Butter Cookies
Two Years Ago: Chili Glazed Pork Ribs
Three Years Ago: Grilled Pork Chops with Chipotle Honey Sauce
Speedy Shrimp and Red Pepper Pasta
Adapted from What to Expect
Printable Recipe
Ingredients:
8 oz whole grain penne
1/2 lb medium shelled and deveined shrimp
salt and pepper
garlic powder
1 red bell pepper, thinly sliced
1/4 cup low sodium chicken broth
1 cup cherry tomatoes, quartered
1 Tablespoon grated parmesan cheese, plus more for serving
fresh basil leaves, chopped
Directions:
Place the shrimp in a shallow dish and season liberally with salt, pepper and garlic powder. Toss to coat.
Cook pasta according to package directions; drain.
Meanwhile, spray a non-stick skillet with oil or cooking spray and heat over medium heat. Add the shrimp and cook 3 minutes per side. Remove from pan. To the same pan, add the red pepper; seasoning with salt and pepper. Cook for 3 minutes or until they are just softened. Remove from pan. Add broth to pan and bring to a boil. Add tomatoes and parmesan cheese. Allow to simmer for 3 minutes. Add the shrimp and red pepper back to the pan and cook for a minute or two until the shrimp is heated through. Toss the sauce with the pasta and season with salt and pepper to taste. Sprinkle with fresh chopped basil and serve. Enjoy!
One Year Ago: Reese's Pieces Peanut Butter Cookies
Two Years Ago: Chili Glazed Pork Ribs
Three Years Ago: Grilled Pork Chops with Chipotle Honey Sauce
Wednesday, December 4, 2013
White Truffle Garlic Aioli
We received lots of great wedding gifts... one of my favorite came from a co-worker. She gave me this really cool oil/vinegar holder with dispensers... but along with it came a Herbs de Provence olive oil, a white balsamic vinegar and ...... wait for it.... a bottle of white truffle oil!!! YUM!! So, of course, my first thought, was to make an aioli. Now, one thing I learned, you can use too much truffle oil. The first batch I made was over powered by the oil and was almost inedible.... almost :). But, never fear, I don't like to give up when it comes to sauces, so I tried again, and the next time I nailed it! I have made this sauce quite a few times since.. I mean it goes so well with the one thing I have pregnancy cravings for - FRENCH FRIES!!! Oh yes, I haven't craved too many things, but fries... oh my gosh, I can't seem to get enough of them. I have done very well with not going over board, and when I have do have the, more times than not I bake them at home, so they are a little better for me... but I guess if you are dredging them in this sauce, it sort of wipes that out, huh? Oh well... it's worth it!!
White Truffle Garlic Aioli
Created by Jenn's Food Journey
Printable Recipe
Ingredients:
1/4 cup mayonnaise (homemade or store bought)
1 Tablespoon lemon juice
1/4 teaspoon white truffle oil
1/4 teaspoon garlic powder
salt and pepper, to taste
Directions:
In a small bowl, mix together all ingredients until well combined. Season with salt and pepper to taste. Cover and refrigerate until ready to use. Can be made up to 3 days in advance. Serve with chicken, fish, shrimp or french fries!! Enjoy!
One Year Ago: Tailgating Asian Chicken Strips
Two Years Ago: Balsamic Chicken Pasta
Three Years Ago: New England Clam Chowder
White Truffle Garlic Aioli
Created by Jenn's Food Journey
Printable Recipe
Ingredients:
1/4 cup mayonnaise (homemade or store bought)
1 Tablespoon lemon juice
1/4 teaspoon white truffle oil
1/4 teaspoon garlic powder
salt and pepper, to taste
Directions:
In a small bowl, mix together all ingredients until well combined. Season with salt and pepper to taste. Cover and refrigerate until ready to use. Can be made up to 3 days in advance. Serve with chicken, fish, shrimp or french fries!! Enjoy!
One Year Ago: Tailgating Asian Chicken Strips
Two Years Ago: Balsamic Chicken Pasta
Three Years Ago: New England Clam Chowder
Monday, December 2, 2013
Baked Chicken Breasts with Parmesan Crust
I hope everyone had a great Thanksgiving!! We had a wonderful day with some of Chris' family and we very much enjoyed our long weekend! I could totally get used to not working!!! lol
Anyway, this is a simple baked chicken recipe that I probably wouldn't have posted because I've done this same thing with fish... BUT... it's all I have in my bag of goodies right now, so it's what you get. Simple, delicious and ready (from start to finish) in less than an hour.... that's hard to beat these days :)
P.s... about the sauce... I just doubled the dijon mixture and mixed half of it with about 1-2 Tablespoons of mayo... simple as that!
Baked Chicken Breasts with Parmesan Crust
Adapted from Ted Allan
- Serves 2 -
Printable Recipe
Ingredients:
2 Tablespoons Dijon mustard
1/4 teaspoon dried thyme
1/4 teaspoon salt
1/4 teaspoon cayenne pepper
2 boneless, skinless chicken breasts (pounded down so they are both an even thickness)
1/2 cup grated parmesan cheese
1/2 cup panko bread crumbs
olive oil
Directions:
Preheat oven to 450 degrees F.
Mix the mustard, thyme, salt and cayenne in a shallow bowl. Add the chicken breasts and turn to coat completely; set aside.
In another shallow bowl, combine the parmesan and panko. Dredge the chicken in the panko mixture, coating evenly and heavily, and pressing the coating into the meat.
Place the chicken on a rack set over a baking sheet, drizzle with a little olive oil and put the sheet in the middle of the oven. Bake until the chicken is golden brown and cooked through, about 15-20 minutes. Let rest 5 minute before serving. Enjoy!
One Year Ago: Pan Seared Cod with Garlic Dill Sauce
Two Years Ago: Peanut Butter Pie with Vanilla Bean Whipped Cream
Three Years Ago: Pots de Creme
Anyway, this is a simple baked chicken recipe that I probably wouldn't have posted because I've done this same thing with fish... BUT... it's all I have in my bag of goodies right now, so it's what you get. Simple, delicious and ready (from start to finish) in less than an hour.... that's hard to beat these days :)
P.s... about the sauce... I just doubled the dijon mixture and mixed half of it with about 1-2 Tablespoons of mayo... simple as that!
Baked Chicken Breasts with Parmesan Crust
Adapted from Ted Allan
- Serves 2 -
Printable Recipe
Ingredients:
2 Tablespoons Dijon mustard
1/4 teaspoon dried thyme
1/4 teaspoon salt
1/4 teaspoon cayenne pepper
2 boneless, skinless chicken breasts (pounded down so they are both an even thickness)
1/2 cup grated parmesan cheese
1/2 cup panko bread crumbs
olive oil
Directions:
Preheat oven to 450 degrees F.
Mix the mustard, thyme, salt and cayenne in a shallow bowl. Add the chicken breasts and turn to coat completely; set aside.
In another shallow bowl, combine the parmesan and panko. Dredge the chicken in the panko mixture, coating evenly and heavily, and pressing the coating into the meat.
Place the chicken on a rack set over a baking sheet, drizzle with a little olive oil and put the sheet in the middle of the oven. Bake until the chicken is golden brown and cooked through, about 15-20 minutes. Let rest 5 minute before serving. Enjoy!
One Year Ago: Pan Seared Cod with Garlic Dill Sauce
Two Years Ago: Peanut Butter Pie with Vanilla Bean Whipped Cream
Three Years Ago: Pots de Creme
Monday, November 25, 2013
A Short Break....And Wishing You a Happy Thanksgiving!!
With all my photos gone, gone, gone... I really don't have anything to share with you this week, so I am going to take a short break and enjoy the holiday with no pressures of feeling that I MUST post something :)
I will hopefully be back after the holiday with some new and delicious recipes to share with you.... Until then... here's wishing you all a happy Thanksgiving filled with family, love and most of all delicious food!!!
Ciao!
Jenn
Wednesday, November 20, 2013
Kansas City Style Pork Back Ribs
(Image courtesy The Neely's - Food Network)
Another borrowed photo - sorry. I am still so upset with myself for deleting so many photos off my camera. I said it before.. it's heart breaking!!! For the last two posts it hasn't been too big of a deal, as these were adapted recipes... but I had two posts for next week that were my own creations... THAT is the most upsetting!! But alas, I guess there could be worse things that happened to me this week, right? oh wait.. there just might be.. some of you may have noticed I haven't been commenting on your blogs much this week.. well, one more depressing thing - my internet connection is spotty.. if that. I am having troubles even connecting to the internet, so don't think of me as rude, just know I will get back to commenting as soon as my issue is fixed... what a week, huh? :)
Anyway - these are ribs that I have made a couple of times and each time I've had a problem with the photo.. lol... this time, I said forget it.. I'll just politely borrow a photo and finally post this delicious recipe!!!
Kansas City Style Pork Back Ribs
Adapted from The Neely's, Food Network
Printable Recipe
Ingredients:
1/4 cup brown sugar
1 Tablespoon dry mustard
3/4 teaspoon cayenne
3/4 teaspoon smoked paprika
3/4 teaspoon garlic powder
3/4 teaspoon onion powder
3/4 teaspoon salt
1/4 teaspoon pepper
1 rack pork back ribs
For the Sauce -
1/2 cup ketchup
1/4 cup brown sugar
2 Tablespoons apple cider vinegar
1 Tablespoon molasses
1/4 teaspoon cayenne
1/4 teaspoon smoked paprika
1/4 teaspoon salt
1/4 teaspoon pepper
2 teaspoons water
Directions:
Mix together the first 8 ingredients until well combined. Sprinkle and rub into both sides of the rib. Cover in plastic wrap and place in refrigerator for 1 hour.
Meanwhile, to make the sauce, add all of the sauce ingredients into a small saucepan over medium heat. Bring to a boil and immediately reduce heat to low (stirring occasionally). Allow to simmer for 8-10 minutes; stirring occasionally so nothing burns. Remove from heat and allow to cool.
Remove ribs from the refrigerator about 30-45 minutes before you are ready to cook them. Preheat grill to 275-300 degree F and set up for indirect cooking. Remove the ribs from the plastic wrap and wrap in foil (I cut the rack in half to make it easier and I pour just a tiny bit of beer in the foil wrap too for added moisture). Place ribs over indirect heat and grill (turning occasionally) for 1 hour. Carefully remove ribs from foil and place over direct heat. Continue to grill 15-20 minutes over direct heat. Remove from grill and allow to rest before digging in. Enjoy!!
One Year Ago: Grilled Fish with Chinese BBQ Sauce
Two Years Ago: Guest Blogger: Cheese Cornbread
Three Years Ago: Baked Tilapia w/Creamy Lemon Dill Sauce
Monday, November 18, 2013
Thai Beef with Basil
(Picture Courtesy Bon Appetit)
I wish I could have shared the picture of what I actually made.. but silly me, I deleted ALL photos off of my camera.... Yep, you read that correctly... I deleted them ALL! I had five meals on that card and they are all gone.... soooooo, unfortunately, what you see here is not what we actually had. Oh, it was close, but yet not close. I am heart broken and pissed off all at the same time. I guess at least I have SOMETHING to share with you, right?
Per Bon Appetit - "what distinguishes this recipe from your typical weeknight ground beef dinner is the meat's wonderfully crisp fried texture". And boy they are not lying. Chris, who isn't always the fondest of stir-fry's, stated that this one a stir fry he could eat regularly. It was flavorful and honestly different from anything else I've made with ground beef. The crispy texture of the meat is a true surprise. And, I'll be honest with you, I was a bit skeptical of that crispiness... but if you follow a few tips and are patient... it will work out perfectly.
The key is tart with beef that is 15 to 20 percent fat, so plenty of the fat will render. Then, as the meat cooks, use the back of a wooden spoon or spatula to press it into the pan and up the sides a little, exposing it to as much heat as possible. Simple as that :)
Thai Beef with Basil
Adapted from Bon Appetit
Printable Recipe
Ingredients:
1 Tablespoon vegetable oil
2 garlic cloves, minced or finely sliced
1/4 teaspoon red pepper flakes
1 lb. ground beef (you want to use 85/15 or 80/20)
1/2 cup low-sodium chicken broth
1 cup fresh basil leaves, roughly chopped
1 small-medium carrot, julienned or coarsely grated
1 jalapeno, thinly sliced
2 green onions, thinly sliced
2 Tablespoons soy sauce
1 Tablespoon fish sauce
3 Tablespoons lime juice
1 teaspoon granulated sugar
Steamed rice (for serving)
Directions:
Heat oil in a large skillet over high heat. Add the garlic and red pepper flakes, stirring about 30 seconds. Add the beef, seals with salt and pepper and cook, breaking up with a spoon and pressing down firmly to help brown, until cooked through and nicely crisped in spots, 8-10 minutes. Add carrots, jalapeno and onions, cooking 1-2 minutes. Add broth and basil and cook, stirring, until basil is welted. About 1 to 2 minutes.
Mix soy sauce, fish sauce, lime juice and sugar together until sugar dissolves. Pour into hot skillet, stirring to combine. Remove from heat.
To serve, top rice with beef mixture and enjoy!
One Year Ago: Buffalo Chicken Salad with Homemade Ranch Dressing
Two Years Ago: Mustard Herb Sauce
Three Years Ago: My Mom's Braciole
Wednesday, November 13, 2013
Southwest Chicken Wraps
This is a super easy meal that is filling and will please everyone in the family! I was silly and didn't cut my chicken as small as I should have, but otherwise, this was perfect. I found the recipe for the spice for the chicken on Barefeet in the Kitchen (I LOVE Mary's site.. if you haven't been there.. go check it out now... well after you are done here that is!!)... but decided to go one step further and throw the chicken into a wrap. Add a little rice, some cooked veggies and a yummy little sauce and viola....you have yourself some hand-held deliciousness!!!
Southwest Chicken Wraps
Adapted from Mary, Barefeet in the Kitchen
Printable Recipe
Ingredients:
1 Tablespoon chili powder
1/4 teaspoon salt
1/4 teaspoon pepper
1/4 teaspoon smoked paprika
1/4 teaspoon dried oregano
1/8 teaspoon garlic powder
1/8 teaspoon onion powder
1/4 teaspoon red pepper flakes
2-3 boneless, skinless chicken breasts, cut into bite size pieces
1 teaspoon coconut oil (can use olive oil too)
3 Tablespoons mayonnaise
1 Tablespoon Ranch dressing
For the wraps -
Small to medium tortillas
Cooked rice mixed with chopped zucchini and red peppers (you can saute the veggies first if you would like)
Directions:
In a small bowl, mix together the first 8 ingredients (chili powder through red pepper flakes) until well combined. Remove 1 teaspoon of mix and set aside. Place the chicken bites in a resealable bag or shallow dish and sprinkle remaining mixture over the chicken. Toss to combine. Cover and refrigerate for at least 1 hour and up to overnight.
Meanwhile, mix together the mayo, ranch dressing and 1 teaspoon of spice mixture in a small bowl until well combined. Cover and place in refrigerator until ready to use.
Heat the oil in a non-stick skillet over medium high heat. Add the chicken and quickly saute until chicken is cooked through (about 5 minutes); stirring occasionally. Remove from heat.
Build the wraps by placing a nice big spoonful of rice in the middle of the tortilla, top with sauce and chicken and fold sides over. Serve immediately and enjoy!!
One Year Ago: Topolo Caesar Salad with Chicken
Two Years Ago: Spicy Chipotle Shrimp Stir-Fry
Three Years Ago: Ranch Chicken Pizza
Southwest Chicken Wraps
Adapted from Mary, Barefeet in the Kitchen
Printable Recipe
Ingredients:
1 Tablespoon chili powder
1/4 teaspoon salt
1/4 teaspoon pepper
1/4 teaspoon smoked paprika
1/4 teaspoon dried oregano
1/8 teaspoon garlic powder
1/8 teaspoon onion powder
1/4 teaspoon red pepper flakes
2-3 boneless, skinless chicken breasts, cut into bite size pieces
1 teaspoon coconut oil (can use olive oil too)
3 Tablespoons mayonnaise
1 Tablespoon Ranch dressing
For the wraps -
Small to medium tortillas
Cooked rice mixed with chopped zucchini and red peppers (you can saute the veggies first if you would like)
Directions:
In a small bowl, mix together the first 8 ingredients (chili powder through red pepper flakes) until well combined. Remove 1 teaspoon of mix and set aside. Place the chicken bites in a resealable bag or shallow dish and sprinkle remaining mixture over the chicken. Toss to combine. Cover and refrigerate for at least 1 hour and up to overnight.
Meanwhile, mix together the mayo, ranch dressing and 1 teaspoon of spice mixture in a small bowl until well combined. Cover and place in refrigerator until ready to use.
Heat the oil in a non-stick skillet over medium high heat. Add the chicken and quickly saute until chicken is cooked through (about 5 minutes); stirring occasionally. Remove from heat.
Build the wraps by placing a nice big spoonful of rice in the middle of the tortilla, top with sauce and chicken and fold sides over. Serve immediately and enjoy!!
One Year Ago: Topolo Caesar Salad with Chicken
Two Years Ago: Spicy Chipotle Shrimp Stir-Fry
Three Years Ago: Ranch Chicken Pizza
Monday, November 11, 2013
Serrano Mayo Sauce
Before I share today's recipe, I just want to say thank you.. thank you to all the men and women who have and are still serving in this countries military. Saying thank you doesn't even seem to be enough - but it is all this little humble girl from the Midwest can do. I am honored to have known at least a few of you.... especially my dad!! Each year I tell him how much I appreciate what he did while he served and this year I feel exactly the same. I love and adore my father and know that he sacrificed a lot to serve this country. So, thank you, first and foremost to my father (I love you dad!!!) and my new father-in-law, but of course, I send a huge thanks to all of you out there who have ever served!!
As for the recipe... well, my friends, it's a spicy little sauce that will go with just about any piece of chicken, fish or shrimp - this is yet another one you could literally just eat with a spoon!!!
Serrano Mayo Sauce
Adapted from Bon Appétit
Printable Recipe
Ingredients:
2 Serrano chiles, seeded and roughly chopped
5 Tablespoons mayonnaise
1/4 teaspoon salt
2-3 teaspoons hot sauce (I used Frank's)
Directions:
In a food processor, add the chiles and pulse until finely chopped. Add the mayo, salt and hot sauce and pulse until everything is combined. Pour into a small bowl, cover and refrigerate until ready to serve. Use with chicken, fish, shrimp or use as a spread on your next sandwich. Enjoy!
One Year Ago: Cheese Frenchees
Two Years Ago: Pomegranate Balsamic Pork Chops
Three Years Ago: Potato and Chipotle Chowder
As for the recipe... well, my friends, it's a spicy little sauce that will go with just about any piece of chicken, fish or shrimp - this is yet another one you could literally just eat with a spoon!!!
Serrano Mayo Sauce
Adapted from Bon Appétit
Printable Recipe
Ingredients:
2 Serrano chiles, seeded and roughly chopped
5 Tablespoons mayonnaise
1/4 teaspoon salt
2-3 teaspoons hot sauce (I used Frank's)
Directions:
In a food processor, add the chiles and pulse until finely chopped. Add the mayo, salt and hot sauce and pulse until everything is combined. Pour into a small bowl, cover and refrigerate until ready to serve. Use with chicken, fish, shrimp or use as a spread on your next sandwich. Enjoy!
One Year Ago: Cheese Frenchees
Two Years Ago: Pomegranate Balsamic Pork Chops
Three Years Ago: Potato and Chipotle Chowder
Wednesday, November 6, 2013
Bacon 'n' Egg Salad Dip - The 3rd Annual Nebraska vs. Michigan Recpie Exchange
It's that time of year again - FOOTBALL SEASON!!! And with football season comes the 3rd annual Nebraska vs. Michigan recipe exchange between myself and Mary over at Food Floozie! I am very excited to be able to do this for the third year in a row... I adore Mary and her blog and can't thank her enough for continuing on with our tradition!! So, without further ado.........
Chazakah [hah-zah-KAH] is a Jewish tradition which dictates that the third instance of an activity makes something permanent. Well, Jenn and I have now made this a permanent gig, then, as this is our third annual swapping of recipes in honor of the Michigan-Nebraska game!
In past years, Jenn - who is amazing and wonderful, and a fabulous grillin' girl! - offered the decadent and delicious Nebraska classics Cheese Frenchees and Runza Bites in honor of her home team. I have played on the maize 'n' blue theme with cornbread, as a near-lifer in Ann Arbor who graduated from U of M. Neither team is in stellar form this season for Saturday's match-up ... well, we won't elaborate! It's not quite a "battle of the bottom-feeders," but it's not a Top 10 "Game of the Week," either! But that doesn't mean that Jenn and I are any less devoted!
This year, I debated whether to offer Michigan-influenced dishes like Detroit-Style Pizza or Maurice Salad Subs. But I decided to go in a different direction, and simply give you some awesome football food for a tailgate, a viewing party, or just loafing on the sofa with your family.
This Bacon 'n' Egg Salad Dip ... well, wow. Creamy, with tidbits of crunchiness. No redeeming nutritional value - what more could you want in football food??? And did I mention that it has BACON??? Well, 'nuff said, right?
Hail to the victors valiant! Hail, hail to Michigan ... and to Jenn, who's a great friend - far more than a mere "blogging buddy" ... :) Thanks so much, Jenn, for letting me borrow some space on your blog to cheer on the Wolverines!!!
Bacon 'n Egg Salad Dip
(inspired by the Egg and Gribenes Spread in Michael Ruhlmann's Schmaltz)
4 hard-boiled eggs
2 strips bacon
1/4 cup finely diced red onion
generous pinch kosher salt
generous pinch freshly ground black pepper
2 tablespoons finely minced green onion
mayonnaise, to taste
crackers or baguette slices, for serving
Peel and chop the eggs, and place into a mixing bowl.
Cook the bacon over medium heat until crisp. Drain the bacon, reserving the fat, and chop the bacon; add to the eggs.
Sauté the red onion in the bacon fat over medium heat until softened; add the onion and the fat to the eggs, along with the salt and pepper and green onion.
Stir in mayonnaise to taste - more if you want it creamier, less if you want it more solid.
Serve at room temperature with crackers for dipping, or schmear it onto baguette slices.
______________________________________________
Chazakah [hah-zah-KAH] is a Jewish tradition which dictates that the third instance of an activity makes something permanent. Well, Jenn and I have now made this a permanent gig, then, as this is our third annual swapping of recipes in honor of the Michigan-Nebraska game!
In past years, Jenn - who is amazing and wonderful, and a fabulous grillin' girl! - offered the decadent and delicious Nebraska classics Cheese Frenchees and Runza Bites in honor of her home team. I have played on the maize 'n' blue theme with cornbread, as a near-lifer in Ann Arbor who graduated from U of M. Neither team is in stellar form this season for Saturday's match-up ... well, we won't elaborate! It's not quite a "battle of the bottom-feeders," but it's not a Top 10 "Game of the Week," either! But that doesn't mean that Jenn and I are any less devoted!
This year, I debated whether to offer Michigan-influenced dishes like Detroit-Style Pizza or Maurice Salad Subs. But I decided to go in a different direction, and simply give you some awesome football food for a tailgate, a viewing party, or just loafing on the sofa with your family.
This Bacon 'n' Egg Salad Dip ... well, wow. Creamy, with tidbits of crunchiness. No redeeming nutritional value - what more could you want in football food??? And did I mention that it has BACON??? Well, 'nuff said, right?
Hail to the victors valiant! Hail, hail to Michigan ... and to Jenn, who's a great friend - far more than a mere "blogging buddy" ... :) Thanks so much, Jenn, for letting me borrow some space on your blog to cheer on the Wolverines!!!
Bacon 'n Egg Salad Dip
(inspired by the Egg and Gribenes Spread in Michael Ruhlmann's Schmaltz)
4 hard-boiled eggs
2 strips bacon
1/4 cup finely diced red onion
generous pinch kosher salt
generous pinch freshly ground black pepper
2 tablespoons finely minced green onion
mayonnaise, to taste
crackers or baguette slices, for serving
Peel and chop the eggs, and place into a mixing bowl.
Cook the bacon over medium heat until crisp. Drain the bacon, reserving the fat, and chop the bacon; add to the eggs.
Sauté the red onion in the bacon fat over medium heat until softened; add the onion and the fat to the eggs, along with the salt and pepper and green onion.
Stir in mayonnaise to taste - more if you want it creamier, less if you want it more solid.
Serve at room temperature with crackers for dipping, or schmear it onto baguette slices.
Monday, November 4, 2013
Meatballs Florentine
Adapted from Cook's Country Magazine
Printable Recipe
Ingredients:
1 lbs ground beef (or do half beef, half pork)
3 oz (3 cups) baby spinach, chopped
1/3 cup panko bread crumbs
1 egg, lightly beaten
2 garlic clove, minced
salt and pepper
2 teaspoons olive oil
1/2 cup red wine
1 28oz can crushed tomatoes
8-10 oz angel hair pasta
1/4 cup chopped fresh basil
Directions:
Combine the beef, 1 cup spinach, panko, 1 garlic clove and 1 teaspoon salt in a bowl and knead gently until incorporated. From mixture into 1-inch meatballs. Heat oil in a nonstick skillet over medium-high heat until just starting to smoke. Cook meatballs until well browned all over, about 5 minutes; transfer to plate.
Add remaining garlic to the now empty skillet and cook about 30 seconds. Deglaze pan with wine, making sure to scrap up all the good brown pieces. Stir in the tomatoes. (I added about 1/4 teaspoon red pepper flakes and pepper along with a little more red wine at this time, but that is totally optional). Taste for seasoning. Allow to simmer on low for about 5 minutes. Add the meatballs and continue to simmer on low while the pasta cooks.
Cook pasta according to package directions; drain. Remove the sauce and meatballs from the heat and stir in the 2 cups of spinach and basil. Toss with pasta and serve. Enjoy!
One Year Ago: Chipotle Cheddar Corn Bread
Two Years Ago: Chipotle Meatballs
Three Years Ago: Greek Chicken Salad
Subscribe to:
Posts (Atom)