Now don't laugh....but this is really just grilled steak fajitas without the tortilla. We had tortillas, but not enough for both Chris and I, so I figured, why not make it into a "stir fry" type dish? Plus, I've been on a real rice kick lately, so I would have rather had the rice then the tortilla, so it worked out perfectly!
Whether you put it in a bowl over rice or noodles or wrap it up in a tortilla, this is a fantastic little grilled steak fajita. The sauce, of course, being the part that brings everything together!
Grilled Steak Fajita "Stir Fry"
Created by Jenn's Food Journey
Printable Recipe
Ingredients:
For the marinade -
1/4 cup Country Bob's Honey Habenaro Sauce (you can use any all purpose sauce, though, like A-1 or Heinz 57 or even a bbq sauce)
3 Tablespoons beer (I used Bud Light)
1/4 teaspoon garlic powder
1/4 teaspoon cayenne pepper
For the sauce -
2 Tablespoons Hoisin
1 Tablespoon Sriracha
2 Tablespoons low sodium soy sauce
1 teaspoon rice wine vinegar
1/4 teaspoons sesame oil
For the "stir fry" -
1 lb. steak (I used top sirloin because I found it really really really cheap)
2 red bell peppers, stem and seeds removed (do not chop yet!!)
1 jalapeno pepper, stem and seeds removed (do not chop yet!!)
1/2 sweet onion, sliced crosswise into 1/8-1/4 inch thick slices
cooked rice or noodles (optional)
Directions:
Mix together the ingredients for the marinade. Season the steak with salt, place in resealable bag, and pour marinade over it. Allow to sit in refrigerator for 4 hours (if you don't have that much time, it's ok, 1-2 hours will work in a pinch).
Preheat the grill to 400 degrees. Remove the steak from the marinade and place directly on the grill grates. Grill about 5-10 minutes per side or until the steaks are done to your liking. Remove from grill and allow to rest for at least 5 minutes before slicing (against the grain). Place the vegetables over direct heat and grill for about 5-8 minutes or just until starting to soften (if you want them with less bite, keep them on the grill longer). Remove from grill and slice into thin strips.
Meanwhile, in a small bowl, mix together all the ingredients for the sauce. To serve, place rice or noodles into a bowl, top with sliced steak and vegetables, drizzle on some sauce (if the sauce is too thick, you can thin it out with a little chicken broth or water), toss to combine everything, and enjoy!
One Year Ago: Peanut Butter Chocolate Chip Cookies
Search This Blog
Thursday, June 9, 2011
Wednesday, June 8, 2011
Thick Cut Pork Chops with Korean BBQ Sauce
As you may well know, I complain a ton because I can only find thin cut pork chops. Well, you can believe me then when I say I was EXTREMELY excited when I actually found thick cut chops!! I had to spend more then I wanted to, so this was considered a "special occasion", BUT I got them.... And.. Oh... My.... God.... They were AMAZING!
I know at least three people out there that will be so proud of me because I brined these chops!! Once again, do I think brining made a difference? Absolutely!! I believe it helped keep those chops nice and moist. Then again, me being a pretty kick ass griller (I know it's not a word, but it should be) doesn't hurt the cause either! (Hey, I don't toot my horn very often, please just let me have this!! lol)
Honestly, these chops were so good just by themselves, but as you know my feelings on sauce, the Korean BBQ Sauce just made them that much more delicious. And the sauce will go with any kind of meat actually, so even if you aren't a fan of pork chops, you can still try this amazing bbq sauce on chicken or even beef. It's a must try!
Thick Cut Pork Chops with Korean BBQ Sauce
Sauce recipe adapted from Epicurious.com
Printable Recipe
Ingredients:
2 large, thick cut bone in pork chops (at least 1-inch thick)
4 cups water
3 Tablespoons kosher salt
3 Tablespoons granulated sugar
1/2 teaspoon garlic powder
1 teaspoon black pepper
1/2 teaspoon cayenne pepper
For the BBQ Sauce -
1 Tablespoon vegetable or olive oil
1 garlic clove, minded
1 serrano chile with seeds, finely chopped
1/3 cup low sodium soy sauce
1/4 cup packed brown sugar
3 Tablespoons rice vinegar
3 Tablespoons water
1 teaspoon hoisin
1 teaspoon sriracha
1/4 teaspoons sesame oil
Directions:
In a large bag or bowl, add the water, salt, sugar, garlic powder, pepper, and cayenne, stirring to dissolve the sugar and salt. Place the pork in the water and allow to brine for at least 2 hours.
Meanwhile, heat the olive oil in a heavy saucepan over medium heat. Add the serrano and saute until starting to soften, about 3 minutes. Add the garlic and saute 1 minute. Add the soy, brown sugar, vinegar, water, hoisin, and sriracha and bring to a boil, stirring until sugar dissolves. Reduce heat to medium low and simmer until mixture reduces to 3/4 cup, about 5 minutes or so (sauce will be thin). Remove from heat and whisk in sesame oil. Allow to cool.
When ready to grill, preheat your grill to 400 degrees F. Remove pork from brine and rinse under running water, thoroughly. Brush each side of pork with bbq sauce and place directly over the fire. Grill, basting with sauce, for about 10 minutes on each side or until the internal temperature reaches 145 degrees F. If the pork is starting to char, remove from direct heat and cook over indirect heat until correct internal temperature is reached. Remove from grill and allow to rest for 3-5 minutes before cutting into. Serve with any remaining bbq sauce. Enjoy!
One Year Ago: Basil & Lime Tilapia with Basil Aioli
Tuesday, June 7, 2011
Greek Style Fish
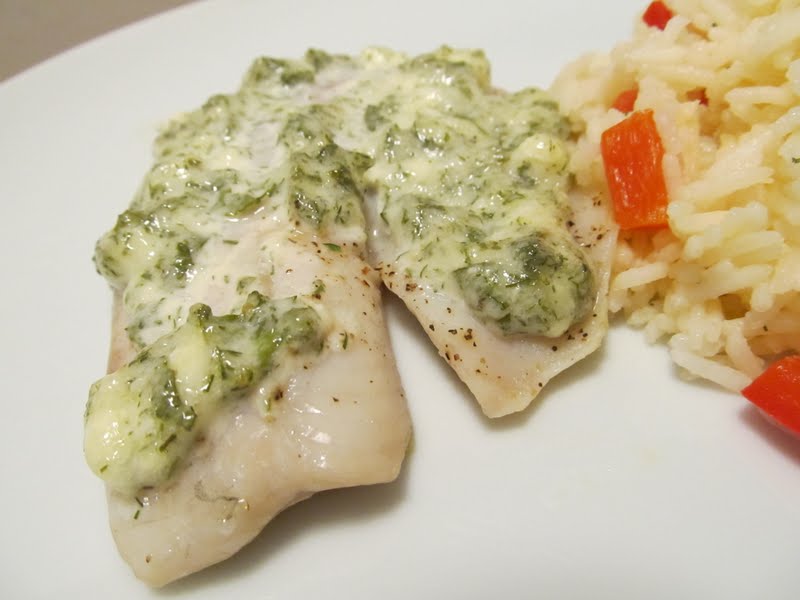
So you may remember my story of our intern, Casey, who we thought we would lose and then was brought on as a permanent employee at the last minute... Well, her mom, Annette (along with Casey), is now a reader of my blog! Not only is she reading my blog, but she also passed along a recipe that she knew I would enjoy: Greek Style Mahi-Mahi. Since you all know we don't really eat anything other fish then tilapia (don't worry, I know all about tilapia and to put all your minds at ease, I know where it comes from so we're ok!!), I figured it would work just as well. Now, as you know, I can't seem to follow an exact recipe, so I did things a little different, but oh.. my... goodness, was this a fantastic tasting fish. This would actually work on any white fish...heck, it would even work well on salmon or trout. But, as you know, I'm a sucker for sauces, so how could I not be smitten with this??
Thank you, Annette, this is quickly becoming a favorite in our house!!
Greek Style Fish
Adapted from Epicurious.com
Printable Recipe
Ingredients:
4 Tilapia fillets (or any white fish)
1/4 cup mayonnaise
2 T crumbled feta cheese
2 Tablespoons fresh mint, chopped
1 teaspoon dried dill
1 teaspoon lemon juice (plus a little for drizzling on fish)
garlic salt and pepper
Directions:
Preheat oven to 375 degrees F. Spray a baking dish with non-stick cooking spray or olive oil. In a small bowl combine the mayo, cheese, mint, dill, and lemon juice; stir to combine. Place the fish in prepared pan, drizzle with a little lemon juice, and season with garlic salt and pepper. Place in oven and bake for 5 minutes. Remove from oven and evenly spread the mayo mixture over each piece of fish. Place back in oven and continue to bake another 8-10 minutes or until the fish flakes easily with a fork. Enjoy!
One Year Ago: Sweet and Spicy Grilled Chicken
Monday, June 6, 2011
Bobby Flay's Mesa Hot Sauce Marinated Chicken
Ok, let's talk about being easy. Easy is throwing together 5 ingredients into a saucepan, letting it simmer, and then letting it cool. Hmmmm.. yea, that's pretty easy!
Now, let's talk about flavorful. No, not just any flavorful...flavor given only by a combination of vinegar and chipotles. Oh, yes, a little tang and a little zing....it's a true flavor party!
If you enjoy vinegar based hot sauces, you will love this! You can use it on anything really, I just figured why not use it as a marinade for some grilled chicken.... set aside a little for brushing on the chicken while it's on the grill and you've got yourself a piece of chicken full of... dare I say it... deliciousness :) Oh...and one more note, the original recipe does not call for heating the sauce, I decided to do that to thicken it up - if you want to skip that part, go right ahead! This recipe yields about a cup of sauce, you can easily cut it in half, but I used the left over sauce for basting while grilling, and for dipping :)
Bobby Flay's Mesa Hot Sauce Marinated Chicken
Hot sauce recipe created by Bobby Flay
Printable Recipe
Ingredients:
1 cup red wine vinegar
3 Tablespoons chipotle puree (to make chipotle puree, place 1 can of chipotle peppers in adobo sauce in a food processor and pulse until pureed)
1 1/2 Tablespoons Dijon mustard
2 Tablespoons honey
1 teaspoon salt
4 boneless, skinless chicken breasts
Directions:
In a saucepan, combine the vinegar, chipotle, Dijon, honey, and salt over medium heat. Bring to a boil. Reduce heat to simmer and allow the sauce to thicken just a bit; stirring occasionally, for about 5-10 minutes. Remove from heat and allow to cool. Reserve half of the cooled sauce. Place the chicken in a resealable bag or a shallow dish and pour half of the sauce over the chicken. Allow to marinate in the refrigerator for 4 hours.
Preheat grill to 375 degrees F. Oil the grill grates. Remove chicken from bag and discard marinade. Place the chicken directly over the fire and grill about 8-10 minutes per side or until the internal temperature registers 165 degrees F. **Optional - baste the chicken, while it's grilling, with half of the reserved sauce. Remove from grill and allow to rest for a few minutes before cutting into it. Serve with any remaining sauce and enjoy!
One Year Ago: Steak de Burgo
Friday, June 3, 2011
Fire Day Friday - It's all I got...
Another busy week finds me without a guest blogger to entertain you with. I actually have a guest blogger all lined up, but I did not get things ready in time. I actually remembered at the last minute that I didn't have the post ready to go...and well, I had already put in almost 12 hours at work, so, unfortunately, this is all you get today :)
It's Fire Day Friday and I'm enticing you all with a Spicy Peach-Molasses Grilled Chicken.
Oh, yes, it's very much like my Peach Glazed Chicken recipe, but different enough where it was worth posting on FDF. So, stop on by and say hello..... maybe in two weeks things will be calmed down enough and blogging will go back to normal..... maybe??
Enjoy your weekend everyone!
Ciao!
Jenn
One Year Ago: Banana Bread with Cinnamon Topping
Thursday, June 2, 2011
Beef Tostadas
Due to some of the long hours I've been working, I decided that over Memorial day weekend, all I really wanted to do was stay at home and relax. Although I would have loved to have invited friends/family over for a barbecue, I really just wanted to spend the long weekend relaxing and getting caught up on some things around the house. I was so glad that Chris agreed to that. We watched movies and lounged around and, well, it was the perfect weekend.
With that in mind, I kept our meals nice and simple. This being one of them. There is nothing to putting this meal together...and I did these on the grill (so there was even less mess), but you don't have to... You can fry up or bake up your tortillas and melt the cheese under the broiler. This does not have to be a big fuss meal. This can seriously be ready in like 20 minutes. I prepped everything before hand, so when I was ready to cook, things took about 10 minutes. See? Simple!!!
Beef Tostadas
Adapted from The Food Network Magazine, April 2011
Printable Recipe
Ingredients:
2 teaspoons vegetable or olive oil
1/2 small sweet onion, finely chopped
1 clove garlic, finely minced
1 pound ground beef (I used 80/20)
Kosher salt
2 Tablespoons tomato paste
1 Tablespoon homemade taco seasoning
1/2 cup refried beans
8 white corn tortillas (if you aren't grilling, fry the tortillas, flat, in 1/2-inch vegetable oil over medium high heat for 1-2 minutes per side)
Shredded monterey jack cheese (about 1 - 1 1/2 cups)
Shredded lettuce
Chopped tomatoes
Sour cream
Directions:
Heat the oil in a large skillet over medium heat. Add the onion and cook until softened, about 5-6 minutes. Add the garlic and cook for 1 minute. Add the ground beef, breaking it up with a wooden spoon, until browned, about 3 minutes. Season with salt. Add the tomato paste and taco seasoning and coo, stirring, about 3-5 more minutes.
Meanwhile, preheat your grill to 375 degrees F. Brush both sides of the tortillas with oil. Place the tortillas directly over the fire and let grill until crisp. Remove from grill, flip over, and spread about a tablespoon (or more if desired) of refried beans on each tortilla (make sure you are spreading it on the already crisp, grilled side). Top with ground beef mixture and shredded cheese. Place tortillas back on the grill and allow to cook another 3-5 minutes or until the tortilla is crisp and the cheese has melted. Top with lettuce, tomatoes, and sour cream. Serve with rice and Enjoy!!
One Year Ago: Asian Inspired Pork Chops
Wednesday, June 1, 2011
Pasta Primavera with Tuna
I have to share something with you....it's good and it's bad. Are you ready? Ok.. good news first: I made it to the final round of The Perfect 3 Recipe Contest hosted by The Cooking Channel!!! (WOOHOO!!!!) Now for the bad news: I didn't win. (BOOOO!!!) But that's ok, honestly, I feel really good that I made it to the final round. I mean, to me, that was a feat in itself. Although, I did not win, I did learn a lot through the process and will be much more confident the next time I enter a contest like this!! Anyway, it was just something I had to share because I felt excited about making it as far as I did. Win or loose, my recipe got noticed and that was cool in my book! Oh, and the recipe I entered: Chicken Braciole with Alfredo Sauce (big thanks to my mom and Johanna for inspiring that one!!!)
Enough about me... let's talk food!
Pasta primavera is a dish I've made only a few times. That sounds a tad bit crazy considering how much pasta we eat. No real reason at all, other then there are so many different types of pasta out there and so little, little, little time!
This is another perfect weeknight meal. Simple, delicious, and if you leave the goat cheese out, fairly healthy. I mean, if I'm gonna eat a bunch of veggies, might as well throw some pasta in there too, right? :)
Pasta Primavera with Tuna
Adapted from The Food Network Magazine, April 2011
Printable Recipe
Ingredients:
12 oz corkscrew pasta
1 carrot, thinly sliced
1 red bell pepper, thinly sliced
3-4 Tablespoons extra virgin olive oil
2 cloves garlic, minced
1/2 pint cherry tomatoes, halved
1/2 teaspoon red pepper flakes
1 cup spinach leaves
1/4 cup grated parmesan cheese
4 oz goat cheese, crumbled
1/2 cup roughly chopped mint leaves
1 can albacore tuna, drained (can be in water or oil, doesn't matter since you are draining it)
Directions:
Cook pasta according to package directions. Drain, reserving 1/2 cup of the pasta water. Set aside.
Meanwhile, heat 1 tablespoons olive oil in a skillet over medium heat. Add the carrot and cook about 2 minutes. Add the red bell pepper and cook another 2 minutes. Add the garlic and cook 30 seconds. Add the remaining olive oil, the tomatoes, red pepper flakes and 1 teaspoons salt; cook until the tomatoes start to soften, about 1 minute. Remove from heat and add the cooked pasta and spinach leaves, stirring to combine. Now add the parmesan and goat cheese and toss until the cheese has melted. Add the reserved water, a little at a time, until the sauce has thinned out a bit. Toss in the mint and tuna until everything is combined. Enjoy!
One Year Ago: Grilled Sriracha Glazed Chicken
Tuesday, May 31, 2011
Cedar Plank Grilled Trout - 2 Ways
Well, I finally did it, I forced Chris to give a different type of a fish a shot. And wouldn't you know it, he actually liked it!! YAY! Once again, it just goes to show you that sometimes it pays to try new things :)
Now, since I had convinced him to try something new, I thought it would fun for me to try something new too. I have been wanting to grill some fish on cedar planks for a while now, so I thought that would be my "something new".
I think I might do things a little differently next time, because I believe it did not get the "cedar" flavor that it should have. But for my first time, the fish really turned out fantastic! What I really liked about the plank was the the trout had skin still on it, and when it was finished, the meat pulled right away from the skin and the skin just stayed right on the board. It was less messy then any other way I was thinking of preparing the trout.
I created two types of sauces for these, since I had to fairly nice sized pieces. I knew Chris would be the happiest with just butter and garlic, but I wanted something a bit more flavorful. Since I've been on this Asian flavor kick as of late, I figured why not do something with a bit of Asian flair! And, wouldn't know it, I was right: Chris preferred the fish with the butter/garlic/lemon sauce and I definitely preferred the hoisin sauce.
Now, you don't have to grill these on cedar planks. You don't even have to grill them at all. You can do the same thing with your broiler....just don't put the planks in there or you'll have a mess :) If you do use planks (for the grill NOT the oven), make sure to soak them in water for at least 30 minutes before putting them over the fire. And please, be careful, keep an eye on the plank if you grill these over direct heat, you don't want them to catch fire!
Cedar Plank Grilled Trout - 2 Ways
Created by Jenn's Food Journey
Printable Recipe
Ingredients:
2 red mountain trout fillets (about 1 lbs total - and really, any fish will do here)
For the Garlic Butter -
2 Tablespoons unsalted butter, room temperature
1 large garlic clove, finely minced
1 Tablespoon lemon juice
1/4 teaspoon lemon pepper seasoning
For the Hoisin Sauce -
1 Tablespoon Hoisin
1 Tablespoon rice vinegar
2 teaspoons lime juice
1 teaspoon Sriracha
1/4 teaspoon brown sugar
Special equipment -
Cedar plank (soaked in water for at least 30 minutes)
Directions:
Preheat grill to 350 degrees F. In separate bowls, mix together the ingredients for the individual sauces. (I took about 1/4-1/2 of each sauce and set it aside for dipping.)
Remove planks from water and place on grill. Close grill lid and let the planks sit on the grill for 5 minutes. Flip the plank and allow to sit for another 5 minutes or until just starting to smoke a tiny bit. Place the fish, skin side down, on the plank.
Brush one fillet with the butter sauce and one with the hoisin sauce.
Move the plank to indirect heat (on my gas grill I had all three burners on, at this point I turn the middle on off and had the plank right over it), close the lid and allow to grill about 15-20 minutes or until the fish flakes easily with a fork.
Remove plank from grill and allow to sit for a few minutes. The fish should come right off, leaving most of the skin on the plank. Serve with reserved sauces. Enjoy!
One Year Ago: White Chocolate Chip Cookies with Key Lime Glaze
Saturday, May 28, 2011
A small break...
I have decided to take a much needed break from blogging this weekend....but not to worry, I'll be back with fresh new recipes on Tuesday.
For now, I leave you with a few of my favorite recipes that I think would be the hit at any Memorial Day BBQ....in case you are looking for some last minute ideas, that is :)
Be safe out there and enjoy the holiday weekend!!
For now, I leave you with a few of my favorite recipes that I think would be the hit at any Memorial Day BBQ....in case you are looking for some last minute ideas, that is :)
Be safe out there and enjoy the holiday weekend!!
Friday, May 27, 2011
Balsamic Steaks with Roasted Jalapeno Aioli
The best meal, in my book, is any meal where every part is fantastic on it's own, but when brought together, something absolutely magical happens.
This meal was just that.
The steak had a wonderful balsamic flavor to them. They were tender cuts of meat. It would have been absolutely wonderful all by itself.
The aioli....well, come on... we all know my love for sauces and I think you can also figure out that I am a HUGE fan for aioli. There is just something wonderful about aioli. And this one is no different. The roasted jalapenos not only added a little spice, but they added a fantastic bit of flavor. Again, it was wonderful on it's own. Seriously, I could have just spooned it into my mouth.
Put the two amazing pieces of this meal together and, like I said, something magical happens. Taste buds will go wild with this one!
Balsamic Steaks with Roasted Jalapeno Aioli
Steak marinade adapted from About.com; Aioli created by Jenn's Food Journey
Printable Recipe
Ingredients:
1 pound top sirloin steak
1/2 cup balsamic vinegar
1 Tablespoon Worcestershire sauce
2 Tablespoons brown sugar
1/2 teaspoon salt
1/4 teaspoon pepper
For Aioli -
1 large jalapeno, seeded and cut into quarters
1 large garlic clover, quartered
1 Tablespoon fresh parsley
3/4 Tablespoon lime juice
1/2 cup mayonnaise
1/4 teaspoon salt
1/8 teaspoon black pepper
1/8 teaspoon cayenne pepper (or more for a bit more bite)
Directions:
In a bowl, mix together the balsamic, Worcestershire, brown sugar, salt, and pepper until well combined. Place the steaks in a resealable bag and pour the marinade over it. Seal the bag and allow to marinate in the fridge for 4 hours.
To make the sauce: Heat your grill to medium high. Place the jalapeno over the flame and allow it to blacken on all sides. (you can always heat a skillet over high heat and add the jalapeno to the dry skillet, allowing all sides to char) Remove from the grill and place in a bowl and over with plastic wrap, of place in a Ziploc bag and seal. Allow to rest for at least 5 minutes. When cooled enough to handle, peel the charred skin, remove the stem and seeds and cut into quarters. Add the garlic to a bowl of a food processor and pulse until roughly chopped. Add the jalapeno and parsley and pulse until minced. Add the lime juice, mayonnaise, salt, pepper, and cayenne. Pulse until just combined. Pour into serving bowl, cover, and refrigerate until ready to use.
Preheat your grill to 400 degrees. Remove the steaks from the bag and discard the marinade. Place the steaks directly over the fire and allow to cook for 4-10 minutes per side depending on desired doneness. Remove from grill and allow to rest for 5 minutes before cutting into it. Serve with roasted jalapeno aioli. Enjoy!
One year Ago: Thai Peanut Tilapia
Thursday, May 26, 2011
Greek Penne
The only real thing I would do differently next time I make it would be to add some kalamata olives. That would have just made it that much more "Greek-ish" for me. But that's it.. I'd change nothing else. If you like Greek flavors, you will definitely dig this pasta!
Greek Penne
Adapted from Cooking.com
Printable Recipe
Ingredients:
1 cup chicken broth or homemade stock
2 teaspoons dried oregano
2 boneless, skinless chicken breasts, cut into 1/2-inch cubes
13.5 oz box whole wheat penne pasta
4 oz crumbled feta cheese
1 Tablespoon lemon juice
1 teaspoon kosher salt
1/2 teaspoon black pepper
3 Tablespoons chopped fresh parsley
1 cup cherry tomatoes, quartered
Directions:
In a large skillet, simmer the chicken broth and the oregano until 1/2 cup of liquid remains, about 4-5 minutes. Stir in the chicken cubes, cover the pan and remove it from the heat. Let the chicken steam in the hot broth until just done, about 8-10 minutes.
Cook pasta according to package directions. Drain and toss with the chicken mixture. Add the feta, lemon juice, salt, pepper, and parsley. Stir until the cheese has melted. Toss in the cherry tomatoes. Enjoy!
One Year Ago: Penne alla Vodka
****I've been informed by a few people that my comment section is not working all the time, so I apologize if you are trying to comment and blogger will not allow it. There seems to be a glitch in the system, hopefully it will be fixed soon!! As always, thanks for visiting!****
Wednesday, May 25, 2011
Spicy Stir Fried Pork with Garlic and Chiles
Well, now, here's something you don't see every day here on Jenn's Food Journey - Stir Fried Pork. Now, you know there are plenty of stir fry recipes on my site, but with pork? I think not! So, I thought it was time to step outside of the box - and lo and behold - spicy stir fried pork showed up on our table! And I'm so glad it did. This stir fry was delicious! Spicy, flavorful, and oh so tender. Yes, folks, by using pork tenderloin you not only get a tender texture, but you get a wonderful, meaty dish. This is definitely one to try!
By the way, to make slicing the tenderloin easier, freeze it for 15 minutes before cutting. This will help firm up the meat and make it easier to cut.
Printable Recipe
Ingredients:
2 Tablespoons low sodium soy sauce
1 Tablespoon fish sauce
1 1/2 Tablespoons lime juice
1 1/2 Tablespoons backed brown sugar
1 teaspoon cornstarch
1 Tablespoons vegetable oil
1 lb pork tenderloin, sliced crosswise into 1/4-inch pieces
1 red bell pepper, seeded and sliced thin
2 jalapeno peppers, seeded and sliced thin
4 cloves garlic, minced
1/4 cup fresh chopped basil
Directions:
In a small bowl, whisk together the soy sauce, fish sauce, lime juice, sugar, and cornstarch until everything is dissolved and well combined.
In a wok or large, deep skillet, heat the oil over medium high heat. Add the pork and quickly stir fry; stirring constantly, for about 3 minutes. Add the bell pepper and jalapeno and cook for another 2-3 minutes, or until the pork is cooked through and the veggies have softened just a bit. Add the garlic and stir fry for 1 minute. Add the sauce to the pan and as soon as it boils, reduce heat to low, making sure to stir to coat the pork, until sauce has thickened. Take off the heat and stir in the basil. Serve over rice or noodles. Enjoy!
One Year Ago: Grilled Island Chicken
By the way, to make slicing the tenderloin easier, freeze it for 15 minutes before cutting. This will help firm up the meat and make it easier to cut.
Spicy Stir Fried Pork with Garlic and Chiles
Adapted from America's Test Kitchen 30-Minute SuppersPrintable Recipe
Ingredients:
2 Tablespoons low sodium soy sauce
1 Tablespoon fish sauce
1 1/2 Tablespoons lime juice
1 1/2 Tablespoons backed brown sugar
1 teaspoon cornstarch
1 Tablespoons vegetable oil
1 lb pork tenderloin, sliced crosswise into 1/4-inch pieces
1 red bell pepper, seeded and sliced thin
2 jalapeno peppers, seeded and sliced thin
4 cloves garlic, minced
1/4 cup fresh chopped basil
Directions:
In a small bowl, whisk together the soy sauce, fish sauce, lime juice, sugar, and cornstarch until everything is dissolved and well combined.
In a wok or large, deep skillet, heat the oil over medium high heat. Add the pork and quickly stir fry; stirring constantly, for about 3 minutes. Add the bell pepper and jalapeno and cook for another 2-3 minutes, or until the pork is cooked through and the veggies have softened just a bit. Add the garlic and stir fry for 1 minute. Add the sauce to the pan and as soon as it boils, reduce heat to low, making sure to stir to coat the pork, until sauce has thickened. Take off the heat and stir in the basil. Serve over rice or noodles. Enjoy!
One Year Ago: Grilled Island Chicken
Tuesday, May 24, 2011
Bacon, Lettuce, and Tomato Pasta
I know a poor soul who cannot eat bacon. I know, I know, I feel for her too. So I made a promise to myself... I said that since she can't eat it, I must do my duty to eat more of it. I mean, there has to be a balance, right?? :) And for me, what better way to enjoy bacon then with pasta??!!
This dish is very similar to the bacon and tomato pasta I've posted, which is of course, one of our favorites! I think this one ties it for first place. And how could either one of them not be a favorite? Didn't I mention it has bacon?? You see where I'm going with this right?
I LOVE BACON!!!
Bacon, Lettuce, and Tomato Pasta
Adapted from Cuisine at Home
Printable Recipe
Ingredients:
4 strips bacon, diced
1/2 sweet onion, thinly sliced
1/2 teaspoon granulated sugar
3/4 cup chicken broth, divided
1 teaspoon red wine vinegar
1/4 teaspoon red pepper flakes
1 cup cherry tomatoes, halved or quartered
8 oz dried spaghetti
1 cup fresh spinach leaves
6 basil leaves, chopped
Directions:
In a large skillet, cook the bacon over medium heat until crisp. Remove with a slotted spoon to a paper towel lined place. Pour off all but 1 tablespoons of the drippings. Add the sliced onion and sugar to the skillet and turn the heat down to medium low. Cook the onion, stirring occasionally, until they are caramelized, about 25-40 minutes. Deglaze the pan with 1/4 cup of the chicken broth, increasing the heat; simmer until liquid is nearly evaporated. Add the remaining broth, vinegar, and pepper flakes. Simmer until the liquid is reduced by a third, about 5 minutes. Add the tomatoes and simmer another 5 minutes.
Cook the pasta according to package directions. Drain, reserving 1/2 cup pasta water.
Add the spinach and cooked bacon to the tomato mixture. Add the pasta and toss to coat. Season with salt and pepper and top with chopped basil. Enjoy!
One Year Ago: Honey & Hoisin Grilled Trout with Orzo Pasta, Zucchini, and Peppers
Monday, May 23, 2011
Lemon-Habanero Tarter Sauce
Let me apologize for the picture.. it's not the greatest. Most of the pictures I took were out of focus or too dark... BUT.. despite how it may photograph this is an intensely wonderful tarter sauce. Granted, this is not for the faint of heart (or maybe I should say the faint of taste buds)... Oh, no, no, no.. you must be a brave soul to even consider trying this. But for those that choose to step into this realm of heat, they will be rewarded with a wonderfully, spicy new tarter sauce that will become an instant favorite. Who knows, you may never go back to that plain old tarter sauce again!
Printable Recipes
Ingredients:
1 Habanero pepper, seeds removed, roughly chopped
3 snack'mms sized dill pickles, cut in half
1 small garlic clove, quartered
6 Tablespoons mayonnaise
2 Tablespoons lemon juice
salt and pepper
Directions:
In a food processor add the habanero, pickles, and garlic. Pulse until well minced. Add the mayonnaise and lemon juice. Pulse until well combined. Pour into a serving bowl, season with salt and pepper to taste. Enjoy!
One Year Ago: Tequila Garlic Lime Steaks
Lemon-Habanero Tarter Sauce
Adapted from Bobby FlayPrintable Recipes
Ingredients:
1 Habanero pepper, seeds removed, roughly chopped
3 snack'mms sized dill pickles, cut in half
1 small garlic clove, quartered
6 Tablespoons mayonnaise
2 Tablespoons lemon juice
salt and pepper
Directions:
In a food processor add the habanero, pickles, and garlic. Pulse until well minced. Add the mayonnaise and lemon juice. Pulse until well combined. Pour into a serving bowl, season with salt and pepper to taste. Enjoy!
One Year Ago: Tequila Garlic Lime Steaks
Friday, May 20, 2011
Guest Blogger: Yikes!! I forgot to set one up!!!
Sorry folks, I have been so busy with work that I completely forgot to get a guest blogger set up for today. Guess all you get now is my Fire Day Friday post! This is definitely one you need to go check out - all I'm going to say is "Fight Night Ribs"!! Oh, yea, and I'm going to tempt your palate with this photo:
Now, wait, just because I don't have a guest blogger doesn't mean that I don't have important things to talk about!
First - Some of you might know that I work for a marketing/advertising agency here in Arizona, but what most of you probably don't know is that we also have a blog. Unfortunately, when certain people within my office found out I had a blog myself, they immediately thought of a way to incorporate what I do with what they do. Confused yet? :) In layman's terms: I had to write a post for our company blog and if you are interested, please check it out. It's all about how marketers can better reach out to bloggers. Here's the link: 5 Tips for Pitching to Bloggers
Second - Chris at Nibble Me This is hosting another great giveaway. Just in time for the grilling season too! If you are the winner of this great giveaway, you will receive a Bush's Baked Beans Grilling Kit. But hurry up, the giveaway closes May 28th. Don't forget to tell him Jenn sent you :) Click Here for all the details.
Third - last week (or maybe longer, geez, the days are all melding into one) I was awarded The Versitle Blogger award from Denise at The Bread Fairy. The best thing about winning this award is that I got to find a brand new blog to follow!! Of course, this comes with certain rules, but as always, I'm breaking the rules. I haven't had a lot of time this week, so I'm just going to thank Denise very much for the award... I'm honored that you would choose to give it to me and am flattered you enjoy my blog so much. Thank you, thank you, thank you!
And finally - if you are at all interested in doing a guest post here on Jenn's Food Journey, contact me through my email jennsfoodjourney@gmail.com and we can discuss up coming dates. No pressure, just thought I would put it out there if you are feeling "guesty" :)
Now....go check out my post for Fight Night Ribs.... you won't be sorry :) And don't forget to have a Foodie-tastic weekend! Ciao!
Subscribe to:
Posts (Atom)