It has been one crazy week around here. Well, I shouldn't say that... Home life has been wonderful (as always), but work... work is a different story. Work has been mega crazy this week! I think most of you know that I am an accountant, and being an accountant, the end/beginning of the month is always the most hectic. For us, it means billing and financials.... it's actually my favorite time of the month.. but that doesn't mean I can't complain when it gets crazy busy, right? Seriously, though, I'm just really glad the week coming to a close and that I'll be able to really relax for at least two days! I plan on spending major time by the pool as it's H.O.T. here. This week we saw anywhere from 105-111 degrees (depending on where you are in the state that is). I mean I know it's June, but dang..... I don't know if I'm ready for summer in the desert yet!!
What I am ready for, though, is some grillin'.... oh wait, that's right, I'm fortunate enough to live in a place where I can easily grill all year around. What I should have said is that I'm so ready for it to be grilling season for everyone else so you can try this delicious new recipe. It's simple and it's perfect for summer grilling.
Grilled Shrimp Tostados
Created by Jenn's Food Journey
Printable Recipe
Ingredients:
1/2 teaspoon chili powder
1/8 teaspoon cayenne pepper
1/8 teaspoon garlic powder
1/4 teaspoon ground cumin
1/4 teaspoon dried oregano
1/4 teaspoon salt
1/4 teaspoon onion powder
1 teaspoon olive oil
24 medium shrimp, peeled, deveined and tails removed
4-6 small tortillas (I used flour)
1/2 cup refried beans (or more if you like
Guacamole (I used Wholly Guacamole)
Shredded lettuce
Cojita cheese
Directions:
In a small bowl, mix together the first 7 ingredients until well combined. Place the shrimp in a shallow dish and drizzle olive oil over it. Toss to combine. Sprinkle the shrimp with the seasoning mixture and toss to combine. Cover and place in refrigerator for at least 1 hour.
Preheat grill to 375 degrees F. Place a pan made for the grill on the grill grates and spray with non-stick oil. Place shrimp on pan and grill for 2-3 minutes per side or until the shrimp are pink and cooked through.
Place the tortillas on the grill over direct heat and grill 1-2 minutes per side or until golden and crispy. Remove from grill and allow to cool for just a minute or two. Top with refried beans, guacamole and lettuce (however much of each you want, this should be to your taste, not mine). Top with 4-6 shrimp, depending on how many tostados you are making, then top with cheese. Serve immediately. Enjoy!
One Year Ago: Grilled Parmesan Garlic Shrimp
Two Years Ago: Thick Cut Pork Chops with Korean BBQ Sauce
Three Years Ago: Basil & Lime Tilapia with Basil Aioli
Search This Blog
Friday, June 7, 2013
Wednesday, June 5, 2013
Sriracha Chicken Skewers with Geen Onions
I have a confession to make - I figured it's been a while, so it was about time - I have no idea what to type right now. There, I said it. Seriously, I'm giving this confession only to fill space... I have literally sat here thinking about what to write for over an hour. Okay, not sitting RIGHT here... I got up and talked to Chris for a while, I checked my email, etc... but I think you get my point. Is it writers block? Maybe. It it just me? Probably. All I know for sure is I'm sorry I made you read through this paragraph of ramble only to say.... You GOTTA try this recipe!! If you are a fan of Srircha... this is one to stick in that "must try" file. And, the original recipe used beef, so it's not only delicious, but it's versatile too!!
P.S... if you want to check out another Sriracha chicken skewer idea, stop by my friend Lea Ann's site Cooking On The Ranch and check out her recipe for Sriracha Chicken Mushroom Kabobs... YUM!!
Sriracha Chicken Skewers with Green Onions
Adapted from Life's Ambrosia
- Serves 2 -
Printable Recipe
Ingredients:
3/4 lbs chicken strips, cut into 1 inch pieces
4 green onions, cut into 1 inch pieces
For the marinade -
2 Tablespoon Srircha
1 Tablespoon Worcestershire sauce
1 Tablespoon white vinegar
1/4 teaspoon ground ginger
1/4 teaspoon sesame oil
For the sauce -
2 Tablespoons mayonnaise
2 Tablespoons sour cream
1 teaspoon rice vinegar
1 teaspoon Sriracha
1/2 teaspoon dried dill
1/4 teaspoon garlic powder
pinch of salt
wooden or metal skewers
Directions:
At least 45 minutes before you are ready to grill, soak wooden skewers in water. Remove only when ready to use.
Place the chicken in a shallow dish or resealable plastic bag. Mix together all the ingredients for the marinade until well combined. Pour marinade over chicken, cover or seal bag and place in refrigerator for at least 2 hours. When ready to grill, skewer two or three pieces of chicken, then green onion, then chicken, then green onion, until all chicken and onions have been used.
Meanwhile, in a small bowl whisk together all the ingredients for the sauce. Taste for seasoning. Cover and store in refrigerator until ready to use.
Preheat grill to 375 degrees F. Clean and oil grill grates. Place over direct heat and grill for about 4 minutes, turn and grill another 4 minutes or until the chicken is cooked through. Carefully remove from grill and allow to rest 5 minutes before serving. Serve with sauce and enjoy!
One Year Ago: Chile-Rubbed Grilled Chicken
Two Years Ago: Bobby Flay's Mesa Hot Sauce Marinated Chicken
Three Years Ago: Steak de Burgo
P.S... if you want to check out another Sriracha chicken skewer idea, stop by my friend Lea Ann's site Cooking On The Ranch and check out her recipe for Sriracha Chicken Mushroom Kabobs... YUM!!
Sriracha Chicken Skewers with Green Onions
Adapted from Life's Ambrosia
- Serves 2 -
Printable Recipe
Ingredients:
3/4 lbs chicken strips, cut into 1 inch pieces
4 green onions, cut into 1 inch pieces
For the marinade -
2 Tablespoon Srircha
1 Tablespoon Worcestershire sauce
1 Tablespoon white vinegar
1/4 teaspoon ground ginger
1/4 teaspoon sesame oil
For the sauce -
2 Tablespoons mayonnaise
2 Tablespoons sour cream
1 teaspoon rice vinegar
1 teaspoon Sriracha
1/2 teaspoon dried dill
1/4 teaspoon garlic powder
pinch of salt
wooden or metal skewers
Directions:
At least 45 minutes before you are ready to grill, soak wooden skewers in water. Remove only when ready to use.
Place the chicken in a shallow dish or resealable plastic bag. Mix together all the ingredients for the marinade until well combined. Pour marinade over chicken, cover or seal bag and place in refrigerator for at least 2 hours. When ready to grill, skewer two or three pieces of chicken, then green onion, then chicken, then green onion, until all chicken and onions have been used.
Meanwhile, in a small bowl whisk together all the ingredients for the sauce. Taste for seasoning. Cover and store in refrigerator until ready to use.
Preheat grill to 375 degrees F. Clean and oil grill grates. Place over direct heat and grill for about 4 minutes, turn and grill another 4 minutes or until the chicken is cooked through. Carefully remove from grill and allow to rest 5 minutes before serving. Serve with sauce and enjoy!
One Year Ago: Chile-Rubbed Grilled Chicken
Two Years Ago: Bobby Flay's Mesa Hot Sauce Marinated Chicken
Three Years Ago: Steak de Burgo
Monday, June 3, 2013
Ziti with Tuna, Lemon and Basil
I probably have another pasta dish very similar to this somewhere on my blog already, but I'll tell you, I was just too lazy to check. So if you notice that this is a double post... please don't tell me :)
Simple, light and perfect for a weeknight meal... especially during the summer. I haven't given you exact amounts on everything and I apologize for that. I thought I had written the recipe down, but when I went to look for it, I found out that I was completely wrong. Oh well, I think you can figure this one out yourself. It's so very simple and so worth trying.
Ziti with Tuna, Lemon and Basil
Created by Jenn's Food Journey
- Serves 2 -
Printable Recipe
Ingredients:
8-10 oz ziti
1 can tuna packed in olive oil
juice of 1 lemon
zest of 1 lemon
extra virgin olive oil
handful of fresh basil, roughly chopped
salt and pepper to taste
Directions:
Cook pasta according to package directions; drain and set aside, reserving 1/2 cup of the pasta water.
Pour the pasta into a bowl and add the tuna with all it's oil. Stir in the lemon juice and zest. If the pasta it too dry, add some olive oil and/or pasta water until you get the right consistency. Stir in the basil and season with salt and pepper to taste. Serve and enjoy!
One Year Ago: Grilled Chicken with Pesto Yogurt Sauce
Two Years Ago: Beef Tostadas
Three Years Ago: Asian Inspired Pork Chops
Simple, light and perfect for a weeknight meal... especially during the summer. I haven't given you exact amounts on everything and I apologize for that. I thought I had written the recipe down, but when I went to look for it, I found out that I was completely wrong. Oh well, I think you can figure this one out yourself. It's so very simple and so worth trying.
Ziti with Tuna, Lemon and Basil
Created by Jenn's Food Journey
- Serves 2 -
Printable Recipe
Ingredients:
8-10 oz ziti
1 can tuna packed in olive oil
juice of 1 lemon
zest of 1 lemon
extra virgin olive oil
handful of fresh basil, roughly chopped
salt and pepper to taste
Directions:
Cook pasta according to package directions; drain and set aside, reserving 1/2 cup of the pasta water.
Pour the pasta into a bowl and add the tuna with all it's oil. Stir in the lemon juice and zest. If the pasta it too dry, add some olive oil and/or pasta water until you get the right consistency. Stir in the basil and season with salt and pepper to taste. Serve and enjoy!
One Year Ago: Grilled Chicken with Pesto Yogurt Sauce
Two Years Ago: Beef Tostadas
Three Years Ago: Asian Inspired Pork Chops
Friday, May 31, 2013
Grilled Chicken Salad with Creamy Balsamic Dressing
As you may have guessed, this post is really not about the actual salad, but about the dressing! And that doesn't surprise any of you, I'm sure (unless you are just visiting my blog for the first time that is). You can make any sort of salad you would like.. this just happens to be what we like :) This just happens to be one of those recipes that I just HAD to post. Simple and delicious and so much better than store bought dressings! Heck, this dressing even uses ingredients most everyone has in their pantry... and that is something you just can't beat. I mean if you can open your pantry/fridge and make a delicious concoction like this without having to go to the store... you are golden!!
Grilled Chicken Salad with Creamy Balsamic Dressing
Adapted from Food Network Magazine
- Serves 2 -
Printable Recipe
Ingredients:
2 boneless, skinless chicken breasts
olive oil
salt and pepper
cayenne pepper
3-4 cups torn lettuce
sliced cucumbers, sliced radishes
cherry tomatoes, quartered
For the dressing -
2 Tablespoons mayonnaise
1 Tablespoon balsamic vinegar
1 Tablespoon lemon juice
2 teaspoons Dijon mustard
1 Tablespoon olive oil
1/4 teaspoon garlic powder
1/2 teaspoon salt
1/4 teaspoon pepper
1/4 teaspoon granulated sugar
Directions:
Drizzle olive oil over both sides of each piece of chicken. Season liberally with salt, pepper and cayenne. Allow to rest, covered, in the refrigerator for at least a hour.
Meanwhile, in a small bowl or measuring cup, whisk together all the ingredients for the dressing until well combined. Cover and store in refrigerator until ready to use. Can be made up to three days in advance.
Preheat grill to 375 degrees F. Clean and oil grill grates. Place chicken over direct heat and grill 5-8 minutes per side or until the chicken reaches an internal temperature of 165 degrees F. Remove from grill and allow to rest for 5-10 minutes before thinly slicing or chopping.
Build the salad by adding the lettuce to two plates or large bowls. Top with tomatoes, cucumber, radishes and finally the chicken. Drizzle on as much dressing as desired and serve immediately. Enjoy!
One Year Ago: Pasta in Pesto Cream with Chicken and Tomatoes
Two Years Ago: Pasta Primavera with Tuna
Three Years Ago: Grilled Sriracha Glazed Chicken
Have a great weekend everyone!!
Grilled Chicken Salad with Creamy Balsamic Dressing
Adapted from Food Network Magazine
- Serves 2 -
Printable Recipe
Ingredients:
2 boneless, skinless chicken breasts
olive oil
salt and pepper
cayenne pepper
3-4 cups torn lettuce
sliced cucumbers, sliced radishes
cherry tomatoes, quartered
For the dressing -
2 Tablespoons mayonnaise
1 Tablespoon balsamic vinegar
1 Tablespoon lemon juice
2 teaspoons Dijon mustard
1 Tablespoon olive oil
1/4 teaspoon garlic powder
1/2 teaspoon salt
1/4 teaspoon pepper
1/4 teaspoon granulated sugar
Directions:
Drizzle olive oil over both sides of each piece of chicken. Season liberally with salt, pepper and cayenne. Allow to rest, covered, in the refrigerator for at least a hour.
Meanwhile, in a small bowl or measuring cup, whisk together all the ingredients for the dressing until well combined. Cover and store in refrigerator until ready to use. Can be made up to three days in advance.
Preheat grill to 375 degrees F. Clean and oil grill grates. Place chicken over direct heat and grill 5-8 minutes per side or until the chicken reaches an internal temperature of 165 degrees F. Remove from grill and allow to rest for 5-10 minutes before thinly slicing or chopping.
Build the salad by adding the lettuce to two plates or large bowls. Top with tomatoes, cucumber, radishes and finally the chicken. Drizzle on as much dressing as desired and serve immediately. Enjoy!
One Year Ago: Pasta in Pesto Cream with Chicken and Tomatoes
Two Years Ago: Pasta Primavera with Tuna
Three Years Ago: Grilled Sriracha Glazed Chicken
Wednesday, May 29, 2013
Asian Inspired Grilled Steaks (a redux)
I knew it would happen sooner or later... I would inevitably try a recipe, jot down any adaptations, take photos, and sit down to write out the recipe on blogger only to find out I had already posted the recipe!! Surprisingly, it has not happened as often as I would have suspected. At least not doing everything before I realized the mistake. Most times I realize as I'm reading off the ingredients that I've done something similar, but this time... nope, not this time... this time I did everything before it hit me that I had made this before. So, what's a blogging girl to do? Well, I'm like a marine in the sense that I can adapt and overcome... at least in this moment I could... and did :) I made a few little tweaks from the original recipe that I think just make it that much better - hence my theory as to why I'm posting this again. Plus, I posted the original recipe back in 2010... I mean who can remember that far back anyway :) I do hope you give it a try, it's definitely worth the reposting!!
A Redux: Asian Inspired Grilled Steaks
Adapted from original post found HERE
Printable Recipe
Ingredients:
1 Tablespoon lime juice
1 Tablespoon low-sodium soy sauce
1 Tablespoon fish sauce
2 Tablespoons sweet chili sauce
1 Tablespoon Sriracha
1 garlic clove, minced
1/4 teaspoon ground ginger
1 lbs petite sirloin steaks
Directions:
In a bowl, mix all the ingredients together, except the steaks, until well combined. Place the steaks in a plastic resealable bag and pour the marinade over it. Seal and place in refrigerator for 2-24 hours.
Preheat grill to 400 degrees. Clean and oil grill grates. Remove steaks and discard marinade. Place steaks over direct heat and grill 4-10 minutes on each side, depending on the desired doneness. Remove steaks from grill and allow to rest for 5 minutes before slicing and serving. Enjoy!
One Year Ago: Tender Grilled Pork Chops
Two Years Ago: Balsamic Steaks with Roasted Jalapeno Aioli
Three Years Ago: White Chocolate Chip Cookies with Key Lime Glaze
A Redux: Asian Inspired Grilled Steaks
Adapted from original post found HERE
Printable Recipe
Ingredients:
1 Tablespoon lime juice
1 Tablespoon low-sodium soy sauce
1 Tablespoon fish sauce
2 Tablespoons sweet chili sauce
1 Tablespoon Sriracha
1 garlic clove, minced
1/4 teaspoon ground ginger
1 lbs petite sirloin steaks
Directions:
In a bowl, mix all the ingredients together, except the steaks, until well combined. Place the steaks in a plastic resealable bag and pour the marinade over it. Seal and place in refrigerator for 2-24 hours.
Preheat grill to 400 degrees. Clean and oil grill grates. Remove steaks and discard marinade. Place steaks over direct heat and grill 4-10 minutes on each side, depending on the desired doneness. Remove steaks from grill and allow to rest for 5 minutes before slicing and serving. Enjoy!
One Year Ago: Tender Grilled Pork Chops
Two Years Ago: Balsamic Steaks with Roasted Jalapeno Aioli
Three Years Ago: White Chocolate Chip Cookies with Key Lime Glaze
Monday, May 27, 2013
A Day to Honor
I have decided to take another break from blogging - I mean I had such a nice one just last week, why not do it again :) Seriously, though, I'm just taking today off. It's memorial day - time to honor those who have served this country - AND - It's also a great time for relaxing in the sun by the pool and grilling out.... so that's what I'm doing. BUT, I would also like to take a quick moment to thank all who have served to protect this country. Thank you, from the bottom of my heart. (And an even bigger thanks goes out to my dad who served in Vietnam! Love you Dad!!! xoxo)
Hope you all enjoy your day and I'll be back here on Wednesday with a delicious new recipe! Until then... if you want to browse through some of my past Memorial Day posts, check out this link HERE. You just might find something new and delicious to serve up this week!
Happy Memorial Day!
Friday, May 24, 2013
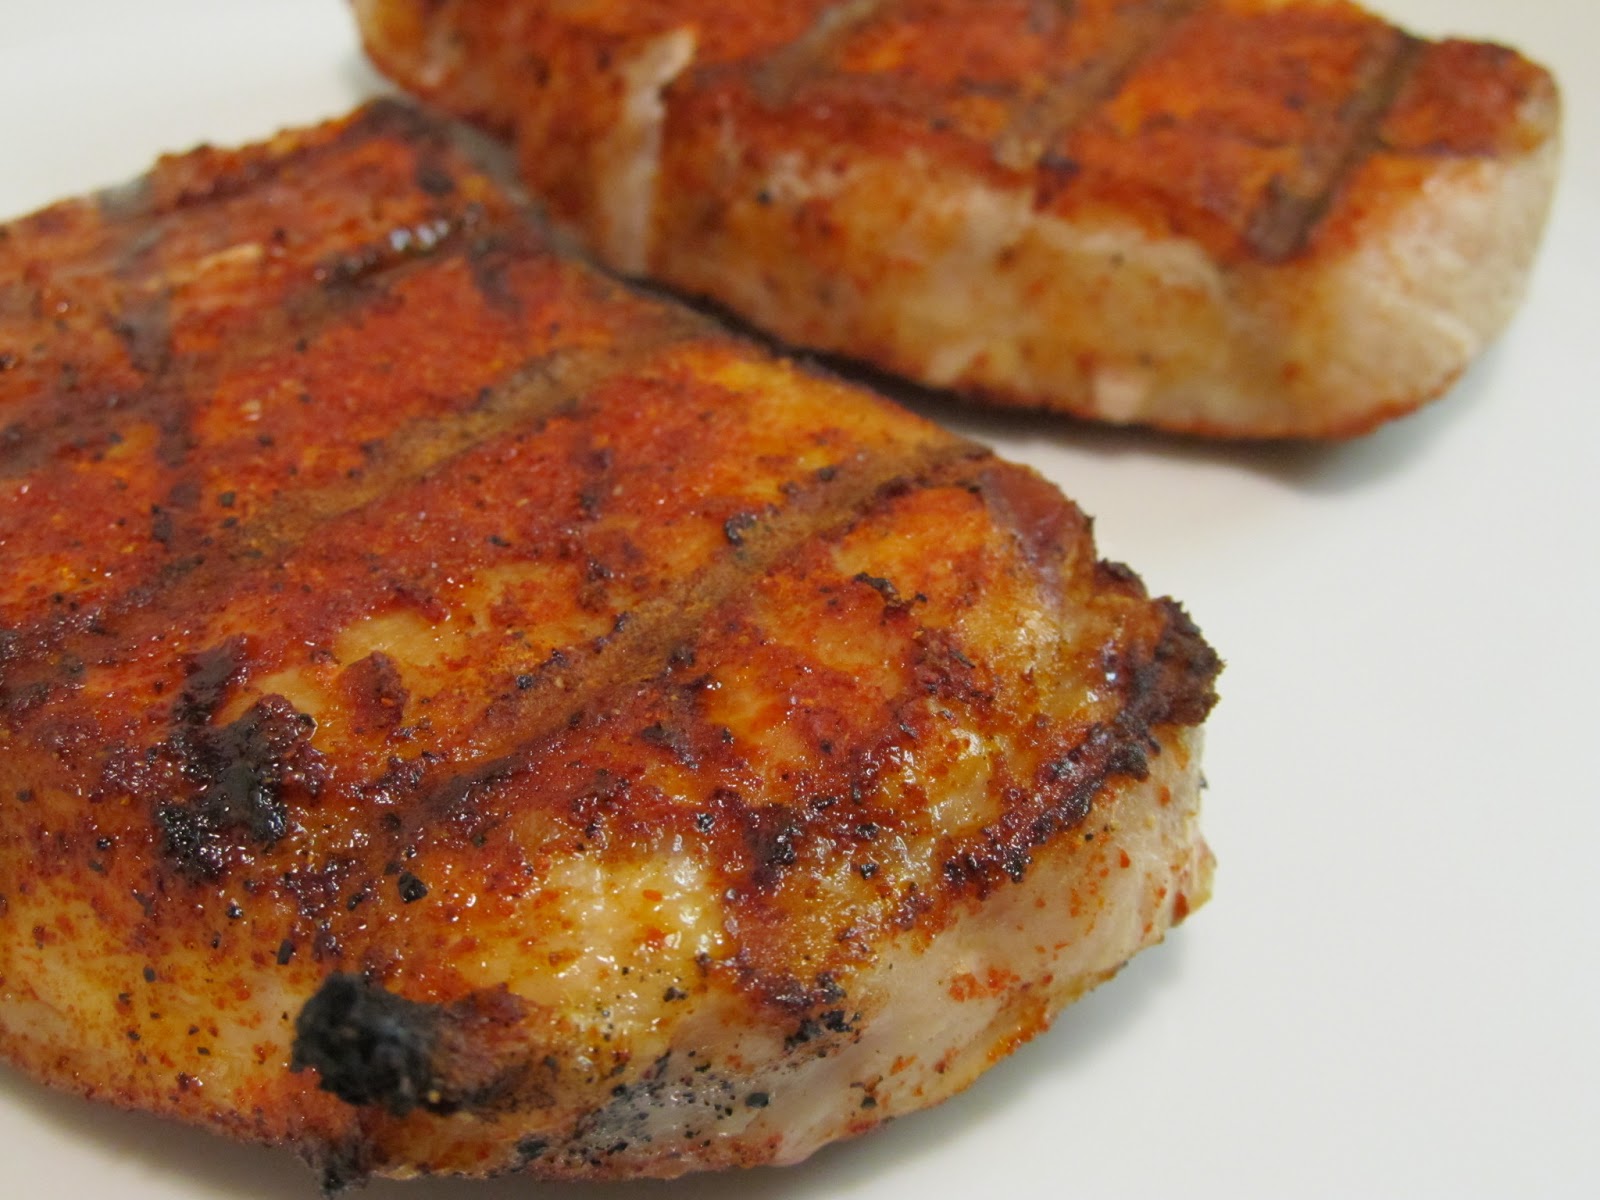
Pork Chop Willy's Spice Rubbed Chops
Happy Friday, everyone!!! It was a long time coming (heck, I even had a short week), but it's FINALLY here!!! Now... all we have to do is get through the day!! :)
So, you might be asking yourself, what's this "Pork Chop Willy's" all about? Well, I am asking myself the same thing. There was nothing on the original recipe stating why this rub is called Pork Chop Willy's, so I have no clue where it came from. I guess I could have looked a little deeper, but who's got time?? Sorry to disappoint you, but there is no fun fact filled story to go with this post.... guess it's gonna have to be all about the chops :) Good thing these chops were fantastic! The rub adds great flavor to the pork and will definitely be made again!
Pork Chop Willy's Spice Rubbed Chops
Adapted from Epicurious.com
Printable Recipe
Ingredients:
2 boneless pork loin chops
For the brine -
2 1/2 cups water
1 Tablespoon kosher salt
1 Tablespoon granulated sugar
1 teaspoon fresh ground pepper
1 teaspoon minced garlic
1/2 teaspoon red pepper flakes
For the rub -
1 Tablespoon Hungarian sweet paprika
1 teaspoon black pepper
1/4 teaspoon chili powder
1/4 teaspoon onion powder
1/4 teaspoon cayenne pepper
1/8 teaspoon garlic powder
1/8 teaspoon granulated sugar
Directions:
Mix together all the ingredients for the brine. Stir until the salt and sugar have pretty much dissolved. Place pork chops in a resealable plastic bag or large bowl and pour the brine over. Seal the bag or cover the bowl and place in refrigerator for 4 hours. Remove and rinse thoroughly under cool water. Pat dry with paper towels.
In a small bowl, mix together all the ingredients for the rub until well combined. Sprinkle the rub on both sides and rub into meat. You will have left over rub, don't worry...place it in a plastic resealable bag and use it within the next three months. Place the pork on a plate and cover with plastic wrap. Allow to rest in refrigerator for at least 1 hour.
Preheat grill to 375 degrees F. Clean and oil grill grates. Drizzle a little olive oil on both sides of the pork and place over direct heat. Grill 4-6 minutes per side or until it reaches an internal temperature of 145-150 degrees F. Remove from grill and allow to rest for 3-5 minutes before serving. Enjoy!
One Year Ago: Herbed Goat Cheese Topped Grilled Chicken
Two Years Ago: Greek Penne
Three Years Ago: Penne alla Vodka
So, you might be asking yourself, what's this "Pork Chop Willy's" all about? Well, I am asking myself the same thing. There was nothing on the original recipe stating why this rub is called Pork Chop Willy's, so I have no clue where it came from. I guess I could have looked a little deeper, but who's got time?? Sorry to disappoint you, but there is no fun fact filled story to go with this post.... guess it's gonna have to be all about the chops :) Good thing these chops were fantastic! The rub adds great flavor to the pork and will definitely be made again!
Pork Chop Willy's Spice Rubbed Chops
Adapted from Epicurious.com
Printable Recipe
Ingredients:
2 boneless pork loin chops
For the brine -
2 1/2 cups water
1 Tablespoon kosher salt
1 Tablespoon granulated sugar
1 teaspoon fresh ground pepper
1 teaspoon minced garlic
1/2 teaspoon red pepper flakes
For the rub -
1 Tablespoon Hungarian sweet paprika
1 teaspoon black pepper
1/4 teaspoon chili powder
1/4 teaspoon onion powder
1/4 teaspoon cayenne pepper
1/8 teaspoon garlic powder
1/8 teaspoon granulated sugar
Directions:
Mix together all the ingredients for the brine. Stir until the salt and sugar have pretty much dissolved. Place pork chops in a resealable plastic bag or large bowl and pour the brine over. Seal the bag or cover the bowl and place in refrigerator for 4 hours. Remove and rinse thoroughly under cool water. Pat dry with paper towels.
In a small bowl, mix together all the ingredients for the rub until well combined. Sprinkle the rub on both sides and rub into meat. You will have left over rub, don't worry...place it in a plastic resealable bag and use it within the next three months. Place the pork on a plate and cover with plastic wrap. Allow to rest in refrigerator for at least 1 hour.
Preheat grill to 375 degrees F. Clean and oil grill grates. Drizzle a little olive oil on both sides of the pork and place over direct heat. Grill 4-6 minutes per side or until it reaches an internal temperature of 145-150 degrees F. Remove from grill and allow to rest for 3-5 minutes before serving. Enjoy!
One Year Ago: Herbed Goat Cheese Topped Grilled Chicken
Two Years Ago: Greek Penne
Three Years Ago: Penne alla Vodka
Wednesday, May 22, 2013
Thai Basil Chicken
Okay, so this is not the loveliest dish I have ever posted, but it is at least a pretty tasty one :)
There is a Thai restaurant that I used to go to that had THE BEST Thai Basil Chicken I have ever had. It used ground chicken instead of chunks and was just utterly delicious. The restaurant closed a few years ago and although I can get good Thai Basil Chicken at other restaurants, they have never quite matched the one I remember so clearly. Soooo, when I stumbled upon this recipe, I immediately put it on the menu to try the following week. Now this did not deliver the exact flavor I was looking for, it was lacking something. But, it was good enough to post about, so I guess that can't be all too bad. Next time, I would definitely add a bit more basil and maybe even a bit more of the sauce... but that's just me. You may find this recipe meets your taste to the T :)
Oh.. and thanks for all the wishes of a relaxing vacation... I definitely had one. I saw family, I saw friends, I didn't once think about work (okay, I thought about it once, but that was it!). Not only was the trip relaxing, but coming back to work was actually not that stressful either... so guess I picked the perfect time to get away!
P.s....the red peppers in the picture are in the rice, NOT the chicken.
Thai Basil Chicken
Adapted from RasaMalaysia, Easy Asian Recipes
Printable Recipe
Ingredients:
2 teaspoons olive oil
1 shallot, finely diced
2 Serrano peppers, stem and seeds removed, finely diced
2 garlic cloves, minced
10-12 oz ground chicken
2 Tablespoons fish sauce
2 teaspoons granulated sugar
2 Tablespoons soy sauce
1/4 teaspoon white pepper (or to taste)
1 bunch Thai or Sweet Basil (about 6-8 large leaves), chopped
Sriracha (optional)
Directions:
In a wok or large deep non-stick skillet, heat the olive oil over medium heat. Add the shallot and cook, stirring frequently to make sure they do not burn, for about 5 minutes. Add the garlic and peppers and cook 1 more minute. Add the chicken, breaking it up with a wooden spoon. Allow to cook for about 5 minutes, or until the chicken is cooked through. Add the fish sauce, sugar and soy to a small bowl and stir to combine. Add soy mixture to the wok or skillet and toss to combine. Season with white pepper. Add the basil, stirring to combine. Remove from heat, drizzle with Sriracha if desired, and serve. Enjoy!
One Year Ago: Penne with Pork Sugo
Two Years Ago: Stir Fried Pork with Garlic and Chiles
Three Years Ago: Grilled Island Chicken
There is a Thai restaurant that I used to go to that had THE BEST Thai Basil Chicken I have ever had. It used ground chicken instead of chunks and was just utterly delicious. The restaurant closed a few years ago and although I can get good Thai Basil Chicken at other restaurants, they have never quite matched the one I remember so clearly. Soooo, when I stumbled upon this recipe, I immediately put it on the menu to try the following week. Now this did not deliver the exact flavor I was looking for, it was lacking something. But, it was good enough to post about, so I guess that can't be all too bad. Next time, I would definitely add a bit more basil and maybe even a bit more of the sauce... but that's just me. You may find this recipe meets your taste to the T :)
Oh.. and thanks for all the wishes of a relaxing vacation... I definitely had one. I saw family, I saw friends, I didn't once think about work (okay, I thought about it once, but that was it!). Not only was the trip relaxing, but coming back to work was actually not that stressful either... so guess I picked the perfect time to get away!
P.s....the red peppers in the picture are in the rice, NOT the chicken.
Thai Basil Chicken
Adapted from RasaMalaysia, Easy Asian Recipes
Printable Recipe
Ingredients:
2 teaspoons olive oil
1 shallot, finely diced
2 Serrano peppers, stem and seeds removed, finely diced
2 garlic cloves, minced
10-12 oz ground chicken
2 Tablespoons fish sauce
2 teaspoons granulated sugar
2 Tablespoons soy sauce
1/4 teaspoon white pepper (or to taste)
1 bunch Thai or Sweet Basil (about 6-8 large leaves), chopped
Sriracha (optional)
Directions:
In a wok or large deep non-stick skillet, heat the olive oil over medium heat. Add the shallot and cook, stirring frequently to make sure they do not burn, for about 5 minutes. Add the garlic and peppers and cook 1 more minute. Add the chicken, breaking it up with a wooden spoon. Allow to cook for about 5 minutes, or until the chicken is cooked through. Add the fish sauce, sugar and soy to a small bowl and stir to combine. Add soy mixture to the wok or skillet and toss to combine. Season with white pepper. Add the basil, stirring to combine. Remove from heat, drizzle with Sriracha if desired, and serve. Enjoy!
One Year Ago: Penne with Pork Sugo
Two Years Ago: Stir Fried Pork with Garlic and Chiles
Three Years Ago: Grilled Island Chicken
Wednesday, May 15, 2013
Pork Back Ribs with Sriracha Barbecue Sauce
****I'm taking a much needed break from work and blogging, so this will be my last post until next Wednesday. Hope everyone has a great week and weekend and I'll see you back here next week! Happy Cooking!****
Late last year, Mary (Food Floozie) and I had this great idea that we would meet up in Memphis for the annual music and barbecue festival, Memphis in May. It sounded like a fantastic idea at the time... actually, it STILL sounds like a fantastic idea... but, unfortunately, time and money and life in general stopped us from actually reaching our dream. Sooooooo, as we put it it.... there's always next year, right? I mean a dream like that doesn't just dissolve because of a small little set back like that. It's still there, just waiting for us..... :)
Since we couldn't actually be at Memphis in May, we thought we'd bring a little Memphis in May to you! Nothing like some good barbecue to get you in the mood. And this is GOOD barbecue!! Not your normal bbq, but a mighty fine one at that. And yes, that's right, I would probably get kicked out of any competition because I don't do my ribs the "proper" way - but who cares, the outcome is still decadent and delicious, so what more do you really need?
And, don't forget to check out Mary's site for some additional BBQ deliciousness!!
Pork Back Ribs with Sriracha Barbecue Sauce
Rib recipe created by Jenn's Food Journey
Sauce recipe adapted from Life's Ambrosia
Printable Recipe
Ingredients:
1 rack pork back ribs
For the rub -
1/2 teaspoon Chinese 5 spice
1/2 teaspoon garlic powder
1 teaspoon dry hot mustard (you can use regular dry mustard)
3/4 teaspoon salt
1/2 teaspoon pepper
For the barbecue sauce -
1/2 cup ketchup
2 Tablespoon brown sugar
1 1/2 teaspoon vinegar
1 Tablespoon Srircha
1 1/2 teaspoon soy sauce
1 teaspoon teriyaki sauce
1/2 teaspoon salt
1/4 teaspoon garlic powder
Directions:
In a small saucepan over medium heat, add all the ingredients for the barbecue sauce; stirring to combine. Bring sauce to a boil, reduce heat and simmer for 15 minutes; stirring occasionally. Remove from heat and allow to cool. You can make the sauce up to three days in advance, just cover and refrigerate until ready to use.
Remove the membrane from the back of the ribs. In a small bowl, mix together all the ingredients for the dry rub until well combined. Rub over both sides of the ribs and let sit at room temperature for 30 minutes.
Grill method - preheat grill to 275 degrees F. Set up for indirect cooking. Loosely wrap the ribs in aluminum foil (I like to add just a little beer in there to keep them moist) and place on indirect heat. Grill that way for 1 hour. Remove from aluminum foil and place over direct heat. Increase the temperature of the grill to 350 degrees F and grill for 20-30 minutes, or until the ribs are cooked through an fall off the bone tender. Remove from grill and allow to rest for 4-5 minutes. Serve with Srircha barbecue sauce and enjoy!!
Bake and grill method - preheat oven to 225 degrees F. Loosely wrap the ribs in aluminum foil and place in preheated oven. Bake for 1 1/2 - 2 hours, or until the ribs are almost done. Remove from foil and place on 350 degree F preheated grill for 20-30 minutes, turning the ribs once. Remove from grill and allow to cool for 5 minutes. Serve with Sriracha barbecue sauce and enjoy!!
One Year Ago: Wasabi Coleslaw
Two Years Ago: General Tso's Chicken - My Way
Three Years Ago: Pasta Carbonara
Late last year, Mary (Food Floozie) and I had this great idea that we would meet up in Memphis for the annual music and barbecue festival, Memphis in May. It sounded like a fantastic idea at the time... actually, it STILL sounds like a fantastic idea... but, unfortunately, time and money and life in general stopped us from actually reaching our dream. Sooooooo, as we put it it.... there's always next year, right? I mean a dream like that doesn't just dissolve because of a small little set back like that. It's still there, just waiting for us..... :)
Since we couldn't actually be at Memphis in May, we thought we'd bring a little Memphis in May to you! Nothing like some good barbecue to get you in the mood. And this is GOOD barbecue!! Not your normal bbq, but a mighty fine one at that. And yes, that's right, I would probably get kicked out of any competition because I don't do my ribs the "proper" way - but who cares, the outcome is still decadent and delicious, so what more do you really need?
And, don't forget to check out Mary's site for some additional BBQ deliciousness!!
Pork Back Ribs with Sriracha Barbecue Sauce
Rib recipe created by Jenn's Food Journey
Sauce recipe adapted from Life's Ambrosia
Printable Recipe
Ingredients:
1 rack pork back ribs
For the rub -
1/2 teaspoon Chinese 5 spice
1/2 teaspoon garlic powder
1 teaspoon dry hot mustard (you can use regular dry mustard)
3/4 teaspoon salt
1/2 teaspoon pepper
For the barbecue sauce -
1/2 cup ketchup
2 Tablespoon brown sugar
1 1/2 teaspoon vinegar
1 Tablespoon Srircha
1 1/2 teaspoon soy sauce
1 teaspoon teriyaki sauce
1/2 teaspoon salt
1/4 teaspoon garlic powder
Directions:
In a small saucepan over medium heat, add all the ingredients for the barbecue sauce; stirring to combine. Bring sauce to a boil, reduce heat and simmer for 15 minutes; stirring occasionally. Remove from heat and allow to cool. You can make the sauce up to three days in advance, just cover and refrigerate until ready to use.
Remove the membrane from the back of the ribs. In a small bowl, mix together all the ingredients for the dry rub until well combined. Rub over both sides of the ribs and let sit at room temperature for 30 minutes.
Grill method - preheat grill to 275 degrees F. Set up for indirect cooking. Loosely wrap the ribs in aluminum foil (I like to add just a little beer in there to keep them moist) and place on indirect heat. Grill that way for 1 hour. Remove from aluminum foil and place over direct heat. Increase the temperature of the grill to 350 degrees F and grill for 20-30 minutes, or until the ribs are cooked through an fall off the bone tender. Remove from grill and allow to rest for 4-5 minutes. Serve with Srircha barbecue sauce and enjoy!!
Bake and grill method - preheat oven to 225 degrees F. Loosely wrap the ribs in aluminum foil and place in preheated oven. Bake for 1 1/2 - 2 hours, or until the ribs are almost done. Remove from foil and place on 350 degree F preheated grill for 20-30 minutes, turning the ribs once. Remove from grill and allow to cool for 5 minutes. Serve with Sriracha barbecue sauce and enjoy!!
One Year Ago: Wasabi Coleslaw
Two Years Ago: General Tso's Chicken - My Way
Three Years Ago: Pasta Carbonara
Monday, May 13, 2013
Buttermilk-Goat Cheese Dressing
This simple little dressing is so delicious, I wish that I had made a double batch so I could have put it on anything else for the next few days!! I am a sucker for goat cheese, though. I love it's creaminess, I love it's tang... I just love it and could eat it on just about anything. Okay, so I could be a bit bias on this one, but trust me.. if you like goat cheese, you will love this dressing!
Buttermilk-Goat Cheese Dressing
Adapted from Food Network Magazine
Printable Recipe
Ingredients:
1/3 cup buttermilk
1.5 oz softened goat cheese
1 Tablespoon white wine vinegar
1/2 Tablespoon olive oil
1 teaspoon horseradish
1/4 teaspoon dried dill
Directions:
In a food processor or blender, pulse together all the ingredients until smooth. Pour into a bowl or jar, cover, and refrigerate until ready to use. Enjoy!
One Year Ago: Honey Tabasco Grilled Pork Chops
Two Years Ago: Chinese Barbecued Pork
Three Years Ago: Vanilla Ice Cream
Buttermilk-Goat Cheese Dressing
Adapted from Food Network Magazine
Printable Recipe
Ingredients:
1/3 cup buttermilk
1.5 oz softened goat cheese
1 Tablespoon white wine vinegar
1/2 Tablespoon olive oil
1 teaspoon horseradish
1/4 teaspoon dried dill
Directions:
In a food processor or blender, pulse together all the ingredients until smooth. Pour into a bowl or jar, cover, and refrigerate until ready to use. Enjoy!
One Year Ago: Honey Tabasco Grilled Pork Chops
Two Years Ago: Chinese Barbecued Pork
Three Years Ago: Vanilla Ice Cream
Friday, May 10, 2013
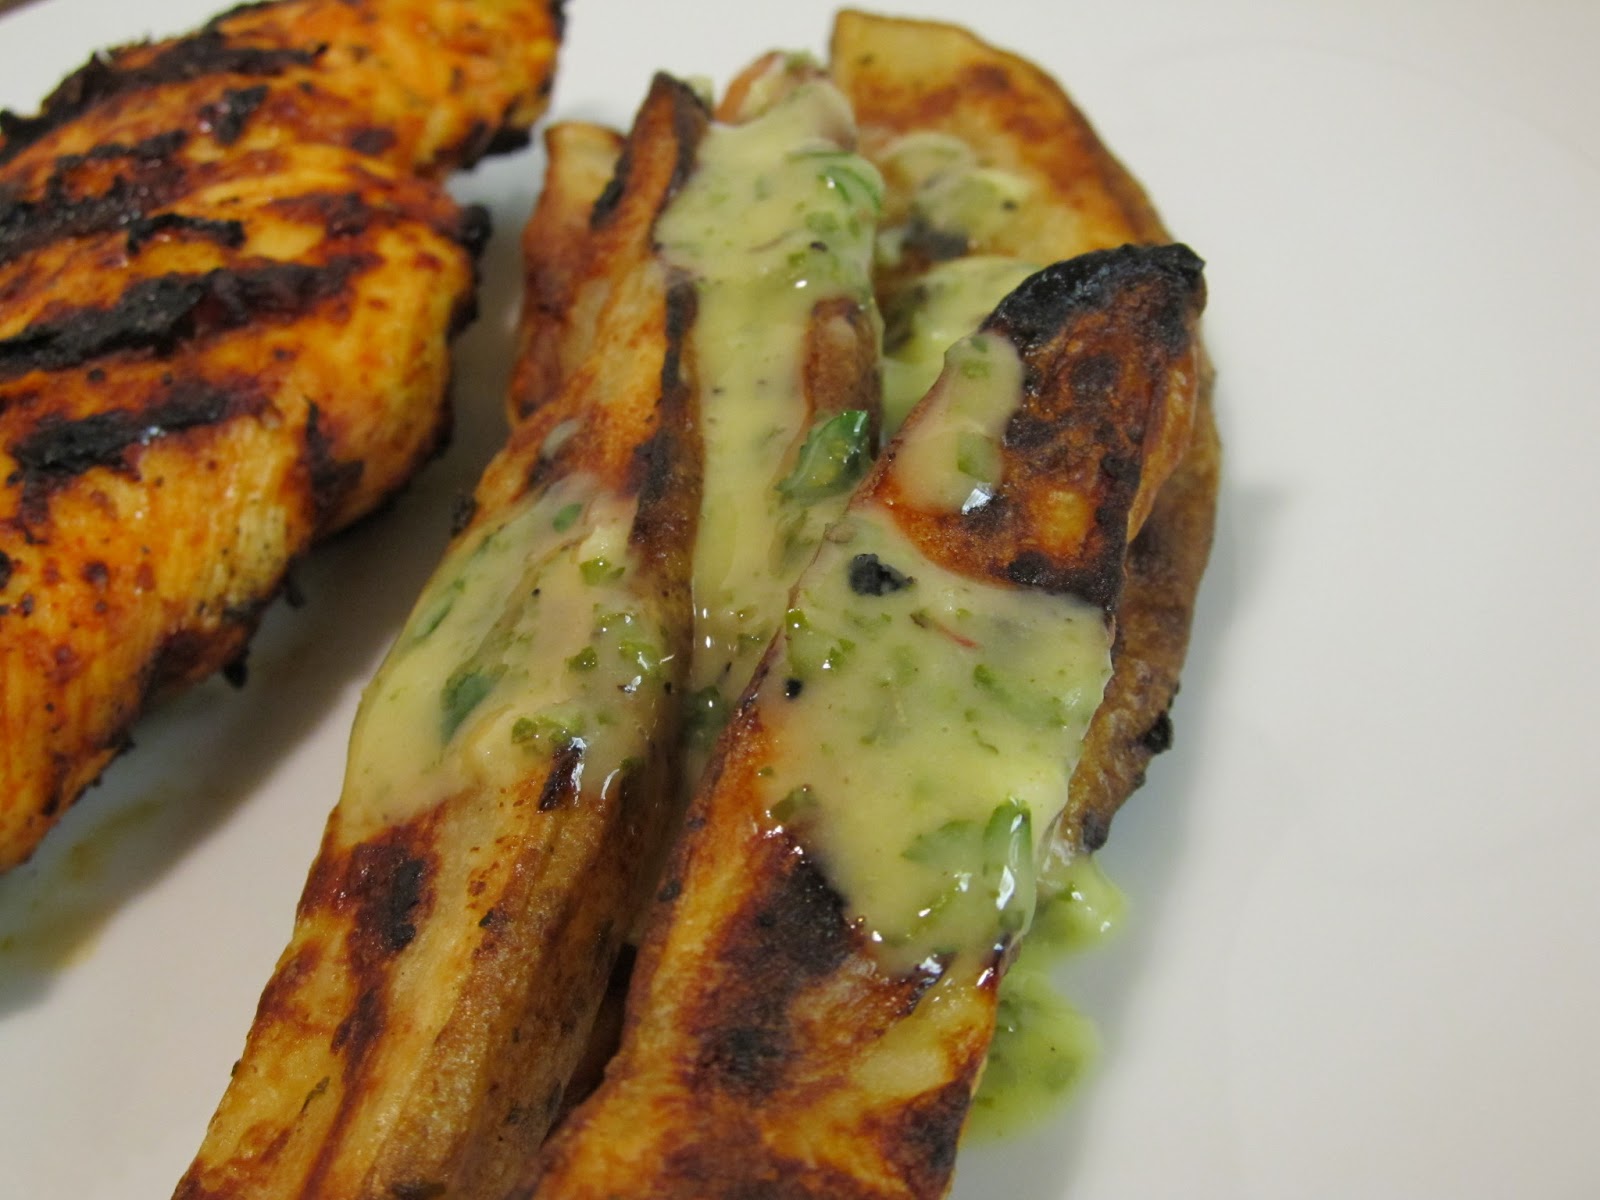
Grilled Potato Wedges with Lemon Vinaigrette
As promised on Wednesday... here is a fantastic little twist to your every day grilled potato wedge. The simple lemon vinaigrette adds so much flavor and Oomph! to these potatoes... it's almost crazy how easy it is!! Honestly, this vinaigrette would be great on a salad or piece of chicken or even a piece of fish. Versatility at it's finest :)
Grilled Potato Wedges with Lemon Vinaigrette
Adapted from Bobby Flay
- Serves 2 -
Printable Recipe
Ingredients:
1/3 cup olive oil
2 teaspoons Dijon mustard
2 Tablespoons lemon juice
2 garlic cloves, minced
2 teaspoons dried oregano
2 Tablespoons fresh parsley, minced
2 Russet Potatoes, cut into wedges
salt and pepper
Directions:
Place the cut potatoes in a large microwave-safe bowl and add 1 tablespoon of water. Cover with plastic wrap and microwave for 2 minutes. Carefully remove the bowl and shake the potatoes around. Continue cooking another 2 minutes, or until the potatoes are just barely fork tender.
In a small bowl or measuring cup, whisk together all the remaining ingredients. Season with salt and pepper to taste and set aside.
Preheat grill to 375 degrees F. Clean and oil grill grates. Place the potatoes directly over the fire and grill about 4-5 minutes per side or until they are cooked through and golden, crispy on the outside. Carefully remove from the grill. Place on plate and drizzle with vinaigrette, or use vinaigrette as a dipping sauce. Either way... enjoy!
One Year Ago: Pasta with Ground Pork and Rosemary Sauce
Two Years Ago: Mustard and Herb Rubbed Sirloin Tip Roast
Three Years Ago: Grilled Potato Rounds
Grilled Potato Wedges with Lemon Vinaigrette
Adapted from Bobby Flay
- Serves 2 -
Printable Recipe
Ingredients:
1/3 cup olive oil
2 teaspoons Dijon mustard
2 Tablespoons lemon juice
2 garlic cloves, minced
2 teaspoons dried oregano
2 Tablespoons fresh parsley, minced
2 Russet Potatoes, cut into wedges
salt and pepper
Directions:
Place the cut potatoes in a large microwave-safe bowl and add 1 tablespoon of water. Cover with plastic wrap and microwave for 2 minutes. Carefully remove the bowl and shake the potatoes around. Continue cooking another 2 minutes, or until the potatoes are just barely fork tender.
In a small bowl or measuring cup, whisk together all the remaining ingredients. Season with salt and pepper to taste and set aside.
Preheat grill to 375 degrees F. Clean and oil grill grates. Place the potatoes directly over the fire and grill about 4-5 minutes per side or until they are cooked through and golden, crispy on the outside. Carefully remove from the grill. Place on plate and drizzle with vinaigrette, or use vinaigrette as a dipping sauce. Either way... enjoy!
One Year Ago: Pasta with Ground Pork and Rosemary Sauce
Two Years Ago: Mustard and Herb Rubbed Sirloin Tip Roast
Three Years Ago: Grilled Potato Rounds
Wednesday, May 8, 2013
Yogurt and Lemon Marinated Chicken
I've been on a big yogurt based marinade kick lately. There is just something wonderful that happens when you marinade chicken in it... it's like mayo, only better for you :) It gives the chicken such a moist texture, that I would rather marinade it in yogurt than brine (shhhhh, don't tell anyone!!)
This is yet another very simple recipe... throw the ingredients together, let it meld together for a few hours, toss it on the grill and you're done. The perfect solution for a busy week night!
And stop by on Friday when I share the recipe for those delicious looking potatoes with you!!
Yogurt and Lemon Marinated Chicken
Adapted from About.com
- Serves 2 -
Printable Recipe
Ingredients:
2 boneless, skinless chicken breasts
5 oz Geek yogurt
2 Tablespoons lemon juice
zest of 1 lemon
1 Tablespoon Hungarian sweet paprika
1 teaspoon Italian herb seasoning
1/2 teaspoon salt
1/2 teaspoon pepper
2 garlic cloves, minced
1 Tablespoon olive oil
Directions:
In a measuring cup or small bowl, mix together all the ingredients, except the chicken, until well combined. Place chicken in shallow dish or resealable plastic bag and pour the marinade over, making sure both sides are covered. Seal or cover and place in refrigerator for 4 hours.
Preheat grill to 375 degrees F. Clean and oil grill grates. Remove chicken from marinade, shaking off any excess. Place directly over the fire and grill 8-10 minutes per side, or until the chicken reaches an internal temperature of 165 degrees F. Remove from grill and allow to rest for 5 minutes before serving. Enjoy!
One Year Ago: Jalapeno Popper Inspired Pizza
Two Years Ago: Guest Blogger - Smoked Tri Tip and Brisket
Three Years Ago: Penne with Beef and Bell Pepper
This is yet another very simple recipe... throw the ingredients together, let it meld together for a few hours, toss it on the grill and you're done. The perfect solution for a busy week night!
And stop by on Friday when I share the recipe for those delicious looking potatoes with you!!
Yogurt and Lemon Marinated Chicken
Adapted from About.com
- Serves 2 -
Printable Recipe
Ingredients:
2 boneless, skinless chicken breasts
5 oz Geek yogurt
2 Tablespoons lemon juice
zest of 1 lemon
1 Tablespoon Hungarian sweet paprika
1 teaspoon Italian herb seasoning
1/2 teaspoon salt
1/2 teaspoon pepper
2 garlic cloves, minced
1 Tablespoon olive oil
Directions:
In a measuring cup or small bowl, mix together all the ingredients, except the chicken, until well combined. Place chicken in shallow dish or resealable plastic bag and pour the marinade over, making sure both sides are covered. Seal or cover and place in refrigerator for 4 hours.
Preheat grill to 375 degrees F. Clean and oil grill grates. Remove chicken from marinade, shaking off any excess. Place directly over the fire and grill 8-10 minutes per side, or until the chicken reaches an internal temperature of 165 degrees F. Remove from grill and allow to rest for 5 minutes before serving. Enjoy!
One Year Ago: Jalapeno Popper Inspired Pizza
Two Years Ago: Guest Blogger - Smoked Tri Tip and Brisket
Three Years Ago: Penne with Beef and Bell Pepper
Monday, May 6, 2013
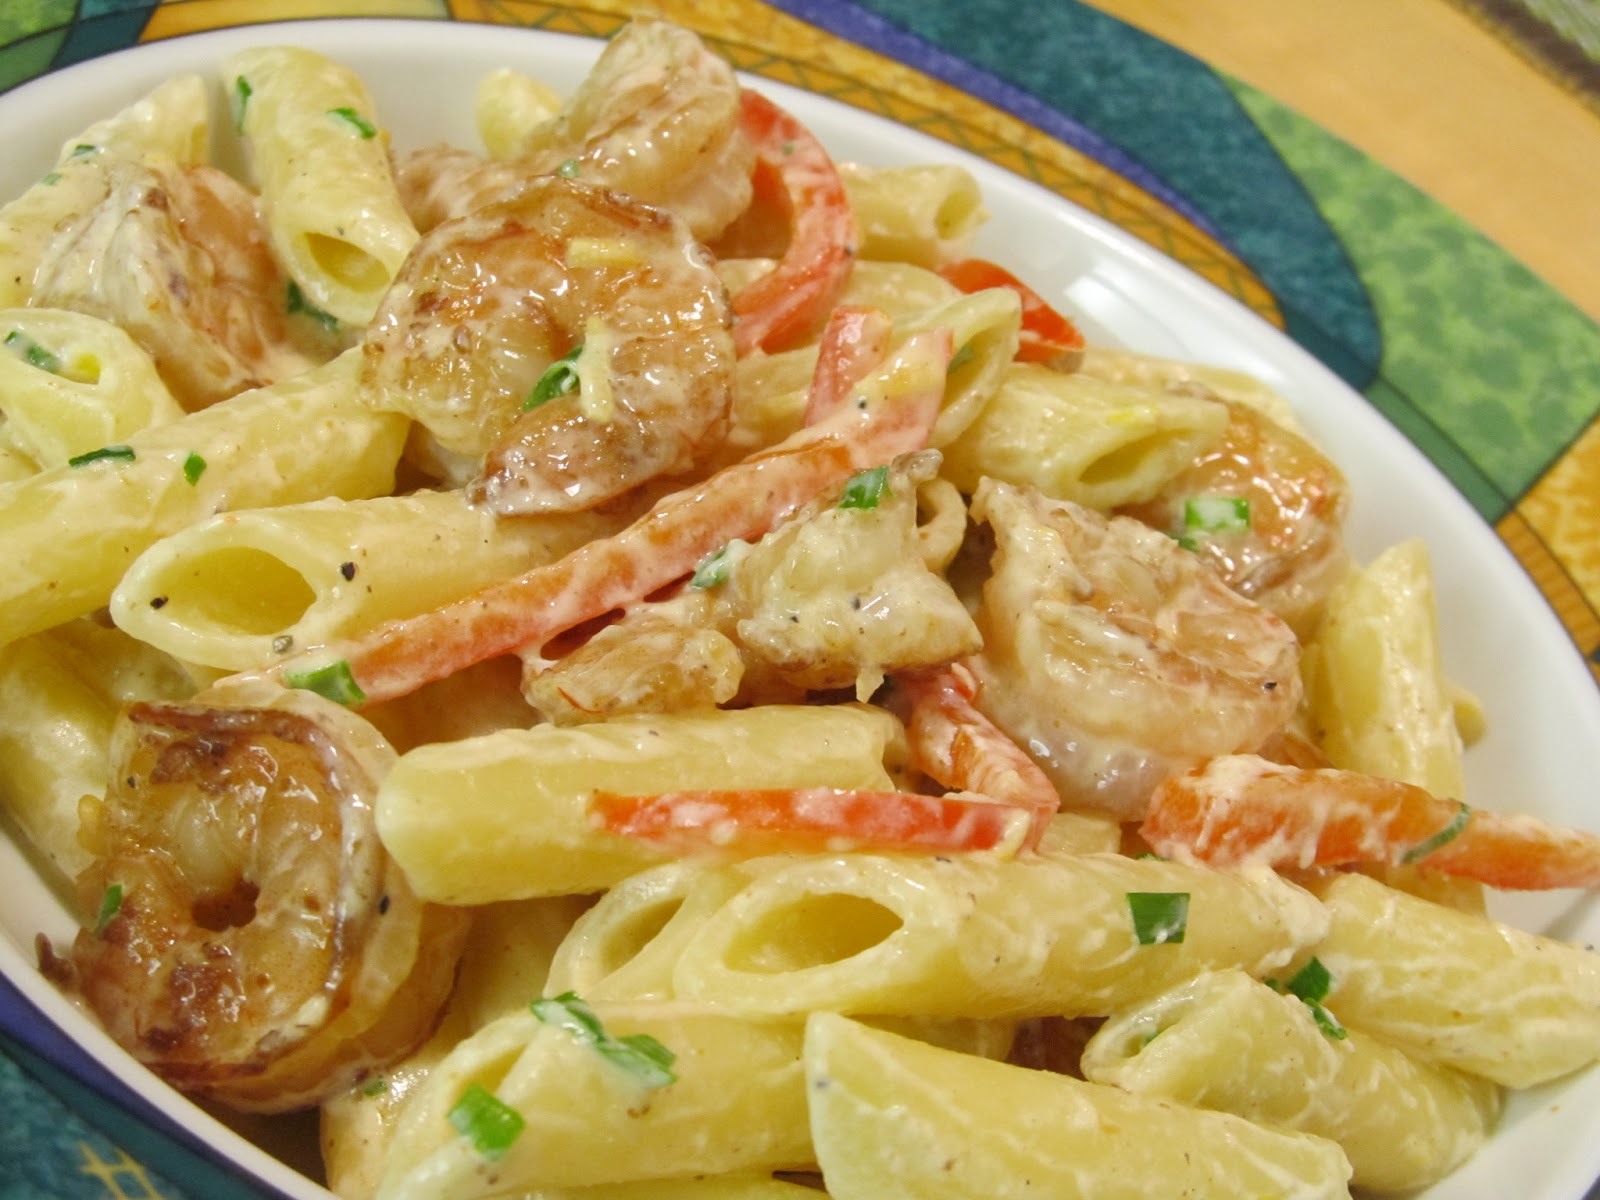
Smoked Paprika Shrimp with Créme Fraîche Lemon Pasta
Créme Fraîche is one of those ingredients I very rarely see at my regular grocery store. It just seems they don't want to carry such a fancy ingredient - so, when I stumbled across some on a trip to Whole Foods, I immediately grabbed it and knew exactly what I was going to do with it. I had my eye on this recipe for a bit now, and was about ready to make it with just regular old sour cream. Good thing I held out just a tiny bit :) This was a fantastically simple, very flavorful dish. Although I would have liked to have had it with smoked salmon (what the original recipe called for), I knew Chris wasn't going to really like it (heck it was a stretch using shrimp), the shrimp was a nice little substitution. Even chicken would work really well with this dish. Definitely worth the try!
Smoked Paprika Shrimp with Créme Fraîche Lemon Pasta
Adapted from Whole Foods
Printable Recipe
Ingredients:
26-30 medium shrimp, peeled, deveined and tails removed
2 teaspoons olive oil
1/4 teaspoon smoked sweet paprika
1/8 teaspoon lemon pepper seasoning
10 oz mostaccioli or ziti pasta
1/3 cup créme fraîche (or sour cream)
1/4 teaspoon lemon zest
juice of 1/2 a lemon
1/4 teaspoon salt
1-2 Tablespoons chives, chopped
1 red pepper, thinly sliced
Directions:
Place shrimp in shallow dish and toss with olive oil. Sprinkle in paprika and lemon pepper seasoning, toss to coat. Cover and place in refrigerator for at least 1 hour.
Preheat grill to 375 degrees F. Remove shrimp and place on a piece of aluminum foil sprayed with non-stick spray or on a pan meant for the grill (spray with non-stick spray). Place directly over the heat and grill for 2 minutes. Flip shrimp and grill another 3 minutes, or until the shrimp is just cooked through.
Meanwhile, cook the pasta according to package directions; drain well, reserving 1/2 cup of the pasta water.
To the pasta, add the zest, lemon juice, and pepper. Toss to combine. Add the créme fraîche, the shrimp and chives, stirring to combine. Serve immediately. Enjoy!
One Year Ago: Grilled Shrimp with Wasabi Mayo Sauce
Two Years Ago: Sweet and Sour Grilled Chicken
Three Years Ago: Hoisin Barbecue Chicken
Smoked Paprika Shrimp with Créme Fraîche Lemon Pasta
Adapted from Whole Foods
Printable Recipe
Ingredients:
26-30 medium shrimp, peeled, deveined and tails removed
2 teaspoons olive oil
1/4 teaspoon smoked sweet paprika
1/8 teaspoon lemon pepper seasoning
10 oz mostaccioli or ziti pasta
1/3 cup créme fraîche (or sour cream)
1/4 teaspoon lemon zest
juice of 1/2 a lemon
1/4 teaspoon salt
1-2 Tablespoons chives, chopped
1 red pepper, thinly sliced
Directions:
Place shrimp in shallow dish and toss with olive oil. Sprinkle in paprika and lemon pepper seasoning, toss to coat. Cover and place in refrigerator for at least 1 hour.
Preheat grill to 375 degrees F. Remove shrimp and place on a piece of aluminum foil sprayed with non-stick spray or on a pan meant for the grill (spray with non-stick spray). Place directly over the heat and grill for 2 minutes. Flip shrimp and grill another 3 minutes, or until the shrimp is just cooked through.
Meanwhile, cook the pasta according to package directions; drain well, reserving 1/2 cup of the pasta water.
To the pasta, add the zest, lemon juice, and pepper. Toss to combine. Add the créme fraîche, the shrimp and chives, stirring to combine. Serve immediately. Enjoy!
One Year Ago: Grilled Shrimp with Wasabi Mayo Sauce
Two Years Ago: Sweet and Sour Grilled Chicken
Three Years Ago: Hoisin Barbecue Chicken
Friday, May 3, 2013
Grilled Chili Chicken with Spring Onions
I have writers block. Yep.... it's true. I sat down to write this post over 30 minutes ago and I have written and erased at least 5 different starts to a paragraph!! I know I don't have to say anything really, but it's just frustrating when you want to sit down to write something and nothing comes to you. Or something comes and you write it down and it sounds really dumb. Anyway, I'm having one of those moments right now, so I thought if I just made the confession and rambled on a few minutes about it, I would have enough typed out to satisfy me.... and what do you know... it worked :)
This is yet another really simple meal to put together. And let me tell you, it is quite delicious too!! I would say that this was one of my favorite grilled chicken recipes in a while. Maybe it was the simplicity? Maybe it was the grilled green onions? I don't know.. it was just really really really REALLY good :)
Grilled Chili Chicken with Spring Onions
Adapted from About.com
- Serves 2 -
Printable Recipe
Ingredients:
2 boneless, skinless chicken breasts
1/4 cup Greek yogurt
1 garlic clove, crushed
1 Tablespoons paprika (I used Hungarian Sweet)
1/2 teaspoon ground chipotle powder
1/2 teaspoon ground cumin
2 Tablespoons lime juice
1/8 teaspoon cayenne
olive oil
1 bunch green onions
salt and pepper
Directions:
Mix together the yogurt, garlic, paprika, chipotle powder, cumin, lime juice and cayenne until well combined. Rinse the chicken and pat dry with a paper towel. Place in shallow dish or resealable plastic bag and pour the yogurt mixture over. Cover/seal and place in refrigerator for 2-4 hours (the longer the better on this one).
Preheat grill to 375 degrees F. Remove chicken from marinade and shake off any excess. Place directly over the fire and grill 8-10 minutes per side, or until the chicken reaches an internal temperature of 165 degrees F. Remove and allow to rest while you grill the onions.
Place the onions in a single layer on a piece of aluminum or on a pan made for the grill. Drizzle with olive oil and season liberally with salt and pepper. Grill 5-6 minutes, turning once, or until they just start to soften. Carefully remove from grill and serve alongside the chicken. Enjoy!
One Year Ago: Hoisin Wasabi Grilled Chicken
Two Years Ago: Hummus Topped Tilapia
Three Years Ago: Creamy Pesto Dip
This is yet another really simple meal to put together. And let me tell you, it is quite delicious too!! I would say that this was one of my favorite grilled chicken recipes in a while. Maybe it was the simplicity? Maybe it was the grilled green onions? I don't know.. it was just really really really REALLY good :)
Grilled Chili Chicken with Spring Onions
Adapted from About.com
- Serves 2 -
Printable Recipe
Ingredients:
2 boneless, skinless chicken breasts
1/4 cup Greek yogurt
1 garlic clove, crushed
1 Tablespoons paprika (I used Hungarian Sweet)
1/2 teaspoon ground chipotle powder
1/2 teaspoon ground cumin
2 Tablespoons lime juice
1/8 teaspoon cayenne
olive oil
1 bunch green onions
salt and pepper
Directions:
Mix together the yogurt, garlic, paprika, chipotle powder, cumin, lime juice and cayenne until well combined. Rinse the chicken and pat dry with a paper towel. Place in shallow dish or resealable plastic bag and pour the yogurt mixture over. Cover/seal and place in refrigerator for 2-4 hours (the longer the better on this one).
Preheat grill to 375 degrees F. Remove chicken from marinade and shake off any excess. Place directly over the fire and grill 8-10 minutes per side, or until the chicken reaches an internal temperature of 165 degrees F. Remove and allow to rest while you grill the onions.
Place the onions in a single layer on a piece of aluminum or on a pan made for the grill. Drizzle with olive oil and season liberally with salt and pepper. Grill 5-6 minutes, turning once, or until they just start to soften. Carefully remove from grill and serve alongside the chicken. Enjoy!
One Year Ago: Hoisin Wasabi Grilled Chicken
Two Years Ago: Hummus Topped Tilapia
Three Years Ago: Creamy Pesto Dip
Wednesday, May 1, 2013
Ziti with Chicken and Roasted Red Pepper Pesto
Pasta dishes do not get much easier than this. Throw all but two ingredients into a food processor.. pulse... viola! A sauce is created and dinner is served. Seriously, cooking the pasta is the only thing that is holding this meal up from hitting the table in 2.2 seconds!
By the way... is anyone else a little disturbed that it's already May? I mean really? Doesn't it seem as if we just celebrated Christmas a few weeks ago? There was a time, when I was much, much younger, that I would have LOVED for time to move this fast (specifically when I was in school). But now, now all I keep thinking is at this rate, I'm going to be 40 WAY sooner than I expected :)
Ziti with Chicken and Roasted Red Pepper Pesto
Created by Jenn's Food Journey
Printable Recipe
Ingredients:
1 garlic clove, quartered
7 oz jar roasted red peppers
1 Tablespoon of the oil from the roasted red peppers
1/4 teaspoon granulated sugar
1/2 teaspoon red pepper flakes
1/2 teaspoon salt
1/4 teaspoon pepper
2 Tablespoons olive oil
1 Tablespoon fresh parsley
2 teaspoons grated parmesan cheese, plus more for garnishing
10 oz ziti pasta
1 cup cooked chicken, chopped
Directions:
In a food processor, add all the ingredients except the pasta and chicken. Pulse until almost smooth; set aside.
Meanwhile, cook the pasta according to package directions; drain well. Return the pasta to the pot and add the cooked chicken. Toss with the pesto and serve immediately. (if the pasta is too dry, add 1 more tablespoon of olive oil) Enjoy!
One Year Ago: Stove Top Tuna Mac and Cheese
Two Years Ago: Hoisin Chicken Stir Fry
Three Years Ago: Chicken Pesto Pizza
By the way... is anyone else a little disturbed that it's already May? I mean really? Doesn't it seem as if we just celebrated Christmas a few weeks ago? There was a time, when I was much, much younger, that I would have LOVED for time to move this fast (specifically when I was in school). But now, now all I keep thinking is at this rate, I'm going to be 40 WAY sooner than I expected :)
Ziti with Chicken and Roasted Red Pepper Pesto
Created by Jenn's Food Journey
Printable Recipe
Ingredients:
1 garlic clove, quartered
7 oz jar roasted red peppers
1 Tablespoon of the oil from the roasted red peppers
1/4 teaspoon granulated sugar
1/2 teaspoon red pepper flakes
1/2 teaspoon salt
1/4 teaspoon pepper
2 Tablespoons olive oil
1 Tablespoon fresh parsley
2 teaspoons grated parmesan cheese, plus more for garnishing
10 oz ziti pasta
1 cup cooked chicken, chopped
Directions:
In a food processor, add all the ingredients except the pasta and chicken. Pulse until almost smooth; set aside.
Meanwhile, cook the pasta according to package directions; drain well. Return the pasta to the pot and add the cooked chicken. Toss with the pesto and serve immediately. (if the pasta is too dry, add 1 more tablespoon of olive oil) Enjoy!
One Year Ago: Stove Top Tuna Mac and Cheese
Two Years Ago: Hoisin Chicken Stir Fry
Three Years Ago: Chicken Pesto Pizza
Subscribe to:
Posts (Atom)