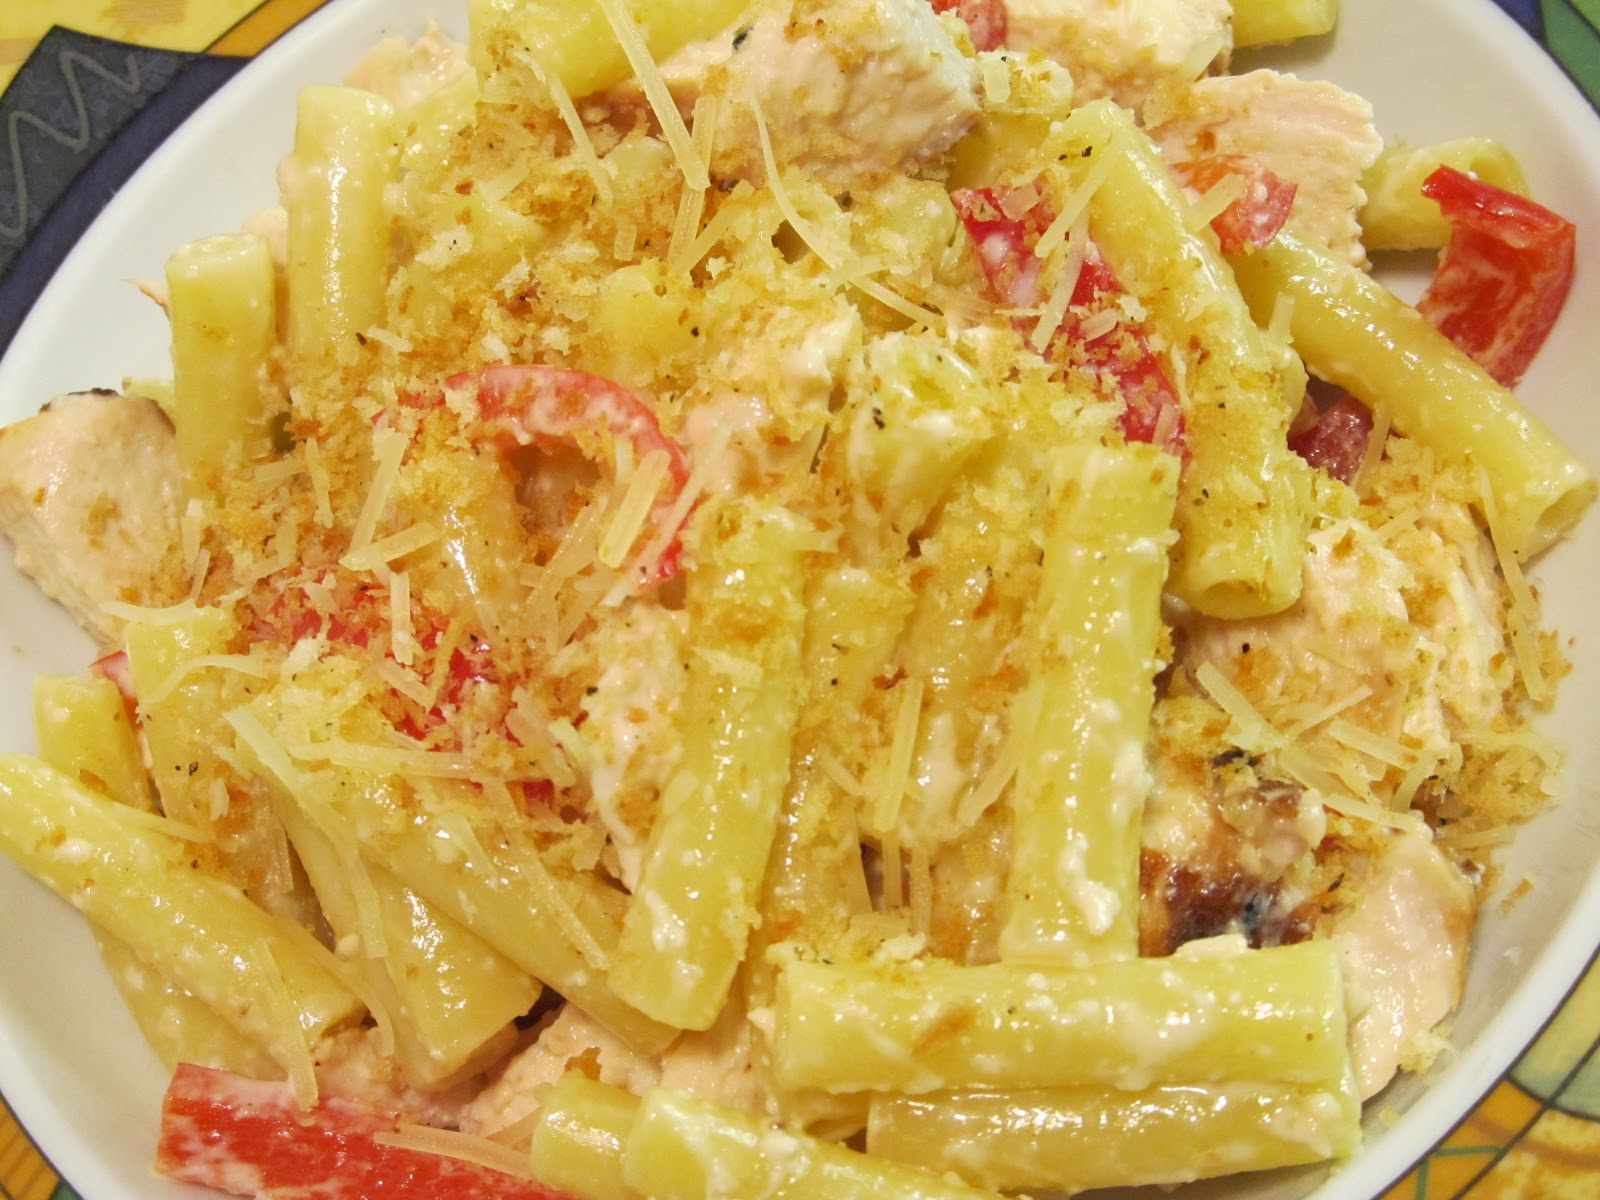
Hmmmmmmm..... Let's see here - chicken, pepper jack cheese AND bacon? What's not to love about this dish? It's got everything - dairy, grains, vegetables, proteins, fats... I mean the only thing missing is the fruit..... You can get that from your dessert :) Who knew a well balanced meal could come from a bowl of mac and cheese??
Although, this would be good baked with a nice crunchy topping, this is a very simple way to get a great mac and cheese on the table in less than 30 minutes. It's creamy, it's smooth, and it's sure to be a crowd pleaser!!
Just a quick note about comments.. I have no removed the word verification - I didn't get a single comment yesterday after I turned it on - I'm going to try moderating my comments and see if that works any better. Sorry for the inconvenience, but this spam stuff is pushing me close to not wanting to blog anymore!! It's sooo frustrating!!
Pepper Jack Mac N Cheese with Bacon and Chicken
Created by Jenn's Food Journey
Printable Recipe
Ingredients:
1 large chicken breast, cooked and cut into bite size pieces
10 mini sweet peppers, roughly chopped
1 Serrano pepper (or jalapeno), finely chopped
5 strips of bacon, cooked crisp and crumbled
2 cups elbow macaroni
2 eggs
5 oz evaporated milk
1 teaspoon hot sauce (I used Frank's Hot Sauce)
1 teaspoon salt
1/4 teaspoon pepper
3/4 teaspoon dry mustard
2 cups shredded pepper jack cheese
Directions:
Cook pasta according to package directions; drain and put back in pot.
In a large measuring cup or bowl, mix together the egg, evaporated milk, hot sauce, salt, pepper and dry mustard until well combined. Place the pot of pasta back on low and slowly pour the mixture into the pasta, stirring to coat. Add the cheese 1 cup at a time and stir until cheese has melted. Add the chicken, sweet peppers, serrano, and bacon. Stir to combine. Allow to cook another minute or two, or until everything is heated through. Remove from heat and serve. Enjoy!
One Year Ago: Pomegranate Balsamic Pork Chops
Two Years Ago: Potato and Chipotle Chowder
Search This Blog
Thursday, November 15, 2012
Wednesday, November 14, 2012
Dry Rubbed Pork Ribs with Georgia Mustard BBQ Sauce
I love ribs! Any time I can find ribs on sale, I will pick up at least one slab. And it's not just the love of eating them either....I love experimenting with different ways of flavoring them, cooking them, and of course, saucing them. Although I love the way ribs come out when I've done them in the smoker, I have less and less patience these days for that method. Not to say I won't get that back, I've just been working extremely long hours over the last two months and, honestly, even on the weekends I want quick fixes for our meals. I've grown to really like the grilling method I have found, so I'll keep doing it that way for now. You may find a way you enjoying cooking them and use that instead.. that's what's great about cooking - do what you like, not what I like ... unless what I like is what you like, of course :)
I used to really only like my ribs sauced... than I realized how wonderful they can be when they are naked. Naked ribs can be dipped in any sauce imaginable, so of course, I was an instant convert. These ribs were really for Chris... he adores his ribs with just a dry rub and some of his favorite bbq sauces are mustard based... so needless to say, these were a big hit!
Dry Rubbed Pork Ribs with Georgia Mustard BBQ Sauce
Dry rub recipe adapted from Chris Lilly
BBQ sauce recipe adapted from About.com
Printable Recipe
Ingredients:
1 slab pork ribs
For the dry rub -
2 teaspoons Country Bob's seasoning salt
1 1/2 teaspoons paprika
1/4 teaspoon cayenne pepper
2 teaspoons brown sugar
1/4 teaspoon black pepper
1/4 teaspoon garlic powder
1/4 teaspoon onion powder
1/4 teaspoon dry mustard
1/4 teaspoon cumin
For the bbq sauce -
1/4 cup yellow mustard
2 Tablespoons brown sugar
1 Tablespoon apple cider vinegar
1 1/2 teaspoons Worcestershire sauce
1/4 teaspoon salt
1/4 teaspoon pepper
1 teaspoon Tabasco sauce
1/8 teaspoon celery seed
Directions:
In a small bowl, mix together all the ingredients for the dry rub until well combined. If you need to, trim the ribs of any back silver lining or excess fat. Rinse and pat dry. Sprinkle and rub in the dry rub on both sides of the ribs. Wrap in plastic wrap and place in refrigerator for 2 hours.
Meanwhile, in a small sauce pan over medium heat, add all the ingredients for the bbq sauce. Stir to combine. Bring just to a boil and reduce heat to low. Simmer for 5 minutes, stirring occasionally. Remove from heat and allow to cool.
Preheat grill to 300 degrees F. Remove ribs from plastic and wrap loosely in aluminum foil. Place ribs in foil over indirect heat and grill for 1 hour, rotating packet at least once. Remove packet from grill and carefully remove the ribs. Crank the heat up on the grill to 325 and place the ribs over direct heat. Grill for 8-10 minutes per side. Remove and allow to cool before cutting. Serve with bbq sauce and enjoy!!
One Year Ago: Grilled Jalapeno Tartar Sauce
Two Years Ago: Chorizo and Eggs
I used to really only like my ribs sauced... than I realized how wonderful they can be when they are naked. Naked ribs can be dipped in any sauce imaginable, so of course, I was an instant convert. These ribs were really for Chris... he adores his ribs with just a dry rub and some of his favorite bbq sauces are mustard based... so needless to say, these were a big hit!
Dry Rubbed Pork Ribs with Georgia Mustard BBQ Sauce
Dry rub recipe adapted from Chris Lilly
BBQ sauce recipe adapted from About.com
Printable Recipe
Ingredients:
1 slab pork ribs
For the dry rub -
2 teaspoons Country Bob's seasoning salt
1 1/2 teaspoons paprika
1/4 teaspoon cayenne pepper
2 teaspoons brown sugar
1/4 teaspoon black pepper
1/4 teaspoon garlic powder
1/4 teaspoon onion powder
1/4 teaspoon dry mustard
1/4 teaspoon cumin
For the bbq sauce -
1/4 cup yellow mustard
2 Tablespoons brown sugar
1 Tablespoon apple cider vinegar
1 1/2 teaspoons Worcestershire sauce
1/4 teaspoon salt
1/4 teaspoon pepper
1 teaspoon Tabasco sauce
1/8 teaspoon celery seed
Directions:
In a small bowl, mix together all the ingredients for the dry rub until well combined. If you need to, trim the ribs of any back silver lining or excess fat. Rinse and pat dry. Sprinkle and rub in the dry rub on both sides of the ribs. Wrap in plastic wrap and place in refrigerator for 2 hours.
Meanwhile, in a small sauce pan over medium heat, add all the ingredients for the bbq sauce. Stir to combine. Bring just to a boil and reduce heat to low. Simmer for 5 minutes, stirring occasionally. Remove from heat and allow to cool.
Preheat grill to 300 degrees F. Remove ribs from plastic and wrap loosely in aluminum foil. Place ribs in foil over indirect heat and grill for 1 hour, rotating packet at least once. Remove packet from grill and carefully remove the ribs. Crank the heat up on the grill to 325 and place the ribs over direct heat. Grill for 8-10 minutes per side. Remove and allow to cool before cutting. Serve with bbq sauce and enjoy!!
One Year Ago: Grilled Jalapeno Tartar Sauce
Two Years Ago: Chorizo and Eggs
Tuesday, November 13, 2012
Topolo Caesar Salad with Chicken
Towards the beginning of my salad kick, Lea Ann from Cooking on the Ranch (Highlands Ranch Foodie) sent me this recipe for a different type of Caesar salad. I couldn't wait to try it when I scanned the list of ingredients and saw that it used a Serrano pepper!! I will never pass up a recipe that uses Serrano's... their heat and flavor are one of my favorites of all the peppers. The great thing is...this salad delivered exactly what I was expecting...a very light, yet flavorful salad dressing! Thank you Lea Ann for the fantastic suggestion!!
Topolo Caesar Salad with Grilled Chicken
Adapted from Rick Bayless
- Serves 2 -
Printable Recipe
Ingredients:
1/4 cup fruity olive oil
1/2 Tablespoon champagne vinegar
1 teaspoon Worcestershire sauce
1 1/2 Tablespoon mayonnaise (or 1 egg)
1 Serrano pepper, stemmed and seeds removed, roughly shopped
1/2 teaspoon lime zest
1/4 teaspoon salt
2 grilled chicken breasts, thinly sliced (I just sprinkled some Ms. Dash on two boneless, skinless breasts and grilled)
4-5 cups romaine lettuce, torn or chopped
1/4 cup goat cheese, crumbled
1 Roma tomato, chopped or sliced
croutons (homemade or store bought)
Directions:
In a food processor, add the olive oil, vinegar, Worcestershire, mayonnaise, Serrano, lime zest and salt. Process one full minute. Season with more salt if needed and set aside.
In a large bowl, combine the lettuce, about 1 tablespoon of the dressing and half the cheese. Toss to coat and then split evenly between two plates. Top with sliced chicken, remaining cheese and tomato. Drizzle with remaining dressing and top with croutons. Enjoy!
One Year Ago: Spicy Chipotle Shrimp Stir-Fry
Two Years Ago: Ranch Chicken Pizza
Topolo Caesar Salad with Grilled Chicken
Adapted from Rick Bayless
- Serves 2 -
Printable Recipe
Ingredients:
1/4 cup fruity olive oil
1/2 Tablespoon champagne vinegar
1 teaspoon Worcestershire sauce
1 1/2 Tablespoon mayonnaise (or 1 egg)
1 Serrano pepper, stemmed and seeds removed, roughly shopped
1/2 teaspoon lime zest
1/4 teaspoon salt
2 grilled chicken breasts, thinly sliced (I just sprinkled some Ms. Dash on two boneless, skinless breasts and grilled)
4-5 cups romaine lettuce, torn or chopped
1/4 cup goat cheese, crumbled
1 Roma tomato, chopped or sliced
croutons (homemade or store bought)
Directions:
In a food processor, add the olive oil, vinegar, Worcestershire, mayonnaise, Serrano, lime zest and salt. Process one full minute. Season with more salt if needed and set aside.
In a large bowl, combine the lettuce, about 1 tablespoon of the dressing and half the cheese. Toss to coat and then split evenly between two plates. Top with sliced chicken, remaining cheese and tomato. Drizzle with remaining dressing and top with croutons. Enjoy!
One Year Ago: Spicy Chipotle Shrimp Stir-Fry
Two Years Ago: Ranch Chicken Pizza
Monday, November 12, 2012
Cheese Frenchees
First, I just want to say thank you to all the veterans out there. Veterans day was yesterday and I wanted to make sure that those who have served, along with those who are still serving, know that I thank them from the bottom of my heart for the service they have given to this country. Specifically, I have to give a big thanks to my dad, who served in Vietnam and still continues to serve his country today by being a part of and supporting the Patriot Guard. So thank you to my dad, MY first, true American hero, and to all of you that have given your time and your lives for this country.
Ok, ok.. now on to some food, right?? Most of you may have seen this on a guest post I did over at Food Floozie, but I just HAD to post it here. This is a sandwich that I have adored for a very long time. This is also a sandwich that I cannot find here in Arizona. Actually, I don't know too many people outside of Nebraska that know about cheese frenchees....but that's about to change.
Think deep fried cheese sandwiches..... I know... right? That's what I'm saying!!! This is a treat that MUST be tried at least once. Ok, you don't want to make this a routine meal, but why not splurge? Trust me, it will be worth it!
Cheese Frenchees
Adapted from King's Food Host
- Makes 6 triangle sandwiches -
Printable Recipe
Ingredients:
6 slices of white bread
6 slices of American cheese (you can use Velveeta if you want, but no other substitutions)
3 Tablespoons mayonnaise
1 egg
1/2 cup milk
1/2 cup flour
1/2 teaspoon salt
2-3 cups finely crushed cornflakes
oil for frying
Directions:
Make three sandwiches, using 2 slices of American cheese and 1 tablespoon of mayonnaise per sandwich. Cut the crusts off the sandwiches and cut each one diagonally, making 2 triangles.
Combine the egg, milk, flour and salt together until it forms a pancake-like batter. Dip the triangles into the egg mixture and coat with cornflake crumbs. Place on a wire rack and continue until all sandwiches are made.
Deep fry in 375 degrees F oil, for about 1 1/2 - 2 minutes per side. Carefully remove from oil and allow to cool for just a minute or too. The cheese will be hot and melty, so be careful. Enjoy!
One Year Ago: Lemon Sage Chicken
Two Years Ago: Tequila Lime Chicken
Ok, ok.. now on to some food, right?? Most of you may have seen this on a guest post I did over at Food Floozie, but I just HAD to post it here. This is a sandwich that I have adored for a very long time. This is also a sandwich that I cannot find here in Arizona. Actually, I don't know too many people outside of Nebraska that know about cheese frenchees....but that's about to change.
Think deep fried cheese sandwiches..... I know... right? That's what I'm saying!!! This is a treat that MUST be tried at least once. Ok, you don't want to make this a routine meal, but why not splurge? Trust me, it will be worth it!
Cheese Frenchees
Adapted from King's Food Host
- Makes 6 triangle sandwiches -
Printable Recipe
Ingredients:
6 slices of white bread
6 slices of American cheese (you can use Velveeta if you want, but no other substitutions)
3 Tablespoons mayonnaise
1 egg
1/2 cup milk
1/2 cup flour
1/2 teaspoon salt
2-3 cups finely crushed cornflakes
oil for frying
Directions:
Make three sandwiches, using 2 slices of American cheese and 1 tablespoon of mayonnaise per sandwich. Cut the crusts off the sandwiches and cut each one diagonally, making 2 triangles.
Combine the egg, milk, flour and salt together until it forms a pancake-like batter. Dip the triangles into the egg mixture and coat with cornflake crumbs. Place on a wire rack and continue until all sandwiches are made.
Deep fry in 375 degrees F oil, for about 1 1/2 - 2 minutes per side. Carefully remove from oil and allow to cool for just a minute or too. The cheese will be hot and melty, so be careful. Enjoy!
One Year Ago: Lemon Sage Chicken
Two Years Ago: Tequila Lime Chicken
Thursday, November 8, 2012
Spicy Orange Garlic Shrimp
Adapted from Barefeet in the Kitchen
Printable Recipe
Ingredients:
1 lb large (41/50 count) size raw shrimp, peeled, deveined and tales removed
3 large garlic cloves, finely minced
3/4 cup good quality orange juice
1/2 teaspoon cayenne pepper
1 teaspoon Old Bay Seasoning
2 teaspoons cornstarch
2 teaspoons butter
Directions:
Dry the peeled shrimp with a paper towel and set aside. In a measuring cup or small bowl, whisk together the garlic, orange juice, cayenne, Old Bay and cornstarch; set aside.
In a large skillet, over medium heat, melt the butter. Add the shrimp and allow to become slightly golden on one side, about 1-2 minutes. Turn the shrimp allow to cook until they are pink and cooked through, about 1-2 minutes longer. Remove the shrimp from the skillet and set aside.
Return the pan to the stove and pour in the sauce. Stir, scraping any bits and pieces from the bottom of the pan. Reduce heat to low and allow sauce to simmer until it has thickened slightly. Return the shrimp to the pan and toss to coat. Let them cook another minute and remove from heat. Serve over rice and enjoy!
One Year Ago: Chipotle Meatballs
Two Years Ago: Tuna Pasta Ponza
Wednesday, November 7, 2012
Wordless Wednesday
My Mom's Famous Tacos (YUM!!!)
One Year Ago: Grilled (or Baked) Fish with Remoulade
Two Years Ago: Simple Chicken Stir-Fry
Monday, November 5, 2012
Greek Chicken Salad
I seriously hope no one is getting tired of my salad recipes. I know it's probably not the most ideal time, as I know most of the country is experiencing more fall/winter like weather than we are. I will say this, though, we finally have started to cool down! I get up early on the week days and run and let me tell you, there have been a few brisk mornings as of late. Good thing for me, it's still in the high 80's/low 90's during the day, so technically, I haven't started craving those winter type foods yet..... or at least I'm not craving them too often just yet...
As for this salad.. you gotta try it. It's simple, flavorful, and oh so easy to put together.
Greek Chicken Salad
Created by Jenn's Food Journey
- Serves 2 -
Printable Recipe
Ingredients:
2 boneless, skinless chicken breasts
1 Tablespoon lemon juice
2 Tablespoons olive oil
1 teaspoon dried oregano
1/2 teaspoon Greek seasoning (optional)
4 cups lettuce (I used a mixture of romaine and green leaf), chopped or torn
1/2 English cucumber, thinly sliced and cut in half
1 cup quartered cherry tomatoes
1/4 cup crumbled feta cheese
1/4 cup Kalamata olives, chopped
For the dressing -
3 Tablespoons mayonnaise
1 Tablespoon lemon juice
2 teaspoons red wine vinegar
1 1/2 teaspoons dried oregano
1/2 teaspoon dried dill
Directions:
Place the chicken in a resealable bag. In a measuring cup or small bowl, mix together the lemon juice, olive oil, oregano and Greek seasoning. Pour marinade over chicken and seal bag. Place in refrigerator for 1 hour.
To make the dressing, mix together all ingredients until well combined. Cover and place in refrigerator until ready to use.
Preheat grill to 375 degrees F. Clean and oil grill grates. Remove chicken from bag and discard marinade. Place chicken over direct heat and grill for 8-10 minutes per side or until the chicken reaches an internal temperature of 165 degrees F. Remove and allow to rest 8-10 minutes. Slice into thin strips or bite sizes pieces.
Build the salad as you wish, but I just start with the lettuce, top that with cucumbers and tomatoes. Add the sliced chicken and top with cheese and olives. Drizzle on the dressing and enjoy!!
One Year Ago: Grilled (or Baked) Fish with Remoulade
Two Years Ago: Simple Chicken Stir-Fry
As for this salad.. you gotta try it. It's simple, flavorful, and oh so easy to put together.
Greek Chicken Salad
Created by Jenn's Food Journey
- Serves 2 -
Printable Recipe
Ingredients:
2 boneless, skinless chicken breasts
1 Tablespoon lemon juice
2 Tablespoons olive oil
1 teaspoon dried oregano
1/2 teaspoon Greek seasoning (optional)
4 cups lettuce (I used a mixture of romaine and green leaf), chopped or torn
1/2 English cucumber, thinly sliced and cut in half
1 cup quartered cherry tomatoes
1/4 cup crumbled feta cheese
1/4 cup Kalamata olives, chopped
For the dressing -
3 Tablespoons mayonnaise
1 Tablespoon lemon juice
2 teaspoons red wine vinegar
1 1/2 teaspoons dried oregano
1/2 teaspoon dried dill
Directions:
Place the chicken in a resealable bag. In a measuring cup or small bowl, mix together the lemon juice, olive oil, oregano and Greek seasoning. Pour marinade over chicken and seal bag. Place in refrigerator for 1 hour.
To make the dressing, mix together all ingredients until well combined. Cover and place in refrigerator until ready to use.
Preheat grill to 375 degrees F. Clean and oil grill grates. Remove chicken from bag and discard marinade. Place chicken over direct heat and grill for 8-10 minutes per side or until the chicken reaches an internal temperature of 165 degrees F. Remove and allow to rest 8-10 minutes. Slice into thin strips or bite sizes pieces.
Build the salad as you wish, but I just start with the lettuce, top that with cucumbers and tomatoes. Add the sliced chicken and top with cheese and olives. Drizzle on the dressing and enjoy!!
One Year Ago: Grilled (or Baked) Fish with Remoulade
Two Years Ago: Simple Chicken Stir-Fry
Thursday, November 1, 2012
Grilled Mongolian Pork Chops
Despite the fact that I wish I could have found thicker cut pork chops for this dish, and despite the fact that the color of the sauce isn't the most eye appealing, I was very pleased with the out come of this meal. I, as most of you know, love the flavors used in this recipe. And, honestly, it doesn't get much easier than this... marinate, grill, eat... how can you go wrong?
Grilled Mongolian Pork Chops
Adapted from Allrecipes.com
Printable Recipe
Ingredients:
1/4 cup Hoisin sauce
1 garlic clove, finely minced
1 Tablespoon soy sauce
1 teaspoon red wine vinegar
1 teaspoon rice vinegar
1 teaspoon mirin
1/4 teaspoon sesame oil
1 teaspoon Sriracha
1 teaspoon granulated sugar
1/4 teaspoon ground ginger
white pepper and salt
4 thin cut pork chops, bone-in (if you can find thick cut, get them!!!)
Directions:
In a bowl or measuring cup, mix together all the ingredients except the pepper, salt and pork chops. Stir until well combined. Season both sides of the pork with white pepper and salt and place in resealable plastic bag. Pour half of the marinade mixture over and seal the bag. Place in refrigerator for 2-4 hours. Set the remaining marinade aside - this will be your sauce :)
Preheat the grill to 375 degrees F. Clean and oil the grill grates. Remove pork from bag and discard marinade. Place pork chops over direct heat and grill for 4-8 minutes per side (depending on thickness) or until they reach an internal temperature of 145 degrees F. Remove from grill and allow to rest for 3-5 minutes. Serve with reserved sauce and enjoy!
One Year Ago: Penne with Pork Ragu
Two Years Ago: Pan Seared Fish with Tomato and Cucumber Salsa
Grilled Mongolian Pork Chops
Adapted from Allrecipes.com
Printable Recipe
Ingredients:
1/4 cup Hoisin sauce
1 garlic clove, finely minced
1 Tablespoon soy sauce
1 teaspoon red wine vinegar
1 teaspoon rice vinegar
1 teaspoon mirin
1/4 teaspoon sesame oil
1 teaspoon Sriracha
1 teaspoon granulated sugar
1/4 teaspoon ground ginger
white pepper and salt
4 thin cut pork chops, bone-in (if you can find thick cut, get them!!!)
Directions:
In a bowl or measuring cup, mix together all the ingredients except the pepper, salt and pork chops. Stir until well combined. Season both sides of the pork with white pepper and salt and place in resealable plastic bag. Pour half of the marinade mixture over and seal the bag. Place in refrigerator for 2-4 hours. Set the remaining marinade aside - this will be your sauce :)
Preheat the grill to 375 degrees F. Clean and oil the grill grates. Remove pork from bag and discard marinade. Place pork chops over direct heat and grill for 4-8 minutes per side (depending on thickness) or until they reach an internal temperature of 145 degrees F. Remove from grill and allow to rest for 3-5 minutes. Serve with reserved sauce and enjoy!
One Year Ago: Penne with Pork Ragu
Two Years Ago: Pan Seared Fish with Tomato and Cucumber Salsa
Wednesday, October 31, 2012
Shrimp Fra Diavolo
Fra Diavolo is Italian for Brother Devil. I thought that was pretty fitting for a post on Halloween, don't you agree?
I've made this dish many times in the past, but of course, for some reason, I haven't made it in ages. The other day I was thumbing through one of my cookbooks when I was reminded of it. I've also made this with chicken too, so if you aren't a fan of shrimp, don't run away. This is a very simple dish with a very fancy name and if you like a bit of spice in your life, this recipe is made just for you!
Shrimp Fra Diavolo
Adapted from Giada de Laurentiis
Printable Recipe
Ingredients:
20 large shrimp, peeled and deveined
1/4 teaspoon salt
1 teaspoon red pepper flakes, divided
1 teaspoon olive oil
2 garlic cloves, finely minced
1 (14oz) can crushed tomatoes
1/4 cup red wine
1/4 teaspoon dried oregano
1 Tablespoon fresh parsley, chopped
1 Tablespoon fresh basil, chopped
1/2 lbs. thin spaghetti
Directions:
Toss the shrimp with salt and red pepper flakes. Let sit for 15 minutes.
Cook pasta according to package directions; drain and set aside.
In a skillet heat the olive oil over medium heat. Add the shrimp and saute for 3-5 minutes, or until the shrimp are pink and cooked through. Remove and set aside. Add the garlic to the skillet and saute for 30 seconds. Add the crushed tomatoes, red wine and oregano. Stir to combine. Reduce heat and simmer until the sauce thickens slightly, about 10 minutes. Return the shrimp to the skillet and add the parsley and basil. Stir to combine. Let cook another 1-2 minutes. Season with salt and pepper to taste. Toss in pasta and serve. Enjoy!
One Year Ago: Simple Shrimp Stir Fry
Two Years Ago: Halloween - Our Tradition
I've made this dish many times in the past, but of course, for some reason, I haven't made it in ages. The other day I was thumbing through one of my cookbooks when I was reminded of it. I've also made this with chicken too, so if you aren't a fan of shrimp, don't run away. This is a very simple dish with a very fancy name and if you like a bit of spice in your life, this recipe is made just for you!
Shrimp Fra Diavolo
Adapted from Giada de Laurentiis
Printable Recipe
Ingredients:
20 large shrimp, peeled and deveined
1/4 teaspoon salt
1 teaspoon red pepper flakes, divided
1 teaspoon olive oil
2 garlic cloves, finely minced
1 (14oz) can crushed tomatoes
1/4 cup red wine
1/4 teaspoon dried oregano
1 Tablespoon fresh parsley, chopped
1 Tablespoon fresh basil, chopped
1/2 lbs. thin spaghetti
Directions:
Toss the shrimp with salt and red pepper flakes. Let sit for 15 minutes.
Cook pasta according to package directions; drain and set aside.
In a skillet heat the olive oil over medium heat. Add the shrimp and saute for 3-5 minutes, or until the shrimp are pink and cooked through. Remove and set aside. Add the garlic to the skillet and saute for 30 seconds. Add the crushed tomatoes, red wine and oregano. Stir to combine. Reduce heat and simmer until the sauce thickens slightly, about 10 minutes. Return the shrimp to the skillet and add the parsley and basil. Stir to combine. Let cook another 1-2 minutes. Season with salt and pepper to taste. Toss in pasta and serve. Enjoy!
One Year Ago: Simple Shrimp Stir Fry
Two Years Ago: Halloween - Our Tradition
Tuesday, October 30, 2012
Spicy Mayo Sauce
I was trying to come up with a quick sauce that would go with a nice piece of grilled fish, (that's right, even I struggle to come up with sauce recipes from time to time) when I ran across this recipe from Emeril. It looked like exactly what I was looking for, so I threw it together and served it just as I had planned. Don't you love it when a plan comes together???
Spicy Mayo Sauce
Adapted from Emeril Lagasse
Printable Recipe
Ingredients:
1/4 cup mayonnaise
1 Tablespoon ground chili paste (Sambal Oelek)
1/4 teaspoon rice vinegar
1/4 teaspoon soy sauce
drop of sesame oil
1 teaspoon Sriracha
Directions:
In a small bowl, mix all ingredients together until well combined. Cover and refrigerate until ready to use. Can be made up to a week in advance. Serve with fish, shrimp, chicken, or use as a spicy sandwich spread. Enjoy!
One Year Ago: Stove Top Chorizo Mac & Cheese
Two Years Ago: Creamy Chipotle Cheddar Chicken
Spicy Mayo Sauce
Adapted from Emeril Lagasse
Printable Recipe
Ingredients:
1/4 cup mayonnaise
1 Tablespoon ground chili paste (Sambal Oelek)
1/4 teaspoon rice vinegar
1/4 teaspoon soy sauce
drop of sesame oil
1 teaspoon Sriracha
Directions:
In a small bowl, mix all ingredients together until well combined. Cover and refrigerate until ready to use. Can be made up to a week in advance. Serve with fish, shrimp, chicken, or use as a spicy sandwich spread. Enjoy!
One Year Ago: Stove Top Chorizo Mac & Cheese
Two Years Ago: Creamy Chipotle Cheddar Chicken
Monday, October 29, 2012
Grilled Fish Tacos with Chipotle Cream
Created by Jenn's Food Journey
Printable Recipe
Ingredients:
2-4 tilapia fillets
lemon juice
salt and pepper
cayenne pepper
1 Tablespoon mayonnaise
1 Tablespoon sour cream
2-3 teaspoons chipotle puree (just dump the entire can of chipotle chiles in adobo sauce into a food processor and puree)
1 teaspoon lime juice
Tortillas
Wasabi Coleslaw (optional)
Directions:
Tear off one square of aluminum foil for each piece of tilapia - large enough to form a packet around the fish. Spray with non-stick cooking spray. Drizzle lemon juice over each piece of fish and season both sides with salt, pepper and cayenne to taste. Place one piece of fish on each square of foil. Pull the long sides together and fold to seal. Now fold up each end to seal and form a packet.
Preheat grill to 350 degrees. Place the foil packets over direct heat and grill 7-9 minutes. Rotate packets and continue to grill another 7-9 minutes or until the fish flakes easily with a fork. Carefully remove from grill and allow to cool.
Meanwhile, mix together the mayo, sour cream, chipotle puree and lime juice until well combined. Refrigerate until ready to use.
To build the taco, carefully remove the fish from the foil packet and place on tortilla, top with wasabi coleslaw and chipotle cream. Enjoy!
One Year Ago: Grilled Parmesan Green Beans
Two Years Ago: There was a man...
Thursday, October 25, 2012
Amazin' Maize 'n' Blue Cornbread
I'm VERY excited about today's post... you see, today marks the 2nd Annual Michigan vs. Nebraska Guest Post Exchange between myself and Mary at Food Floozie! Not only will you get an amazing recipe from me on her site (click here) (and trust me, this is one you are not going to want to miss!!!) BUT, you, my loyal readers are going to get an even MORE amazing recipe featured here from Mary!!!! I could go on and on about how wonderful Mary is, how big her heart is, how wonderful all her recipes are... but I will just leave it with this.... you are soooo going to want to try this recipe!!! Big thanks to Mary for continuing our tradition for yet another year!! (Go big red!!)
First, I've gotta thank Jenn for joining me in our 2nd Annual Michigan-Nebraska (Nebraska-Michigan???) Guest Post Exchange - it's so much fun!
Jenn is one of my very favorite people, not just a "blogging buddy." Her fabulous grillin' skills, the vibrant flavors she offers, the distinctive foods she encourages others to try (from tamales to wasabi to sriracha to tilapia) ... it all adds up to a blog that makes me hungry every time I stop by to visit. You'd think I'd learn not to do so first thing in the morning, when I haven't eaten breakfast, huh? 'Cause I inevitably want what Jenn is serving, and I don't have access to it ... major disappointment when everything always looks so good! But even more than the food, I come back to Jenn's Food Journey because of the wonderfulness that is JENN. The smile in her photo radiates as brightly as her heart, which shines even through a computer screen. And I am determined to get to the Memphis in May World Championship BBQ Cooking Contest (a.k.a.: The Super Bowl of Swine!) this spring, where my grill-master girl and I can finally meet and eat and have an adventure together!
But in the meantime, there's a big football game on Saturday. And a big game requires the proper food. This is not the time for finger sandwiches or for salads. Nope. This is a time for chili, for ribs, for subs, for pizza, for burgers, for nachos ... for real food! And if you can tie in the theme of the game, or make a connection with the teams that are playing, all the better.
And so, I offer Amazin' Maize 'n' Blue Cornbread. I admit that's it's not exactly the supermodel of photogenic specimens, but it's a perfect accompaniment to some of that game food. And it features the team colors of my Michigan Wolverines ... it's perfect! Made with blue cornmeal and kernels of maize, otherwise known as "corn," this is ideal to serve to your favorite Michigan fans as they sing "Hail to the Victors" ... :)
Amazin' Maize 'n' Blue Cornbread
1/8 cup bacon fat, at room temperature
1/8 cup shortening, at room temperature
1/4 cup butter, at room temperature
1/3 cup sugar
2 eggs
2/3 cup flour
1/2 cup blue cornmeal
2 teaspoons baking powder
1/2 teaspoon kosher salt
4 ounces Colby cheese, shredded
2/3 cup frozen corn
Preheat oven to 350F. Grease a 9" round baking pan. In a large bowl, cream together bacon fat, shortening, butter, and sugar. Stir in eggs. Add flour, cornmeal, baking powder, and salt; stir to combine. Stir in cheese and corn. Spread batter into prepared pan, and bake for 30 minutes or until cornbread is golden and a toothpick inserted into the center comes out clean. Serve topped with chili or shredded pork. And cheese - never forget the cheese! Makes 12 servings.
First, I've gotta thank Jenn for joining me in our 2nd Annual Michigan-Nebraska (Nebraska-Michigan???) Guest Post Exchange - it's so much fun!
Jenn is one of my very favorite people, not just a "blogging buddy." Her fabulous grillin' skills, the vibrant flavors she offers, the distinctive foods she encourages others to try (from tamales to wasabi to sriracha to tilapia) ... it all adds up to a blog that makes me hungry every time I stop by to visit. You'd think I'd learn not to do so first thing in the morning, when I haven't eaten breakfast, huh? 'Cause I inevitably want what Jenn is serving, and I don't have access to it ... major disappointment when everything always looks so good! But even more than the food, I come back to Jenn's Food Journey because of the wonderfulness that is JENN. The smile in her photo radiates as brightly as her heart, which shines even through a computer screen. And I am determined to get to the Memphis in May World Championship BBQ Cooking Contest (a.k.a.: The Super Bowl of Swine!) this spring, where my grill-master girl and I can finally meet and eat and have an adventure together!
But in the meantime, there's a big football game on Saturday. And a big game requires the proper food. This is not the time for finger sandwiches or for salads. Nope. This is a time for chili, for ribs, for subs, for pizza, for burgers, for nachos ... for real food! And if you can tie in the theme of the game, or make a connection with the teams that are playing, all the better.
And so, I offer Amazin' Maize 'n' Blue Cornbread. I admit that's it's not exactly the supermodel of photogenic specimens, but it's a perfect accompaniment to some of that game food. And it features the team colors of my Michigan Wolverines ... it's perfect! Made with blue cornmeal and kernels of maize, otherwise known as "corn," this is ideal to serve to your favorite Michigan fans as they sing "Hail to the Victors" ... :)
Amazin' Maize 'n' Blue Cornbread
1/8 cup bacon fat, at room temperature
1/8 cup shortening, at room temperature
1/4 cup butter, at room temperature
1/3 cup sugar
2 eggs
2/3 cup flour
1/2 cup blue cornmeal
2 teaspoons baking powder
1/2 teaspoon kosher salt
4 ounces Colby cheese, shredded
2/3 cup frozen corn
Preheat oven to 350F. Grease a 9" round baking pan. In a large bowl, cream together bacon fat, shortening, butter, and sugar. Stir in eggs. Add flour, cornmeal, baking powder, and salt; stir to combine. Stir in cheese and corn. Spread batter into prepared pan, and bake for 30 minutes or until cornbread is golden and a toothpick inserted into the center comes out clean. Serve topped with chili or shredded pork. And cheese - never forget the cheese! Makes 12 servings.
Wednesday, October 24, 2012
Chicken Caesar Pasta
Ok, maybe this is taking my salad kick a little too far, but I couldn't help myself. Putting Caesar salad dressing on a pasta dish probably isn't the way to go if you are counting calories... but, if you really want to splurge a little... this is the pasta dish for you. It brings everything I love about the salad into one of my favorite meals... PASTA!
My idea was to throw some romaine lettuce in with this pasta - stir it in right at the end just to wilt it a tiny bit, but Chris wasn't really too eager to try it with the lettuce in it. Although he has had grilled romaine before, he did not sound as if he was too thrill with the thought of warmed lettuce in his pasta, so to appease him and to get a little veggie into the mix, I added red pepper instead. The only problem....? if you can call it that... the red pepper sort of overpowered the flavors at times.... but only just a little... only just a little :)
Can you say yum??
Chicken Caesar Pasta
Created by Jenn's Food Journey
Printable Recipe
Ingredients:
2 boneless, skinless chicken breasts
1 Tablespoon lemon juice
1 Tablespoon olive oil
dash of Worcestershire sauce
1 Tablespoon grated parmesan cheese
1 red pepper, stem and seeds removed
8-10oz ziti or penne pasta
1/3 - 1/2 cup Caesar dressing (recipe follows)
1/4 cup parmesan cheese, shredding
1/4 cup panko breadcrumbs, mixed with 1 Tablespoon olive oil and toasted (browned in a skillet or under a broiler)
Caesar dressing - (makes about 2/3 cup)
1/3 cup mayonnaise
2 Tablespoons lemon juice
2 Tablespoons grated parmesan cheese
1/2 teaspoon Worcestershire sauce
1/8 teaspoon garlic powder
- mix all ingredients together until well combined. Cover and refrigerate for up to one week.
Directions:
Mix together the lemon juice, olive oil, Worcestershire, and parmesan cheese. Place the chicken in a resealable bag and pour the marinade over top. Seal and refrigerate for 1-2 hours. Preheat grill to 375 degrees F and clean and oil grill grates. Place the chicken over direct heat and grill for 8-10 minutes per side or until the chicken reaches an internal temperature of 165 degrees F. Remove from grill and allow to cool. Now grill the red pepper by placing over direct heat and allow to grill 3 minutes per side. Remove and thinly slice. When chicken is cool enough to handle, cut into bite size pieces or thinly slice. (You can also cook the chicken and peppers in a skillet over medium high heat if you don't want to grill)
Meanwhile, cook the pasta according to package directions. Drain and pour into large bowl. Add the cooked chicken and peppers. Add Caesar dressing and toss to combine. top with shredded parmesan cheese and toasted breadcrumbs. Serve immediately. Enjoy!
One Year Ago: A Cook's Book For Cooks
Two Years Ago: Sour Cream Corn Muffins
My idea was to throw some romaine lettuce in with this pasta - stir it in right at the end just to wilt it a tiny bit, but Chris wasn't really too eager to try it with the lettuce in it. Although he has had grilled romaine before, he did not sound as if he was too thrill with the thought of warmed lettuce in his pasta, so to appease him and to get a little veggie into the mix, I added red pepper instead. The only problem....? if you can call it that... the red pepper sort of overpowered the flavors at times.... but only just a little... only just a little :)
Can you say yum??
Chicken Caesar Pasta
Created by Jenn's Food Journey
Printable Recipe
Ingredients:
2 boneless, skinless chicken breasts
1 Tablespoon lemon juice
1 Tablespoon olive oil
dash of Worcestershire sauce
1 Tablespoon grated parmesan cheese
1 red pepper, stem and seeds removed
8-10oz ziti or penne pasta
1/3 - 1/2 cup Caesar dressing (recipe follows)
1/4 cup parmesan cheese, shredding
1/4 cup panko breadcrumbs, mixed with 1 Tablespoon olive oil and toasted (browned in a skillet or under a broiler)
Caesar dressing - (makes about 2/3 cup)
1/3 cup mayonnaise
2 Tablespoons lemon juice
2 Tablespoons grated parmesan cheese
1/2 teaspoon Worcestershire sauce
1/8 teaspoon garlic powder
- mix all ingredients together until well combined. Cover and refrigerate for up to one week.
Directions:
Mix together the lemon juice, olive oil, Worcestershire, and parmesan cheese. Place the chicken in a resealable bag and pour the marinade over top. Seal and refrigerate for 1-2 hours. Preheat grill to 375 degrees F and clean and oil grill grates. Place the chicken over direct heat and grill for 8-10 minutes per side or until the chicken reaches an internal temperature of 165 degrees F. Remove from grill and allow to cool. Now grill the red pepper by placing over direct heat and allow to grill 3 minutes per side. Remove and thinly slice. When chicken is cool enough to handle, cut into bite size pieces or thinly slice. (You can also cook the chicken and peppers in a skillet over medium high heat if you don't want to grill)
Meanwhile, cook the pasta according to package directions. Drain and pour into large bowl. Add the cooked chicken and peppers. Add Caesar dressing and toss to combine. top with shredded parmesan cheese and toasted breadcrumbs. Serve immediately. Enjoy!
One Year Ago: A Cook's Book For Cooks
Two Years Ago: Sour Cream Corn Muffins
Monday, October 22, 2012
Steak Salad
Steak Salad
Adapted from The Pioneer Woman
- Serves 2 -
Printable Recipe
Ingredients:
6 Tablespoons olive oil
3 Tablespoons red wine vinegar
1 Tablespoon balsamic vinegar
1 Tablespoon Worcestershire sauce
2 Tablespoons soy sauce
2 Tablespoons lime juice
1 Tablespoon granulated sugar
1 garlic clove, crushed
1/2 teaspoon Sriracha
1/2 teaspoon kosher salt
1/4 teaspoon black pepper
2 top sirloin strip steaks (mine totaled about 1 pound)
4-6 cups lettuce, chopped or torn
1 cup cherry tomatoes, quartered or halved
1/4 English cucumber, sliced
1/4-1/2 cup crumbled goat cheese
1/4 cup fried onions
Directions:
Mix together the olive oil, red wine vinegar, balsamic vinegar, Worcestershire, soy, lime, sugar, garlic, Sriracha, salt and pepper together until well combined. Place the steak in a resealable bag and pour half of the marinade over. Seal and place in refrigerator for 2-4 hours. Set remaining marinade aside.
Preheat grill to 400 degrees F. Clean and oil grill grates. Remove the steak from the bag and discard the marinade. Place the steaks over direct heat and grill for 4-8 minutes per side. Remove from grill and allow to rest for 5-8 minutes before slicing. Thinly slice the steak against the grain.
Build your salad with lettuce, tomatoes, cucumber, goat cheese and sliced steak. Drizzle with reserved dressing and top with fried onions. Enjoy!
One Year Ago: A Birthday Break
Two Years Ago: Guest Post - Calzones
Thursday, October 18, 2012
Queso Fundido Burger
Adapted from Rick Bayless
Printable Recipe
Ingredients:
1/2 lbs ground chuck
4 oz Mexican chorizo (ground, not dried)
1-2 Tablespoons chipotle puree (toss a can of chipotle peppers in adobo sauce into a food processor and puree)
1/2 teaspoon salt
1/4 teaspoon pepper
4 slices cheddar, American, or any kind of cheese of your liking
4 hamburger buns (I used King's Hawaiian sweet hamburger buns.. they're the BOMB!!!)
Lettuce/tomato (optional)
Chipotle Cheddar Tortilla Strips (optional)
Directions:
In a large bowl, using your hands, mix together the ground beef, chorizo, chipotle puree, salt and pepper, until just combined. Form into four patties and place on plate to rest.
Preheat grill to 375-400 degrees F. Clean and oil grill grates. Place the burgers over direct heat and grill for 5-8 minutes, flip and continue to grill until the burger is done to your like, at least another 3-5 minutes. Place 1 slice of cheese on each patty about 2 minutes before you are ready to remove from grill. Allow the cheese to melt and remove and let rest for 3 minutes. Build your burger however you would like, but I do recommend the tortilla strips.. they really add a nice crunch to the burger! Enjoy!
One Year Ago: Grilled Tilapia with Garlic Parsley Aioli
Two Years Ago: Raspberry Chipotle Chicken
Subscribe to:
Posts (Atom)