Yesterday I posted some of my favorite appetizer recipes that I have made and enjoyed many times. Today, I'm venturing out and and sharing some appetizer recipes I've seen pop up on the web over the last few days or so. Why would I do this you ask? Well, because I think you can never have too many appetizer recipes and I just don't make enough of them, therefore your choices are very limited when you read my blog. Life can be SO dull with limits!! So, without further ado - here are some appetizers I think would be the highlight to any party. (and this is a shortened condensed list, by the way, if I put up all the yummy post some of you have on your sites, this post would take days to get through!!)
The Super Bowl is right around the corner.... are you ready for it? Have any idea what you are going to bring to that party you've been invited to? Have any idea on what you will supply your guest with at the party you are throwing? Well, no worries, I have some great ideas to help feed all those hungry Patriots and Giants fans. And heck, even if you aren't having or going to a party, these are still some great appetizer recipes that can be showcased at anytime throughout the year.
Oh yes, it was only time before I created my very own green goddess sauce... I mean, I am the self proclaimed queen (aka goddess) of sauce, so why not, right? Now, you can find all sorts of recipes for green goddess sauce out there, but if you want a fresh, spicy, and creamy treat.. look no further, this is the green goddess sauce for you! It's simple, it's flavorful, it's even a bit spicy. You'll want to make this a regular resident of your refrigerator, trust me!
Green Goddess Sauce Created by Jenn's Food Journey Printable Recipe Ingredients: 2 Tablespoons reduced fat sour cream 3 Tablespoons mayonnaise 1 1/2 teaspoons white wine vinegar 1 teaspoon lemon juice 2 Tablespoons fresh chopped parsley 1 Tablespoon fresh chopped basil 1/2 large jalapeno, finely chopped garlic salt and white pepper to taste
Directions: In a small bowl, mix together all ingredients until well combined. Season with garlic salt and white pepper to taste. Cover and refrigerate until ready to use. Can be made up to two weeks in advance. Enjoy!
Simply grilled, simply dressed - this recipe is a great way to bring a delicious meal to the table in under 30 minutes. (ok, minus marinating time... is that misleading???)
Do I really need to say anymore? :)
Grilled Chicken with Hoisin-Spice Sauce Adapted from the Food Network Magazine - Serves 2 - Printable Recipe Ingredients: 1/4 cup hoisin 1/8 - 1/4 teaspoon Chinese five spice (five spice packs a pretty good flavor punch, start off with 1/8 tsp, taste, and add more - you can always add more, you can't take away!!) 1 teaspoon honey 1 teaspoon rice vinegar 1 teaspoon mirin (if you don't have mirin just use more rice vinegar) 2 teaspoons soy sauce 1 teaspoon water 2 boneless, skinless chicken breasts
Directions: In a bowl, mix together all the ingredients except the chicken together until well combined. Reserve 2 tablespoons of the sauce and set aside. Rinse chicken, pat dry, and place in a shallow dish. Spread the remaining hoisin mixture over the chicken, cover, and refrigerate for at least 2 hours.
Preheat grill to 375 degrees F. Oil the grill grates and place the chicken directly over the fire. Grill 8-10 minutes on each side or until chicken reaches an internal temperature of 160-165 degrees F. Remove from grill and allow to rest for 3-5 minutes before serving. Serve with reserved sauce and enjoy!
I'm not 100% certain this would be considered a true shrimp scampi pasta, but hey, it's my recipe and my blog and I'm going to call it whatever I want :)
Whatever YOU want to call it is fine with me, just make sure you try it. It's another simple and delicious meal idea that I think everyone will enjoy. And if you aren't a shrimp fan, use chicken instead, it will taste just as good.
Shrimp Scampi Pasta Created by Jenn's Food Journey Printable Recipe Ingredients: 10oz angel hair pasta 1/2 lb (31/40 count) shrimp (I used frozen shrimp, defrosted and tails removed) Lemon pepper seasoning (to taste - I used about 1/2 to 1 teaspoon) 2 Tablespoons olive oil 1 jalapeno, thinly sliced or chopped 2 large garlic cloves, minced 1/4 teaspoon red pepper flakes 1/2 teaspoon salt 1/4 teaspoon pepper 1/4 cup white wine 2 Tablespoons unsalted butter 1/2 lemon, juiced and zested fresh chopped parsley grated parmesan cheese
Directions: Place the shrimp in a bowl and season with lemon pepper seasoning; set aside. Cook pasta according to package directions; drain.
In a skillet, heat the oil over medium heat. Add the jalapeno and allow to cook for 3 minutes, stirring occasionally (you might need to turn down the heat, don't let it burn). Add the garlic, red pepper flakes, salt and pepper and cook for 1 minute. Slowly add the white wine. Add the butter and lemon juice and stir to combine everything. Add the shrimp, tossing to coat. Add drained pasta to the skillet and toss to coat. Sprinkle in parsley and parmesan if desired. Serve immediately. Enjoy!
On the weekends, especially during the winter, I tend to get into a bit of a baking mood. Now, because I don't consider myself much of a baker, the things I make are usually very simple, like cookies and brownies. Lately, I've been on a cookie binge. So last weekend, when I was trying to think of something yummy to make, I came across this recipe for Double Chocolate Chip Cookies from Martha Stewart. Normally, I am not one to try a Martha recipe as I've had so many of them not turn out right. But of course, how can you go wrong with a cookie recipe, right? And especially one for chocolate CHOCOLATE chip cookies!
Chocolate Chocolate Chip Cookies Ever so slightly adapted from Martha Stewart Printable Recipe Ingredients: 1/2 cup unsalted butter, room temperature 1/2 cup granulated sugar 1/2 cup brown sugar 1 large egg 1 teaspoon vanilla extract 1 1/2 cups all purpose flour 1/4 cup unsweetened cocoa powder 1/2 teaspoon baking powder 1/2 teaspoon baking soda 1/2 teaspoon salt 1 cup milk chocolate chips
Directions: Preheat oven to 350 degrees F. Cream the butter and sugars int a large bowl with an electric mixer (I used my standing mixer) on high speed. Lower to medium speed and add the egg and vanilla. Sift together the flour, cocoa, baking soda, baking powder, and salt. On low speed, add the dry mixture to the butter mixture. Beat until fully incorporated. Fold in the chocolate chips.
Form dough into approximately 1 1/2-inch balls. Place on baking sheets, 2 inches apart. Bake until the centers are just set, about 10-12 minutes. Let cook on sheets for 5 minutes, then transfer to wire rack to finish cooling. Enjoy!
Change doesn't always have to be a bad thing, right? :) Well, after 2 years, I believe it's time for a change. And today, Jenn's Food Journey is changing. I am taking on a whole new look. What do you think?
I love it! Although I can't take credit for this new creation - no, not at all. I owe it all to Chris! He worked hard to help me make this what it is. We agreed at times, we argued (only just a little, though) at times, but in the end, if it wasn't for him, I would still be housing the boring old Blogger blue background.
Now I know it's a big extreme from my last look, but that's what I wanted. I love the fact that Chris pulled in my love for fire for this new look. Whether it be cooking over it or spinning it, fire is a passion and I believe it will be well known now.
So, I hope this new look is as exciting for you all as it is for me. Make sure to stop by Tuesday for an all new recipe and tag along while I continue my exploration of edible proportions!
Chicken noodle soup - such a simple little dish - everyone has their favorite recipe - most of them passed down from their mother or grandmother. This one - This one is inspired by my mother. It's not exactly her recipe, but it's the closest I could get without actually calling her. The reason I loved my mom's chicken soup more than anyone other chicken soup - she used thick egg noodles. There was just something even more comforting about those thick hearty noodles. To this day, chicken noodle soup is really not my thing UNLESS it has those wonderfully thick noodles that reminds me of my childhood!
Oh.. and just because I can't help myself, I have to show off my new love in the kitchen:
Isn't she pretty? I was so excited to receive this Dutch oven from Chris for Christmas - I couldn't wait to use it. The soup was the first thing I made in it, but it's just taken me this long to write about it! Sorry I waited :)
Chicken Noodle Soup Created by Jenn's Food Journey (inspired by my mom) Printable Recipe Ingredients: 2 tsp olive oil 1 large carrot, chopped 3 celery stalks, chopped 2 teaspoon flour salt and pepper 1 teaspoon dried thyme 1/4 teaspoon onion powder 1 garlic clove, minced 4 cups chicken broth splash or white wine 10 oz frozen homestyle egg noodles (I used Reames) 1 1/2 cups cooked chicken, chopped fresh chopped parsley (optional)
Directions: In a Dutch oven or large soup pot, heat the olive oil over medium heat. Add the carrots and celery and saute 5 minutes or until vegetables are softened. Add the flour and stir to coat veggies. Season with salt and pepper. Stir in the thyme, onion powder, and garlic and cook 1 minutes. Slowly add the chicken broth and a splash of white wine and bring to a boil. Reduce heat and simmer for 10 minutes. Add the noodles and cook according to package directions (mine called for 20 minutes and covered). Add the chicken about 10 minutes before the noodles are done to get it heated through. Add parsley if using. Serve in large bowls with crusty bread. Enjoy!
I know that I normally am one to say that you don't always have to follow a recipe to a "T" - but sometimes, just sometimes, there are recipes that you probably should not mess with. This was one of those times. Mary at One Perfect Bite posted a recipe a while back for a peanut crusted chicken with a nutty sweet onion sauce that I knew I was going to have to try sooner or later. Well, that time finally came, but when it did, I thought I would change things up just a tad bit. The first thing was that I was going to grill the chicken instead of coating and baking it. That part went well.. YAY! (although, you know you can't go wrong with a crunchy baked piece of chicken.) The part that went way, way wrong was the sauce. Yep, there, I said it - I screwed up a sauce!!! (Please don't judge me, it could happen to anyone, even the self proclaimed sauce queen.) The first issue was that I did not have Greek yogurt - but I thought, no problem, I'll use sour cream or mayo or a mixture of both. The second issue was that I thought I would change the quantities of each ingredient thinking my mixture would be better. I was wrong. Very, very wrong. My sauce didn't turn out inedible, mind you, it just wasn't what I'm sure it was supposed to be. I believe my final peanut butter to sweet onion dressing ratio was off and it just ended up tasting too peanut buttery (if there is such a thing).
I will not lead you down the same path I was led, though. I will do Mary better justice than that. The recipe for the sauce is her recipe. I highly suggest if you try it.. stick to this one. Don't think you can make it better. lol You just might be disappointed!!
Nutty Sweet Onion Grilled Chicken Adapted from Mary at One Perfect Bite - Serves 2 - Printable Recipe Ingredients: 2 boneless, skinless chicken breasts For the marinade - 1 Tablespoon creamy peanut butter 3 Tablespoons Sweet Vadalia Onion Dressing 1 teaspoon soy sauce 1 Tablespoons water 1/2 Tablespoon white wine (optional) For the sauce - 1 1/2 Tablespoons creamy peanut butter 5 Tablespoons Vidalia onion salad dressing 1/4 teaspoon soy sauce 2 teaspoons finely chopped parsley 1/4 cup Greek-stye yogurt
Directions: Mix together the ingredients for the marinade until well combined. Pour marinade over chicken, cover, and refrigerate for at least 4 hours.
In a small bowl, mix together the peanut butter and dressing until smooth. Stir in the soy sauce, parsley, and yogurt. (per Mary, if the sauce is too thick, thin out with milk) Cover and refrigerate until ready for use.
Preheat the grill to 375 degrees F. Oil the grill grates. Place the chicken over the fire and grill for 8-10 minutes per side or until chicken reaches an internal temperature of 160-165 degrees F. Remove from grill and let rest for 3-5 minutes. Serve with sauce. Enjoy!
Aren't they awesome? I know the lovely and talented Ginny and just wanted to take a moment to show her off. I don't know exactly where all my readers are reading from, BUT, if you happen to live in Iowa, specifically around the Ely - Iowa City - Coralville - North Liberty - Cedar Rapids area, you need to seriously consider having Ginny make your next celebration cake!
Check out more great cakes and how to contact her on her website HERE or find her on Facebook HERE - and when the time comes and you see her on a Food Network cake challenge, you can tell everyone you saw her here first!! :)
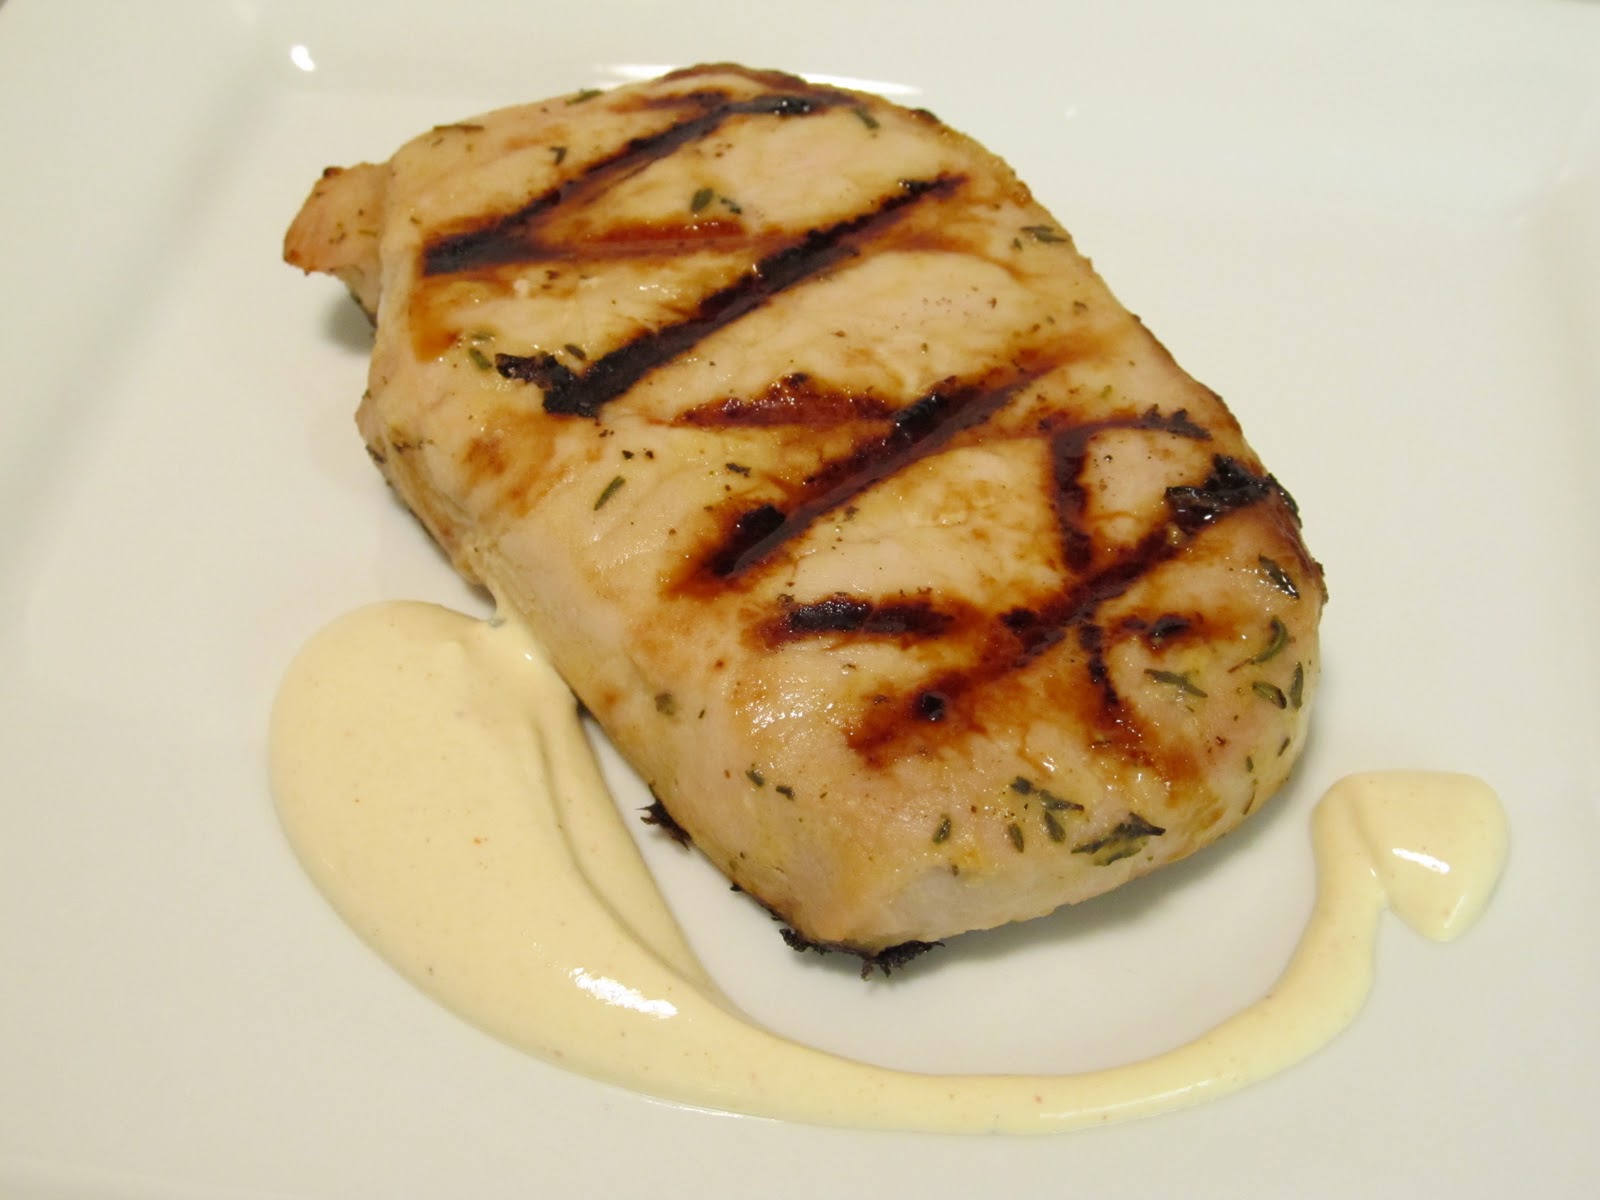
Mustard and pork - it's like they were meant for each other. I bet the inventor of mustard was sitting around one day, gnawing on a pork chop thinking: "there really is something missing.. something tangy and wonderful... I think I'll invent mustard"
Ok, I'm sure that's probably not how it went down, but still.. Look at what happens when the two come together - it's a bit like heaven!
Grilled Mustard Pork Chops Created by Jenn's Food Journey - Serves 2 - Printable Recipe Ingredients: 3 Tablespoons apple juice 2 Tablespoons Dijon mustard 3/4 teaspoon dried thyme 2 boneless pork loin chops For the sauce (optional - but why would you leave it out???) 3 Tablespoons sour cream 1 1/2 Tablespoons Dijon mustard 1 Tablespoon lemon juice garlic salt, white pepper, cayenne pepper (all to taste)
Directions: In a small bowl or measuring cup, mix together the apple juice, mustard, and thyme. Place the pork in a resealable bag and pour the marinade over it. Seal bag and refrigerate for at least 4 hours.
Meanwhile, in a small bowl, mix together all the ingredients for the sauce. Cover and refrigerate until ready to use.
Preheat grill to 375 degrees F. Oil the grill grates. Remove the pork from the bag and discard the marinade. Place the pork over the fire and allow to cook 4-5 minutes per side or until pork reaches an internal temperature of 145 degrees F. Remove from grill and allow to rest for 3 minutes. Serve with sauce on the side. Enjoy!
First, I have to say this.... My friend Ruben has spoiled my chorizo experience!! Back in September you might remember my post for Terrific Man Tacos - Chorizo Style, where I told you about him bringing me the most amazing chorizo I have ever had - well - thanks to him, the standard chorizo I find at the grocery store has taken on this ... this... well, unsatisfying flavor. It lacks the luster that the chorizo he brought me had. So now, when I make meals that have chorizo in it - they are good, but I know they could be so much better!! (Thanks a lot Rube!!! lol)
Take this meal for instance - it was good - but it could have been soooooooo much better!! It might not look like much, but it's a simple little meal packed with a lot of flavor. I saw this recipe in my Food and Wine Magazine and knew I had to make it. I mean bacon AND chorizo?? Yea, how could you go wrong there??? The original recipe called for using chicken thighs and I think they would have worked better than the chicken breasts, but Chris is not a fan of dark meat, so I did my best. If you don't have an aversion to dark meat, I highly recommend trying it with that. Either way, it's a simple little dish that I think you will enjoy!
(P.S.. If you've been having problems commenting over the past few posts, I apologize - there seems to be a problem with blogger - I believe I have fixed the issue, but if you find you are still having problems, please email me and let me know! Thanks!)
Chicken Alambre Adapted from Food and Wine Printable Recipe Ingredients: 6 strips of bacon, chopped 1/2 sweet onion, thinly sliced 6 oz fresh chorizo, casings removed if necessary and meat crumbled 1 large boneless, skinless chicken breast, cut into strips 1 red pepper, cut into strips 1 yellow pepper, cut into strips 4 oz queso fresco Rice (cooked - Spanish or plain) Flour Tortillas Avocado, sliced Salsa (optional)
Directions: In a skillet, over medium heat, add the bacon. Cook until crispy. Remove with a slotted spoon and drain on a paper towel liked plate. Add the onion to the skillet and turn heat down to medium low. Saute the onions until tender, about 5 minutes. Add the chorizo and the chicken and cook about 8 minutes. Add the peppers and cook another 3 minutes or until the chicken and chorizo are cooked through. Scatter the cheese over the top and stir until it starts to melt. Remove from heat.
Place tortilla on a plate, top with rice and spoon on chicken mixture. Top with avocado and salsa. Enjoy!
Way back in August of 2010, I had my first guest blogger - Andrea The Kitchen Witch. She posted a recipe for white wine marinated chicken kabobs and since then, has, from time to time, mentioned how much she loves using white wine as the base of her marinades. Well, I'm a red wine drinker, so there is never really a time when I actually have white wine on hand. Thanks to some wonderful house warming gifts, we received a couple bottles of white wine... and me not wanting to let any alcohol go to waste, instantly thought of Andrea and her marinade! And boy was I happy I finally tried it! Talk about an amazing flavor that it brings to the chicken. All of a sudden I find myself walking down the wine aisle and scoping out more white wine :) Of course, in true Jenn's Food Journey form, I just HAD to make an aioli to go with it... and let me tell you, this was one of my better aiolis.. then again, how can you go wrong with white wine and mayo!! lol
Even if you don't try the aioli (although I'm not sure why you wouldn't!!), I highly recommend trying the marinade. I changed it up just a bit to go with what I had on hand, so don't feel you have to follow either of our recipes to the T - just make sure you start with the white wine!!
The Witch's Marinated Chicken with White Wine and Parsley Aioli Adapted from Andrea, The Kitchen Witch, Aioli created by Jenn's Food Journey - Serves 2 - Printable Recipe Ingredients: 2 boneless, skinless chicken breasts For the marinade - 1/3 cup white wine 1 1/2 Tablespoons basil olive oil (you can use extra virgin) 1/8 teaspoon pepper 1/8 teaspoon kosher salt 2 Tablespoon chopped parsley 2 large garlic cloves, minced For the aioli - 1/3 cup mayonnaise 1 Tablespoon white wine 1/8 teaspoon garlic powder or 1 garlic clove finely minced 1/8 teaspoon white pepper 1/8 teaspoon salt 2 Tablespoons chopped parsley
Directions: In a bowl or large measuring cup, mix together all the ingredients for the marinade. Place the chicken in a resealable bag and pour the marinade over it. Seal and refrigerate for 2-4 hours.
Meanwhile, in a small bowl, mix together all the ingredients for the aioli until well combined. Cover and refrigerate until ready to use.
Preheat your grill to 375 degrees F. Remove chicken from bag and discard marinate. Place the chicken directly over the fire and grill for 8-10 minutes per side or until the chicken reaches an internal temperature of 160 degrees F. Remove and allow to rest for 3 minutes. Serve with aioli and enjoy!
So the general idea for this fish recipe came from a post for crunchy pork chops on Pam's Midwest Kitchen Korner. I loved her idea of using Melba toast as the crunchy part of the recipe! The Po'Dunk sauce.. well that is a Nibble Me This creation... (you'll have to click on the link to find out why it's called Po'Dunk sauce) I've doctored both up a bit, but obviously could not take full credit for this fantastic meal! Simple, crunchy, delicious - yep, that pretty much sums it up!
Crunchy Topped Tilapia with Po'Dunk Sauce Adapted from Pam and Chris Ingredients: 4 tilapia fillets 16 pieces roasted garlic Mela snacks 2 Tablespoons mayonnaise 1 teaspoon Dijon mustard 1/2 teaspoon lemon juice For the sauce - 5 Tablespoons mayonnaise 1 teaspoon white wine vinegar 2 teaspoons Cholula hot sauce (I used original - Chris used Chipotle) 1/4 teaspoon granulated sugar 1/8 teaspoon garlic powder 1/8 teaspoon cayenne pepper 1/4 teaspoon salt
Directions: In a small bowl, mix together all the ingredients for the po'dunk sauce. Cover and refrigerate until ready to use.
Preheat oven to 400 degrees F. Spray a baking dish with non-stick cooking spray. Rinse the tilapia fillets and pat dry; place in prepared dish. In a food processor, add the Melba snacks; pulse until finely (or roughly, whichever way you want) chopped. Mix together the 2 tablespoons mayo, Dijon mustard and lemon juice. Spread evenly over each piece of fish. Top evenly with chopped up Melba snacks. Bake 15-20 minutes or until the fish flakes easily with a fork and the top is golden brown. Serve with po'dunk sauce. Enjoy!
As Chris stated after he took a few bites, it was good, but for some reason the flavors of the pork and the gremolata just didn't blend well. Maybe I should have stuck with using chicken like the original recipe, but I had pork in the fridge and I thought the flavors would still work well.. I mean pork is the other white meat, right? I also added a tad bit too many pine nuts, so I think that may have had a little bit to do with it... but I still thought it was worth posting. The gremolata was good, so maybe trying it with chicken ... or better yet, toss it on some pasta - that would be fantastic!
Grilled Pork Chops with Mint and Pine Nut Gremolata Adapted from Cooking Light Printable Recipe Ingredients: 2 boneless pork loin chops 2 cups water 1 Tablespoon kosher salt 1 Tablespoon lemon juice 1 teaspoon black pepper 1 cup loosely packed mint leaves 2 Tablespoons pine nuts 2 teaspoons grated lemon rind 1 garlic clove, minced 1 1/2 Tablespoons extra virgin olive oil 1/4 teaspoon salt
Directions: Mix together the water, salt, lemon juice, and black pepper. Place pork in a large resealable bag and pour the brine over. Seal and place in refrigerator for at least 2 hours.
In a food processor, add the mint, pine nuts, lemon rind, and garlic; process just until combined. Add the olive oil and salt; process to combine. Set aside.
Preheat grill to 375 degrees F. Remove pork from brine and rinse thoroughly under cool water. Place the pork directly over the fire and grill for 4-6 minutes per side or until the internal temperature reaches 145 degrees F. Remove from grill and allow to rest for 3-5 minutes. Serve with gremolata. Enjoy!
Here's another dish that is so simple to make - you truly can never use the excuse of "I just didn't have time to make dinner" again. Oh sure, you can jazz it all up by adding all sorts of extra veggies and different cheeses - but honestly, I sort of think it's perfect just as it is. Serve it with a nice side salad and some warm crusty bread... and yea, I could eat it for dinner every night!
Baked Ziti Created by Jenn's Food Journey Printable Recipe Ingredients: 2 teaspoons olive oil 1/2 sweet onion, finely chopped 3/4 lbs ground beef 1 large garlic clove, finely minced 2 1/2 - 3 cups pasta sauce (homemade or store bought) 10oz dried ziti 1 cup shredded mozzarella cheese
Directions: Preheat oven to 350 degrees. In a skillet, over medium low heat, add the oil and the onion. Cook until the onion is just becoming tender, about 3-5 minutes. Add the beef, breaking it up with a wooden spoon, and cook until the meat is no longer pink. Add the garlic and cook for 1 minute. Add the sauce and mix to combine everything. Cook until the sauce is heated through. Remove from heat.
Meanwhile, cook pasta according to package directions. Drain. Mix the pasta and the sauce together and pour into a prepared baking dish. Top with cheese and cover with aluminum foil. Place in the oven and bake for 15 minutes. Carefully remove the foil and continue baking another 10-15 minutes or until the cheese is melted and bubbly. Remove and allow to cool just a tiny bit before digging in. Enjoy!
I have a confession to make: My friend Ruben taught me how to make tamales. (hehehe) Oh, I know that might not float a lot of boats...but I think it was truly one of the most wonderful experiences I have had in the kitchen :) I will share that recipe.. or at least the technique.. with you, but it's going to have to wait a bit. Talk about a labor intensive project! Whew... Anyway, my real reasoning for going to his house and helping him with tamales was completely selfish- I wanted his red chili recipe!! Oh, don't be so appalled, he totally knew that was my reason!!
Let me just say.. his red chili was fantastic! Not only did he give me a little of the leftover product, he also gave me a bit of the red chili sauce - which is actually very simple to make!!
Here's what you do: take some dried chilis, hot or mild, stem and seeds removed. Throw them in a pot and cover with water - add 1 whole peeled garlic clove - bring to a boil and remove from heat. Allow to cool a bit. Add chilis to a blender and pulse - add enough of the boil water or broth to make a nice thick sauce. Viola!
Now, jazz it up a bit and marinate some chicken.. and you have a fantastic week night meal. And isn't the color just incredible???? Oh, and you know I just HAD to have a little creamy sauce to go with it... mmmmmmmmm!!!
Red Chili Grilled Chicken Created by Jenn's Food Journey (with help from Rube, of course) Printable Recipe Ingredients: 1/2 cup red chili sauce (dried red chilis, cover with water, bring to a boil, remove from heat, blend with boiled water or broth) 1/4 teaspoon garlic powder 1/2 teaspoon salt 1/4 teaspoon black pepper 1/2 teaspoon Mexican oregano 2 boneless, skinless chicken breasts 1/4 cup mayonnaise (optional)
Directions: In a bowl, mix together the chili sauce, garlic powder, salt, pepper, and oregano. Reserve 2 Tablespoons of the sauce (if making sauce). Place the chicken in a resealable bag and pour the remaining sauce over it. Seal and refrigerate for 2-4 hours.
Meanwhile, mix reserved sauce with mayonnaise until well combined. Taste for seasoning (I added just a tad bit of cayenne just to give it a bit more kick and a drop of lemon juice). Cover and refrigerate until ready to use.
Preheat grill to 375 degrees F and oil the grill grates. Remove chicken from marinade and place directly over the fire. Grill 5-10 minutes per side or until the chicken is cooked through. Remove and allow to rest for 3 minutes. Serve with sauce if desired. Enjoy!
Let me just say this: These cookies might not make you want to marry whoever made them for you, but they might make you want to marry the actual cookie!!! Oh, wow, these were absolutely fantastic cookies... I usually have my one, maybe two (if I really stretch it) favorite chocolate chip cookie recipes and I don't venture far from them - but these... yea, these will definitely end up as my number two chocolate chip cookie recipe. And trust me, that is saying a lot!
I Want to Marry You Cookies Slightly adapted from Mary at Barefeet in the Kitchen Printable Recipe Ingredients: 1 cup butter, room temperature 1 1/4 cups brown sugar (I used light) 1/2 cup granulated sugar 1 egg plus 1 egg yolk 1 teaspoon vanilla 1 vanilla bean, split and scraped 2 cups all-purpose flour 1 cup old fashioned rolled oats 1/2 teaspoon baking soda 1/2 teaspoon kosher salt 1/4 teaspoon cinnamon 1 cup milk chocolate chips 1 cup white chocolate chips
Directions: In a bowl of a standing mixer, cream the butter and both sugars together with the paddle attachment on medium speed until light and fluffy, about 3-5 minutes. Scrape sides down with a rubber spatula. With the mixer running on low, add the egg and mix until just incorporated. Add the egg yolk and mix until just incorporated (don't forget to scrape down the sides!!). Add the vanilla and vanilla bean and mix just until combined.
In another bowl, mix together all the dry ingredients and add it to the wet ingredients, mixing until combined. Fold in the chocolate and white chocolate chips. Roll, by hand, into 24 medium size balls or 50-60 smaller ones. Chill for an hour.
Preheat the oven to 325 degrees F. Remove cookies from the refrigerator and place on baking sheets, about 2 inches apart. Bake 8-12 minutes, depending on how big you make them, or until cookies are just set and slightly brown on the edges. Remove from the baking sheet and cool on a wire rack. Enjoy!