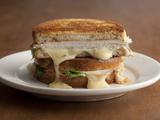
This was the first meal I made for us when we moved into our new house! It's taken me a bit of time to post it, but never late than never is what I always say!! This is a fantastic recipe by one of my grilling idols. I do not give Robyn the Grill Girl enough props (ok, ok, any props) and I apologize for that. I think it's because I might actually be jealous of her. lol Seriously, she's got an amazing set up, she's amazingly talented, she does grilling instructional videos.. I mean the list goes on and on and on :) Or it could be that I'm intimidated by her abilities on the grill. She is a true master and I worry that I will not be worthy. Whichever personal issue that I may be faced with, I cannot go on any longer without at least mentioning her because, honestly, she really is who I want to be when I grow up! If that's wrong, I don't wanna to be right!! haha!
In all seriousness, this recipe really is DE-licious! It's spicy, it's wonderful, I don't know what else to say about it other then TRY IT. Go now and do it if you can, you will not be sorry.. would I lie to you about anything? Especially when it comes to grilling?? Of course not... so make this.... soon. Oh, and don't forget to make a little sauce for your chicken. Save at least 1 Tablespoon of your pesto - mix it with some mayo.. VIOLA!
Ok, Ok... I've wasted enough of your time, haven't I? I know what you are all here for...
The winner of the great vanilla bean giveaway is:
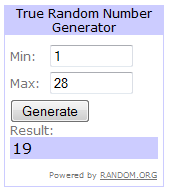
#19 is Chris at Nibble Me This - Chris said: "I would have to do some crazy version of creme brulee" (I'm going to hold you to that, Chris)
Congratulations to Chris and a big thanks to everyone for the wonderful response this giveaway received! I love that I've even seen some new readers. Welcome to you all and of course, thank you to all my loyal readers. You all make this incredibly fun. And to be able to give away such a great product feels incredibly good. Remember, all Whitney's vanilla beans are extremely well priced, so stop by IndriVanilla and order yours today!
Jalapeno Pesto Chicken
Recipe slightly adapted from Robyn the Grill Girl
- Serves 2 -
Printable Recipe
Ingredients:
2 boneless, skinless chicken breasts
2 limes, juiced and zested
1 cup fresh parsley leaves, loosely packed (you can use cilantro - Chris doesn't like cilantro so I used parsley instead)
3 jalapenos, stems removed, roughly chopped (if you want less heat, remove seeds too)
2 garlic cloves, quartered
3-4 Tablespoons olive oil
salt and pepper to taste
1/4 cup mayonnaise
Directions:
Add the lime juice, lime zest, parsley, jalapenos, and garlic to a bowl of a food processor. Pulse until everything is pretty well chopped up. Slowly add in the olive oil until it is fully incorporated and smooth. Season to taste with salt and pepper. Reserve 1 Tablespoon of pesto. Pour remaining pesto over chicken and let marinate for at least 4 hours.
Meanwhile, in a small bowl add the mayo and the reserved sauce. Stir to combine. Cover and refrigerate until ready to use.
Preheat grill to 375 degrees F. Oil the grill grates. Place the chicken over the fire and grill for 6-10 minutes per side or until the chicken reaches an internal temperature of 160 degrees F. Remove from grill and allow to rest for 5 minutes. Serve with sauce. Enjoy!
One Year Ago: Grilled Spicy Chicken Masala
Search This Blog
Friday, December 9, 2011
Thursday, December 8, 2011
Penne with Braised Beef Ribs
The pictures just don't do this meal justice - they aren't bad, mind you, but they just don't highlight what a wonderful little dish this is. Yes, it takes a little time, but it's so worth it, trust me. This is the perfect Sunday afternoon dish to make... throw it on the stove, go do some laundry, watch a few episodes of Diners, Drive-ins, and Dives.. and the next thing you know, you are having amazing dinner!
REMINDER: Today is the last day to enter the great vanilla bean giveaway! You have until 8pm (Pacific time) to enter. Winners will be picked by random.org and will be announced tomorrow morning. Clink on this LINK for more details. Good luck!!
Penne with Braised Beef Ribs
Created by Jenn's Food Journey
Printable Recipe
Ingredients:
1 Tablespoon vegetable oil
1/2 sweet onion, chopped
1 lb boneless beef country style ribs
salt and pepper
1 cup beef broth
1/4 cup red wine
28oz can crushed tomatoes
2 teaspoons parsley
2 teaspoons dried oregano
2 garlic cloves, finely minced
1/4 teaspoon granulated sugar
12oz whole grain penne pasta
Directions:
Preheat oven to 350 degrees F.
In a Dutch oven, heat the oil over medium heat. Sear the meat on all sides. Remove and add the onions. Cook for 2-3 minutes; stirring occasionally. Add the meat back into the pot along with the beef broth and wine. Cover and place in oven. Bake for 1 hour. Lower temperature to 325 degrees F and continuing cooking for 1 hour.
Remove meat from the Dutch oven and skim off any excess fat. With a submersion hand mixer, carefully puree what is left in the Dutch oven. Place over medium heat and ad the crushed tomatoes, parsley, oregano, garlic, and sugar. Stir to combine. Add the meat and stir to coat. Bring to a boil, reduce heat, and simmer for 30 minutes.
Meanwhile, cook the pasta according to package directions; drain. Serve the sauce over the pasta and enjoy!
One Year Ago: Baked Tilapia with Horseradish Dill Sauce
REMINDER: Today is the last day to enter the great vanilla bean giveaway! You have until 8pm (Pacific time) to enter. Winners will be picked by random.org and will be announced tomorrow morning. Clink on this LINK for more details. Good luck!!
Penne with Braised Beef Ribs
Created by Jenn's Food Journey
Printable Recipe
Ingredients:
1 Tablespoon vegetable oil
1/2 sweet onion, chopped
1 lb boneless beef country style ribs
salt and pepper
1 cup beef broth
1/4 cup red wine
28oz can crushed tomatoes
2 teaspoons parsley
2 teaspoons dried oregano
2 garlic cloves, finely minced
1/4 teaspoon granulated sugar
12oz whole grain penne pasta
Directions:
Preheat oven to 350 degrees F.
In a Dutch oven, heat the oil over medium heat. Sear the meat on all sides. Remove and add the onions. Cook for 2-3 minutes; stirring occasionally. Add the meat back into the pot along with the beef broth and wine. Cover and place in oven. Bake for 1 hour. Lower temperature to 325 degrees F and continuing cooking for 1 hour.
Remove meat from the Dutch oven and skim off any excess fat. With a submersion hand mixer, carefully puree what is left in the Dutch oven. Place over medium heat and ad the crushed tomatoes, parsley, oregano, garlic, and sugar. Stir to combine. Add the meat and stir to coat. Bring to a boil, reduce heat, and simmer for 30 minutes.
Meanwhile, cook the pasta according to package directions; drain. Serve the sauce over the pasta and enjoy!
One Year Ago: Baked Tilapia with Horseradish Dill Sauce
Wednesday, December 7, 2011
Sweet and Spicy Sauce
This sauce is exactly what you would assume it would be: Sweet and Spicy! It worked perfectly on a nicely baked piece of tilapia but would also work extremely well on chicken and/or pork. This recipe only makes just over a 1/4 cup, so if you want more, double the recipe. It was the perfect amount for Chris and I.. and a little, truly does go a long way.
***Remember to enter the great vanilla bean giveaway! Click on this LINK to find out all the yummy details. You have until Thursday, December 8th at 8pm Pacific time.. so hurry!!***
Sweet and Spicy Sauce
Created by Jenn's Food Journey
Prinbale Recipe
Ingredients:
3 Tablespoon hoisin
1 Tablespoon rice vinegar
1 Tablespoon mirin
2 teaspoon soy sauce
1/4 teaspoon cayenne pepper
1/4 teaspoon minced garlic
dash of sesame oil
Directions:
In a small bowl, mix together all ingredients until well combined. Serve over fish, chicken, or pork. Enjoy!
One Year Ago: Adobo Chicken
***Remember to enter the great vanilla bean giveaway! Click on this LINK to find out all the yummy details. You have until Thursday, December 8th at 8pm Pacific time.. so hurry!!***
Sweet and Spicy Sauce
Created by Jenn's Food Journey
Prinbale Recipe
Ingredients:
3 Tablespoon hoisin
1 Tablespoon rice vinegar
1 Tablespoon mirin
2 teaspoon soy sauce
1/4 teaspoon cayenne pepper
1/4 teaspoon minced garlic
dash of sesame oil
Directions:
In a small bowl, mix together all ingredients until well combined. Serve over fish, chicken, or pork. Enjoy!
One Year Ago: Adobo Chicken
Tuesday, December 6, 2011
Chili Glazed Pork Ribs
I decided to do these ribs in the oven... and unfortunately, they were not fall off the bone delicious. I am sure I did not back them slow enough or low enough.. but that's ok.. the flavor was still there and that made it at least blog worthy :) And I promise, the recipe is updated so that you will get the right tenderness if you decide to make this.
***Don't forget to enter the great vanilla bean giveaway! Click on this LINK to find out all the details. Giveaway ends Thursday, December 8th at 8pm Pacific time.***
And if my giveaway isn't enough for you, check out the giveaway IndriVanilla has on their Facebook page.. more chances to win more vanilla beans is NOT a bad thing!!
Chili Glazed Pork Ribs
Adapted from the Food Network
Printable Recipe
Ingredients:
1 rack pork ribs
1/2 Tablespoon salt
1 Tablespoon brown sugar
1/4 teaspoon garlic powder
1 teaspoon dried thyme
2 Tablespoons ancho chili powder
1/4 teaspoon black pepper
1/4 teaspoon cayenne
For the glaze (sauce) -
1/4 cup barbecue sauce
1 Tablespoon beer
Directions:
In a small bowl, mix together the salt, brown sugar, garlic powder, thyme, ancho, pepper, and cayenne. Remove 1 Tablespoon of mixture and set aside. Rub remaining mixture over both sides of the ribs and wrap in plastic wrap. Place in refrigerator for 1 hour.
In a bowl, mix together the barbecue sauce, beer, and reserved rub mixture. Set aside.
Preheat oven to 225 degrees F. Line a rimmed baking sheet with aluminum foil and place a wire rack over it. Spray with non-stick spray. Place in oven and bake for 45 minutes. Carefully remove from oven and brush with sauce mixture. Cover with foil and return to oven. Turn oven down to 200 degrees F and continue to bake for another 1.5 hours. Remove from oven, remove the foil, brush with more sauce and return to oven for 30 more minutes or until the ribs can be picked up with a tong and "bend" at the ends. Remove from oven and allow to rest for at least 5 minutes. Cut and serve with any remaining sauce. Enjoy!
One Year Ago: Grilled Pork Chops with Chipotle Honey Sauce
***Don't forget to enter the great vanilla bean giveaway! Click on this LINK to find out all the details. Giveaway ends Thursday, December 8th at 8pm Pacific time.***
And if my giveaway isn't enough for you, check out the giveaway IndriVanilla has on their Facebook page.. more chances to win more vanilla beans is NOT a bad thing!!
Chili Glazed Pork Ribs
Adapted from the Food Network
Printable Recipe
Ingredients:
1 rack pork ribs
1/2 Tablespoon salt
1 Tablespoon brown sugar
1/4 teaspoon garlic powder
1 teaspoon dried thyme
2 Tablespoons ancho chili powder
1/4 teaspoon black pepper
1/4 teaspoon cayenne
For the glaze (sauce) -
1/4 cup barbecue sauce
1 Tablespoon beer
Directions:
In a small bowl, mix together the salt, brown sugar, garlic powder, thyme, ancho, pepper, and cayenne. Remove 1 Tablespoon of mixture and set aside. Rub remaining mixture over both sides of the ribs and wrap in plastic wrap. Place in refrigerator for 1 hour.
In a bowl, mix together the barbecue sauce, beer, and reserved rub mixture. Set aside.
Preheat oven to 225 degrees F. Line a rimmed baking sheet with aluminum foil and place a wire rack over it. Spray with non-stick spray. Place in oven and bake for 45 minutes. Carefully remove from oven and brush with sauce mixture. Cover with foil and return to oven. Turn oven down to 200 degrees F and continue to bake for another 1.5 hours. Remove from oven, remove the foil, brush with more sauce and return to oven for 30 more minutes or until the ribs can be picked up with a tong and "bend" at the ends. Remove from oven and allow to rest for at least 5 minutes. Cut and serve with any remaining sauce. Enjoy!
One Year Ago: Grilled Pork Chops with Chipotle Honey Sauce
Monday, December 5, 2011
Balsamic Chicken Pasta and a Giveaway!
Although there may seem like a lot of ingredients in this dish, it's fairly simple to put together. Along with the simplicity, it is quite delicious! I think it could have used some goat cheese crumbles or even some fresh mozzarella, but other than that, it was pretty much perfect!
Now, before I get to the giveaway announcement (I know you can't wait!) I want to wish my sister, Tracy, a very happy birthday!! My sister and I have not always gotten along so well, but fortunately, that changed as we got older. I miss her dearly and wish I could be with her on this day, so I had to make sure to send out a special Happy Birthday to her! So...
Happy Birthday Tracy!!! Love and miss you so very much!!!!
Now - the giveaway announcement!!! - Last week I showcased recipes using IndriVanilla Bourbon Java Vanilla Beans and because of my wonderful experience with them, I truly want all of you to experience them too. Unfortunately, I cannot give you ALL vanilla beans, BUT, I can give one very lucky winner a sampling of each type of bean Whitney has in stock! And all YOU have to do is leave a comment here telling me what the first recipe you will try out with your vanilla beans will be. Simple. Please do not leave comments as annonymous - or if you must, please make sure to leave your name and email address in the comment. The giveaway ends Thursday, December 8th, at 8pm Pacific time. The winner will be announced first thing Friday morning. Good luck!
Balsamic Chicken Pasta
Created by Jenn's Food Journey
Printable Recipe
Ingredients:
4 chicken tenders, chopped or sliced
salt and pepper
1/2 teaspoon Italian herb mix
1 Tablespoon olive oil
2 teaspoons balsamic vinegar
1 red pepper, sliced or chopped
1 pasilla (green) chili, sliced or chopped
10oz penne multi-grain penne pasta
2 Tablespoons balsamic vinegar
1 garlic clove, finely minced
1/4 teaspoon salt
1/8 teaspoon pepper
2 teaspoons oregano
1 teaspoon dried basil
1 teaspoon parsley
1/4 cup extra virgin olive oil
Directions:
Place the chicken in a shallow dish; season with salt, pepper, and Italian herb mix. Drizzle on 1 Tablespoon olive oil and 2 teaspoons balsamic. Toss everything to combine. Cover and let sit in refrigerator for at least 1 hour.
Heat a skillet over medium heat. Spray with non-stick cooking spray. Add the cut up chicken and saute until chicken is no longer pink in the middle; about 8 minutes.
Meanwhile, cook pasta according to package directions; drain. In a large measuring cup, add the balsamic, garlic, salt, pepper, oregano, basil and parsley. Slowly whisk in the olive oil.
Add the chicken to the pasta and pour balsamic mixture over. Toss to coat. Serve with warm Italian bread. Enjoy!
One Year Ago: My Sister
Now, before I get to the giveaway announcement (I know you can't wait!) I want to wish my sister, Tracy, a very happy birthday!! My sister and I have not always gotten along so well, but fortunately, that changed as we got older. I miss her dearly and wish I could be with her on this day, so I had to make sure to send out a special Happy Birthday to her! So...
Happy Birthday Tracy!!! Love and miss you so very much!!!!
Now - the giveaway announcement!!! - Last week I showcased recipes using IndriVanilla Bourbon Java Vanilla Beans and because of my wonderful experience with them, I truly want all of you to experience them too. Unfortunately, I cannot give you ALL vanilla beans, BUT, I can give one very lucky winner a sampling of each type of bean Whitney has in stock! And all YOU have to do is leave a comment here telling me what the first recipe you will try out with your vanilla beans will be. Simple. Please do not leave comments as annonymous - or if you must, please make sure to leave your name and email address in the comment. The giveaway ends Thursday, December 8th, at 8pm Pacific time. The winner will be announced first thing Friday morning. Good luck!
Balsamic Chicken Pasta
Created by Jenn's Food Journey
Printable Recipe
Ingredients:
4 chicken tenders, chopped or sliced
salt and pepper
1/2 teaspoon Italian herb mix
1 Tablespoon olive oil
2 teaspoons balsamic vinegar
1 red pepper, sliced or chopped
1 pasilla (green) chili, sliced or chopped
10oz penne multi-grain penne pasta
2 Tablespoons balsamic vinegar
1 garlic clove, finely minced
1/4 teaspoon salt
1/8 teaspoon pepper
2 teaspoons oregano
1 teaspoon dried basil
1 teaspoon parsley
1/4 cup extra virgin olive oil
Directions:
Place the chicken in a shallow dish; season with salt, pepper, and Italian herb mix. Drizzle on 1 Tablespoon olive oil and 2 teaspoons balsamic. Toss everything to combine. Cover and let sit in refrigerator for at least 1 hour.
Heat a skillet over medium heat. Spray with non-stick cooking spray. Add the cut up chicken and saute until chicken is no longer pink in the middle; about 8 minutes.
Meanwhile, cook pasta according to package directions; drain. In a large measuring cup, add the balsamic, garlic, salt, pepper, oregano, basil and parsley. Slowly whisk in the olive oil.
Add the chicken to the pasta and pour balsamic mixture over. Toss to coat. Serve with warm Italian bread. Enjoy!
One Year Ago: My Sister
Friday, December 2, 2011
Peanut Butter Pie with Vanilla Bean Whipped Cream
I've been wanting to make this pie since I first saw it on the Taste of Home website. The problem is, if I make a pie, it's just Chris and I and... well... frankly... we'll eat the whole thing. No, not in one sitting, but still, we end up eating a whole pie. I feel bad that in 3 or 4 days (or less depending on the size of each slice), I've eaten half a pie.. it just feels wrong (yet oh so right) - so, I don't make a lot of pies, hence why it took me so long to make this :)
The nice thing about the holiday season is that I don't guilt myself about eating half a pie in a matter of days. So, when Chris suggested making a dessert of some kind for Thanksgiving, I immediately said.. Peanut Butter Pie!!! Mmmmmmmm!!! He happily agreed.
Now, had I been thinking proactively, I probably would have added some vanilla bean into the pie mixture, but for some reason I had it in my mind to make vanilla bean whipped cream and didn't think past that. That's ok, the pie was incredibly fantastic and the homemade whipped cream was just the icing on the cake... or the whipped cream on the pie in this case, I guess you could say. The pie is simple, the whipped cream is simple, there is no excuse NOT to make this.
What? What's that you say? You say you can't make it because you don't have vanilla beans? Well, check out IndriVanilla for all your vanilla bean needs. With that said, I also want to thank Whitney from IndriVanilla for opening my eyes to some amazing vanilla beans. I am so grateful for the samples she sent me and I can't wait to use all of these up so I can buy more!! (Thanks so much Whitney!!)
Peanut Butter Pie with Vanilla Bean Whipped Cream
Pie recipe courtesy Taste of Home, Whipped cream recipe created by Jenn's Food Journey
Printable Recipe
Ingredients:
3/4 cup creamy peanut butter
4 oz cream cheese, softened
1 cup powdered sugar
1 (8oz) carton frozen whipped topping, thawed
1 9-inch graham cracker pie crust
For the Whipped Cream -
1/2 cup heavy whipping cream
1 vanilla bean, split and scraped
3-4 Tablespoons powdered sugar (you may want to use more or less depending on taste and consistency you desire)
Directions:
In a large bowl, beat the peanut butter, cream cheese, and 1 cup powdered sugar together until smooth. Fold in whipped topping; pour into pie crust. Chill for at least 4 hours.
To make the whipped cream - add the whipping cream and vanilla bean to a bowl. Beat in the powdered sugar one tablespoon at a time until you get the right flavor and consistency. Serve on top of pie. Refrigerate any leftovers. Enjoy!
One Year Ago: Pots de Creme
The nice thing about the holiday season is that I don't guilt myself about eating half a pie in a matter of days. So, when Chris suggested making a dessert of some kind for Thanksgiving, I immediately said.. Peanut Butter Pie!!! Mmmmmmmm!!! He happily agreed.
Now, had I been thinking proactively, I probably would have added some vanilla bean into the pie mixture, but for some reason I had it in my mind to make vanilla bean whipped cream and didn't think past that. That's ok, the pie was incredibly fantastic and the homemade whipped cream was just the icing on the cake... or the whipped cream on the pie in this case, I guess you could say. The pie is simple, the whipped cream is simple, there is no excuse NOT to make this.
What? What's that you say? You say you can't make it because you don't have vanilla beans? Well, check out IndriVanilla for all your vanilla bean needs. With that said, I also want to thank Whitney from IndriVanilla for opening my eyes to some amazing vanilla beans. I am so grateful for the samples she sent me and I can't wait to use all of these up so I can buy more!! (Thanks so much Whitney!!)
Peanut Butter Pie with Vanilla Bean Whipped Cream
Pie recipe courtesy Taste of Home, Whipped cream recipe created by Jenn's Food Journey
Printable Recipe
Ingredients:
3/4 cup creamy peanut butter
4 oz cream cheese, softened
1 cup powdered sugar
1 (8oz) carton frozen whipped topping, thawed
1 9-inch graham cracker pie crust
For the Whipped Cream -
1/2 cup heavy whipping cream
1 vanilla bean, split and scraped
3-4 Tablespoons powdered sugar (you may want to use more or less depending on taste and consistency you desire)
Directions:
In a large bowl, beat the peanut butter, cream cheese, and 1 cup powdered sugar together until smooth. Fold in whipped topping; pour into pie crust. Chill for at least 4 hours.
To make the whipped cream - add the whipping cream and vanilla bean to a bowl. Beat in the powdered sugar one tablespoon at a time until you get the right flavor and consistency. Serve on top of pie. Refrigerate any leftovers. Enjoy!
One Year Ago: Pots de Creme
Thursday, December 1, 2011
Orange Vanilla Grilled Chicken
That's right... I came up with another savory dish using vanilla beans!! And this recipe did not end up a "little too sweet" at all! YAY! The vanilla just added this perfect flavor combination with the orange... sweet and tangy again... guess that is the perfect key!
I made a vanilla bean aioli too.... uhmmmm... it was unusual, but eaten with the chicken, it really worked well.... so I'm including it... It's up to you if you want to make it or not.
Oh.. and please don't forget to stop by IndriVanilla to get your own amazingly cheap and amazingly good vanilla beans. You'll be creating your own sweet and savory dishes using vanilla beans in no time!
Orange Vanilla Grilled Chicken
Created by Jenn's Food Journey
Printable Recipe
Ingredients:
3 Tablespoon orange juice
1 Tablespoon soy sauce
1 teaspoon Sriracha
1 vanilla bean, split and scraped
1/2 teaspoon honey
drop of sesame oil
1 garlic clove, minced
1/8 teaspoon ground ginger
salt and pepper
2 boneless, skinless chicken breasts
For the aioli -
1/4 cup mayonnaise
1 Tablespoon orange juice
1/2 vanilla bean, split and scraped
Directions:
Mix together the orange juice, soy sauce, Sriracha, vanilla bean, honey, sesame oil, garlic and ground ginger until well combined. Season both sides of the chicken with salt and pepper and place in resealable bag. Pour the marinade over the chicken, seal, and refrigerate for at least 2 hours.
In a small bowl, mix together the mayo, orange juice and vanilla bean. Cover and refrigerate until ready to use.
Preheat grill to 375 degrees. Oil the grill grates with paper towel that's been soaked in oil (use tongs please). Remove the chicken from the bag, discard the marinade and place directly over the fire. Grill for 6-10 minutes per side or until the chicken is cooked through. Remove from grill and allow to rest for 3 minutes. Serve with aioli. Enjoy!
One Year Ago: Baked Coconut Tilapia
I made a vanilla bean aioli too.... uhmmmm... it was unusual, but eaten with the chicken, it really worked well.... so I'm including it... It's up to you if you want to make it or not.
Oh.. and please don't forget to stop by IndriVanilla to get your own amazingly cheap and amazingly good vanilla beans. You'll be creating your own sweet and savory dishes using vanilla beans in no time!
Orange Vanilla Grilled Chicken
Created by Jenn's Food Journey
Printable Recipe
Ingredients:
3 Tablespoon orange juice
1 Tablespoon soy sauce
1 teaspoon Sriracha
1 vanilla bean, split and scraped
1/2 teaspoon honey
drop of sesame oil
1 garlic clove, minced
1/8 teaspoon ground ginger
salt and pepper
2 boneless, skinless chicken breasts
For the aioli -
1/4 cup mayonnaise
1 Tablespoon orange juice
1/2 vanilla bean, split and scraped
Directions:
Mix together the orange juice, soy sauce, Sriracha, vanilla bean, honey, sesame oil, garlic and ground ginger until well combined. Season both sides of the chicken with salt and pepper and place in resealable bag. Pour the marinade over the chicken, seal, and refrigerate for at least 2 hours.
In a small bowl, mix together the mayo, orange juice and vanilla bean. Cover and refrigerate until ready to use.
Preheat grill to 375 degrees. Oil the grill grates with paper towel that's been soaked in oil (use tongs please). Remove the chicken from the bag, discard the marinade and place directly over the fire. Grill for 6-10 minutes per side or until the chicken is cooked through. Remove from grill and allow to rest for 3 minutes. Serve with aioli. Enjoy!
One Year Ago: Baked Coconut Tilapia
Wednesday, November 30, 2011
Vanilla Bean Sugar Cookies
I cheated... yes, that's right, you caught me. I have posted this recipe for sugar cookies before.... BUT, in my defense, I did not use vanilla bean in them - Hence, the cheating re-posting :)
These are truly the easiest (and best) sugar cookies I have made. I got this yummy recipe from Andrea the Kitchen Witch and decided that when I made them this time, I would not only use the vanilla extract, but I would use a fresh vanilla bean too... just to make them that much more vanilla-y (and yes that is a word in my book, thank you!).
If I had more time over the weekend, I would have made a wonderful vanilla bean frosting to top these, but alas, I did not get that far. If you wanted to make it, feel free, I would have made a cream cheese frosting using 1 vanilla bean, 4-6oz cream cheese, and powdered sugar (until you get the desired consistency and sweetness)... this frosting is not needed of course, it just would have made these delicious little cookies even better!
Vanilla Bean Sugar Cookies
Adapted from Andrea the Kitchen Witch
Printable Recipe
Ingredients:
1 1/4 cup granulated sugar (I used vanilla sugar)
2 sticks (1 cup) unsalted butter, softened
2 egg yolks
1 Tablespoon vanilla extract
1 vanilla bean, split and scraped
2 1/2 cups all purpose flour
1/2 teaspoon cream of tartar
1 teaspoon baking soda
1/4 teaspoon salt
1/4 cup granulated sugar (for rolling)
Directions:
Cream the butter and sugar together in a stand mixer with the paddle attachment until very light and fluffy, about 5 minutes on medium speed.
Scrape down the sides and add the vanilla and vanilla bean. Mix until incorporated. Add the egg yolks one at a time, beating well between each addition and scraping sides of bowl and paddle after each addition.
Mix the flour, baking soda, cream of tartar and salt together in a bowl. Slowly add the dry ingredients to the wet ingredients, scraping down the sides after each addition.
Preheat the oven to 350 degrees. Scoop balls of dough and roll into sugar, coating all sides. Place balls of dough on cookie sheet and bake for 11 minutes or until just set. You do not want these to brown, brown means they will not be soft and chewy in the middle. Let cool on cookie sheet for 2 minutes and then move to wire rack to finish cooling. Enjoy!
One Year Ago: Kung Pao Chicken
These are truly the easiest (and best) sugar cookies I have made. I got this yummy recipe from Andrea the Kitchen Witch and decided that when I made them this time, I would not only use the vanilla extract, but I would use a fresh vanilla bean too... just to make them that much more vanilla-y (and yes that is a word in my book, thank you!).
If I had more time over the weekend, I would have made a wonderful vanilla bean frosting to top these, but alas, I did not get that far. If you wanted to make it, feel free, I would have made a cream cheese frosting using 1 vanilla bean, 4-6oz cream cheese, and powdered sugar (until you get the desired consistency and sweetness)... this frosting is not needed of course, it just would have made these delicious little cookies even better!
Vanilla Bean Sugar Cookies
Adapted from Andrea the Kitchen Witch
Printable Recipe
Ingredients:
1 1/4 cup granulated sugar (I used vanilla sugar)
2 sticks (1 cup) unsalted butter, softened
2 egg yolks
1 Tablespoon vanilla extract
1 vanilla bean, split and scraped
2 1/2 cups all purpose flour
1/2 teaspoon cream of tartar
1 teaspoon baking soda
1/4 teaspoon salt
1/4 cup granulated sugar (for rolling)
Directions:
Cream the butter and sugar together in a stand mixer with the paddle attachment until very light and fluffy, about 5 minutes on medium speed.
Scrape down the sides and add the vanilla and vanilla bean. Mix until incorporated. Add the egg yolks one at a time, beating well between each addition and scraping sides of bowl and paddle after each addition.
Mix the flour, baking soda, cream of tartar and salt together in a bowl. Slowly add the dry ingredients to the wet ingredients, scraping down the sides after each addition.
Preheat the oven to 350 degrees. Scoop balls of dough and roll into sugar, coating all sides. Place balls of dough on cookie sheet and bake for 11 minutes or until just set. You do not want these to brown, brown means they will not be soft and chewy in the middle. Let cool on cookie sheet for 2 minutes and then move to wire rack to finish cooling. Enjoy!
One Year Ago: Kung Pao Chicken
Tuesday, November 29, 2011
Vanilla Balsamic Chicken over Pasta with Garlic Vanilla Cream Sauce
I am so excited to share this recipe with you. When I was approached by Whitney at IndriVanilla, who asked if I would interested in some free vanilla bean samples, I couldn't pass it up. I had all these ideas of all these yummy desserts I could make... then it hit me. Why not try and create a savory dish with them? I very rarely see savory dishes that call for vanilla beans, outside of certain curry dishes, that is. So I set out to do just that.
My first test....vanilla balsamic chicken - grilled of course - but I wanted to go a bit further. You know me and my love for sauces.... why not create a sauce to go over it. Enter the garlic vanilla cream sauce... mmmmm!!! Put it all over a bit of pasta and you have yourself a savory dish using vanilla beans!
How did it turn out? Well, honestly.. the chicken was kick ass. It had this perfect mixture of tanginess and sweetness, that worked together amazingly well. The sauce.. the sauce was just a tad bit too sweet... but that can easily be fixed, so all in all, this dinner rocked! Would I make it again... hell yes!! Would I encourage you to try it? Most definitely!!
And, just one more word on the vanilla beans. I seriously thought that for the price of the vanilla beans that they would not be of the best quality. I was 100% incorrect in that thinking. So far I have used the "low grade" beans that Whitney sent me and I can say to you, I see no difference in the vanilla beans I have used before - even the expensive, most coveted, Madagascar beans. So, don't wait any longer, hop on IndriVanilla and order your own beans right now.... seriously, they will package them in how every many beans you want.... but go now... you are going to LOVE not only the price, but the actual beans themselves!!
Vanilla Balsamic Chicken over Pasta with Garlic Vanilla Cream Sauce
Chicken recipe adapted from Cooking Light, Sauce recipe created by Jenn's Food Journey
Printable Recipe
Ingredients:
1/4 cup chicken broth
1/3 cup balsamic vinegar
2 Tablespoons brown sugar
2 Tablespoons orange juice
1 vanilla bean, split and scraped
pinch of salt
2 boneless, skinless chicken breasts
For the sauce -
1 Tablespoon vanilla balsamic sauce (which you will be making with above ingredients)
1/2 cup chicken broth
1/2 cup heavy cream
1/2 vanilla bean, split and scraped
1 Tablespoon butter
2 Tablespoon flour
2 large garlic cloves, minced
salt and pepper to taste
10oz whole grain penne pasta (or whatever kind of pasta you want to use)
Directions:
In a saucepan over medium heat, add 1/4 cup chicken broth, balsamic vinegar, brown sugar, orange juice, vanilla bean, and salt. Stir to combine. Bring to a boil and reduce heat. Let simmer for 10-15 minutes, or until the sauce thickens. Remove from heat and allow to cool. Remove 1 Tablespoon of the sauce and set aside. Place the chicken in a shallow dish and pour all but 1 Tablespoon (you'll use this to baste the grilled chicken with) of the sauce over the chicken, cover, and refrigerate for at least 2 hours.
Preheat grill to 375 degrees F and oil the grill grates. Place the chicken directly over the fire and grill for 6-10 minutes per side, or until the chicken is cooked through. Brush with reserved sauce. Remove from grill and allow to rest for 5 minutes. Once cooled a bit, slice into bite size pieces.
Meanwhile, cook the pasta according to package directions; drain. Mix together 1 Tablespoon of reserved sauce, chicken broth, cream, and vanilla bean until well combined. In a sauce pan over medium heat, add the butter and let melt. Add the garlic and allow to cook for 1 minute. Add the flour and stir to combine everything. Slowly whisk in the cream mixture. Allow to come to a slow simmer. Simmer for 5-10 minutes or until the sauce thickens just a bit. Season with salt and pepper to taste.
Place pasta on a plate or in a bowl, top with chicken and sauce. Serve immediately. Enjoy!
One Year Ago: Mac & Texas Cheese with Chicken and Roasted Chiles
My first test....vanilla balsamic chicken - grilled of course - but I wanted to go a bit further. You know me and my love for sauces.... why not create a sauce to go over it. Enter the garlic vanilla cream sauce... mmmmm!!! Put it all over a bit of pasta and you have yourself a savory dish using vanilla beans!
How did it turn out? Well, honestly.. the chicken was kick ass. It had this perfect mixture of tanginess and sweetness, that worked together amazingly well. The sauce.. the sauce was just a tad bit too sweet... but that can easily be fixed, so all in all, this dinner rocked! Would I make it again... hell yes!! Would I encourage you to try it? Most definitely!!
And, just one more word on the vanilla beans. I seriously thought that for the price of the vanilla beans that they would not be of the best quality. I was 100% incorrect in that thinking. So far I have used the "low grade" beans that Whitney sent me and I can say to you, I see no difference in the vanilla beans I have used before - even the expensive, most coveted, Madagascar beans. So, don't wait any longer, hop on IndriVanilla and order your own beans right now.... seriously, they will package them in how every many beans you want.... but go now... you are going to LOVE not only the price, but the actual beans themselves!!
Vanilla Balsamic Chicken over Pasta with Garlic Vanilla Cream Sauce
Chicken recipe adapted from Cooking Light, Sauce recipe created by Jenn's Food Journey
Printable Recipe
Ingredients:
1/4 cup chicken broth
1/3 cup balsamic vinegar
2 Tablespoons brown sugar
2 Tablespoons orange juice
1 vanilla bean, split and scraped
pinch of salt
2 boneless, skinless chicken breasts
For the sauce -
1 Tablespoon vanilla balsamic sauce (which you will be making with above ingredients)
1/2 cup chicken broth
1/2 cup heavy cream
1/2 vanilla bean, split and scraped
1 Tablespoon butter
2 Tablespoon flour
2 large garlic cloves, minced
salt and pepper to taste
10oz whole grain penne pasta (or whatever kind of pasta you want to use)
Directions:
In a saucepan over medium heat, add 1/4 cup chicken broth, balsamic vinegar, brown sugar, orange juice, vanilla bean, and salt. Stir to combine. Bring to a boil and reduce heat. Let simmer for 10-15 minutes, or until the sauce thickens. Remove from heat and allow to cool. Remove 1 Tablespoon of the sauce and set aside. Place the chicken in a shallow dish and pour all but 1 Tablespoon (you'll use this to baste the grilled chicken with) of the sauce over the chicken, cover, and refrigerate for at least 2 hours.
Preheat grill to 375 degrees F and oil the grill grates. Place the chicken directly over the fire and grill for 6-10 minutes per side, or until the chicken is cooked through. Brush with reserved sauce. Remove from grill and allow to rest for 5 minutes. Once cooled a bit, slice into bite size pieces.
Meanwhile, cook the pasta according to package directions; drain. Mix together 1 Tablespoon of reserved sauce, chicken broth, cream, and vanilla bean until well combined. In a sauce pan over medium heat, add the butter and let melt. Add the garlic and allow to cook for 1 minute. Add the flour and stir to combine everything. Slowly whisk in the cream mixture. Allow to come to a slow simmer. Simmer for 5-10 minutes or until the sauce thickens just a bit. Season with salt and pepper to taste.
Place pasta on a plate or in a bowl, top with chicken and sauce. Serve immediately. Enjoy!
One Year Ago: Mac & Texas Cheese with Chicken and Roasted Chiles
Monday, November 28, 2011
Beef Roast
![]() |
| Pot Roast Image © Diana Rattray |
I'm sorry to say the picture used here, are not mine. No, I actually wanted to sit down to dinner at the same time Chris did... I mean it was Thanksgiving and all... so I decided not to take a picture, thinking it would be fine, that this wasn't that great of a dish to post anyway. Well, I was wrong.... once I took a bite of the melt in your mouth roast, I knew I had made a mistake....hence the borrowing of others pictures. This was too easy and too good not to share.
Chris and I decided to forgo the traditional Thanksgiving meal this year. With moving into the new house and the fact that it was just the two of us, it just seemed like too much work to put a whole Thanksgiving meal together. After a quick discussion about it, Chris recommended that we do a roast. And I thought, PERFECT! I can throw it in the crock pot in the morning and forget about it the rest of the day. That freed up my entire day to relax, unpack, and frankly, just do whatever the hell I wanted to. The perfect way to spend Thanksgiving... well, perfect would have included all of my family, but I think you see where I'm going with this :) This is very simple and could actually be done in a Dutch oven in a low temp oven too, so don't fret if you don't have a crock pot. Where there is a will, there is a way!
***Just a little extra note - starting tomorrow I will be showcasing recipes that highlight vanilla beans. And not just any vanilla beans... you might remember I mentioned IndriVanilla a few weeks back and the awesome prices they have on vanilla beans. Well, I finally got around to testing them out in different recipes ... and trust me, you aren't going to want to miss these!!***
Beef Pot Roast
Created by Jenn's Food Journey
Printable Recipe
Ingredients:
2 lb beef roast
olive oil
garlic salt
pepper
2 cups beef broth
1 cup water
1 Tablespoon Worcestershire sauce
1 packet onion soup mix (I used Lipton's)
Directions:
Heat a non-stick skillet over medium high heat. Rub the outside of the roast with olive oil and season liberally with garlic salt and pepper. Sear all sides of the roast in the heated skillet (this should only take about 5-8 minutes). Remove from skillet and place in crock pot. Mix together the broth, water, Worcestershire sauce, and onion soup mix. Pour over roast and cover. Cook on high for 30 minutes. Turn down to low and cook for 8 hours. For faster cooking time, cook on high for 4-5 hours. The meat should just fall apart!! Enjoy!
One Year Ago: Grilled Chicken with Bacon Balsamic Glaze
Friday, November 25, 2011
So many leftovers......
Most of you probably have more turkey leftovers than you know what to do with... well, never fear, my loyal readers, for I am here to help you with this dilemma!
None of the following recipes are mine (not enough time for me to make all these wonderful dishes, I'm sorry to say), but they are recipes I would look forward to trying if I had lots of leftover turkey (ok, ok, you got me, we had roast for Thanksgiving... yep, that's right, ROAST!!).
I'll be back on Monday with all new recipes.... see you then!!
None of the following recipes are mine (not enough time for me to make all these wonderful dishes, I'm sorry to say), but they are recipes I would look forward to trying if I had lots of leftover turkey (ok, ok, you got me, we had roast for Thanksgiving... yep, that's right, ROAST!!).
Hope you all had a fantastic Thanksgiving and that some of these recipes give you creative ideas on how to use up those leftovers!!
I'll be back on Monday with all new recipes.... see you then!!
Thursday, November 24, 2011
Thanksgiving
Happy Thanksgiving everyone!!
Today, as every day, I am most thankful for my family and Chris. I am also so very thankful for all my amazing followers, for our new home, for my health, and for so many wonderful things in my life!
I hope everyone is having a fantastic day... may you be with loved ones and may you eat mucho delicious food!
Ciao!
Friday, November 18, 2011
Photo Friday - Our New Digs
We have moved!!! This is the kitchen where I will be creating more magic... or at least that is the plan!! To get that magic, I need to take some time away from blogging, but hang tight... I will be back soon with delicious and wonderfully yummy posts - just for you!!
(The view from the kitchen window!!!)
For now, you can stop by Fire Day Friday and tempt your senses with another simple and delicious grilled chicken recipe:
Enjoy your week and plan on seeing me back to my regularly scheduled posts after the turkey holiday. Have a happy Thanksgiving and I'll see y'all real soon!
Ciao!
Jenn
One Year Ago: My Mom's Braciole
Thursday, November 17, 2011
Guest Blogger: Cheesy Cornbread
It's guest blogger time, and today is a very special guest blog. Mary of Food Floozie and I are switching things up today in honor of the Nebraska vs. Michigan game on Saturday. So, after checking out Mary's yummy little post, stop on by her site and check out my post for Runza Bites - You'll have to go there to see what it's all about!! :)
______________________________________________________
______________________________________________________
I'm not Southern, but I still make a great cornbread! And, believe it or not, this recipe is actually a great way to represent both schools in honor of Saturday's Nebraska-Michigan game. Thanks so much, Jenn, for trading posts with me today as we celebrate what will undoubtedly be an amazing match-up!
Nebraska, of course, is famous for its agriculture, particularly for beautiful corn. So cornbread seemed a perfect choice to offer for tailgating or for watching the game at home; it goes with chili, with soups, with salads ... you name it, it's hard to go wrong with cornbread on the side!
This recipe is not my own, I must admit. It comes from Jo Mathis, a reporter who used to write for The Ann Arbor News before its 2009 demise. I loved reading her columns, in which Jo wrote about daily life with her husband and her daughters; we readers all felt a part of her inner circle as she shared her heart and soul with us.
I remember one column in particular that told a story of travelling and about serendipitously finding great food. I don't know where the original clipping has wandered off to, so I can't tell you all of the details. But Jo managed to find the perfect slice of cornbread and finagle the recipe from the waitress, then she generously shared it with all of her readers.
And what did she ask for in return? Chocolate. Recipes for any kind of chocolate treat. How could you not love this woman???
So today I'm featuring a recipe that pays tribute both to the corn that is so much a part of the state of Nebraska, as well as a recipe that comes from Ann Arbor's history. This is moist, flavorful, has great texture, and it's easy to make - what more do you need, other than lots of butter to slather on the cornbread?
Nebraska at Michigan
Saturday, November 19 at noon EST
GO BLUE!!!
Saturday, November 19 at noon EST
GO BLUE!!!
Cheesy Cornbread
(slightly adapted from a recipe provided by Jo Mathis)
1/2 cup butter, at room temperature
1/2 cup sugar
2 eggs
1 cup creamed corn
1/2 cup flour
1/2 cup yellow cornmeal
2 teaspoons aluminum-free baking powder
1/2 teaspoon kosher salt
pinch of freshly ground black pepper
4 oz shredded Colby-Jack cheese
Preheat oven to 350F. Grease an 8"x8" baking pan.
In a large bowl, cream together butter and sugar; mix in eggs, one at a time. Stir in creamed corn. Combine flour, cornmeal, baking powder, salt and pepper; stir into batter. Stir in cheese.
Pour batter into the prepared baking pan. Bake for 30 minutes, until cornbread is golden at the edges and a toothpick inserted into the center comes out clean. Cool, then cut into squares.
Makes 8 servings.
Note: Feel free to substitute sharp Cheddar or Pepper Jack for the Colby Jack, or to use a combination of cheeses. I've offered Jeremy's favorite version of the cornbread, but one of its many charms is its adaptability.
Wednesday, November 16, 2011
Mustard Herb Sauce
I sure hope no one is getting sick of my sauce recipes :)
Ok, that was a little sarcasm, if you are getting sick of sauce recipes, you should probably find another blog to follow... I do love me some sauces and will continue to post about them as long as I can come up with new and creative ideas.... truth be told, it doesn't even have to be that creative.. just delicious! And this one screams that. It uses very few ingredients and packs a major punch in the taste factor. It works on fish, chicken, or even pork. It's fresh, simple, and definitely delicious!
Mustard Herb Sauce
Created by Jenn's Food Journey
Printable Recipe
Ingredients:
3 Tablespoons Dijon mustard
1 1/2 Tablespoons mayonnaise
1 Tablespoon sour cream
1 Tablespoons fresh chives, chopped
1 Tablespoons fresh parsley leaves, chopped
Directions:
Mix all ingredients together until well combined. Cover and refrigerate until ready to use. Can be store in an airtight container for up to 2 weeks. Enjoy!
One Year Ago: Chicken Nacho Bake
Ok, that was a little sarcasm, if you are getting sick of sauce recipes, you should probably find another blog to follow... I do love me some sauces and will continue to post about them as long as I can come up with new and creative ideas.... truth be told, it doesn't even have to be that creative.. just delicious! And this one screams that. It uses very few ingredients and packs a major punch in the taste factor. It works on fish, chicken, or even pork. It's fresh, simple, and definitely delicious!
Mustard Herb Sauce
Created by Jenn's Food Journey
Printable Recipe
Ingredients:
3 Tablespoons Dijon mustard
1 1/2 Tablespoons mayonnaise
1 Tablespoon sour cream
1 Tablespoons fresh chives, chopped
1 Tablespoons fresh parsley leaves, chopped
Directions:
Mix all ingredients together until well combined. Cover and refrigerate until ready to use. Can be store in an airtight container for up to 2 weeks. Enjoy!
One Year Ago: Chicken Nacho Bake
Subscribe to:
Posts (Atom)