So, I'm taking a few days off to spend some time with my family!! (YAY!!!) I'm SO excited!! Unfortunately, for you though, it means I will be MIA until at least Wednesday. Fortunately, for you though, I am leaving you with one of the best meals we've had in a while.
Some of you might remember last year when Chris and I went to Oklahoma and I learned how to make Terrific Man Tacos. Basically, I learned how to make grilled tacos!! For some reason, since that time, I have not made them again. Silly, I know. So, when my friend from work, Ruben, brought me some of the most amazing chorizo I have ever had, I knew I needed to revisit the terrific man taco idea.
Let me give you a bit of background on the chorizo. This chorizo is extra special because my friend Ruben grew up eating it. To me, that means more than the fact that it was pretty kick ass. It's something from a friends past that they enjoyed and that means a lot to me. His mother used to either cook it by itself with some onions, or she would cook it and then mix it with potatoes. Either way would be wonderful, I'm sure, but today, we are focusing on making them into tasty grilled tacos! This chorizo is actually made at Leo's Grocery store in Superior, AZ. People drive from everywhere to buy it so they have started packaging it in 1lbs. packages and freezing it. And this, my friends, is how Ruben gifted me this wonderful pound package that turned into one of the most delicious meals we've had in a while!! (Thank you Rube!!!)
Besides how wonderful tasting this chorizo was, I LOVED the way that it looked. You could actually see the peppers and spices speckled through it. It was gorgeous!! Now, most of you cannot get your hands on this fantastic protein, but that's ok, you can easily substitute regular chorizo. It's not going to be AS fabulous, but I promise, you will not be disappointed!
Terrific Man Tacos - Chorizo Style
Adapted from Eddie Canterbury
Printable Recipe
Ingredients:
1 lbs chorizo
1/2 can of refried beans (16oz can)
1 avocado, sliced
crumbled queso fresco cheese (as much as you want)
shredded Mexican cheese mix
8-10 white corn tortillas (8-10")
olive oil
For the Mango Salsa -
1 mango, cut into chunks
1 cup cherry tomatoes, halved or quartered
1 Tablespoon finely diced onion or shallots
1 Tablespoon freshly chopped cilantro leaves
garlic salt, to taste
lime juice, to taste
Directions:
Mix all ingredients together for the salsa. Cover and refrigerate until ready to use.
In a skillet over medium heat, add the chorizo. Cook for 5-8 minutes or until chorizo is cooked through. Remove from heat and drain if desired.
Preheat grill to 325 degrees. Brush each tortilla with oil on both sides. Spread a layer of refried beans on the tortilla and top with avocado slices on one half of the tortilla. Add the chorizo and queso fresco on the same side. Now cover entire tortilla with shredded cheese. Do not fold at this time, leave them flat.
Place the tortillas directly on the grill grate and let cook 2-3 minutes. When the tortilla becomes flexible, carefully fold up the cheese side only to create a taco (I used tongs and a spatula). Continue to cook until both sides of the taco or golden brown. Carefully remove from grill. Serve with mango salsa and enjoy!
One Year Ago: Spicy Thai Pork Chops with Coconut Rice
Search This Blog
Friday, September 16, 2011
Thursday, September 15, 2011
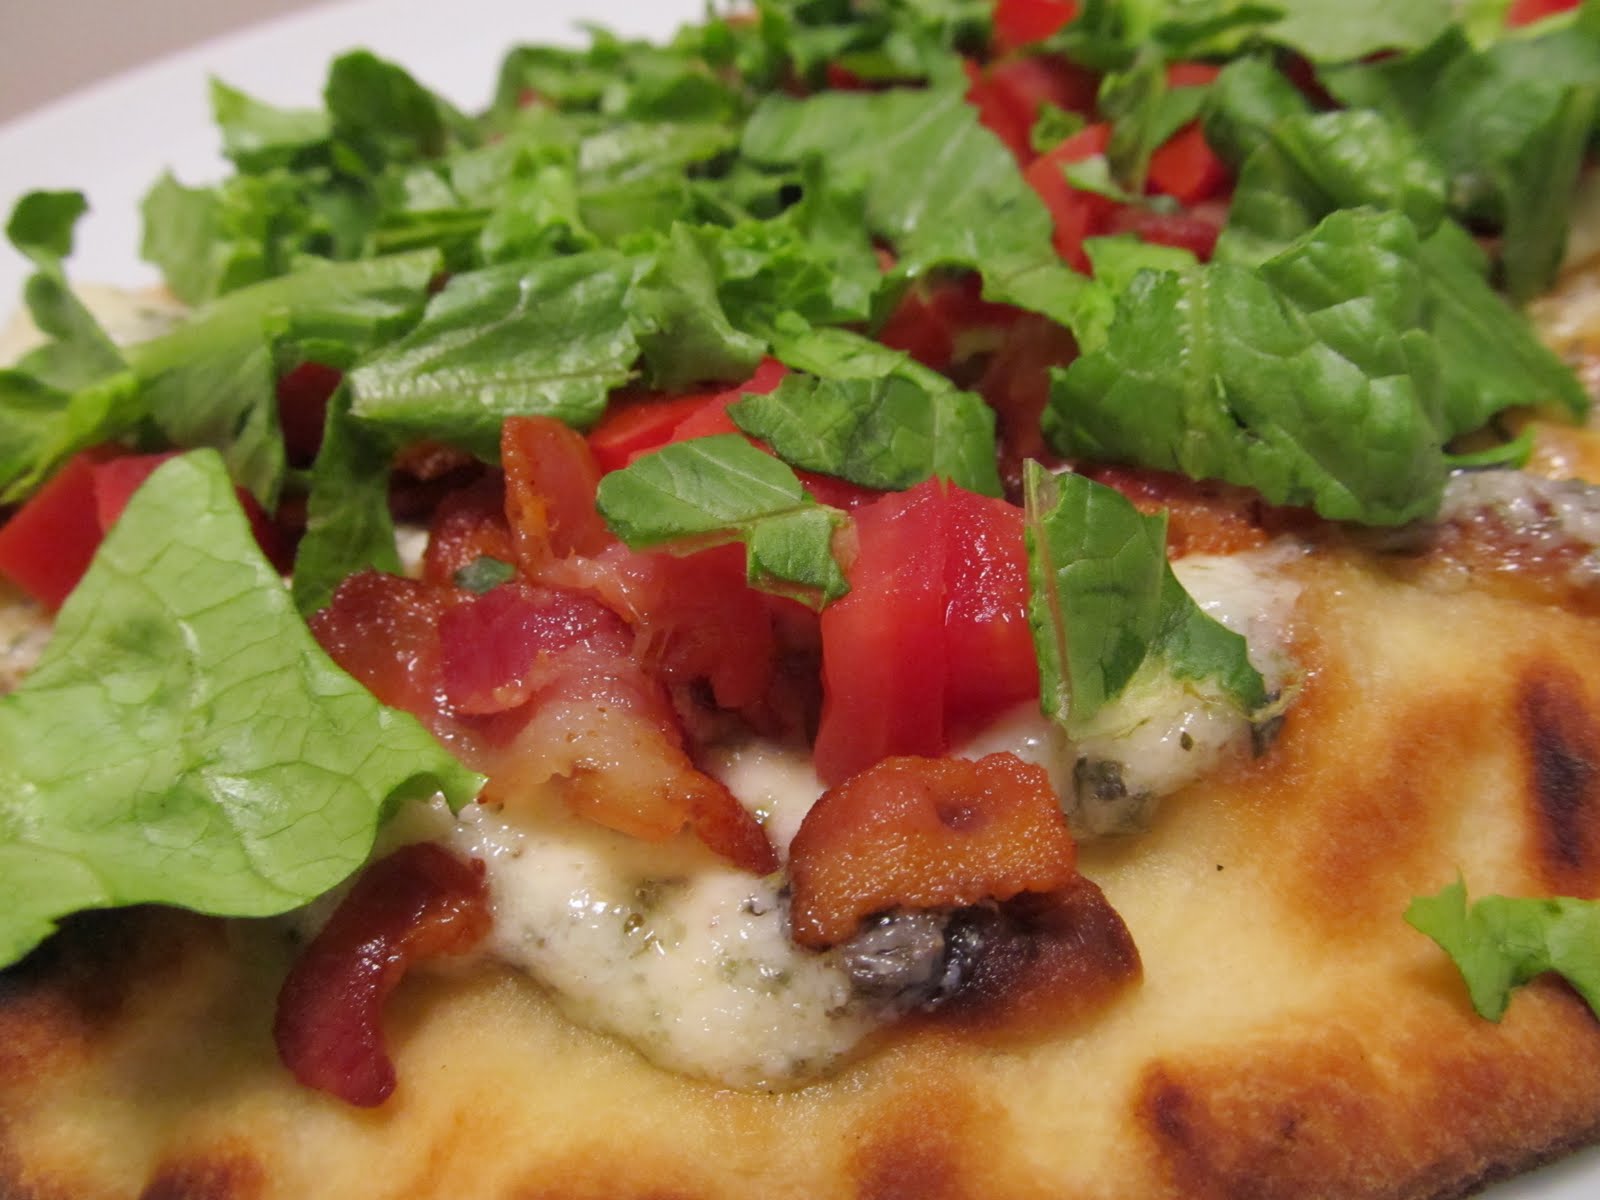
BLT Pizza
A few weeks ago, I confessed my love for BLT's.. Now, I figured, since I've come clean with this info, I'd continue to share some of my favorite ways to switch up my beloved sandwich.
I think the first time I had a BLT pizza was at California Pizza Kitchen. And, although they serve a pretty good one, I have created this little number that you can make at home and will cost you about half the price to make! How can you beat that right? Plus, you get to use simple naan flat bread instead of going through all the work of making homemade dough. Oh, don't get me wrong, you can make your own dough, but during the week.. who's got the time?
So sit back and take it all in.. this is definitely a pizza to try!
BLT Pizza
Created by Jenn's Food Journey
Printable Recipe
Ingredients:
2-3 naan flat breads
1/4 cup mayonnaise (I may have used an extra tablespoon)
1 1/4 teaspoons Italian herb mix
dash of garlic salt and white pepper
1 teaspoon lemon juice
1/2 cup crumbled queso fresco cheese
6-8 pieces of bacon, chopped, cooked crisp and drained
1 cup cherry tomatoes, quartered
shredded green leaf lettuce (I used about 6 or 7 leaves)
Directions:
Preheat grill to 325 degrees F.
In a small bowl, mix together the mayonnaise, Italian herb ix, garlic salt, white pepper, and lemon juice until well combined.
Place each naan directly onto the grill grates. Allow to grill for 3-5 minutes, or until golden brown. Carefully remove from grill. Flip the naan over and slather evenly with mayo mixture. Top with crumbled queso fresco cheese, bacon, and tomatoes. Place back on grill (ungrilled side down of course) and grill until the bottom crust is golden and the cheese has melted. Remove from grill and top with lettuce. Serve and enjoy!
One Year Ago: Tilapia with Sambal Vinaigrette and Ginger Lime Cream
I think the first time I had a BLT pizza was at California Pizza Kitchen. And, although they serve a pretty good one, I have created this little number that you can make at home and will cost you about half the price to make! How can you beat that right? Plus, you get to use simple naan flat bread instead of going through all the work of making homemade dough. Oh, don't get me wrong, you can make your own dough, but during the week.. who's got the time?
So sit back and take it all in.. this is definitely a pizza to try!
BLT Pizza
Created by Jenn's Food Journey
Printable Recipe
Ingredients:
2-3 naan flat breads
1/4 cup mayonnaise (I may have used an extra tablespoon)
1 1/4 teaspoons Italian herb mix
dash of garlic salt and white pepper
1 teaspoon lemon juice
1/2 cup crumbled queso fresco cheese
6-8 pieces of bacon, chopped, cooked crisp and drained
1 cup cherry tomatoes, quartered
shredded green leaf lettuce (I used about 6 or 7 leaves)
Directions:
Preheat grill to 325 degrees F.
In a small bowl, mix together the mayonnaise, Italian herb ix, garlic salt, white pepper, and lemon juice until well combined.
Place each naan directly onto the grill grates. Allow to grill for 3-5 minutes, or until golden brown. Carefully remove from grill. Flip the naan over and slather evenly with mayo mixture. Top with crumbled queso fresco cheese, bacon, and tomatoes. Place back on grill (ungrilled side down of course) and grill until the bottom crust is golden and the cheese has melted. Remove from grill and top with lettuce. Serve and enjoy!
One Year Ago: Tilapia with Sambal Vinaigrette and Ginger Lime Cream
Wednesday, September 14, 2011
Grilled Steaks with Red Pepper and Feta Salsa
Take a simple marinated grilled steak and top it with a flavorful salsa and what do you get? Well, you get grilled steaks with red pepper and feta salsa!
The saltiness of the feta matched very well with the slightly grilled, slightly charred red peppers. And let's not forget the every so slight kick that the habanero gives it! That's right.. a little spice is nice, my friends, don't be scared. And, if you actually are worried, use only half of the habanero instead of the whole thing, but please use it. The tiny bit of sweetness that the habenro brings, along with it's spice, is just fantastic!
The salsa makes an already delicious steak, that much better!
Grilled Steaks with Red Pepper and Feta Salsa
Created by Jenn's Food Journey
- Serves 2 -
Printable Recipe
Ingredients:
2 sirloin steaks (or any cut you prefer)
1/4 cup beer
1/4 cup Worcestershire sauce
1 Tablespoon olive oil
1 Tablespoon honey
salt and pepper
For the salsa -
1 red pepper
1 habanero pepper, finely minced
1 garlic clove, finely minced
1 Tablespoon fresh parsley, finely chopped
1-2 Tablespoons crumbled feta cheese
pepper to taste
Directions:
In a bowl mix together the beer, Worcestershire, olive oil, and honey until well combined. Season with a little salt and pepper. Place steaks in a shallow dish or resealable plastic bag. Pour the marinade over and place in refrigerator for 2-4 hours.
Preheat grill to 400 degrees F. Oil the grill grates and place steaks directly over the fire. Grill both sides until desired doneness. (I like mine more on the medium rare side and it takes about 3-5 minutes per side. Chris likes his more on the done side so his usually stays on about 8-10 minutes per side. This all depending on the thickness of the steak, of course.) Remove from grill and allow to rest for a few minutes before serving.
Meanwhile, place the pepper on the grill and allow to grill for 5 minutes. Remove from grill, remove the stem and seeds, and roughly chop. Toss in a bowl with habanero, garlic, parsley, and feta. Season with pepper to taste. Serve with steaks and enjoy!
One Year Ago: Homemade Potato Chips
The saltiness of the feta matched very well with the slightly grilled, slightly charred red peppers. And let's not forget the every so slight kick that the habanero gives it! That's right.. a little spice is nice, my friends, don't be scared. And, if you actually are worried, use only half of the habanero instead of the whole thing, but please use it. The tiny bit of sweetness that the habenro brings, along with it's spice, is just fantastic!
The salsa makes an already delicious steak, that much better!
Grilled Steaks with Red Pepper and Feta Salsa
Created by Jenn's Food Journey
- Serves 2 -
Printable Recipe
Ingredients:
2 sirloin steaks (or any cut you prefer)
1/4 cup beer
1/4 cup Worcestershire sauce
1 Tablespoon olive oil
1 Tablespoon honey
salt and pepper
For the salsa -
1 red pepper
1 habanero pepper, finely minced
1 garlic clove, finely minced
1 Tablespoon fresh parsley, finely chopped
1-2 Tablespoons crumbled feta cheese
pepper to taste
Directions:
In a bowl mix together the beer, Worcestershire, olive oil, and honey until well combined. Season with a little salt and pepper. Place steaks in a shallow dish or resealable plastic bag. Pour the marinade over and place in refrigerator for 2-4 hours.
Preheat grill to 400 degrees F. Oil the grill grates and place steaks directly over the fire. Grill both sides until desired doneness. (I like mine more on the medium rare side and it takes about 3-5 minutes per side. Chris likes his more on the done side so his usually stays on about 8-10 minutes per side. This all depending on the thickness of the steak, of course.) Remove from grill and allow to rest for a few minutes before serving.
Meanwhile, place the pepper on the grill and allow to grill for 5 minutes. Remove from grill, remove the stem and seeds, and roughly chop. Toss in a bowl with habanero, garlic, parsley, and feta. Season with pepper to taste. Serve with steaks and enjoy!
One Year Ago: Homemade Potato Chips
Tuesday, September 13, 2011
Seasoned Grilled Tilapia
My apologies for the picture - it's not the prettiest picture I have ever posted, that's for sure!! But don't worry, although the fish might not look that pretty, it was flavorful and delicious. I grilled these tilapia fillets in foil, but you can bake them, or heck, you can even fry them up in a pan :) whichever way you choose, it's a simple and healthy idea for a busy week night.
Seasoned Grilled Tilapia
Created by Jenn's Food Journey
Printable Recipe
Ingredients:
1 teaspoon dried parsley
1/2 teaspoon dried thyme
1/4 teaspoon paprika
1/8 teaspoon onion powder
1/4 teaspoon kosher salt
1/8 teaspoon pepper
dash of garlic powder
dash of cayenne pepper
4 Tilapia fillets
Directions:
In a small bowl, mix together all ingredients except the tilapia.
Preheat grill to 350 degrees F. Tear 4 squares of aluminum foil and spray with non-stick cooking spray. Place one fillet in the middle of each square. Sprinkle the season mixture evenly over each piece of fish. Close the sides of the foil, sealing the fish in. Place the foil packets on the grill and allow to cook for 10-12 minutes, rotating the packets halfway through grilling. Carefully remove from grill and foil packet. Enjoy!
One Year Ago: Smoked Whole Chicken
Seasoned Grilled Tilapia
Created by Jenn's Food Journey
Printable Recipe
Ingredients:
1 teaspoon dried parsley
1/2 teaspoon dried thyme
1/4 teaspoon paprika
1/8 teaspoon onion powder
1/4 teaspoon kosher salt
1/8 teaspoon pepper
dash of garlic powder
dash of cayenne pepper
4 Tilapia fillets
Directions:
In a small bowl, mix together all ingredients except the tilapia.
Preheat grill to 350 degrees F. Tear 4 squares of aluminum foil and spray with non-stick cooking spray. Place one fillet in the middle of each square. Sprinkle the season mixture evenly over each piece of fish. Close the sides of the foil, sealing the fish in. Place the foil packets on the grill and allow to cook for 10-12 minutes, rotating the packets halfway through grilling. Carefully remove from grill and foil packet. Enjoy!
One Year Ago: Smoked Whole Chicken
Monday, September 12, 2011
Grilled Yakitori Chicken
I know I have told you this before, but I get very impatient in the kitchen at times. I try to curb it, but it's hard to do. Especially on nights where I am hungry and I'm rushing to get dinner on the table. Alas, the night I made this dish was just one of those nights. The sad part about that, well, this meal was really, really good.. BUT.. had I been just a bit more patient, it could have been really, really kick ass good!!!
On a positive note, it just means I must make this again so that I can perfect it and, of course, work on my patience :) You see, I didn't let this sauce boil long enough, so it never truly thickened up like it should have. Great thing though, is that it still had the delicious flavor it was supposed to have!! So although I was disappointed in my performance, I was NOT at all disappointed with this recipe. It's just yet another hit from my pal Andrea The Kitchen Witch. Thanks Andrea!!
Grilled Yakitori Chicken
Adapted from Andrea The Kitchen Witch
- Serves 2 -
Printable Recipe
Ingredients:
2 large boneless, skinless chicken breasts, cut into three strips each
1/4 cup low sodium soy sauce
1/4 cup mirin
1/4 cup brown sugar
1/4 cup water
1 Tablespoon rice vinegar
1 whole garlic clove, crushed with a back of knife
1 Tablespoon chili paste (Sambal Oelek)
Directions:
Combine the soy, mirin, brown sugar, water, rice vinegar, and garlic clove in a small saucepan over high heat and bring to a boil. Reduce heat to simmer. Remove the garlic clove after 5 minutes of simmering. Continue too simmer until the sauced as reduced to a thick syrup. (and please be patient, it takes a while but is worth the wait!!) Remove from heat and allow to cool.
Remove 2-3 Tablespoons of the sauce add the chili paste. Stir to combine. Cover and refrigerate until ready to use. Place the chicken in a resealable bag and pour the remaining sauce mixture over it. Refrigerate for at least 1 hour.
Preheat grill to 375 degrees F. Remove chicken from bag and place directly over the fire. Grill for 5-10 minutes per side or until the chicken has reached an internal temperature of 165 degrees F. Remove and allow to rest for 5 minutes. Serve with reserved sauce. Enjoy!
One Year Ago: Smoked Pork Back Ribs
On a positive note, it just means I must make this again so that I can perfect it and, of course, work on my patience :) You see, I didn't let this sauce boil long enough, so it never truly thickened up like it should have. Great thing though, is that it still had the delicious flavor it was supposed to have!! So although I was disappointed in my performance, I was NOT at all disappointed with this recipe. It's just yet another hit from my pal Andrea The Kitchen Witch. Thanks Andrea!!
Grilled Yakitori Chicken
Adapted from Andrea The Kitchen Witch
- Serves 2 -
Printable Recipe
Ingredients:
2 large boneless, skinless chicken breasts, cut into three strips each
1/4 cup low sodium soy sauce
1/4 cup mirin
1/4 cup brown sugar
1/4 cup water
1 Tablespoon rice vinegar
1 whole garlic clove, crushed with a back of knife
1 Tablespoon chili paste (Sambal Oelek)
Directions:
Combine the soy, mirin, brown sugar, water, rice vinegar, and garlic clove in a small saucepan over high heat and bring to a boil. Reduce heat to simmer. Remove the garlic clove after 5 minutes of simmering. Continue too simmer until the sauced as reduced to a thick syrup. (and please be patient, it takes a while but is worth the wait!!) Remove from heat and allow to cool.
Remove 2-3 Tablespoons of the sauce add the chili paste. Stir to combine. Cover and refrigerate until ready to use. Place the chicken in a resealable bag and pour the remaining sauce mixture over it. Refrigerate for at least 1 hour.
Preheat grill to 375 degrees F. Remove chicken from bag and place directly over the fire. Grill for 5-10 minutes per side or until the chicken has reached an internal temperature of 165 degrees F. Remove and allow to rest for 5 minutes. Serve with reserved sauce. Enjoy!
One Year Ago: Smoked Pork Back Ribs
Friday, September 9, 2011
Photo Friday - Banff National Park, Canada
With temperatures still soaring over 100 degrees - I dream of spending a few days in a cabin that is nestled right at the foot of that mountain!
It's Fire Day Friday again... and you are not going to want to skip this one... I made a fantastic little grilled side dish that goes perfectly with the Vietnamese Spiced Pork Chops I posted yesterday.
One Year Ago: The Easiest Sugar Cookies Ever...But first some important news!
It's Fire Day Friday again... and you are not going to want to skip this one... I made a fantastic little grilled side dish that goes perfectly with the Vietnamese Spiced Pork Chops I posted yesterday.
Eat, dance, and laugh this weekend... that's an order!!!
Ciao!
Jenn
One Year Ago: The Easiest Sugar Cookies Ever...But first some important news!
Thursday, September 8, 2011
Vietnamese Spiced Pork Chops with Sweet Chili Sauce
I decided to make this the other night because, honestly, I really wanted another excuse to use the sweet chili sauce Andrea (The Kitchen Witch) came up with. Don't get me wrong, the pork was really good and would have been just wonderful without the sauce. But, as you know by now, I believe sauce makes all things better.
- Serves 2 -
Printable Recipe
Ingredients:
2 boneless pork loin chops
2 cups water
1 Tablespoon kosher salt
1 Tablespoon granulated sugar
1 teaspoon pepper
2 teaspoons brown sugar
1/2 teaspoon paprika
1/4 teaspoon coriander
1/8 teaspoon ground ginger
pinch of garlic powder
Sweet Chili Sauce (however much your little heart fancies)
Directions:
Place the pork in a shallow dish. Mix together the water, salt, sugar, and pepper until the salt and sugar are dissolved. Pour over pork and cover. Let sit in refrigerator for at least 2 hours. Remove the pork from the brine and rinse thoroughly under cool water. Pat dry with paper towel.
Meanwhile, in a small bowl, mix together the brown sugar, paprika, coriander, ginger, and garlic powder until well combined. Sprinkle/rub over both sides of each pork chop. Place on a clean plate and cover. Let sit in refrigerator for at least 1 hour.
Preheat grill to 375 degrees. Oil the grill grates. Place the pork directly over the fire and grill 4-5 minutes per side or until the pork reaches 145 degrees F. Remove from the grill and allow to rest for 4 minutes before cutting into. Serve with sweet chili sauce. Enjoy!
One Year Ago: Roasted Red Pepper Sauce with Chicken over Penne
Vietnamese Spiced Pork Chops with Sweet Chili Sauce
Adapted from Cooking Light- Serves 2 -
Printable Recipe
Ingredients:
2 boneless pork loin chops
2 cups water
1 Tablespoon kosher salt
1 Tablespoon granulated sugar
1 teaspoon pepper
2 teaspoons brown sugar
1/2 teaspoon paprika
1/4 teaspoon coriander
1/8 teaspoon ground ginger
pinch of garlic powder
Sweet Chili Sauce (however much your little heart fancies)
Directions:
Place the pork in a shallow dish. Mix together the water, salt, sugar, and pepper until the salt and sugar are dissolved. Pour over pork and cover. Let sit in refrigerator for at least 2 hours. Remove the pork from the brine and rinse thoroughly under cool water. Pat dry with paper towel.
Meanwhile, in a small bowl, mix together the brown sugar, paprika, coriander, ginger, and garlic powder until well combined. Sprinkle/rub over both sides of each pork chop. Place on a clean plate and cover. Let sit in refrigerator for at least 1 hour.
Preheat grill to 375 degrees. Oil the grill grates. Place the pork directly over the fire and grill 4-5 minutes per side or until the pork reaches 145 degrees F. Remove from the grill and allow to rest for 4 minutes before cutting into. Serve with sweet chili sauce. Enjoy!
One Year Ago: Roasted Red Pepper Sauce with Chicken over Penne
Wednesday, September 7, 2011
Spur of the Moment Pasta
Sometimes I get busy with work and with life and the next thing I know it's already 7:30pm and I haven't even thought about starting dinner. Sometimes, when that happens, I don't feel like going through the motions and making what I had planned to make. Take this night for instance... I just didn't want to spend more than 10 minutes putting everything together for dinner. It was late, I was tired, but boy was I hungry. So, Spur of the Moment Pasta was born. It's simple, it's quick, and it's definitely tasty - the perfect week night meal!
Spur of the Moment Pasta
Created by Jenn's Food Journey
Printable Recipe
Ingredients:
2 1/2 cups elbow pasta (you can use any pasta really)
3/4 cup cherry tomatoes, quartered
garlic salt and pepper
1 teaspoon dried oregano
1 teaspoon dried thyme
1/2 teaspoon fresh mint, finely chopped
1 jalapeno, finely minced
1 Tablespoon basil olive oil (you can use extra virgin)
2 splashes of lemon juice
1 can albacore tuna, drained - optional
extra virgin olive oil (I used about 2 Tablespoons)
Directions:
Cook the pasta according to package directions. Drain.
In a small bowl or measuring cup, add the tomatoes and season with garlic salt and pepper. Add the oregano, thyme, mint and basil olive oil. Toss to combine. Add tomato mixture, lemon juice, jalapeno, and tuna (if using) to the drained pasta. Toss to combine. Add extra virgin olive oil by the tablespoons full until the pasta is no longer dry. Top with parmesan cheese if desired. Enjoy!
One Year Ago: Basic White Bread
Spur of the Moment Pasta
Created by Jenn's Food Journey
Printable Recipe
Ingredients:
2 1/2 cups elbow pasta (you can use any pasta really)
3/4 cup cherry tomatoes, quartered
garlic salt and pepper
1 teaspoon dried oregano
1 teaspoon dried thyme
1/2 teaspoon fresh mint, finely chopped
1 jalapeno, finely minced
1 Tablespoon basil olive oil (you can use extra virgin)
2 splashes of lemon juice
1 can albacore tuna, drained - optional
extra virgin olive oil (I used about 2 Tablespoons)
Directions:
Cook the pasta according to package directions. Drain.
In a small bowl or measuring cup, add the tomatoes and season with garlic salt and pepper. Add the oregano, thyme, mint and basil olive oil. Toss to combine. Add tomato mixture, lemon juice, jalapeno, and tuna (if using) to the drained pasta. Toss to combine. Add extra virgin olive oil by the tablespoons full until the pasta is no longer dry. Top with parmesan cheese if desired. Enjoy!
One Year Ago: Basic White Bread
Tuesday, September 6, 2011
Baked Tilapia with Sweet Chili Glaze
I was once again thwarted by a wind storm, so I had to switch gears with this recipe. I was actually going to grill these tilapia filets, but ended up baking them in the end. The great thing is, though... this really isn't about the fish, it's about the sauce.... :)
And this time... this time all the credit for the sauce goes to Andrea The Kitchen Witch. Yes, folks, I can't claim this one as my own, but that's ok, I'll let Andrea have all the thunder on this one because she very much deserves it. I have purchased sweet chili sauce for years now. Never again!! That's right.. thanks to Andrea I will never have to purchase a bottle of that manufactured stuff again!! YAY!! And you know what? This homemade version is WAY better than the store bought and costs you even less!! I even did a side by side comparison as I had just a little bit of the bottled stuff left... and it was spot on in appearance - but on taste, it blew the bottled stuff away. I made mine a bit spicier than you can find in the store, but that just made it that much better!!
Thank you for figuring out the secret to this sauce, Andrea - it is DA BOMB!!!
Baked Tilapia with Sweet Chili Glaze
Fish recipe created by Jenn's Food Journey, Sweet Chili Sauce Created by Andrea The Kitchen Witch
Printable Recipe
Ingredients:
1 cup granulated sugar
3/4 cup white vinegar
1/2 cup water
1-2 Tablespoons chili paste
1 clove garlic, crushed but left whole
1 small carrot, finely grated
1 Tablespoon cornstarch
pinch of salt
4 tilapia fillets
1/2 cup panko bread crumbs
2 Tablespoon chopped nuts (I used cashews) - optional
Directions:
In a small sauce pan, combine the sugar, vinegar, water, garlic and carrot. Bring to a boil and cook on high for 3 minutes. Make a cornstarch slurry by adding 1 tablespoon of water to 1 tablespoon of cornstarch. Slowly add to mixture and then add the chili paste and salt. Boil for 3 minutes longer. Taste for seasoning - add more chili paste if desired. Remove from heat and allow to cool. Remove garlic clove before serving. Can be made days in advance. Keep in container with lid in refrigerator.
Preheat oven to 400 degrees. Spray a baking dish with non-stick cooking spray. Rinse the tilapia and pat dry. Top each fillet with 2 tablespoons of the sweet chili sauce. Sprinkle the panko evenly over each fillet. Place in oven and bake for 14-16 minutes or until the fish flakes easily with a fork. Serve with additional sauce if desired. Enjoy!
One Year Ago: Honey and Spiced Grilled Chicken
And this time... this time all the credit for the sauce goes to Andrea The Kitchen Witch. Yes, folks, I can't claim this one as my own, but that's ok, I'll let Andrea have all the thunder on this one because she very much deserves it. I have purchased sweet chili sauce for years now. Never again!! That's right.. thanks to Andrea I will never have to purchase a bottle of that manufactured stuff again!! YAY!! And you know what? This homemade version is WAY better than the store bought and costs you even less!! I even did a side by side comparison as I had just a little bit of the bottled stuff left... and it was spot on in appearance - but on taste, it blew the bottled stuff away. I made mine a bit spicier than you can find in the store, but that just made it that much better!!
Thank you for figuring out the secret to this sauce, Andrea - it is DA BOMB!!!
Baked Tilapia with Sweet Chili Glaze
Fish recipe created by Jenn's Food Journey, Sweet Chili Sauce Created by Andrea The Kitchen Witch
Printable Recipe
Ingredients:
1 cup granulated sugar
3/4 cup white vinegar
1/2 cup water
1-2 Tablespoons chili paste
1 clove garlic, crushed but left whole
1 small carrot, finely grated
1 Tablespoon cornstarch
pinch of salt
4 tilapia fillets
1/2 cup panko bread crumbs
2 Tablespoon chopped nuts (I used cashews) - optional
Directions:
In a small sauce pan, combine the sugar, vinegar, water, garlic and carrot. Bring to a boil and cook on high for 3 minutes. Make a cornstarch slurry by adding 1 tablespoon of water to 1 tablespoon of cornstarch. Slowly add to mixture and then add the chili paste and salt. Boil for 3 minutes longer. Taste for seasoning - add more chili paste if desired. Remove from heat and allow to cool. Remove garlic clove before serving. Can be made days in advance. Keep in container with lid in refrigerator.
Preheat oven to 400 degrees. Spray a baking dish with non-stick cooking spray. Rinse the tilapia and pat dry. Top each fillet with 2 tablespoons of the sweet chili sauce. Sprinkle the panko evenly over each fillet. Place in oven and bake for 14-16 minutes or until the fish flakes easily with a fork. Serve with additional sauce if desired. Enjoy!
One Year Ago: Honey and Spiced Grilled Chicken
Monday, September 5, 2011
Labor Day and Seven Links
Happy Labor Day everyone!! Hope you are all enjoying your day away from work. Actually, I hope you all are enjoying delicious foods while enjoying your day away from work :)
Today I'm going to share seven links with you. That's right, seven links. Michael, over at Me, My Food and I, tagged me in a little game that has been working it's way around the blogging world called Seven Links. As Michael says, basically there are seven questions that you must answer using your previous posts. I combined the second question and the last question together, so technically there are seven links even though you'll only see 6 :) Here goes:
I'm not much of a baker, so I really don't have any gorgeous looking cakes or sweets, but I did have a hard time trying to decide between two of my favorite pictures. With Chris' help, I narrowed it down to the Spicy Grilled Pork Chops with Mango Salsa. I do believe it to be the most colorful of all my posts. Runner up was Rotini with Cherry Tomatoes an Tuna.
Like, Michael, I was glad to have the stats tab on blogger. It made it quite easy to find out the most popular, which, hands down, was my post about my grandfather - There was a man... - It's definitely the post I'm most proud of too, which covers not only this question, but the final question - You are most proud of. The feed back I received from this post was unbelievable. People that had known and worked with my grandfather before his death, reached out to me. People who had only heard of him reached out to me. It was incredible. My grandfather was truly an amazing man. The most popular food post - Creamy Lemon Pasta with Chicken, Spinach and Tomatoes.
I don't know if you could call it the most controversial...but it definitely got the strangest responses. Enter The Great Spam Experiment. I actually loved this post on spam. I basically was given a challenge by my mom's cousin - create a spam parmigiana dish. It actually turned out pretty darn good.
This is a no brainer - Hamburger Buddy - by far the past that did not get the attention it deserved. Hamburger Buddy is like homemade hamburger helper, but SOOO much better and it's even healthier!!! YAY!!! The picture might not be the best, but those were the early years... this is da bomb! I promise!
I'm going with the theory that this question means what was the most successful meal I made that I posted about. Don't know if that is what it means or not, but that's what I'm going with. And in this case, that would be Pasta Carbonara! Love, love, love carbonara but was always so afraid to making it and scrambling the eggs... but alas, it turned out to be much easier of a process then I thought it would be.... success in my book!!!
I gotta say, I had a very hard time with this one. I think, though, that my post (thanks to Andrea The Kitchen Witch) for Basic White Bread has to be the most detailed in the instructions - hence, the most helpful. (Yes, that was sort of reaching, but come on, I couldn't find anything else!! lol)
Today I'm going to share seven links with you. That's right, seven links. Michael, over at Me, My Food and I, tagged me in a little game that has been working it's way around the blogging world called Seven Links. As Michael says, basically there are seven questions that you must answer using your previous posts. I combined the second question and the last question together, so technically there are seven links even though you'll only see 6 :) Here goes:
1. The Most Beautiful
2. The Most Popular
3. The Most Controversial
4. The post that did not get the attention it deserved
5. The Post That's Surprisingly Successful!
6. The Most Helpful
Now, I'm supposed to tag seven other bloggers, but you know me... I don't play games very well :) So, if you want to answer these seven questions and post them on your site, fantastic!! If not, it's all good!!
Friday, September 2, 2011
BLT Scrambled Eggs
In case you ever need to know this - my all time favorite sandwich is a BLT. I could eat a (ok, maybe two or three) BLT every single day and never get tired of them. Seriously. I've done it before...... but don't tell my mom :)
This is a simple idea...nothing special or life changing...but still worth putting out there for you all to enjoy. I decided on this one night when I was thinking of how many BLT with fried egg sandwiches I've been seeing. It got me thinking... and this was what sprung from those thoughts.
In all reality, this should really be called BBT scrambled eggs as I used basil instead of lettuce. But I figured, I'd spend too much time explaining it, so I left it at BLT... If you wanted to add spinach instead of basil, that would work really well too.
BLT Scrambled Eggs
Created by Jenn's Food Journey
- Serves 2 -
Printable Recipe
Ingredients:
6 slices of bacon, chopped
8 eggs
1-2 Tablespoons heavy cream
1/8 teaspoon garlic salt
1/8 teaspoon pepper
dash of cayenne pepper
1 cup cherry tomatoes, quartered
6-8 large fresh basil leaves, chopped
Directions:
In a non-stick skillet, cook the bacon until crisp; about 5-10 minutes. Remove with slotted spoon and allow to drain on a paper towel. Remove all but 1 tablespoon of the bacon grease.
In a large bowl, whisk together the eggs, cream, garlic salt, pepper, and cayenne until light and foamy. Put the skillet with the grease in it over medium high heat for 1 minute. Pour the eggs straight into the middle of the pan, which will force the grease to the edges, where you want it. Stir slowly with a rubber or silicone spatula. As soon as curds (big soft lumps) of eggs begin to form, drop the heat down to low and shift from stirring to folding the curds over on themselves while gently shaking the pan with the other hand. As soon as no more liquidous egg is running around the pan, add the tomatoes and bacon and fold into eggs. Cook for 1 minute. Remove from heat and fold in basil. Serve warm and enjoy!
One Year Ago: Grilled Chicken Sandwich with Roasted Pepper and Goat Cheese Spread
This is a simple idea...nothing special or life changing...but still worth putting out there for you all to enjoy. I decided on this one night when I was thinking of how many BLT with fried egg sandwiches I've been seeing. It got me thinking... and this was what sprung from those thoughts.
In all reality, this should really be called BBT scrambled eggs as I used basil instead of lettuce. But I figured, I'd spend too much time explaining it, so I left it at BLT... If you wanted to add spinach instead of basil, that would work really well too.
BLT Scrambled Eggs
Created by Jenn's Food Journey
- Serves 2 -
Printable Recipe
Ingredients:
6 slices of bacon, chopped
8 eggs
1-2 Tablespoons heavy cream
1/8 teaspoon garlic salt
1/8 teaspoon pepper
dash of cayenne pepper
1 cup cherry tomatoes, quartered
6-8 large fresh basil leaves, chopped
Directions:
In a non-stick skillet, cook the bacon until crisp; about 5-10 minutes. Remove with slotted spoon and allow to drain on a paper towel. Remove all but 1 tablespoon of the bacon grease.
In a large bowl, whisk together the eggs, cream, garlic salt, pepper, and cayenne until light and foamy. Put the skillet with the grease in it over medium high heat for 1 minute. Pour the eggs straight into the middle of the pan, which will force the grease to the edges, where you want it. Stir slowly with a rubber or silicone spatula. As soon as curds (big soft lumps) of eggs begin to form, drop the heat down to low and shift from stirring to folding the curds over on themselves while gently shaking the pan with the other hand. As soon as no more liquidous egg is running around the pan, add the tomatoes and bacon and fold into eggs. Cook for 1 minute. Remove from heat and fold in basil. Serve warm and enjoy!
One Year Ago: Grilled Chicken Sandwich with Roasted Pepper and Goat Cheese Spread
Thursday, September 1, 2011
Avocado Basil Pasta
Avocado, basil, and bacon... what more could you ask for in a pasta dish?? How about some tomato?
I knew I'd hook you sooner or later... :)
This was a fantastic dish...my only regret is that I did not try this sooner. This is one of those recipes that I sat on for years, actually, don't ask me why... I think that I had assumed Chris would not like it because of the avocado, but when I finally asked him about it, he was all on board to try it out. I think the bacon out weighed everything else, but hey, that's what bacon does sometimes!!
Avocado Basil Pasta
Adapted from Better Homes & Gardens
Printable Recipe
Ingredients:
12 oz whole grain penne pasta
1 avocado, chopped
1 cup grape tomatoes, quartered
6 slices bacon, chopped, cooked crisp and drained
2 Tablespoons lemon juice
1 Tablespoon olive oil
1 clover garlic, finely minced
1 can albacore tuna, drained
6 large fresh basil leaves, chopped
salt and pepper to taste
parmesan cheese - optional
Directions:
Cook pasta according to package directions; drain.
In a large bowl, combine the avocado, tomatoes, bacon, lemon juice, olive oil, and garlic. Toss in the drained pasta. Add the tuna and the basil and toss to combine. Season with salt and pepper. Sprinkle on parmesan cheese. Serve warm. Enjoy!
One Year Ago: Stuffed Pork Chops
I knew I'd hook you sooner or later... :)
This was a fantastic dish...my only regret is that I did not try this sooner. This is one of those recipes that I sat on for years, actually, don't ask me why... I think that I had assumed Chris would not like it because of the avocado, but when I finally asked him about it, he was all on board to try it out. I think the bacon out weighed everything else, but hey, that's what bacon does sometimes!!
Avocado Basil Pasta
Adapted from Better Homes & Gardens
Printable Recipe
Ingredients:
12 oz whole grain penne pasta
1 avocado, chopped
1 cup grape tomatoes, quartered
6 slices bacon, chopped, cooked crisp and drained
2 Tablespoons lemon juice
1 Tablespoon olive oil
1 clover garlic, finely minced
1 can albacore tuna, drained
6 large fresh basil leaves, chopped
salt and pepper to taste
parmesan cheese - optional
Directions:
Cook pasta according to package directions; drain.
In a large bowl, combine the avocado, tomatoes, bacon, lemon juice, olive oil, and garlic. Toss in the drained pasta. Add the tuna and the basil and toss to combine. Season with salt and pepper. Sprinkle on parmesan cheese. Serve warm. Enjoy!
One Year Ago: Stuffed Pork Chops
Wednesday, August 31, 2011
Grilled Chicken Lettuce Wraps with Fiery Sauce
I've done pork lettuce wraps and I've done shrimp lettuce wraps - now it's time for the chicken! I really didn't do anything different this time except for changing the protein.. and of course... yep, you know it.. the sauce :) And the sauce... I'm not ashamed to admit... is basically the same sauce I used on my Grilled Shrimp Po' Boy with rice vinegar added to it. I loved the flavors in that remoulade and thought the addition of rice vinegar gave it that extra Asian flavor.
I love making lettuce wraps, sure they can be a bit messy from time to time, but they are light, simple, and absolutely delicious!!
Grilled Chicken Lettuce Wraps with Fiery Sauce
Created by Jenn's Food Journey
Printable Recipe
Ingredients:
4 boneless skinless chicken breasts
1 Tablespoon Hoisin
1 Tablespoon rice vinegar
1 Tablespoon Sriracha
1 Tablespoon low sodium soy sauce
head of green leaf lettuce
1/2 English cucumber, sliced and cut into moon shapes
1 jalapeno, sliced
fresh mint leaves
2 cups cooked basmati rice
For the Fiery Sauce -
3 Tablespoons mayonnaise
2 teaspoon chili paste
2 teaspoon Sriracha
1 teaspoon lemon juice
1/2 teaspoon rice vinegar
Directions:
Rinse the chicken and pat dry with a paper towel; place in resealable plastic bag. In a small bowl, mix together the hoisin, rice vinegar, Sriracha, and soy sauce until well combined. Pour mixture over chicken, seal bag, and place in refrigerator for at least 1 hour.
To make the sauce - mix together the mayo, chili paste, Sriracha, lemon juice, and rice vinegar until well combined. Cover and store in refrigerator until ready to use.
Preheat grill to 375 degrees F. Oil the grill grates. Remove the chicken from the bag and discard the marinade. Place the chicken directly over the fire and grill for 5-10 minutes per side or until the chicken reaches an internal temperature of 165 degrees F. Remove from grill and allow to rest for 5-10 minutes. Once cooled a bit, cut the chicken into strips.
To build the wrap: Take a piece of lettuce, top with rice, cucumber slices, jalapeno slices, mint leaves, and chicken. Top with fiery sauce. Enjoy!!
One Year Ago: Chimichurri Chicken Pita Pizza
I love making lettuce wraps, sure they can be a bit messy from time to time, but they are light, simple, and absolutely delicious!!
Grilled Chicken Lettuce Wraps with Fiery Sauce
Created by Jenn's Food Journey
Printable Recipe
Ingredients:
4 boneless skinless chicken breasts
1 Tablespoon Hoisin
1 Tablespoon rice vinegar
1 Tablespoon Sriracha
1 Tablespoon low sodium soy sauce
head of green leaf lettuce
1/2 English cucumber, sliced and cut into moon shapes
1 jalapeno, sliced
fresh mint leaves
2 cups cooked basmati rice
For the Fiery Sauce -
3 Tablespoons mayonnaise
2 teaspoon chili paste
2 teaspoon Sriracha
1 teaspoon lemon juice
1/2 teaspoon rice vinegar
Directions:
Rinse the chicken and pat dry with a paper towel; place in resealable plastic bag. In a small bowl, mix together the hoisin, rice vinegar, Sriracha, and soy sauce until well combined. Pour mixture over chicken, seal bag, and place in refrigerator for at least 1 hour.
To make the sauce - mix together the mayo, chili paste, Sriracha, lemon juice, and rice vinegar until well combined. Cover and store in refrigerator until ready to use.
Preheat grill to 375 degrees F. Oil the grill grates. Remove the chicken from the bag and discard the marinade. Place the chicken directly over the fire and grill for 5-10 minutes per side or until the chicken reaches an internal temperature of 165 degrees F. Remove from grill and allow to rest for 5-10 minutes. Once cooled a bit, cut the chicken into strips.
To build the wrap: Take a piece of lettuce, top with rice, cucumber slices, jalapeno slices, mint leaves, and chicken. Top with fiery sauce. Enjoy!!
One Year Ago: Chimichurri Chicken Pita Pizza
Tuesday, August 30, 2011
Shrimp in Love Pasta
I found this recipe many years back and I happened to stumble across it again just recently. I thought I remembered it being pretty good, so I decided to give it another try. Besides the fact that something went wrong and my pasta became way too dry - the flavor was still there. Creamy and delicious but definitely not for anyone counting calories! It's an indulgence I was willing to run an extra mile for :)
Shrimp in Love Pasta
Adapted from Kraftrecipes.com
Printable Recipe
Ingredients:
3/4 lbs angel hair pasta
24 large frozen shrimp, thawed and tails removed
1 cup cherry tomatoes, quartered
5 oz cream cheese
1 cup torn baby spinach
Directions:
Cook pasta according to package directions.
Meanwhile, heat a large skillet over medium low heat. Add shrimp, tomatoes, and cream cheese; cook and stir for 4 to 5 minutes, or until shrimp are done and the mixture is well blended.
Drain pasta and place in large bowl. Add spinach and mix lightly. Stir in shrimp mixture. Enjoy!
One Year Ago: Sweet Pepper Olive Puree Over Penne and Chicken
Shrimp in Love Pasta
Adapted from Kraftrecipes.com
Printable Recipe
Ingredients:
3/4 lbs angel hair pasta
24 large frozen shrimp, thawed and tails removed
1 cup cherry tomatoes, quartered
5 oz cream cheese
1 cup torn baby spinach
Directions:
Cook pasta according to package directions.
Meanwhile, heat a large skillet over medium low heat. Add shrimp, tomatoes, and cream cheese; cook and stir for 4 to 5 minutes, or until shrimp are done and the mixture is well blended.
Drain pasta and place in large bowl. Add spinach and mix lightly. Stir in shrimp mixture. Enjoy!
One Year Ago: Sweet Pepper Olive Puree Over Penne and Chicken
Monday, August 29, 2011
Chicken in Satay Sauce
Do you remember when I raved about the Thai Style Honey Peanut Chicken that I politely borrowed from Mary at One Perfect Bite? Well, folks.. I have found a very close competitor. Enter Anna of At Anna's Kitchen Table and her Chicken in Satay Sauce. This chicken had a lovely peanut butter flavor without feeling as if we were spooning peanut butter directly into our mouths - which, I'm sorry to say, so many satay sauces can be like. I even decided to change things up a bit by adding sugar snap peas - I always forget how much I enjoy having them in stir frys - but you know you can add whatever veggies you want. Remember, it's your canvas to paint on!
This is yet another simple and delicious stir fry for those busy week nights!
Chicken in Satay Sauce
Adapted from At Anna's Kitchen Table
Printable Recipe
Ingredients:
2 Tablespoons low sodium soy sauce
2 Tablespoons brown sugar
2 Tablespoons smooth peanut butter (if you want yours a little more peanut buttery add another tablespoon)
2 Tablespoons sweet chili sauce
1 Tablespoon chili paste
1 Tablespoons lime juice
5 Tablespoons unsweetened coconut milk
1/4 teaspoon crushed red pepper flakes
2 teaspoons vegetable oil
1 pound chicken, cut into bite size chunks (you can you breasts or thighs are both, I used breasts)
2 cups sugar snap peas (or snow peas)
Directions:
In a bowl or large measuring cup, whisk together the soy sauce, brown sugar, peanut butter, sweet chili sauce, chili paste, lime juice, coconut milk, and crushed red peppers until well combined; set aside.
In a wok or deep, non-stick skillet, over medium high heat, add the oil. Once the oil is hot, add the diced chicken. Stir fry for until cooked through, about 5-7 minutes. Add the sugar snap peas and stir fry for two minutes. Add the sauce and bring to a boil, stirring to combine everything. Reduce heat to low and simmer until sauce has thickened just a little, about 1-2 minutes. Serve over rice. Enjoy!
One Year Ago: Grilled Parmesan Chicken
This is yet another simple and delicious stir fry for those busy week nights!
Chicken in Satay Sauce
Adapted from At Anna's Kitchen Table
Printable Recipe
Ingredients:
2 Tablespoons low sodium soy sauce
2 Tablespoons brown sugar
2 Tablespoons smooth peanut butter (if you want yours a little more peanut buttery add another tablespoon)
2 Tablespoons sweet chili sauce
1 Tablespoon chili paste
1 Tablespoons lime juice
5 Tablespoons unsweetened coconut milk
1/4 teaspoon crushed red pepper flakes
2 teaspoons vegetable oil
1 pound chicken, cut into bite size chunks (you can you breasts or thighs are both, I used breasts)
2 cups sugar snap peas (or snow peas)
Directions:
In a bowl or large measuring cup, whisk together the soy sauce, brown sugar, peanut butter, sweet chili sauce, chili paste, lime juice, coconut milk, and crushed red peppers until well combined; set aside.
In a wok or deep, non-stick skillet, over medium high heat, add the oil. Once the oil is hot, add the diced chicken. Stir fry for until cooked through, about 5-7 minutes. Add the sugar snap peas and stir fry for two minutes. Add the sauce and bring to a boil, stirring to combine everything. Reduce heat to low and simmer until sauce has thickened just a little, about 1-2 minutes. Serve over rice. Enjoy!
One Year Ago: Grilled Parmesan Chicken
Subscribe to:
Posts (Atom)