Search This Blog

Monday, June 14, 2010

Sugar Ray's Body Blow Ribs

FINALLY!  Last time I made these I had a tiny problem with fire and ... uhmm... well... they got a bit charred to say the least!  So I'm pleased to present my all time favorite rib recipe, made in honor of the legend himself...Sugar Ray Leonard.  (YAY!!!!!)  Paula Dean did a show called "Risky Business Party" where she invited three guys who have some of the toughest jobs around to come and cook with her.  My favorite, from the episode, was Sugar Ray.  Paula taught him how to make these ribs and I figured I needed to give it a shot.  Since then, I haven't made ribs any other way!  The first night I made them, Chris proclaimed them the "best ribs he'd ever had".  What makes them so so special?  I believe it's the sauce (go figure).  Paula knows her sauces and I LOVE that!

Quick story before I go...my sister and brother-in-law and my nephew are coming to visit (they should be here in about an hour and a half actually).  When I asked my nephew what he wanted me to make for dinner while he was here, I received an immediate response (absolutely no hesitation)......Ribs!  Ok, ribs.. cool.. I've never cooked that many ribs at the same time.. and well.. ouch, how much is this gonna cost me?  Well, as luck would have it, I found ribs for $1.97 a pound over memorial day weekend.  YES!!!!!  I saved myself $30!! $30.. that's BIG!  I was happy and needed to share it with you.  Anyway, this was my practice round for when my nephew's here.  I want HIM to say they are the best ribs he's ever had! :) 


Make sure to leave yourself at least 8 hours, if not over night, to let the ribs marinate.  I promise you won't be sorry you took the time to do it!  Also, this recipe calls for baking the ribs first, then grilling them....you know my need for not using the oven in the summer, so I decided to let the ribs cook in the slow cooker first, then threw them on the grill.  This works great and I would recommend doing it this way, but I will give you both options and let you choose which one works best for you.

And last but not least, this recipe was created for 2 slabs...that's 4 racks....of pork ribs.  I cut it down to something Chris and I could handle, so this recipe is for only 1 rack. (we even have leftovers!)  I also make the full amount of the BBQ sauce as I like to have some for dipping the ribs in while I eat.  You can easily cut it in half if you don't want any extra!

Sugar Ray's Body Blow Ribs
Adapted from Paula Dean, Food Network 
Printable Recipe 
Ingredients:
Dry Rub-
3 Tablespoons brown sugar
2 1/2 Tablespoons sugar
1 Tablespoons salt (I use either kosher or sea salt)
1 1/2 teaspoons black pepper
1 1/2 teaspoons paprika
1 rack pork back ribs
BBQ Sauce-
2 cups ketchup
2/3 cup brown sugar
1/4 cup cider vinegar
2 Tablespoons molasses
1 Tablespoon Worcestershire sauce
1 Tablespoon paprika
2 teaspoons salt
2 teaspoons dry mustard
1 teaspoon onion powder
1 teaspoon garlic powder
1/2 teaspoon red pepper flakes
**Slow cooker option only ingredients***
1 (12oz) bottle of beer (can be anything, I used Bud Light)
2 cups beef broth
1/4 cup barbecue sauce (if you make the full amount of sauce from this recipe use that, you'll have plenty!!)

Directions:
Combine all the ingredients for the dry rub in a small bowl.  Rub the ribs with the dry rub, wrap in plastic and let marinate in the refrigerator for 8 hours or overnight.

For the BBQ sauce:
Add all the ingredients in a medium saucepan.  Bring to a boil then reduce to a low simmer.  Let simmer for 25 minutes, on low heat, stirring occasionally.  (you can make this a day ahead of time and store in an airtight container in the fridge)

Slow Cooker and Grill Method:
Pour all slow cooker ingredients into your slow cooker.  Add the ribs and cover.  Cook on high for one hour, then turn down to low and cook another 1-2 hours.  (you want the ribs to be almost cooked through..it will finish on the grill)  

Preheat the grill to medium heat.  Reserve 1/4 - 1/2 cup of the sauce.  Brush ribs with sauce and place on grill.  Cook for 10 minutes and then turn the heat down and continue to cook until ribs are done ...about 5-10 more minutes... turning and basting with the sauce.  Remove from grill and serve with reserved sauce!  Enjoy!


Bake and Grill Method:
Preheat the oven to 275 degrees.  Place the ribs on a large baking sheet lined with aluminum foil.  Cover tightly with foil and place in middle rack of oven.  Let roast for 2 1/2 hours.  Follow the grill instructions from above. 

Saturday, June 12, 2010

Old Bay® Grilled Fish

The other morning I put on one of my favorite pair of jeans and when I zipped them up, I realized they were a tad bit snug.  UGH!  I knew it was going to happen.  I no longer run around, up and down stairs all day.  Not only do I sit on my butt all day, but the food.. OMG...every other day they have some sort of scrumptious snack floating around the office.  Granted, I don't have to eat it, but I mean.. it's pizza, and donuts, and cookies, and trail mix, and skittles, and then they take us out for frozen yogurt...and did I forget to mention chocolate?  Good gravy!  mmmmmmm...gravy!!!!!!    :)    ANYWAY.... So this morning I made a conscience effort to start eating a bit healthier again.  I even took a salad to lunch...no more being tempted by pizza and beer!

This was a very simple dish to make, sort of a spur of the moment recipe.  It's nothing special, but it's light and healthy and very simple to make.  You could use this same concept on chicken, except I would double the recipe and marinate your chicken in it, instead of just brushing it on.  You could use this on shrimp also...and again, I would marinate it first.  If you didn't want to grill this dish, you can bake it at 400 degrees for 12-14 minutes.  And of course, I've said it before, and I'll say it again... any white fish will do really :)

Old Bay® Grilled Fish 
Printable Recipe 
Ingredients:
3 Tablespoons extra virgin olive oil
1 Tablespoon lemon juice
1 1/2 teaspoons Old Bay® seasoning
1/4 - 1/2 teaspoon garlic powder (depending on how garlicky you want it)
4 Tilapia fillets

Directions:
Preheat your grill to medium.

In a small bowl, mix together all ingredients except the fish.  Brush both sides of each fillet with mixture and place fish on squares of aluminum foil sprayed with non-stick spray.  Fold and seal the foil into packets.  Place foil packets directly on the grill and grill for 12-14 minutes, turning at least once.  Carefully remove from grill and foil packets.  Enjoy!
 
In case you are interested, the rice side dish is just Garlic Rice with sauteed diced zucchini and bell pepper.    

Friday, June 11, 2010

New New Orleans Pasta

This is one of those dishes I use to make often, then something else really fantastic took it's place and the recipe was put in a book and placed on a shelf.  The other day I was reading The Obsessive Chef's recipe for Shrimp Mac & Cheese (you gotta check out the recipe, it is scrumptious!) when one of the ingredients sparked the memory of this dish:  Chorizo.  Chorizo is a form of either fresh sausage (with lots of yummy seasonings) or as a fermented cured smoked sausage.  It has a very distinctive smokiness and deep red color.  I had never had chorizo until I moved to Arizona.  My first experience with it was in a breakfast burrito with egg, cheese (3 to be exact), chorizo, and homemade salsa.  YUM!  I was instantly hooked!  There are different types of chorizo; Spanish, Portuguese, Mexican, South American, Philippines, and a few others.  In this recipe, I used Mexican because it was what I had access to.  I suppose you could use Italian sausage in place of the chorizo, but you will definitely get a different flavor, but it is an option if you can't find or don't like chorizo.


New New Orleans Pasta
Adapted from Emeril Lagasse 
Printable Recipe 
Ingredients:
3/4 lbs penne pasta (you can use a full pound, aka 16oz)
1 Tablespoon olive oil
1 boneless, skinless chicken breast - cut into bite size chunks
3 chorizo sausages, casings removed
1 large garlic clove (or 2 small ones), minced
4 green onions, chopped
1/4-1/2 teaspoon Louisiana hot sauce
1 teaspoon Worcestershire sauce
3/4 cup heavy cream
1/4 cup grated parmesan cheese
salt & pepper
Creole seasoning (recipe to follow)

Directions:
Cook pasta according to package directions.  Drain; reserving 1/2 cup pasta water.

Meanwhile, heat olive oil in a large skillet.  Add the sausage and chicken.  Cook 5 minutes, breaking up the sausage as it cooks.  Add the hot sauce and Worcestershire.  Add the green onion and garlic and cook for 1 minute.  Slowly whisk in the heavy cream; stir to combine.  Stir in the parmesan cheese and season with salt, pepper, and Creole seasoning.  Add the pasta to the skillet and toss to combine.  (If sauce is too thick, add a bit of pasta water).  Sprinkle with extra parmesan cheese and enjoy!

Creole Seasoning:
2 1/2 tablespoons paprika
2 tablespoons salt
2 tablespoons garlic powder
1 tablespoon black pepper
1 tablespoon onion powder
1 tablespoon cayenne pepper
1 tablespoon dried leaf oregano
1 tablespoon dried thyme

Combine all ingredients thoroughly and store in an airtight jar or container. 


Thursday, June 10, 2010

Herb Marinated Chicken

Have you ever had to actually name a recipe?  It's not as easy as you think sometimes.  You want it to sound tasty and flavorful and mmmmmmmmmmmmm... and sometimes you just can't figure out what that name should be.  I'm not the most creative person (outside of the kitchen) so, though the name might not be "exciting", the chicken is definitely a must try!

This chicken was moist AND delicious.  I would say that the chicken stayed so moist by being marinated in mayonnaise, but I have to tell you, the key to keeping chicken tender and juicy is by not over cooking it.  I know everyone is worried about under cooking chicken, I mean who wants to cut into a piece of chicken and see a pink center right?  It's not steak, my friends!!  But the problem then becomes that people will over cook it.  Over cooked chicken can never be moist, no matter what you marinate it in or for how long.  Keep on eye on your chicken, as soon as it is no longer pink remove it immediately!  Remember, the chicken will continue to cook even after you take it off the grill.  Also remember, thicker pieces will take longer to cook.  By all means...use a meat thermometer if you have it.  Chicken is cooked at 165 degrees.  If you want all your pieces of chicken to cook the same, you are going to have to pound them down to the exact same thickness.  You'll want to use the flat side of your meat tenderizer for that.

Anyway.. this chicken has the potential to be melt in your mouth good... don't ruin it by over cooking it!!!

Herb Marinated Chicken
Printable Recipe 
Ingredients:
4 boneless, skinless chicken breasts
1/3 cup mayonnaise
1 teaspoon grainy mustard (you could use Dijon also)
1 teaspoon lemon juice
1 teaspoon Worcestershire sauce
1 teaspoon fresh rosemary, chopped
1 teaspoon fresh basil, chopped
1 teaspoon fresh oregano, chopped
1/2 teaspoon paprika
1/4 teaspoon cayenne pepper
salt and pepper

Directions:
Mix all the ingredients, except the chicken, together in a small bowl.  Place the chicken in a Ziploc bag or shallow dish.  Spoon the mayo mixture over the chicken and massage bag to coat.  Seal and let marinate in the refrigerator for at least 1 hour.

Preheat your grill to about 400 degrees (medium, medium-high).  Remove the chicken from the bad and discard the marinade.  Place the chicken on the grill and cook for about 5-8 minutes per side, depending on the thickness.  Remove from grill and Enjoy!!

Wednesday, June 9, 2010

Peanut Butter Chocolate Chip Cookies

I know what you're thinking....she baked AGAIN???  After all this talk, day after day, of not using the oven when it's so hot, she BAKED?  No, No, and No!  You can just put that silly thought aside!  I didn't actually bake again, I made these cookies well over a month ago and I'm just now finally getting around to posting about them!  These little devils didn't turn out exactly like I wanted them too, but hey, sometimes that's the way things go in the kitchen.  They weren't bad, believe me, we ate them... boy did we eat them!!  I was just expecting something different, that's all.  Not even necessarily better, just different.  My biggest problem came from the fact that I used too much flour (I've adjusted the amount in this recipe), so the dough was really dry and hard to handle.  Once I figured out a cure for it, they worked a lot better, but I believe it's why they didn't turn out like planned.  Nonetheless, these are peanut butter cookies with chocolate AND peanut butter chips....how can they really be bad, right?

Peanut Butter Chocolate Chip Cookies
Printable Recipe 
Ingredients:
1 1/4 cup all purpose flour
1 teaspoon baking powder
1/2 cup granulated sugar
1/2 cup light brown sugar
1 stick butter, softened
1 egg
1 teaspoon vanilla extract
1 cup creamy peanut butter
1 cup peanut butter and milk chocolate chips (you can just use one or the other if you can't find the combo bag)

Directions:
Preheat oven to 350 degrees.

In a bowl, sift together the flour and baking powder.

In the bowl of a standing mixer, on low, beat together the sugar, brown sugar and butter until smooth.  Slowly add the egg and then the vanilla.  Once combined, add the peanut butter.  Slowly add the flour mixture a little at a time.  Dough should be moist but not real sticky.  Fold in the peanut butter and chocolate chips.

Shape dough into balls the size of walnuts, place on cookie sheet and flatten with fork in a crisscross pattern.  Bake for 10-12 minutes or until cookies begin to brown on the edges.  Remove from oven and allow to rest on cookie sheet for a couple of minutes.  Transfer to wire rack and allow to fully cool.  Enjoy!

Tuesday, June 8, 2010

Mr. T does some movie bashing!

That's right, I was a fan of the A-Team.  I was intrigued by the thought of a movie, too....until I watched a preview that looked absolutely RIDICULOUS!!  lol  And now.. now I find out even Mr. T didn't like it!  So what is a fan to do?  Go see it and risk a HUGE disappointment or wait until it comes out on video and if it sucks at least I only spent $5 instead of $9!!!???

According to Cinematical.com, Mr. T has a few problems with the rebooting of the long ago TV episodes....check it out: (this comes directly from Cinematical.com)

"You knew this was coming. Even if Dirk Benedict hadn't gotten the ball rolling last month on the A-Team movie bashing, a negative response was to be expected from Mr. T. Unlike Benedict (and Dwight Schultz), the mohawked '80s icon had already refused to appear in the film for a cameo role, claiming it wouldn't be right. But also unlike the first slam, this one comes from someone who has seen the movie. T's major complaint, quoted by WENN, is that "it's nothing like the show we turned out every week." How the adaptation is different especially bothers him:

"People die in the film and there's plenty of sex," he said. "But when we did it no one got hurt and it was all played for fun and family entertainment. These seem to be elements nobody is interested in anymore."

Did you know the guy had such an issue with content like this? Despite always looking like a bad ass, Mr. T is a born-again Christian and has always represented good values and been a good influence on kids through TV appearances and cereal boxes. The increase of sex and violence should be more of a draw to others, though. Mr. T does acknowledge the movie will "do big business at the box office" but admitted that it was just too graphic for him. Unfortunately, he didn't use his trademark phrase and say that he pities the fool who'll go see it.

Mr. T starred on The A-Team series as Bosco "B.A." Baracus, a role being played on the big screen by UFC fighter Quinton "Rampage" Jackson. The movie adaptation opens this Friday. Are you any less likely to see it now that Mr. T does not endorse it?"
_____________________________
Mr. T's endorsement would have helped ... I'm not gonna lie :) 

Basil & Lime Tilapia with Basil Aioli

I do love aioli.  Maybe it's my love for mayonnaise, maybe it's my love for sauces, maybe it's a mixture of both? Either way, I love it!! The first time I had aioli, I was hooked.  I literally could have just eaten it with a spoon. MMMMMMMM!!  This aioli was no exception.  Granted, I should probably try and make one from pure scratch, with homemade mayo and everything, but honestly, it feels like a ton of work and I know how easy it is to screw up....so I buy mayo and make my aioli with that....call the cops, see if I care!  You are gonna wanna try this recipe first, then maybe you won't be so ashamed of me!  Of course, I grilled this fish in a foil packets, but you can bake them just as easily.  I don't think I have to keep telling you how warm it gets here.. and well.. in all honesty, I really like grilling.  It's sort of my calling outside of the kitchen :)  This fish was light and fresh and very flavorful, but I believe the basil aioli is what really makes the dish.  Shocking, huh?  The sauce is my favorite part of the meal!

Basil & Lime Tilapia with Basil Aioli
Printable Recipe 
Ingredients:
4 Tilapia fillets
2 Tablespoons lime juice
4 Tablespoons extra virgin olive oil
1 Tablespoon fresh chopped basil
1/2 teaspoon salt
2 teaspoons tequila
pepper to taste

For Aioli:
3 Tablespoons finely chopped basil
2 Tablespoons mayonnaise
1 Tablespoon lemon or lime juice
1 1/2 teaspoons Dijon mustard
1 garlic clove, minced
1/2 teaspoon olive oil

Directions:
In a small bowl, mix together all ingredients except for the fish.  Place the fish in a Ziploc bag and pour the marinade over the fish.  Seal the bag and refrigerate for 30 minutes.

Mix together all ingredients for the aioli.  Place in refrigerator until you are ready to use.

Preheat your grill to medium.

Tear off squares of aluminum foil and spray with non-stick spray.  Seal up into packets and place directly on the grill.  Grill for 12-14 minutes, turning once.  Carefully remove from grill and foil packet...serve with basil aioli on the side... Enjoy!  


Monday, June 7, 2010

Sweet and Spicy Grilled Chicken

I use to get about 10 different cooking magazines (I'm not kidding either).  After realizing that I never cooked a single dish from over half of them, I canceled all of my subscriptions except for two of them.  They are my favorite two, of course.  One is the Food Network Magazine and the other being Taste of Home Simple & Delicious magazine (thanks mom!!).  Both have simple, budget friendly, and delicious recipes.  Yes, you can actually get all the recipes in the magazine online, but there is something about flipping through a magazine that I like.  I don't want to give them up!  This recipe happens to be from the Simple & Delicious magazine.  It's simple AND delicious.. just like the magazine said!!  Wow :)  impressive!  This blend of sweet and spicy spices works perfectly.  Not one flavor is over powering and I really like that.  This is not only easy and yummy, but it is healthy too... so, go ahead, light up that grill, get it ready for this recipe!!

(by the way, sorry the pictures are so yellow..this was one of those nights I was messing around with the settings on my camera and these, unfortunately, were the best pics!)

Sweet and Spicy Grilled Chicken
Adapted from Melissa Ball, Simple & Delicious, May 2010 issue
Printable Recipe 
Ingredients:
2 Tablespoons brown sugar
1 Tablespoon paprika
2 teaspoons onion powder
1 teaspoon salt
1/2 teaspoon chili powder
4 boneless, skinless chicken breasts

Directions:
Combine the first 5 ingredients; rub over chicken.  Let sit in refrigerator for 30 minutes to an hour.

Preheat your grill to medium, medium-high.  Rub grill rack with a little olive oil.  Grill chicken (covered) 5-8 minutes per side depending on the thickness.  (Meat thermometer should read 170 degrees.)  Enjoy!

(Nutritional Information: 1 chicken breast = 207 calories, 4g fat, 6g carbohydrates, 94mg cholesterol, 679mg sodium, 35g protein.)  

Sunday, June 6, 2010

Thank you Foodie Blogroll!!!

YAY!!!!  I WON I WON I WON!!!  Thank you SO much Foodie Blogroll for my copy of Steven Raichlen's Planet Barbecue!!!  And for those of you who have been reading my blog, you will know that this book will not go to waste on me!  I couldn't even wait to actually get it before I posted about it!  

I joined the Foodie Blogroll (You can check out the widget on the right side bar of this blog) shortly after I started my blog.  Simply put, Foodie Blogroll is a place to go if you have a food blog.  It helps bloggers, like me, to get the word out about them and hopefully drive more traffic to their sites.  Each month they do a certain amount of giveaways.  All you have to do is leave a comment and you are entered.  I've entered each month since I started and was absolutely, positively, SHOCKED when I got the email on Friday saying that I had won.  I actually thought it was a joke!  lol  Not only had I won, but I won the BBQ cookbook I REALLY REALLY REALLY wanted!!  Like I said, I was so excited I couldn't even wait to get it to tell you all about it. Oh, the new things I'll be able to try...I can't wait to share the wonderful recipes with you, my constant readers!!  We are going to have one kick ass, barbecue filled, summer!  Stick around, I believe you will not be disappointed!


Thanks again Foodie Blogroll, not only for the cookbook, but for the people you have helped find my site.


Ciao!
Jenn

Friday, June 4, 2010

Steak de Burgo

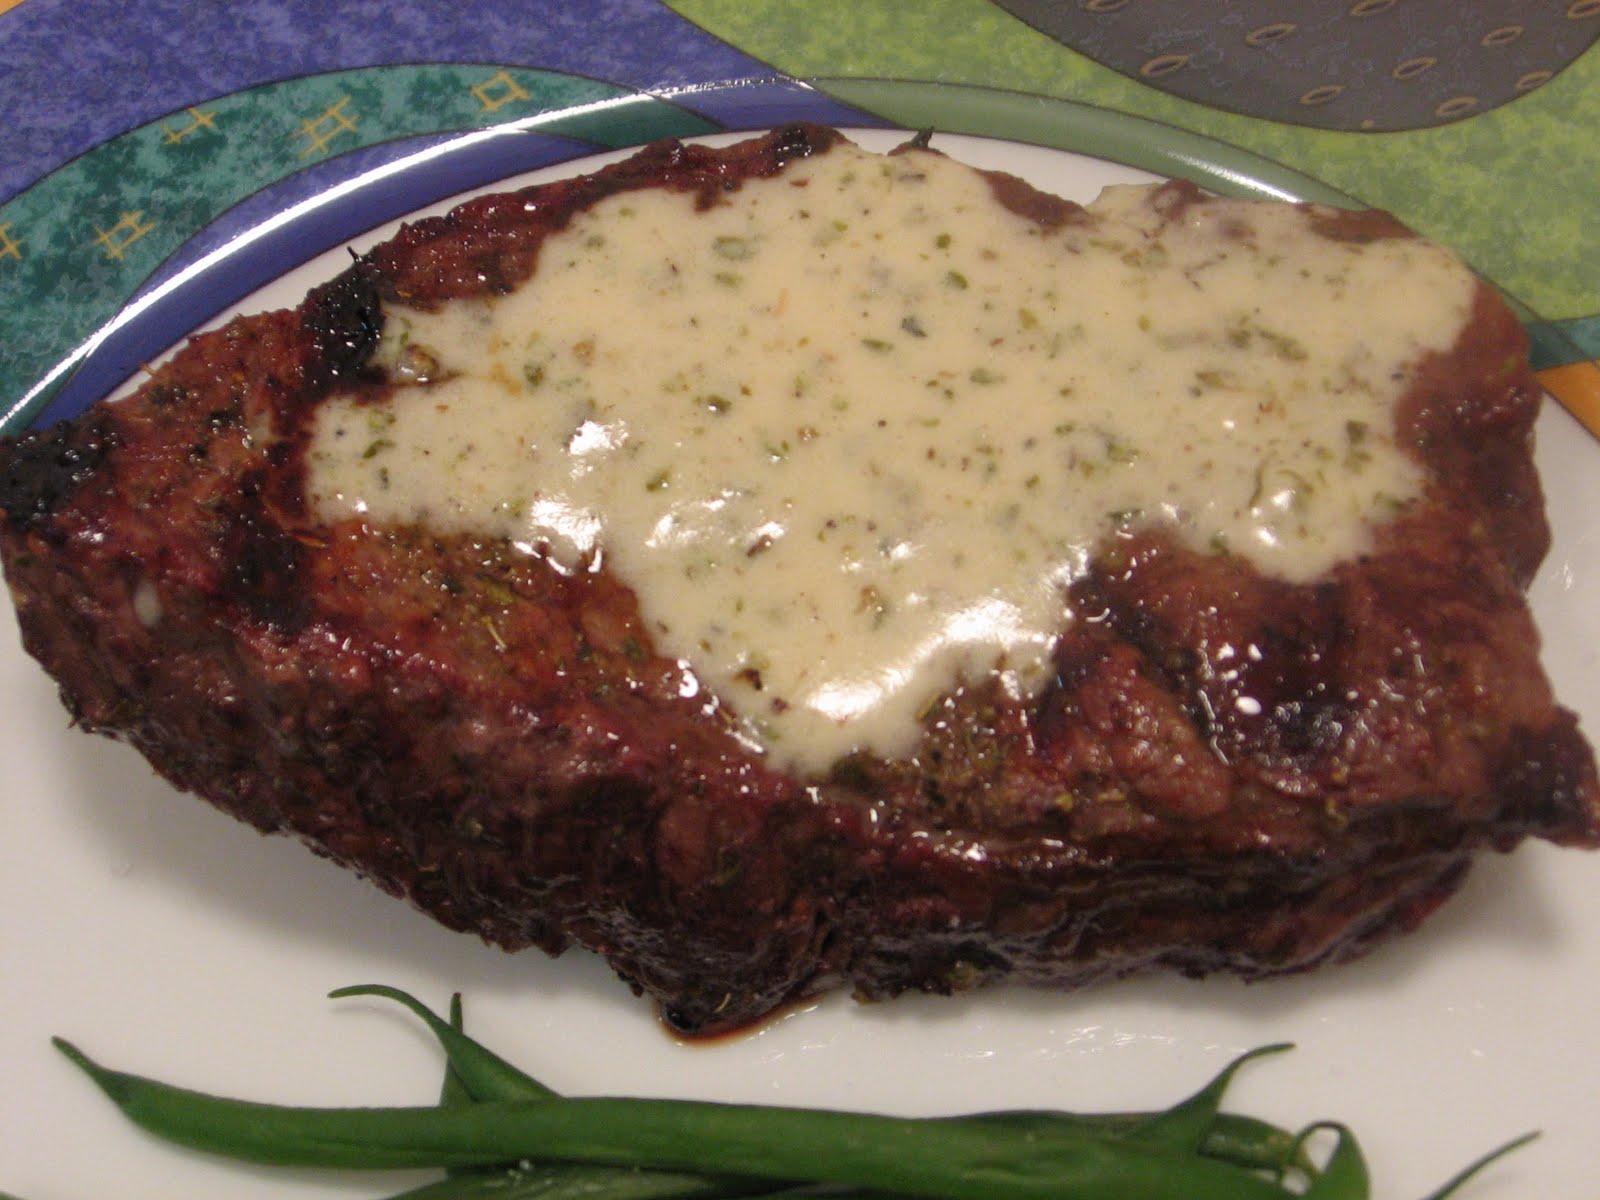
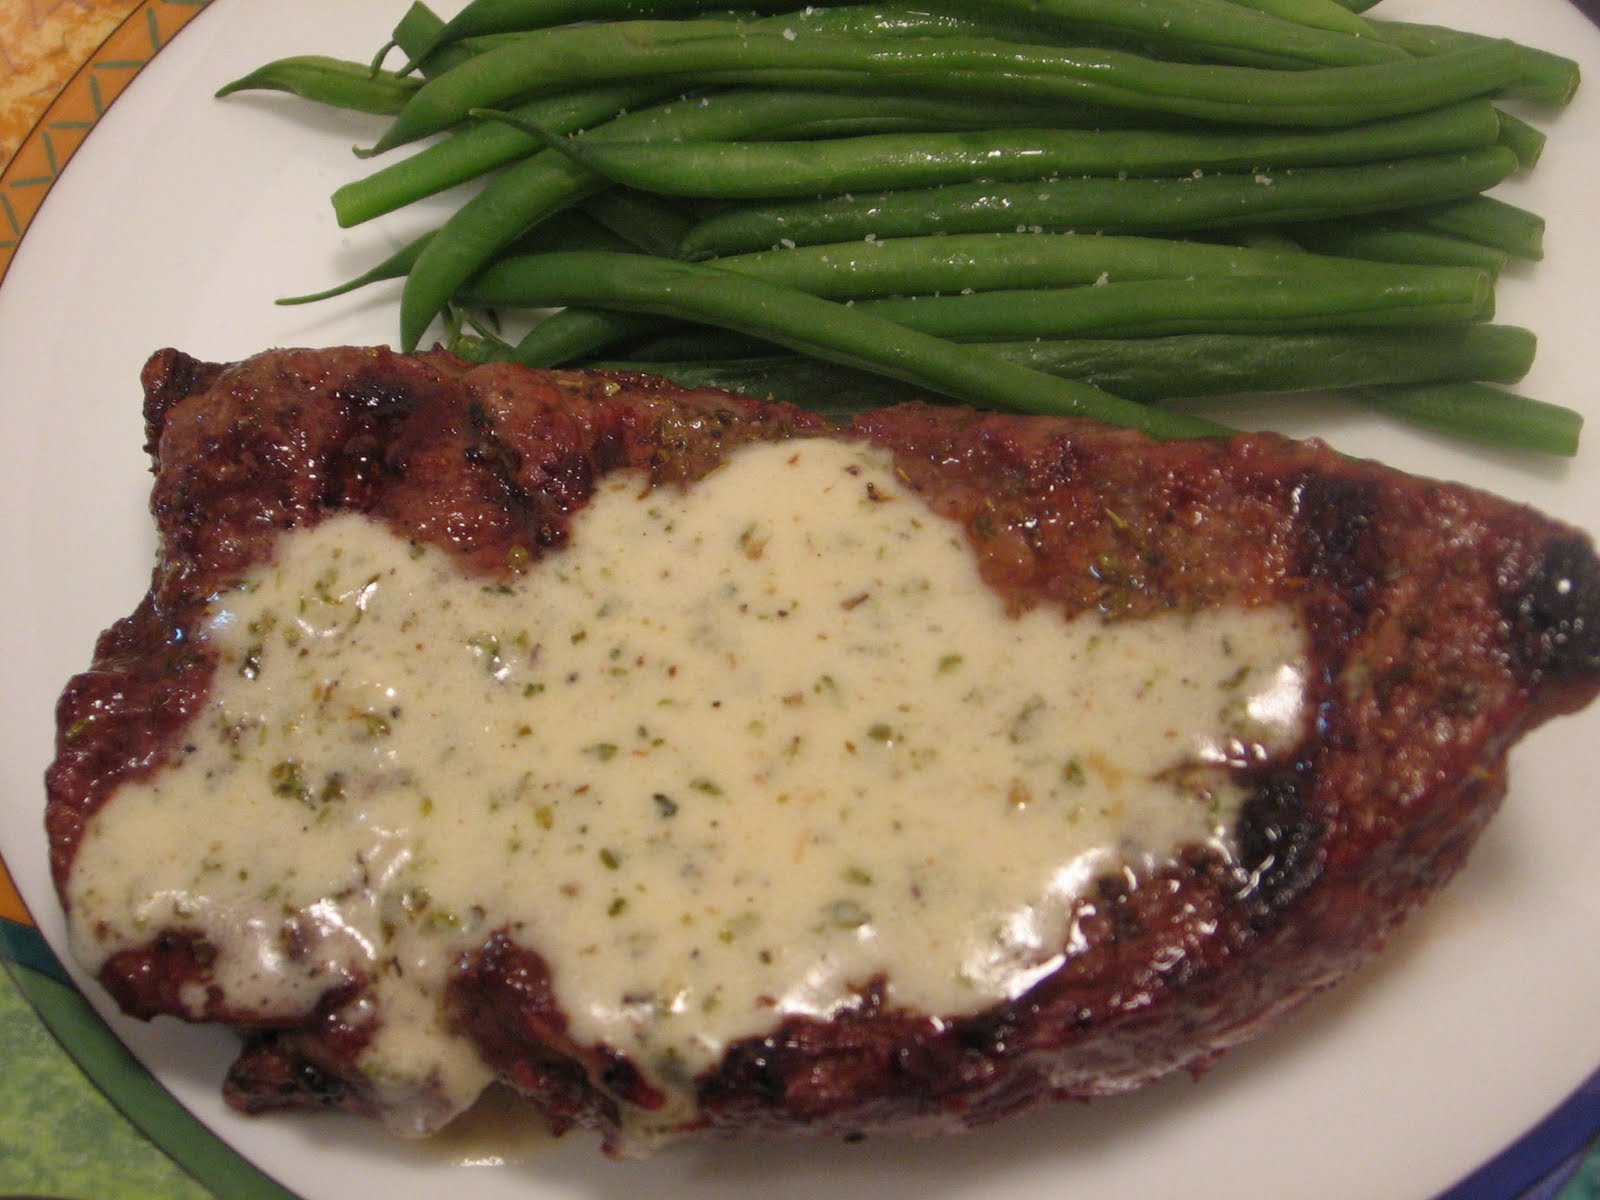
I visit The Obsessive Chef's website daily.  Stephen is not afraid of anything in the kitchen.  There are recipes on his site that I know I WANT to try, but might be a bit hesitant out of fear.  There are also recipes on his site that I know I will never try...he even has a list of recipes:  "The best __________ that you'll never make!"  lol  His site is full of interesting and very tasty recipes, you have to check it out if you have not been there yet.  Recently, he's made a ton of recipes that I will make....eventually! (so many recipes, so little time!)  The other day, he posted a recipe for Steak de Burgo that I KNEW I wanted to try asap!  Fortunately, for me, I had steaks already on the menu for the following week AND I had all the ingredients on hand (YAY!).  So the other night, I changed my planned meal and made Steak de Burgo instead.  OH MAN, was I happy I did.  This steak was scrumptious!  Granted, I think the cut of beef I found had a little to do with it, but the seasoning you put on the steak and the SAUCE.... oh, yes, there's sauce.... YUM!!!

One more thing before I go....I finally figured out how to make a printable recipe link!!  So now printing out recipes is that much easier!


Steak de Burgo
Adapted from The Obsessive Chef 
Printable Recipe 
Ingredients:
1.18 lbs top sirloin steak
1/2 teaspoon dried oregano
1/2 teaspoon garlic powder
salt and pepper
olive oil
1/2 Tablespoon bacon grease (**I used this because the original recipe calls for cooking the steaks in a pan on the stove, I wanted to grill them, so I thought the bacon grease would add a bit more flavor to the sauce...you could just as easily use extra virgin olive oil**)
1 garlic clove, peeled and halved
1/4 cup chicken broth
2 Tablespoons unsalted butter, cold and cut into pieces
2 Tablespoons heavy cream
1 teaspoon dried oregano

Directions:
Mix the 1/2 tsp oregano and 1/2 tsp garlic powder together in a small bowl.  Season both sides of the steak with salt and pepper.  Rub each side of the steak with olive oil and then season with the oregano/garlic mixture.  Let rest at room temperature for 10 minutes.

Meanwhile, preheat your grill to medium high.  

When the grill is ready, lay the steaks directly on the grate.  Grill on each side for 5-10 minutes (depending on your desired doneness), turning the steak only once.  Remove from grill and let rest 3-5 minutes before cutting into it.

While your steaks are cooking or resting, start the sauce.  Heat the bacon grease in a small sauce pan over me medium heat.  Add the garlic and cook for one minute.  Slowly stir in the chicken broth.  Let it boil for about 2 minutes (you might have to turn up the heat).  Add the butter, heavy cream, and oregano.  Let the sauce simmer for 3-5 minutes.  Serve drizzled of the steaks....Enjoy!

Thursday, June 3, 2010

Banana Bread with Cinnamon Topping

 
That's right... I baked!  I know, I know, I said I don't bake once it gets warm here...but...well... I may have told a small little fib.  It's not that I don't EVER bake, it's just that I try NOT to when it gets so warm here.  And wouldn't you know it, the day I decided to bake this wonderfully tasty bread, it was 99 degrees here in the desert!  OUCH!  (good thing I started at 8:00am!!)  But, sometimes you gotta do what you gotta do...and I HAD to do THIS!  OMG, this was the best banana bread I've had.  Ok, so you might find it odd that I say that because it is my banana bread recipe, but the topping....the topping is what makes this even better and THAT was not my idea.  The idea for the strudel like topping came from Andrea The Kitchen Witch.  I saw her post for cinnamon topped banana bread the other day... and so did Chris.  Chris LOVES banana bread.  I remember before we started dating that I found out he liked it, so I made it and brought it into work (we use to work together, it's how we met) a few days later!  hehehe  I don't know if he even got the hint, but hey, I tried and that's what counts right? :)  Since that day I have actually perfected my banana bread recipe...and now...with Andrea's help, I think I've reached a whole new height.  Even if you have your own banana bread recipe, you gotta try this topping on it.  I swear, you just might not make it any other way!

Banana Bread with Cinnamon Topping
Ingredients:
3 over ripe bananas
1 cup sugar
1 stick of butter, softened
1 teaspoon vanilla
1 egg
1 1/2 cup of all purpose flour
1 teaspoon salt (I used kosher salt)
1 teaspoon baking soda
Topping:
1/4 cup brown sugar
1 teaspoon cinnamon

Directions: 
Preheat oven to 350 degrees.

In a medium sized bowl, mash the bananas well.  Add sugar, butter, and vanilla.  Mix well.  Add the egg and mix until just incorporated.

In another bowl, sift together the flour, salt, and baking soda.  Slowly add the dry mixture to the banana mixture a little at a time.  (Be sure to stop and scrape down the sides of the bowl if you are using a mixer.)  Mix well.

In a small bowl, mix together the topping ingredients.

Pour the batter into a greased loaf pan.  Top evenly with the cinnamon sugar mixture.  Bake for 50 minutes or until a tooth pick inserted in the center comes out clean.  Let cool at least 30 minutes before you slice into it.  Enjoy! (I like mine warm with a little butter...yum!!!) 

Wednesday, June 2, 2010

Asian Inspired Pork Chops

You know, by now, that hoisin and sriracha and I are very good friends.  What you didn't know is that I'm also close friends with Sambal Oelek sauce.  It's a fresh ground chili paste and it's WONDERFUL!  I use to use it all the time and then hadn't been able to find it at my local grocery store, then it had been so long since I had cooked with it, that I kind of forgot about it.  Well, the other day I was walking in the Asian food isle of my store and lo and behold, there it was... calling to me.......
So, needless to say I bought some.  With it, I created this Asian inspired pork recipe.  It's simple and takes no time at all... that's the way I like my recipes most days!  If you didn't have Sambal or couldn't find it or didn't want to even try it, you can easily use Sriracha instead, though Sriracha is a bit hotter then Sambal, so add a little at time.  Beware, though, Sambal is spicy too, you might want to test it before you just go and add the full amount. 
 
Asian Inspired Pork Chops
Ingredients:
4 boneless center cut pork chops
2 Tablespoons Hoisin sauce
1 Tablespoon chili paste (Sambal Oelek Sauce) 
juice from 1/2 a lime
1 garlic clove, minced

Directions:
In a small bowl, mix together the Hoisin, chili paste, lime and garlic.  Place pork chops in a Ziploc bag and pour sauce over top.  Seal bag and massage sauce around the meat to coat.  Marinate in the fridge for 4 hours.

Place pork chops on a preheated grill and cook for 6-8 minutes per side (turning only once).  Or you can bake in a preheated 400 degree oven for 12-15 minutes or until the pork chops are cooked through.  Serve with rice or your favorite side.  (I served mine with garlic rice tossed with sauteed zucchini, it was perfect!!)  Enjoy!

Tuesday, June 1, 2010

Grilled Sriracha Glazed Chicken

First, let me apologize for the pictures today.  The lighting is way off and far too bright and almost washes this wonderful looking chicken completely out.  I believe I am pictured doomed when it comes to this recipe.  A few weeks ago, I made this chicken and it turned out incredible AND I got a fantastic picture of it.  Let me tell you, I was HAPPY!  Then..wouldn't you know it...I pull a really dumb move while I'm at my computer and before you know it...the pictures were GONE.  Deleted.  Never to return.  I deleted it straight from my little card from my camera, so there was no way to retrieve it at all.  I was bummed...and that's putting it lightly.  The one good thing about that disaster... I got to make this dish again!!!  YUM!  That pretty much sums this dish up!  Granted, if you are not a spicy food lover, this will not appeal to you, but if you can handle heat...you gotta try this!  I created this recipe last year using bone-in, skin-on chicken breasts, they ended up being like chicken wings, but breasts :)  I loved it that way, but this time, I had boneless, skinless breasts and figured, what the heck, it can't hurt to try.  I did have to do things just a bit different from the original recipe, but I still think it turned out wonderful!
   
Grilled Sriracha Glazed Chicken
Ingredients:
2-4 skinless, boneless chicken breasts
salt and pepper
garlic powder
cayenne pepper (optional)
3 Tablespoons unsalted butter
1/4 cup Sriracha Hot Chili Sauce
1 teaspoon lime juice
1 teaspoon honey

Directions:
Lightly season both sides of the chicken with salt, pepper, garlic powder, and cayenne.  Cover and let set in the refrigerator for 30 minutes to an hour.

In a small bowl, melt the butter.  Add the Sriracha, lime juice, and honey.  (if the mixture thickens up, just zap it in the microwave for a few seconds)  Using 2 Tbls of the mixture, brush both sides of the chicken.  Return to the refrigerator to marinate for at least 1-2 hours.

Preheat your grill to medium-high.  Place chicken on the grill, brush with remaining sauce.  Grill for 5-8 minutes.  Flip chicken over, brush with sauce; continue grilling for another 5-8 minutes or until the chicken is cooked through.  Remove from grill and ENJOY!