Search This Blog

Friday, May 14, 2010

Vanilla Ice Cream

I was contemplating on whether or not to purchase Madagascar vanilla beans from my local spice store when, as luck would have it, I won a kick ass giveaway from Michelle (All Home Cooking. All Year Long) and it included not just one but THREE of those exact vanilla beans.  My contemplation behind me, I got one killer idea.  Why not use one of those beans and make vanilla ice cream!!!  YAY!  What a great idea Jenn...you are a genius!  And it doesn't stop there...I not only got to use this wonderful vanilla bean but I also got to use some amazingly good vanilla extract:  Michelle's very own, homemade pure vanilla extract!!
Anyway...so with these two fantastic ingredients, I knew right away I was going to make a batch of vanilla ice cream.  This recipe is simple.  That's all you need to know.  There are no eggs involved, so the process is quick.  There are 5 ingredients.  Uhmm...yea... simple, see.  I will admit to you, though, this was the first time I've ever actually had to use a real vanilla bean.  I was worried about scraping out the little seeds, but it really wasn't that tough.  I would suggest putting the bean on top of some wax paper, though.  That way you can drop the little amounts of the seeds on there and then just transfer right to the pot.  They tend to stick a bit to your fingers and you don't want to loose anything...that's good stuff you'd have to wash down the sink!!  Also, don't throw away that precious pod either.  Put it in a jar with an air tight lid and cover with sugar for homemade vanilla sugar.  Place the pod in your coffee container to add a bit of a vanilla flavor to your morning blend.  The point is, don't let them go to waste!

The ice cream came out perfect!  This was by far our favorite ice cream so far!!  It's pure decadence.  Creamy and rich.  It's almost sinful.  ALMOST!!

Vanilla Ice Cream
Recipe courtesy The Perfect Scoop by David Lebovitz
Ingredients:
3 cups heavy cream (or 2 cups heavy cream and 1 cup whole milk)
3/4 cup sugar
pinch of salt
1 vanilla bean, split in half lengthwise
3/4 teaspoon pure vanilla extract

Directions:
Pour 1 cup of cream into a medium saucepan and add sugar and salt.  Scrape the seeds from the vanilla bean into the saucepan and add the pod to the pot.  Warm over medium heat, stirring, until the sugar has dissolved.

Remove from heat and add the remaining 2 cups cream and vanilla extract.  Chill the mixture in the refrigerator thoroughly (I let mine sit in there for over 4 hours).  When ready to churn, remove the vanilla bean, rinsing and reserving for another use.  Mix ice cream in an ice cream maker according to the manufactures instructions.  Enjoy....oh and you will!!!
This is what it looked like right from the ice cream maker.....perfect!!
 YUM!

Thursday, May 13, 2010

Tilapia in Olive Oil & Garlic

I have not had the best of luck with fish recipes lately.  They have been hit or miss and mostly misses.  One night I couldn't get a good picture of the dish I made, another night it just wasn't really appetizing, another night it was just nothing special....oh wait, that's what this one was.  Unfortunately, this fish was nothing special..I can say that because it's a recipe I created...BUT that does not mean it wasn't good.  It was good, it just wasn't...well, it wasn't anything to "write home about".  If you make it, though, you CAN make it better!!  I think if you let the fish soak in the oil and garlic a longer period of time, the flavor might be better.  It's not bad though, it just lacked in that old flavor department.  I think adding a little lemon would help "kick it up a notch", as Emeril would say.  I added those changes to the recipe I'm posting.  

Regarding the lemon:  You can squeeze the juice on each fillet OR (and this is my recommended way) you can slice it and lay the slices on top of each fillet.  You can easily cook this fish in the oven or on the grill.  I love the grill, so that's how I wrote the recipe...but if you want to use your oven, preheat it to 400 and bake 12-15 minutes.  (Before you do that though, you'll want to put the fillets in a Ziploc bag, pour the olive oil and garlic over and let marinate for 30min-1hour.)

Tilapia in Olive Oil & Garlic
Ingredients:
4 Tilapia fillets
4 garlic cloves, minced or pressed
8 teaspoons olive oil
salt & pepper
Italian Herb Seasoning
1 lemon, sliced into 4 or 8 slices

Directions:
Tear off 4 squares of foil large enough to make a packet around each fillet.  Spray with non stick cooking spray.  Sprinkle both sides of the fish with salt and pepper.  Place one fillet on each square of foil.  Drizzle each fillet with 2 teaspoons of olive oil and one minced or pressed garlic clove.  Sprinkle with Italian Herb seasoning.  Lay the lemon wedges on top of each fillet and seal foil into packet.  Let marinate at least 30-45 minutes in the refrigerator.

Preheat grill to 350 degrees.  Place the foil packets on the grill and cook 12-14 minutes, turning once.  Be careful removing the fish from the grill and from the foil packet.  Serve with tarter sauce or lemon aioli. Enjoy!

Wednesday, May 12, 2010

Grilled Chicken & Veggie Pasta

I came up with this recipe last year when I was on my grill kick.  It was simple and delicious.  As you know, I'm a huge fan of pasta....and I love to grill.... so the two combined....well, try it, I know you will like it!  You can use any vegetables you want, actually.  And if you didn't have access to a grill, you could easily roast the veggies in the oven or even just saute them in a skillet.  This is another "canvas" recipe.  I'm giving it to you and if there are things you don't like, or don't have, change it, I promise I will not be upset or offended!  I used fresh rosemary and basil because I had it on hand.  If I had fresh oregano or thyme, I would have used those instead.  (Using dried herbs would work just find too!)  You don't even need to add the chicken if you didn't want to.  Heck, you could even use a different kind of pasta!  So, see, just a canvas for you to create on!


Grilled Chicken & Veggie Pasta
Ingredients:
1 lb. angle hair pasta
1 red bell pepper, stemmed and seeded
1 yellow bell pepper, stemmed and seeded
1 zucchini squash, ends removed and cut in half length wise
2 boneless, skinless chicken breasts
salt and pepper
6 Tablespoons extra virgin olive oil
3-4 garlic cloves, unpeeled
1 Tablespoon each fresh rosemary, parsley, & basil - chopped
1/2 teaspoon red pepper flakes
1 lemon, zested and juiced
shredded parmesan cheese

Directions:
Preheat your grill.  Place garlic cloves in a foil packet and drizzle with a little olive oil; seal the packet and place on the top rack of your grill.  Allow the garlic to roast for about 5-10 minutes, or until the cloves are just softened.  Carefully remove from skin and mince finely.

Place the peppers and zucchini on the grill (you can brush with a little olive oil if you want and don't forget to sprinkle with salt and pepper).  Let them cook a few minutes or until just starting to soften, turning at least once.  Remove from the grill and allow to cool just a bit before cutting the peppers into strips and the zucchini into half moons.

Drizzle the chicken with a little olive oil and season with salt and pepper.  Place the chicken on the grill and cook 5-8 minutes on each side or until chicken is not longer pink in the middle.  Remove from grill and let sit 3 minutes before cutting into strips or chunks.

Meanwhile, cook the pasta according to package.  Reserve 1/2 cup pasta water; drain the rest.

Add the olive oil, garlic, peppers, zucchini, and chicken to the drained pasta; toss to combine.  Add the zest and juice of the lemon, red pepper flakes; toss to combine.  If the pasta is too dry, add a little of the reserved water.  Now add the fresh herbs and toss one more time to combine.  Top with parmesan cheese and serve!

Tuesday, May 11, 2010

Bloody Mary Steaks and THE WINNER!!!

Drum roll please..........................and the winner is:

Wayne Hoxie
YAY!  Congratulations Wayne!

Now don't run away everyone...I'm in the giving mood and I have scored a great deal, so I'm going to add a runner up.. the runner up is going to receive a year (10 issue) subscription to the Food Network Magazine.  I subscribed to it last year and LOVE it.  I think everyone who likes to cook should think about picking one up.  Anyway...the second runner up is:

Patricia
Congratulations Patricia!

All I need is for you both to email me at jennsfoodjourney@gmail.com your mailing address and I'll get you your giveaway winnings asap!  Thanks to everyone who participated, this was fun for me.  It was great to hear all the foods you love!!  Looking forward to the next giveaway! 

Now...bring on the food:  YUM!!!

Guy Fieri's story is an interesting one.  He is the only Next Food Network Star to really make it.  And boy has he made it.  He's now on about 4 or 5 different shows on the Food Network and owns two restaurants in California.  Guy is a kitchen god.  Every single recipe I have tried of his has turned out fantastic.  My favorite still has to be his Bacon & Tomato Pasta.  The man knows what he is doing, for sure.  This steak was no different.  It was amazingly good!  From the moment I dropped them on the grill the aroma alone had my mouth watering.  The steak was tomato-y and spicy and you could just taste the hint of the celery...wow...just like a bloody mary, go figure!  LOL  If you are worried about using vodka...leave it out, no worries.  The true flavor comes from the juice more then the alcohol.  You will still get a flavorful steak, believe me.  It will be a Virgin Bloody Mary Steak :)

Bloody Mary Steaks
Adapted from Guy Fieri, Food Network 
Ingredients:
1 1/4 lbs chuck tender steaks
1/2 cup V8 juice
1/4 cup vodka
1/2 teaspoon sea salt
1/2 teaspoon pepper
1/2 teaspoon hot sauce
1/2 Tablespoon lemon juice
1/2 Tablespoon Worcestershire sauce
1/4 teaspoon granulated garlic or garlic powder
1/2 teaspoon onion powder
1/4 teaspoon celery seed
1/2 Tablespoon horseradish
1/2 Tablespoon olive oil

Directions:
Place steaks in a Ziploc bag.  In a small bowl, combine all the other ingredients.  Pour over steaks, seal bag and toss to coat.  Let steaks marinate 8-12 hours.

On a preheated grill, cook steaks to desired doneness, about 5-10 minutes per side, turning only once.  Remove from grill and allow to rest for 3-5 minutes before cutting into them.  Enjoy!

I served these steaks with a creamy horseradish sauce (though you definitely don't need a sauce), which I have made before. You can find the recipe for it here.

Monday, May 10, 2010

Grilled Potato Rounds

I figured since Stephen (The Obsessive Chef) has already blogged about my favorite side dish, and Andrea The Kitchen Witch mentioned something about peer pressure, maybe it was time I actually got my butt in gear and posted this delicious side dish myself!  Stephen had wonderfully nice things to say about my dish, so now I'm even more confident in posting them!  (Thanks Stephen!)

This is a very simple side dish that goes perfectly with any meal really, but definitely any meal you are planning to make on the grill.  Honestly, these potatoes go with anything from burgers to steaks to chicken to fish..oh, and don't forget pork!!  It's an addictive side dish though, so beware!  You'll see it on my plate a lot over the next few months!

I did do something just a tad bit different then I normally do.  I decided to see if placing garlic cloves in the water with the potatoes while they boil would help give them a bit of a garlic flavor.  It seemed to work, it wasn't dominate or anything, but there was a hint of garlic, and that was what I was looking for.  If you want more garlic flavor, use more cloves OR you could toss with granulated garlic before you place on the grill (which is what I normally do).

Don't forget, you still have until 9:00pm tonight to enter the 100th post giveaway! 

Grilled Potato Rounds
- Serves 2 -
Ingredients:
1-2 russet potatoes (depending on the size)
extra-virgin olive oil (about 1-2 Tablespoons)
2 large garlic cloves
salt (I used either Kosher salt or sea salt)
black pepper

Directions:
Scrub potatoes under running water.  Slice into 1/4" disks.  Place in a pot and cover with water.  Slice the garlic cloves into quarters and place in water with potatoes.  Over high heat, as soon as you start to see the water bubble (even just a little), set the timer for 5 minutes.  Immediately remove from the heat and run quickly under cold water.  Drain completely.  Cover potatoes with olive oil.  (I start with 1 Tbls and add until nicely covered.)  Season liberally with salt and pepper. (I sometimes use cayenne pepper or Italian seasoning too, depending on what I'm making.  The point is, you can use any seasoning you desire.)  Toss to combine.


On a preheated grill (medium-low to low), place the potatoes directly on the grates and grill for 15-20 minutes, turning frequently to reduce burning.  When finished, potatoes should be crispy on the outside and still nice and tender on the inside.  Remove from grill and season with more salt and pepper if necessary.  Enjoy!

Saturday, May 8, 2010

Gotta show off my winnings!!!

So a couple weeks ago, I won a giveaway that Michelle over at All Home Cooking. All Year Long. was having.  You gotta check out the loot I got!!!

White Lily flour (which I've never used and am excited to try!), sea salts, both fine and course (love having sea salt on hand and I was completely out!! YAY!), Starbucks Pike Place roast coffee beans (I now have an excuse to go buy a coffee bean grinder!!), a dough bench scrapper (Martha Stewart style...now I must bake more!!)  3 Madagascar vanilla beans (there is vanilla ice cream in my future with at least one of those little flavor boosters), and what I have been the MOST excited about....

(WOOOO HOOOO!!!!)
Michelle's very own, homemade pure vanilla extract!!!  I so can't wait to try this...the smell alone as I took it out of the plastic bag was enough to make me want to open it and guzzle it down!  Made with vodka and ... guess what...Madagascar vanilla beans...which I have!!!

Thank you so much Michelle, all my goodies will definitely come in handy, I'll keep you updated on my uses of these wonderful products!

And to all of you...though I don't think my giveaway is half as cool as Michelle's was.. there is still time to enter for your chance to win!  There just may be an addition to the winnings I've already announced..but you have to enter to find out:  Jenn's 100th Post Giveaway!

Friday, May 7, 2010

Penne with Beef & Bell Pepper

If you have the food network, I'm sure you have seen Giada.  Oh how I love her shows :)  She's so cute and boy, can that girl COOK!  When I saw this episode I thought.. hhhmmm... pasta and steak... yea, that's a great combination...so I tried it.  HEAVEN!!!!

The combination of the balsamic vinegar and Dijon mustard gives the pasta this great tangy zip.  And the steak, well, it's steak, you know it's gonna be good!!!  If you didn't have New York strip, you can use another cut.  They were actually having a great sale on it last time I was at the store, so I snagged up a nice (almost) one pound piece and added this to my menu plan.  I had made this once before with leftover steak and had completely forgotten about the recipe.  Then, just a few weeks ago, I happen to catch a rerun of the episode where Giada made it.  It was cute, she packed it in a basket to take to her husband at work....aaaawwwwwwwhhhhhhhh!!!  I'm a romantic at heart, I can't help it!!

And just a reminder, don't forget to enter the first ever Jenn's Food Journey giveaway, you have until Monday night!
 

Penne with Beef & Bell Pepper
Adapted from Giada De Laurentiis, Food Network
Ingredients:
1 (1-pound) New York strip steak
1 teaspoon herbs de Provence (or Italian herb seasoning)
Garlic Salt

1/4 cup extra-virgin olive oil
1 pound penne pasta
1/4 cup balsamic vinegar

1 tablespoons Dijon mustard
1/2 teaspoon salt

1/2 teaspoon freshly ground black pepper, plus more for steak
1/4 cup chopped fresh basil leaves
1/4 cup chopped fresh parsley leaves
1 red pepper, roasted on the grill until just softened, then cut into strips


Directions:
Season the steak with salt and freshly ground black pepper, herbs de Provence, and garlic salt. Grill steaks on a preheated grill for about 7 minutes on each side. Remove the meat from pan and let it rest for 5 minutes. Thinly slice the steak. Set aside.

Meanwhile, bring a large pot of salted water to a boil over high heat. Add the pasta and cook until tender but still firm to the bite, stirring occasionally, about 8 to 10 minutes. Drain pasta.

In a small bowl, whisk together the balsamic vinegar, Dijon mustard, 1/2 teaspoon salt, 1/2 teaspoon pepper, fresh herbs, and olive oil. In a large bowl toss the pasta with half of the salad dressing. Add the red pepper and steak, more dressing, and season with salt and freshly ground black pepper, as needed.  Enjoy!

Thursday, May 6, 2010

Hoisin Barbecued Chicken + 100th Post = Giveaway!!!

That's right folks...today is my 100th post!! YAY!!  I feel very good about that, because, honestly, I really thought I would have abandoned this by now.  Not the cooking part, just the blogging part.  I felt like there were so many blogs out there, why would mine really attract anyone?  Ahhh...but I was not completely right, I've attracted at least a few of you and in honor of YOU, my constant readers (Sorry SK for stealing your line!!) I am giving away a few special food/kitchen items, check them out:

A Cocoa Lover's gift box (natural cocoa, hot chocolate mix, sweet cassia cinnamon, & a hint of mint hot chocolate mix....mmmmmmmmmmm)
AND a 16oz box of Giada's very own Fusilli Col Buco pasta, a hand-held mandoline slicer, and a pair of kitchen shears (every kitchen needs one)
 
To enter, all you need to do is leave a comment on this post telling me what your all time favorite food is.  (US residents only, sorry!)  If you could eat only one thing from here until eternity, what would it be?  For me, it would have to be a toss up between sushi or pasta...more specifically, caterpillar rolls or my grandma's mac & cheese!  YUM YUM & YUM!  You may only enter once and winners will be picked at random with the help of Random.org.  You have until 9pm Monday, May 10th, 2010 to enter.  Winners will be announced Tuesday the 11th. Good luck everyone!

Now, on to the recipe!!  I love that there are like a million and twelve different flavors of barbecue sauce.  I'd like to be able to try making them all, but that may be impossible.  This, my friends, is so far my second favorite...the first being a recipe I have not posted yet, but I'll get there.  Hoisin...I've talked about it before...maybe you are tired of seeing recipes with this ingredient in it...maybe not...either way, it has become a flavor I am totally hooked on.

One thing to know about this recipe...the longer the chicken marinates, the better it will be!  Try and give yourself at least 8 hours of marinating time (4 if you really, really, really have to).  I actually put it together just as I was leaving for work.. it soaked for about 12 hours and it was delicious!  Cook time is all you have to worry about once it's done marinating and depending on the method of cooking and the size of the breasts, that can take anywhere from 15-20 minutes.  Simple.. and just in time for the warm summer weather!!!


Hoisin Barbecued Chicken
Adapted from Cooking Light
Ingredients:
4 boneless, skinless chicken breasts
2/3 cup hoisin sauce
2 Tablespoons rice vinegar
3 Tablespoons low-sodium soy sauce
3 Tablespoons ketchup
2 Tablespoons brown sugar
3-4 teaspoons chili paste

Directions:
To prepare barbecue sauce, combine all ingredients except the chicken, in a medium bowl. 

Place the chicken in a Ziploc bag and pour 1/4-1/2 cup of the barbecue sauce over it.  Seal and let marinate in the refrigerator for 8-12 hours.  Cover the leftover sauce and store in the refrigerator.

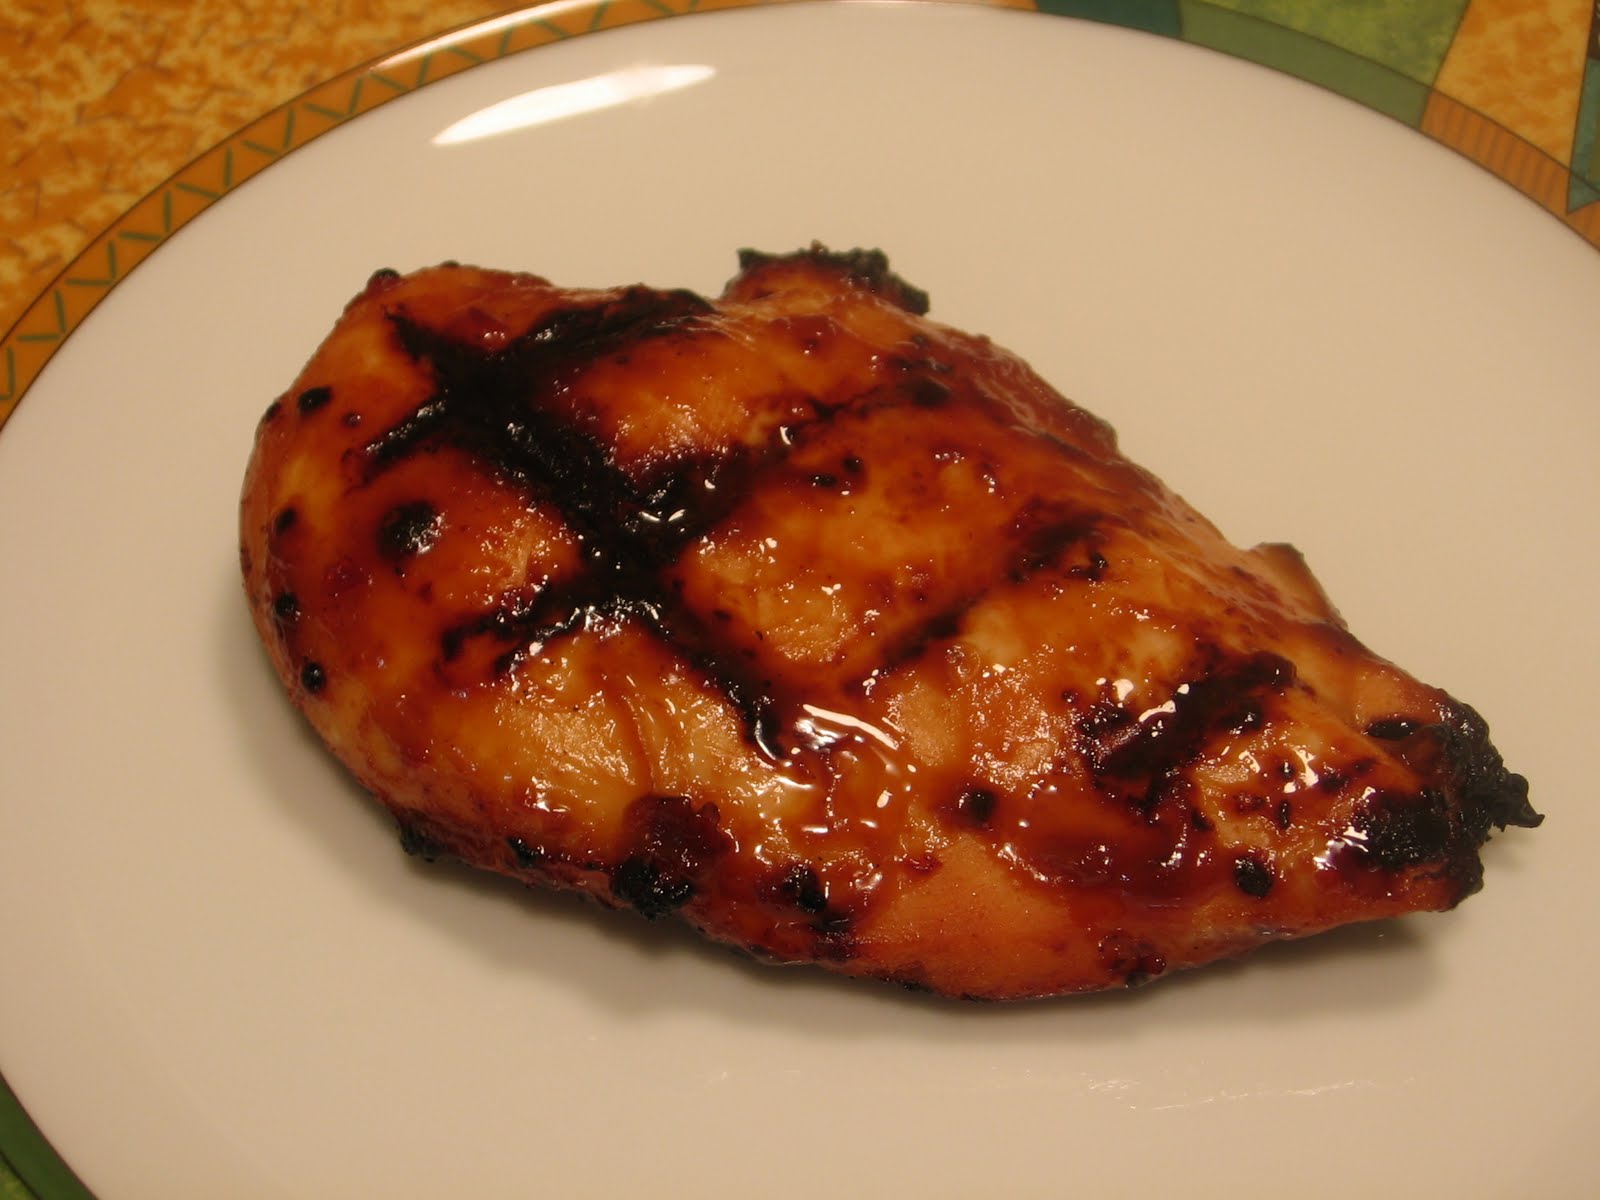
Barbecue the chicken on a preheat grill (you can also bake this at 375-400 degrees for about 20 minutes too).  Baste with some of the sauce (you can leave some aside to pour or dip the chicken in after it's cooked too).  Keep an eye on the chicken, you don't want it to burn!  Cook until chicken is no longer pink in the middle about 5-7 minutes on each side.  Enjoy!

Wednesday, May 5, 2010

Creamy Pesto Dip

I had some left over pesto and decided I wanted to make something I could dip things into.  That's right, I was in the dipping mood, not ashamed to admit it either!  I sat down and took stock of what I had...which wasn't a lot, but I had mayo (always) and I had sour cream...always a good combo for making dips (check out the caramelized french onion dip you'll never use lipton onion soup mix again), so I figured, why not add a little prepared pesto to it and be done?  Well, it worked like a charm!  This dip was just what I wanted.  We scooped it up with some pita chips and baby carrots.  It was the perfect afternoon snack!  Bring it to the next party you're invited to, people won't be able to pull themselves away from the bowl, I promise!


Creamy Pesto Dip
Ingredients:
1/2 cup mayonnaise
1/2 cup sour cream
1/3 cup pesto
2 teaspoons lemon juice

Direction:
Mix all ingredients together in a small bowl.  Cover and refrigerator for at least 2 hours.  Serve with pita chips, baby carrots, peppers, or whatever vegetables/chips you choose!  Enjoy!

Tuesday, May 4, 2010

Lemon Pepper Chicken

Let me just say, this picture might not make this chicken look like anything special, but do not let looks fool you.  This chicken soaks up the lemon juice so wonderfully, by the time it's been cooked that lemon zing is in every bite and it's like a party in your mouth!

I found this recipe last summer while I was on my grilling kick!  It ended up being one of my favorites.  It's simple, it's delicious, its healthy...how can that be a bad thing?

By the way...you may want to check back here by the end of the week.  I'm reaching post number 100 and there just might be a giveaway in the next few days!!

Lemon Pepper Chicken
Adapted from Life's Ambrosia
Ingredients:
1 large garlic clove, minced
2 teaspoons lemon pepper seasoning
1/2 teaspoon paprika
1 Tablespoon extra-virgin olive oil
juice of 1/2 a lemon
1/2 teaspoon kosher salt
1/2 teaspoon dried oregano
2 boneless, skinless chicken breasts (I've actually used 4 before and there was plenty of marinade)

Directions:
In a bowl, combine all ingredients except the chicken.  Place chicken in a Ziploc bag and pour the marinade over it.  Seal the bag and let marinate in the refrigerator for 1-2 hours.

Remove chicken from bag and throw the marinade away.  Cook the chicken in a skillet over medium heat for 5-8 minutes on each side or until cooked through.  OR you can throw the chicken on a preheated grill for the same amount of time per side. (CHOOSE THE GRILL!!!)  Enjoy!
     

Monday, May 3, 2010

Pass it On Week 4: Chicken Pesto Pizza

Well, it's my fourth and final week of Pass it On.  Whether you passed these recipes on or not, as long as you cooked more this week then you did the week before, then I'm happy!  Just get out there and do some of your own healthy home cooking!

You may remember me mentioning a pizza place down the road from us, that Chris and I venture to on occasion.  (if not, that's ok too!!)  They have this killer pesto pizza that we each and every time we go.  We are definitely creatures of habit!  We go in there with every intention of trying something new and each time, we end up with the same thing.  It's just that good!  This is my attempt at recreating the master piece we so very much enjoy!  It definitely did not look as pretty...they squirt the pesto on at the end in this wonderful spiral pattern that I just couldn't duplicate.  I also did not get the dough stretched out like I could/should have.  AND I under cooked the dough just a tad big (Ugh, don't you hate it when you do that?)...BUT.. if I had another shot or two I just KNOW I could perfect it!

Anyway, I could ramble all day, but I won't.  I made this pizza on the grill.  You can use the oven if you prefer.  I'd recommend using a baking stone if you have it, and bake it at about 450-500 degrees.  This is a fun recipe to pass on too.  You can get the whole family involved in the creating process. 

Chicken Pesto Pizza (on the grill)
Ingredients:
1 ball of your favorite pizza dough (or 1/2 of this simple pizza dough recipe here.)
4 oz pesto 
2 small boneless, skinless chicken breasts, grilled and cut into small pieces
1 cup pizza sauce 
1-2 cups shredded cheese (your choice, I used an Italian blend)
olive oil 

Directions:
Preheat grill (or oven) to 400 degrees.  Gently roll out or stretch the dough to desired shape/size (i did about a 12-14" round).  Brush both sides with olive oil.
  
At this point you can either place the dough directly on the grill or you can do what I do and pull out a piece of aluminum foil big enough to hold the dough, spray it with non stick cooking spray and place on a cookie sheet.  When ready to put on the grill just slide the aluminum foil off of the sheet onto the grill, when you are ready to take it off, slide it right back onto the cookie sheet.  Grill on one side for about 5-8 minutes, you want that side crispy and nicely browned (you want the dough cooked half way through, but you don't want to burn it, so keep on eye on it).

Remove from grill and flip over.  Spread the sauce on top of the cooked side of dough, layer the cooked chicken, then the cheese and return to the grill for 2 minutes.  Add the pesto in a circular-type pattern and cook until the crust is brown on the bottom and the cheese is melted.  Enjoy!


Friday, April 30, 2010

Hudson's Baked (or Grilled) Fish with Dill Sauce

 
Anytime I use dill in a dish, I'm always fondly reminded of my childhood.  When I was a kid, my whole family would get together on Sunday's at my grandma's for lunch.  Whole family meaning my mom, dad, sis, aunts, uncles, cousins, grandmas.  I have so many great memories from those times.  One in particular always stands out (and to my dear cousin Cortney, I'm sorry, but it's time to bring this up!!!) ... rolls with grass.  Yes, that's right, rolls with grass.  My mom use to make these rolls and she'd spread butter with dill on them and then bake them.  My younger cousin, Cortney, always referred to them as rolls with grass.. and you know, dill really does look a bit like grass! :)  ****I was just reminded by my mom that she actually called them grass rolls...sorry Cort for getting it wrong!!***


Anyway, this was a nice fresh idea.  It actually called for baking, but I decided to try doing it on the grill.  I put them in foil packets and threw them on the grill that way.  It worked out perfectly!  And I didn't have to heat up the kitchen!!  YAY!  Of course, there was sauce...mmmmmm...sauce!!  And just a nice simple sauce that uses fresh dill...and THAT is why I told the story of the grass rolls!

Hudson's Baked (or Grilled) Fish with Dill Sauce
Adapted from Allrecipes.com 
Ingredients:
4 (4oz) tilapia fillets (again, you can use any white fish for this)
1 Tablespoon Creole seasoning (you can make your own, check out Emeril's recipe)
1 lemon, sliced
For the sauce:
2 Tablespoons mayonnaise
2 Tablespoons sour cream
1/8 teaspoon garlic powder
2 teaspoons fresh lemon juice
1-2 Tablespoons chopped fresh dill

Directions:
In a small bowl, mix together all the ingredients for the sauce.  Cover and refrigerate until ready to use.

To Grill:
Preheat grill to 400 degrees.  Tear off squares of aluminum foil and spray with non-stick cooking spray.  Season both sides of the fillets with the Creole seasoning.  Place one fillet on each square of foil.  Top each fillet with 1-2 slices of lemon (depends on how thick or thin you sliced the lemon) and seal into a packet.  Place on grill and cook for 12-14 minutes.

To Bake:
Preheat the oven to 400 degrees.  Prepare a baking dish with non-stick cooking spray.  Season both sides of the fish with the Creole seasoning and lay in a single layer in the baking dish.  Place a layer of lemon slices over each fillet.  Bake, uncovered, for 12-15 minutes.

Serve the sauce along side the fish....and Enjoy!!

Thursday, April 29, 2010

Rigatoni with Sping Herbs and Tuna

 
Let me just say....THIS DISH WAS FANTASTIC!  It was simple and light and fresh.  Everything I love in a springtime pasta dish!  Spring has definitely sprung in this part of the country (ok.. summer has about sprung here, but still)!  When spring hits, my craving for heavy, comforting foods sort of subsides. But never fear, I never loose the craving for pasta, so I try to find nice light healthy dishes to make.  This was exactly one of those meals.  It had a wonderful fresh taste to it.  I used parsley, dill, and basil, but you could use any combination of herbs if you'd like.  If you are blessed to have an herb garden, use what you have on hand.  Again, if you weren't a tuna fan you could easily leave it out, or substitute cut up chicken breasts.  Whatever you do, just try it, I promise you will love it!

MMMMMMMMMMMMMMM....all gone!!!

Rigatoni with Spring Herbs & Tuna
Adapted from Martha Stewart
Ingredients:
1/2 pound dried rigatoni
1/2 cup roughly chopped mixed herbs  (I used parsley, dill, and basil)
2 tablespoons extra-virgin olive oil
1 tablespoon fresh lemon juice
Coarse salt
1/8 teaspoon freshly ground pepper

1 can tuna fish in oil, do not drain (I used solid light tuna in olive oil)
1/2 cup (1 ounce) grated Parmesan cheese


Directions:
Cook pasta in a large pot of salted water according to package directions. Drain pasta, then toss with oil, lemon juice, 1/4 teaspoon salt, the pepper.  Add the mixed herbs, tuna, and 1/4 cup Parmesan in a large serving bowl. Serve with remaining 1/4 cup cheese on the side.  Enjoy!

Wednesday, April 28, 2010

Murphy's Hot Hamburger

Have you ever seen a recipe post (with a picture of course) and said to yourself...Holy CRAP that looks GOOOOD!!!  Well, if not, you are missing out, because the true fun is seeing if you can duplicate the recipe that made you say that!  This was one of those recipes for me (my picture might not have the effect on you, but trust me..this is fantastic).  I saw it and my mouth instantly watered.  I knew, without a doubt that Chris would enjoy it, so there was no problem there.  It turned out to be just what I wanted.  It was just the type of meal you'd find in a small little hole in the wall dinner.  It was a down home, Midwest style meal and it was gone in 60 seconds.  LOL  Ok, ok.. it took us longer then that, but it sure did seem like it was over that quick.  The great thing about this recipe is, it's simple and takes no time at all.  Actually, the most time you put into is just waiting for the potatoes to cook.  Once you get the hamburger patties on the skillet it's about 10-20 minutes and it's ready for your plate.  Now, I don't know where Murphy's is or anything about it for that matter..but what I do know is they make (or made) this dish...and well.. now I also know that Murphy's RULES!!

By the way... I use Wondra flour in this...you can just use regular all purpose flour, but if you want something that is less likely to cause lumps.. you have got to invest in this....

(You won't be disappointed!!)

Murphy's Hot Hamburger
Adapted from Alisha, Tasty Kitchen.com
Ingredients:
1 pound Ground Beef (I used 80/20)
1 Tablespoon Minced Garlic
1 teaspoon Onion Powder
1 teaspoon Seasoned Salt 
2-3 Tablespoons Wondra flour (or all purpose flour)
1 - 14 Oz. Can Beef Broth OR 2 Cups Water With Beef Bouillon 
2-3 whole Large Potatoes
1 Tablespoon Oil, Or As Needed
Cayenne pepper
Salt And Pepper, to taste

Directions:
Preheat oven to 425 degrees. 

Slice potatoes into fries. Place on a large baking sheet. Pour about 1 tablespoon of oil over the fries and toss with fingers to coat evenly. Sprinkle fries with seasoning of choice. I use seasoned salt. Place in the oven. Bake for approximately 30-45 minutes or until golden and crispy.

In a mixing bowl, mix hamburger, garlic, seasoned salt, onion powder, and pepper. Mix well with hands. Form 4 large patties. Place in a large preheated skillet over medium heat, preferably one with deep sides. Brown burgers on each side until done. 

Remove burgers from the skillet and place on a plate covered in paper towels. Do not drain the grease. Add the flour a tablespoon at a time, stirring with a whisk. You have enough when the grease is all absorbed and the flour mixture gets thick and bubbly. Slowly add the broth a little at a time, whisking constantly. Bring to a simmer and allow to thicken.
To serve, place an ample amount of fries on the plate. Place a hamburger on top of the fries and cover it all amply in gravy. Enjoy!