I promise I will not say anything about The Walking Dead... but only out of respect for those of you that might watch it but have recorded it so you can watch it later.... but I will say this.... I'm SOOOOOOOO glad it's back on!!!! The third season is going to be over before we all know it, but while it's here, I plan on enjoying every single moment of it!! WHOOHOO!!!
Ok, no with the food.... this is such an easy recipe.. and I simplified it from what the original recipe called for. And the flavors... oh yea, the flavors are so incredibly good! Why is it I forget how wonderful the salty, briny flavor olives bring to a dish until I have one with it? It's always just "V8" moment for me, you know?
Easy Mediterranean Chicken and Rice
Adapted from Cook's Country
Printable Recipe
Ingredients:
1/4 cup pitted Kalamata olives, chopped
1/4 cup olive brine
2 Tablespoons olive oil
1 1/2 Tablespoons minced fresh oregano
1 garlic clove, minced
1 teaspoon grated lemon zest
salt and pepper
2 boneless, skinless chicken breasts
1 cup low sodium chicken broth
1/2 cup white rice
4 oz cherry or grape tomatoes, halved
1 Tablespoon minced fresh parsley
1 Tablespoon minced fresh oregano
Directions:
Combine olive brine, olive oil, 1 1/2 tablespoons oregano, garlic, lemon zest, 1/2 teaspoon salt and 1/4 teaspoon black pepper in a zipper-lock bag. Pat the chicken dry with a paper towel and place in bag. Refrigerate for 1 to 2 hours, turning occasionally.
In a saucepan with a lid, bring the chicken broth to a boil and add the rice. Cover and reduce heat to low. Simmer 15-20 minutes or until all the liquid is absorbed. Remove from heat and allow to sit, covered, for 5 minutes.
Meanwhile, preheat grill to 375 degrees F. Clean and oil grill grates. Remove chicken from bag and discard marinade. Place the chicken directly over the fire and grill 8-10 minutes per side or until the chicken reaches an internal temperature of 165 degrees F. Remove from grill and allow to rest for 5 minutes. (Psst... if you don't want to grill the chicken, you can pan sear it or bake it.)
Remove cover from rice and stir in olives, tomatoes, parsley and remaining oregano. Spoon rice onto plates, top with chicken and serve. Enjoy!
One Year Ago: Double Trouble
Two Years Ago: Parmesan Garlic Tilapia
Three Years Ago: Stuffed Chicken Breasts
I know I've talked about the extended hours I work from time to time, but what's great about where I work... we may work hard, but we get to play hard too. For example - two years ago, a couple of the ladies there decided to do a Spring Break Luau. A lot of the people I work with are fresh out of college and it only seemed natural. So these wonderful ladies put a little luau lunch together for us. There were all kinds of decorations, we got to wear our Hawaiian gear, and let's not forget all the luau style food they had. The most memorable of that food was this Hawaiian pulled pork that one of my co-workers, Carol, made. It was AMAZING!! Since I'm always trying to find new recipes, I of course, asked her for this one. She told me and it sounded really simple and I thought, I should probably write this down, but like most things, by the time I got to my desk, I had already forgotten about it.
Flash forward to a few weeks ago... Carol shows up at work with her crock pot full of some uncooked pork. When I inquired as to what she was doing, she informed me that she was making her Hawaiian pulled pork as a way of saying sorry to some of her fellow co-workers who she felt she had wronged (don't worry, it wasn't anything serious, she just showed up for kitchen cleaning duty late). As soon as I heard her say Hawaiian, my mouth started watering and my stomach started growling... oh yes, we remember the pulled pork very, very well, don't we precious???? Lucky for me, there was a TON of it and Carol ended up offering it to everyone. Well, having it once before, I was not going to pass it up!! While we were eating, I asked Carol.. "so tell me what's in this again..... sugar? pineapple juice?" LOL Carol was like.. "WHAT? No there is nothing sweet in this!!" And what's crazy.. I don't know why I thought there was something sweet.. it doesn't even taste sweet. ANYWAY.. Long story shortened, I text Carol that evening, begged for the recipe and the next night I was making my own!! WOOT WOOT!! Thank you Carol, this is now my all time favorite dish!!!

I needed something to go along side the pork (besides the necessary rice and sweet roll that is) so I decided to make a traditional Hawaiian macaroni salad. Well, traditional mac salads are just pasta, grated onion and carrot, mayo, milk, sugar and salt and pepper... so I sort of stuck with it, but of course, had to jazz it up just a bit.
This is a MUST try for sure........ did I mention it's a MUST try??? :)
Hawaiian Pulled Pork with Macaroni Salad
Pork recipe courtesy Carol K.
Macaroni Salad recipe created by Jenn's Food Journey
Printable Recipe
Ingredients:
For the Pork -
1 Pork Shoulder Roast (or pork picnic cut) -sorry, can't remember how much mine weighed, but it was the smallest of the ones in the grocery store
1 cup water
1/4 cup salt (I used kosher salt-but according to Carol, any salt will do)
1-2 teaspoon liquid smoke
Additional items to serve with pork -
1-2 cups cooked white rice
King's Hawaiian Sweet Rolls
For the Macaroni Salad -
8oz elbow macaroni, cooked according to package directions, drained and thoroughly cooled
1/3 cup finely grated carrot (about 1 regular sized carrot)
1/2 cup mayonnaise
2 Tablespoons milk
1 teaspoon sugar
1/4 teaspoon salt
1/8 teaspoon black pepper
2 Tablespoons finely chopped dill pickles
1 hard boiled egg, roughly chopped
Directions:
For the Pork - Place the pork (I had to cut mine into three pieces to fit properly) in a crock pot. In a measuring cup add the water, salt and liquid smoke; stirring until the salt has pretty much dissolved. Pour mixture over pork, cover and cook on low for 8 hours or high for 4-5 hours .... OR.. until the pork pulls apart easily with a fork. Remove from crock pot and allow to cool a little before shredding. **Carol will skim the fat off the remaining water in the crock pot, add some flour to thicken it and serve. I just skimmed the fat and drizzled a little of it over the pork, but Chris left his dry - the pork is so good, you can seriously eat it with no sauce!**
For the macaroni salad - Place the cooled cooked pasta in a large serving bowl. Add the carrot, mayo, milk, sugar, salt and pepper; stir to combine. Fold in the pickles and egg. Cover and refrigerate until ready to use.
To make your mixed plate - start with some cooked rice and top with pork. Serve with macaroni salad and rolls.... and enjoy!! (and you will... TRUST me!!!)
One Year Ago: Sriracha Glazed Fish
Two Years Ago: Spicy Caramel Chicken
Three Years Ago: Snickers Pie
I know I have talked of this briefly before... BUT... I've GOT to talk about it again! For those of you that don't watch The Walking Dead, you might want to skip to the next paragraph... for those of you that DO watch The Walking Dead..... are you as excited as I am about the new episode next Sunday? OMG... what's going to happen to Daryl? Yikes!! I read the comic, but Daryl is a character that is not in the comic, so I really have no clue how they are going to handle things with him..... and I adore him!! He is absolutely, hands down, my favorite character! I saw an extended preview of the rest of the season and they show Daryl once! I'm sure it's just to make us wonder and speculate, but geeeeez, Oooohhh... I so can't wait for Sunday!!
Ok...ok.... on to the recipe! This dish is comfort in a bowl... not much else needs to be said about it really. Although it may taste as if the sauce cooks all day, this can be thrown together even on a busy weeknight!
Mostaccioli with Tomato Pork Sauce
Created by Jenn's Food Journey
Printable Recipe
Ingredients:
1 small sweet onion, roughly chopped
1 jalapeno, stem and seeds removed, roughly chopped
6 mini sweet peppers, stem and seeds removed, roughly chopped
10 oz Mostaccioli pasta
1/2 lbs Mexican chorizo
1/2 lbs ground pork
1 28oz can Cento Tomato Puree
1/2 cup dry red wine
1/2 teaspoon granulated sugar
1/2 teaspoon salt
1/4 teaspoon pepper
2 teaspoons fresh thyme, chopped
1 small zucchini squash, sliced lengthwise then sliced
Directions:
Place the onion, jalapeno and mini peppers in a food processor and pulse until everything is finely chopped.
Cook pasta according to package instructions; drain and set aside.
In a deep non-stick skillet, over medium heat, add the chorizo; breaking it up with a wooden spoon. Allow to cook for about 3 minutes. Add the ground pork; breaking that up with a wooden spoon also. Allow to cook for 5 minutes, stirring occasionally. Add the veggies and cook until the meat is no longer pink and cooked through, about 3 more minutes. Pour off any excess grease and add the tomato puree, wine, sugar, salt and pepper; stirring to combine. Bring to a low simmer and allow to cook for 20 minutes. Add the thyme and zucchini and cook another 5-10 minutes or until the zucchini is cooked to your liking. Serve over mostaccioli and enjoy!
One Year Ago: A Belated Birthday Wish
Two Years Ago: Midnight Chocolate Cupcakes with Strawberry Frosting
Three Years Ago: Snickers Cookies

Although Chris' birthday is actually tomorrow (shhhhhhh, he's turning the big 40!!!!), over the weekend we celebrated by going out to dinner at this amazing restaurant called Roy's. Roy's is an Hawaiian fusion restaurant that has been on my list of "I soooo want to try" places for a while now. I have heard nothing but good things about it....And now I know why. We had one of the best meals we'd had in a very long time. I wish I had pictures, but our table was really dark and well... sometimes I like to go out without having to document everything I eat :) If you ever get a chance to go there, I highly recommend the Misoyaki Butterfish. I have never had butterfish before and now... now I would gladly eat it daily. The fish literately tasted as if it had been poached in butter... but it wasn't.. it is just the natural flavors of the fish coming out. I don't even know how to describe it other than it was the best fish I had ever had. EVER! Everything about the experience was wonderful. From the wine that was sent to our table (secretly ordered by a friend from across the country as his way of wishing Chris a happy birthday) to the attentiveness of our waiter (and the rest of the staff at that) to the amazing food...... it was quite the perfect evening!
Although this tilapia recipe has nothing to do with our dinner from Saturday, I thought it was still a good recipe to follow a story about fish :) Simple... light... and delicious. Might not be Roy's but it will do in a pinch!!!
Baked Lemon Tilapia with Herb Butter
Created by Jenn's Food Journey
- Serves 2 -
Printable Recipe
Ingredients:
1 Lemon, sliced in half
2 Tilapia fillets
1/4 teaspoon salt
1/4 teaspoon pepper
1/4 teaspoon paprika
2 Tablespoons unsalted butter, room temperature
1 teaspoon chopped fresh parsley
1 teaspoon chopped fresh chives
Directions:
Thinly slice one half of the lemon into 4 slices. Zest and juice the remaining half of lemon. In a small bowl, mix together the salt, pepper and paprika; set aside.
Meanwhile, in a small
bowl, mix together the butter and remaining lemon juice. Stir in the
chopped herbs and lemon zest. Season with a pinch of salt. Cover and
refrigerate until ready to use.
Preheat oven to 400 degrees F. Spray a baking dish with non-stick spray and place the lemon slices on the bottom. Rinse fillets and pat dry with a paper towel. Place on top of the lemon slices. Drizzle half of the lemon juice and sprinkle the seasoning mix evenly over each piece of fish. Place in oven and bake for 15-18 minutes or until the fish flakes easily with a fork. Top with a dollop of butter and serve immediately. Enjoy!
One Year Ago: Shrimp and Red Pepper Pesto Pizza
Two Years Ago: Spicy Potato Soup
Three Years Ago: Leek Potato Soup
While trying to come up with ideas on how to use up the apricot preserves I purchased, I stumbled across this recipe on Grilling.com. OMG, can you say yum? I mean, never mind how good the chicken wings actually looked, but the list of ingredients was right up my alley. All the flavors I use and love so often.... just mixed with some apricot preserves. Although, I continued my search for ideas for a little while longer, I knew, without a doubt, this would be the one I would make. And it did not disappoint!!
Spicy Apricot Grilled Chicken
Adapted from Grilling.com
- Serves 2 -
Printable Recipe
Ingredients:
1/4 teaspoon ground ginger
2 Tablespoons brown sugar
2 Tablespoons Worcestershire sauce
1/2 cup apricot preserves
1 Tablespoon Dijon mustard
1 Tablespoon soy sauce
1/2 teaspoon garlic powder
1 teaspoon paprika
1 teaspoon black pepper
1 teaspoon red pepper flakes
2 boneless, skinless chicken breasts
Directions:
In a bowl, mix together all the ingredients except the chicken, until well combined. Rinse chicken and pat dry with a paper towel. Place chicken in resealable bag or shallow dish and pour marinade over. Seal bag and place in refrigerator for at least 2 hours and up to overnight.
Preheat grill to 375 degrees F. Clean and oil grill grates. Remove chicken from marinade and discard. Place the chicken over direct heat and grill 8-10 minutes per side, or until it reaches an internal temperature of 165 degrees F. Remove and allow to rest for 5 minutes before serving. Enjoy!
One Year Ago: Pistachio Crusted Tilapia
Two Years Ago: Jamaican-Spiced Chicken
Three Years Ago: Super Bowl Count Down.. Take Three: Chili
Here's something you don't hear me talk about very often - Rain. Oh yes, that lovely rain that so very rarely shows it's smiling face on us here in the American southwest desert. This weekend, though, we saw quite a bit of it. It rained pretty much all day Saturday and most of the morning on Sunday. So much rain that our pool has filled up considerably and our hot tub is on the verge of overflowing! I love the rain, so this weekend was perfect for me, especially because I really didn't have to go out in it except to go to the grocery store. I did a lot of reading and that, to me, is a perfect weekend!
With the rain came colder weather and with colder weather comes my craving for soups. I have been wanting to make a homemade tomato soup for a while, but usually, when I'm craving it, I can't find good tomatoes, so when I saw Jean (Delightful Repast) post this recipe for tomato soup using canned tomatoes, I was all over it. It turned out to be just what I needed... and served along side a grilled cheese... it is the perfect meal for any cold night!
Fire-Roasted Tomato Soup
Adapted from Jean, Delightful Repast
Printable Recipe
Ingredients:
1 red pepper, roughly chopped
1/2 sweet onion, roughly chopped
1 garlic clove, quartered
2-3 teaspoons olive oil
1/2 teaspoons salt (or to taste)
1/4 teaspoons pepper (or to taste)
1 28oz can fire-roasted crushed tomatoes
1 cup chicken or vegetable broth (or more if soup is too thick)
1/2 - 1 teaspoon sugar (to taste)
1/4 teaspoon red pepper flakes
Direction:
Place the pepper, sweet onion and garlic in a food processor and pulse until finely chopped. In a soup pot, heat the olive oil over medium heat. Add the chopped up veggies and cook until they have softened, about 5-8 minutes. Add the salt, pepper, tomatoes, vegetable broth, sugar, and red pepper flakes. Bring everything to a boil; stirring occasionally. Reduce heat to low and simmer 10 minutes. Remove the pot from the heat and with an immersible blender, blend the soup until smooth. Adding more broth if needed to thin the soup out. Taste for seasoning and adjust where necessary. Place the pot back on the heat and let cook another 5 minutes. Remove from heat and serve immediately. Enjoy!
One Year Ago: Super Appetizer Ideas for Your Super Bowl Party
Two Years Ago: Chorizo Chipotle Chili
Three Years Ago: Tomato Walnut Tilapia
It's not often that I have apricot preserves in the house - Chris and I are more the raspberry, strawberry, grape sort of people. But when I saw this recipe the other day, I decided, I was going to have to break down and buy something we normally wouldn't. Nine out of ten times, I will not buy an ingredient I know I will never use again. I will usually figure out something to substitute .... or, as in this case... I'll come up with another recipe to help use up what would maybe end up going to waste. Friday, I'll post another recipe that will feature apricot preserves. That way, if you are like me and know it won't get used any other way, you won't feel guilty about buying it!
This was a great recipe. The sweetness of the preserves and the spiciness of the chili garlic sauce worked perfectly together! I would use this marinade on chicken or shrimp or even fish. It is simple and delicious. I served these with a wasabi mayo sauce... mmmmmmmm.. it was fantastic!
Asian Apricot Glazed Chops
Adapted from BHG Grillin' & Chillin'
Printable Recipe
Ingredients:
1/3 cup apricot preserves
1 Tablespoon chili-garlic sauce (Sambal Oelek)
1 Tablespoon soy sauce
drop or two of sesame oil
4 boneless pork loin chops
salt and pepper
Directions:
In
a small bowl, mix together the first 4 ingredients until well
combined. Rinse pork chops and pat dry with a paper towel. Season both
sides with salt and pepper and place in resealable bag. Pour half of
the apricot mixture over the pork and seal the bag. Place in
refrigerator for 2 hours. Cover the remaining apricot mixture and place
in refrigerator until ready to use.
Remove pork and glaze from the refrigerator. Preheat
grill to 350 degrees F. Clean and oil grill grates. Place the pork
directly over the fire and brush the glaze over each pork chop grill 4 minutes. Flip pork chops and brush with remaining glaze. Grill another 4 minutes or until they reach an internal temperature of 145 degrees F. Remove from grill and allow to rest for 5 minutes before serving. Enjoy!
One Year Ago: Green Goddess Sauce (My Way)
Two Years Ago: Cheesy Rice Casserole
Three Years Ago: Firecracker Tilapia with Lemon Aioli

As promised on Wednesday - the perfect side to serve with any bowl of chili ---- Cornbread! And not just any cornbread, but cornbread made in a cast iron skillet - it's just so old school to me and I love that! Now, my cornbread turned out on the dry side. It was still good, but it over baked and was just too dry. Chris said it needed more sweetness, but I have to disagree. Could it have used more? Maybe, but I think if you wanted to add a bit more sweetness to it, you could use a little honey instead - this recipe already calls for 1/4 cup. Anyway, the reason why mine came out so dry is because once you put the cornbread in the preheated oven, the recipe instructs you to turn the oven down to 375 degrees... I missed that part or forgot that part or whatever - that part did not happen... so I baked mine for 20 minutes at 425 degrees.. DO NOT do that!! Once again, a reminder for me to slow down and THOROUGHLY read through a recipe before I messing around in the kitchen.... we live and we learn, right? :)

Cast Iron Skillet Cornbread
Recipe courtesy Alex Guarnaschelli, The Food Network
Printable Recipe
Ingredients:
1 1/4 cup yellow cornmeal
3/4 cup all purpose flour
1/4 cup sugar
1 teaspoon salt
2 teaspoons baking powder
1/2 teaspoon baking soda
1 cup milk (I used 2%)
1/3 cup heavy cream
2 eggs, slightly beaten
7 Tablespoons butter, melted and cooled
1 Tablespoons butter, room temp
Directions:
Place a 9 inch cast iron skillet in the over and preheat to 425 degrees F.
In a large bowl, add the cornmeal, flour, sugar, salt, baking powder and soda, whisk together until well combined. In another bowl, mix together the milk, cream, eggs and butter. Slowly whisk wet ingredients into dry ingredients until just combined.
CAREFULLY remove the skillet from the oven and reduce the temperature to 375 degrees F. Drop in remaining tablespoon of butter; letting it coat the bottom and sides. Pour the batter mixture into the skillet and place it back in the oven. Bake for 20-25 minutes. Carefully remove and allow to cool a bit before cutting. Serve warm with butter and/or honey. Enjoy!
One Year Ago: Grilled Chicken with Hoisin-Spice Sauce
Two Years Ago: Rotini with Cherry Tomatoes and Tuna
Three Years Ago: Super Bowl Count Down.. Take Two: More Appetizers
Although the weather has improved considerably over the last few days, we, here in the southwest desert, have been experiencing some pretty chilly conditions. Seriously, it was down into the 20's for a low.. why I understand that may be a common thing in Green Bay Wisconsin this time of year, it is quite a rarity in the Phoenix Metro area. I might not like going out in the colder weather, but I do enjoy when it hits, as I get to make more warming, comforting foods. Besides mac and cheese, chili is one of the favorites of those comforting foods.
So why the name firecracker? Well, I was having a hard time coming up with a name for the chili... and well.... it was spicy... and well... someone at work has nicknamed me Firecracker.......... I think you can put two and two together from there :)
Firecracker Chili
Created by Jenn's Food Journey
Printable Recipe
Ingredients:
2 teaspoons olive oil
1 sweet onion, finely chopped
2 jalapenos, finely chopped
6 mini sweet peppers, finely chopped
1/3 lbs ground beef
1/2 lbs ground Mexican chorizo
1/4 lbs ground pork
1 12oz bottle Guinness
1 1/2 cups beef broth
3 Tablespoons chili powder (I used 1 T regular and 2 T ancho chili powder)
1 teaspoon Hungarian sweet paprika
1/2 teaspoon ground cumin
1/2 teaspoon cayenne pepper
1 teaspoon Frank's hot sauce
1 8oz can tomato puree
1 Tablespoons tomato paste (optional)
1 cup chili beans
salt and pepper
Directions:
In a Dutch oven or soup pot, heat the oil over medium heat. Add the onion and turn the heat down to medium low. Saute 5-8 minutes, or until the onions are just starting to soften. Add the jalapenos and sweet pepper and saute 1 minute. Turn the heat back up to medium and add chorizo. Cook for 2 minutes. Add the pork and ground beef and cook until the meats are just cooked through and no longer pink. Another 5-8 minutes. Slowly stir in the beer and beef broth. Add the chili powder, paprika, cumin, cayenne and hot sauce and stir to combine. Stir in the tomato puree and bring the whole thing to a boil. Loosely cover and turn the heat to low. Allow the chili to simmer for at least 1 hour. Taste for seasoning. Stir in beans in the last 20 minutes. Add the tomato paste if the chili is too thin. Serve with cornbread (which I'll be posting on Friday) and Frito's. Enjoy!
One Year Ago: Shrimp Scampi Pasta
Two Years Ago: White Chocolate & Strawberry Muffins
Three Years Ago: Chicken & Basil Stir Fry
I have been looking for a good jerk chicken recipe for awhile now. The funny ... or sad, I truly think in this case....thing is, I have had this recipe in my "must try" folder for awhile now. How it kept slipping under my radar, I will never know. I found this recipe awhile back on Larry's blog and all but forgot about it (I am spacey from time to time to time to time....) until recently, when he made note of it again just a few months ago. I would have given him a great big hug and kiss (sorry, Bev, I mean no offense by that one) had he actually been in front of me when I clicked on his blog that morning. I was looking for ideas regarding grilled chicken... you know how I love the grilled chicken... and there it was.. staring me square in the eyes....... and... we all know you can't turn down a good jerk marinade when it's staring into your eyes :)
Jerk Chicken
Adapted from Larry, Big Dude's Electric Ramblings
- Serves 2 -
Printable Recipe
Ingredients:
3 Habanero chiles, cut in half
1 teaspoon dried thyme
1 teaspoon allspice
1 garlic clove, quarter
1 teaspoon sugar
1/2 teaspoon black pepper
2 Tablespoons olive oil
2 Tablespoons soy sauce
1 Tablespoon lime juice
2 Tablespoons orange juice
2 Tablespoons white wine vinegar
1/4 teaspoon ground cinnamon
1/4 teaspoon nutmeg
1/4 teaspoon ground ginger
2 boneless, skinless chicken breasts
Directions:
Place all ingredients, except the chicken, into a food processor or blender and blend until chiles are chopped fine. Rinse the chicken and pat dry with a paper towel. Place in a resealable plastic bag and pour the marinade over. Seal and place in refrigerator and allow to marinate for a minimum of 2 hours or overnight. (Larry does his overnight, I let mine marinate for 4 hours. The longer it marinates, the more flavorful your meat will be)
Preheat grill to 375 degrees F. Clean and oil grill grates. Remove chicken from bag and discard marinade. Place the chicken over direct heat and allow to grill 8-10 minutes per side or until the chicken reaches an internal temperature of 165 degrees F. Remove from grill and allow to rest for 5 minutes. Serve with Lemon Aioli if desired. Enjoy.
One Year Ago: Chocolate Chocolate Chip Cookies
Two Years Ago: Sriracha Chicken Wings
Three Years Ago: Lemon Tuna Pasta with Basil & Zucchini
Over the last few months, I had been working some pretty long hours through the week - so, by the time I got home each night, I was wiped out. Cooking dinner was truly the last thing on my mind, but I knew I had to do something, or all we would eat would be chips and cookies. I became pretty good at coming up with very simple ideas for dinner... even on the weekends, because that is just how exhausted I was. This was just one of those recipes. Most of those recipes will not end up here, unfortunately, because with exhaustion came not wanting to photograph anything either. Oh well.. they'll fall back into the rotation at a less busy time and I'll be able to document them. Until then... enjoy :)
Grilled Dijon Chicken with Lemon Dijon Aioli
Created by Jenn's Food Journey
- Serves 2 -
Printable Recipe
Ingredients:
3 Tablespoon Dijon mustard
1 Tablespoon Balsamic vinegar
1 Tablespoon olive oil
1 teaspoon Worcestershire sauce
1/4 teaspoon black pepper
2 boneless, skinless chicken breasts
Lemon Dijon Aioli -
3 Tablespoons homemade mayonnaise
1 1/2 Tablespoons lemon juice
1 teaspoon Dijon mustard
1/8 teaspoon garlic powder
1/4 teaspoon black pepper (or to taste)
Directions:
In a bowl or measuring cup, add the 3T Dijon, Balsamic, olive oil, Worcestershire and black pepper. Mix together until well combined. Rinse the chicken and pat dry with a paper towel. Place in resealable bag and pour marinade over top. Seal and place in refrigerator for at least 2 hours (I let mine side for 4 hours).
Meanwhile, mix together all the ingredients for the aioli in a small bowl. Taste for seasoning. Cover and place in refrigerator until ready to use. Can be store for up to a week.
Preheat grill to 375 degrees F. Clean and oil grill grates. Remove chicken from bag and discard marinade. Place chicken directly over the fire and grill 8-10 minutes per side or until the internal temperature reaches 165 degrees F. Remove from grill and allow to rest for 5 minutes. Serve with aioli and enjoy!
One Year Ago: Chicken Noodle Soup
Two Years Ago: Another Nut Topped Fish
Three Years Ago: Pan-Seared Tilapia with White Bar-B-Q Sauce
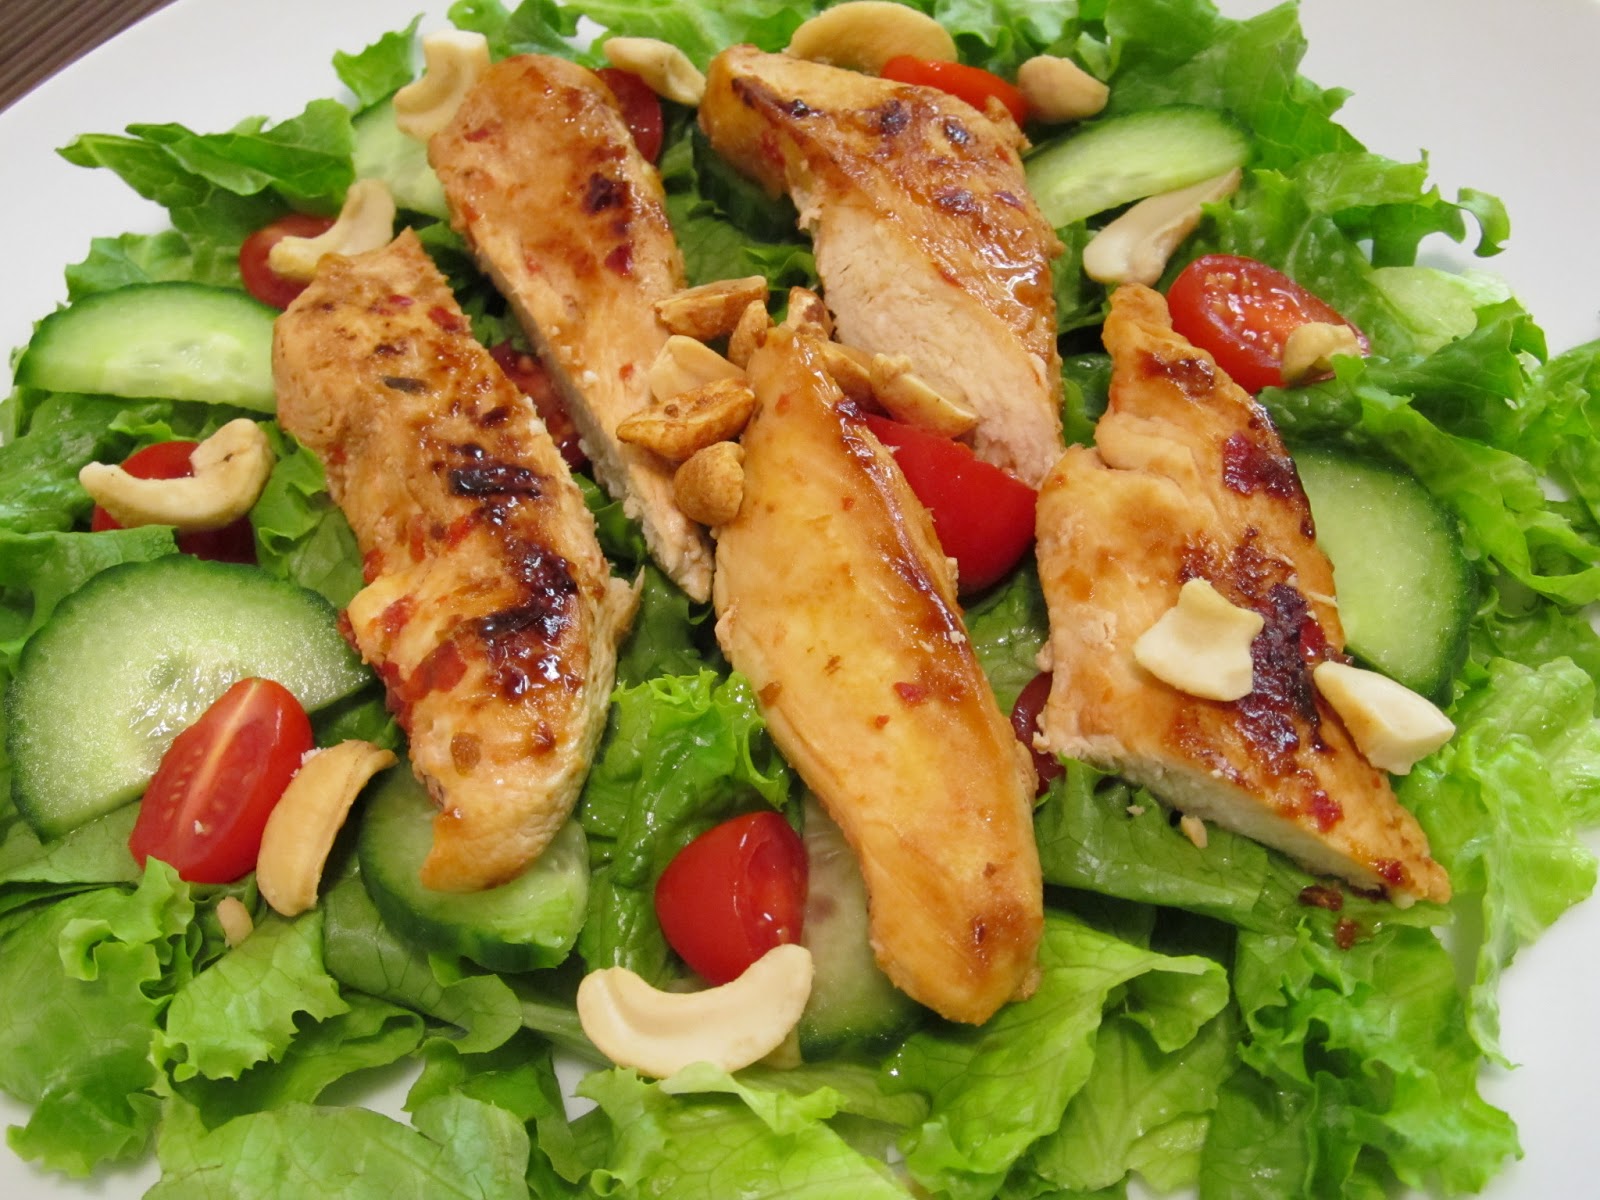
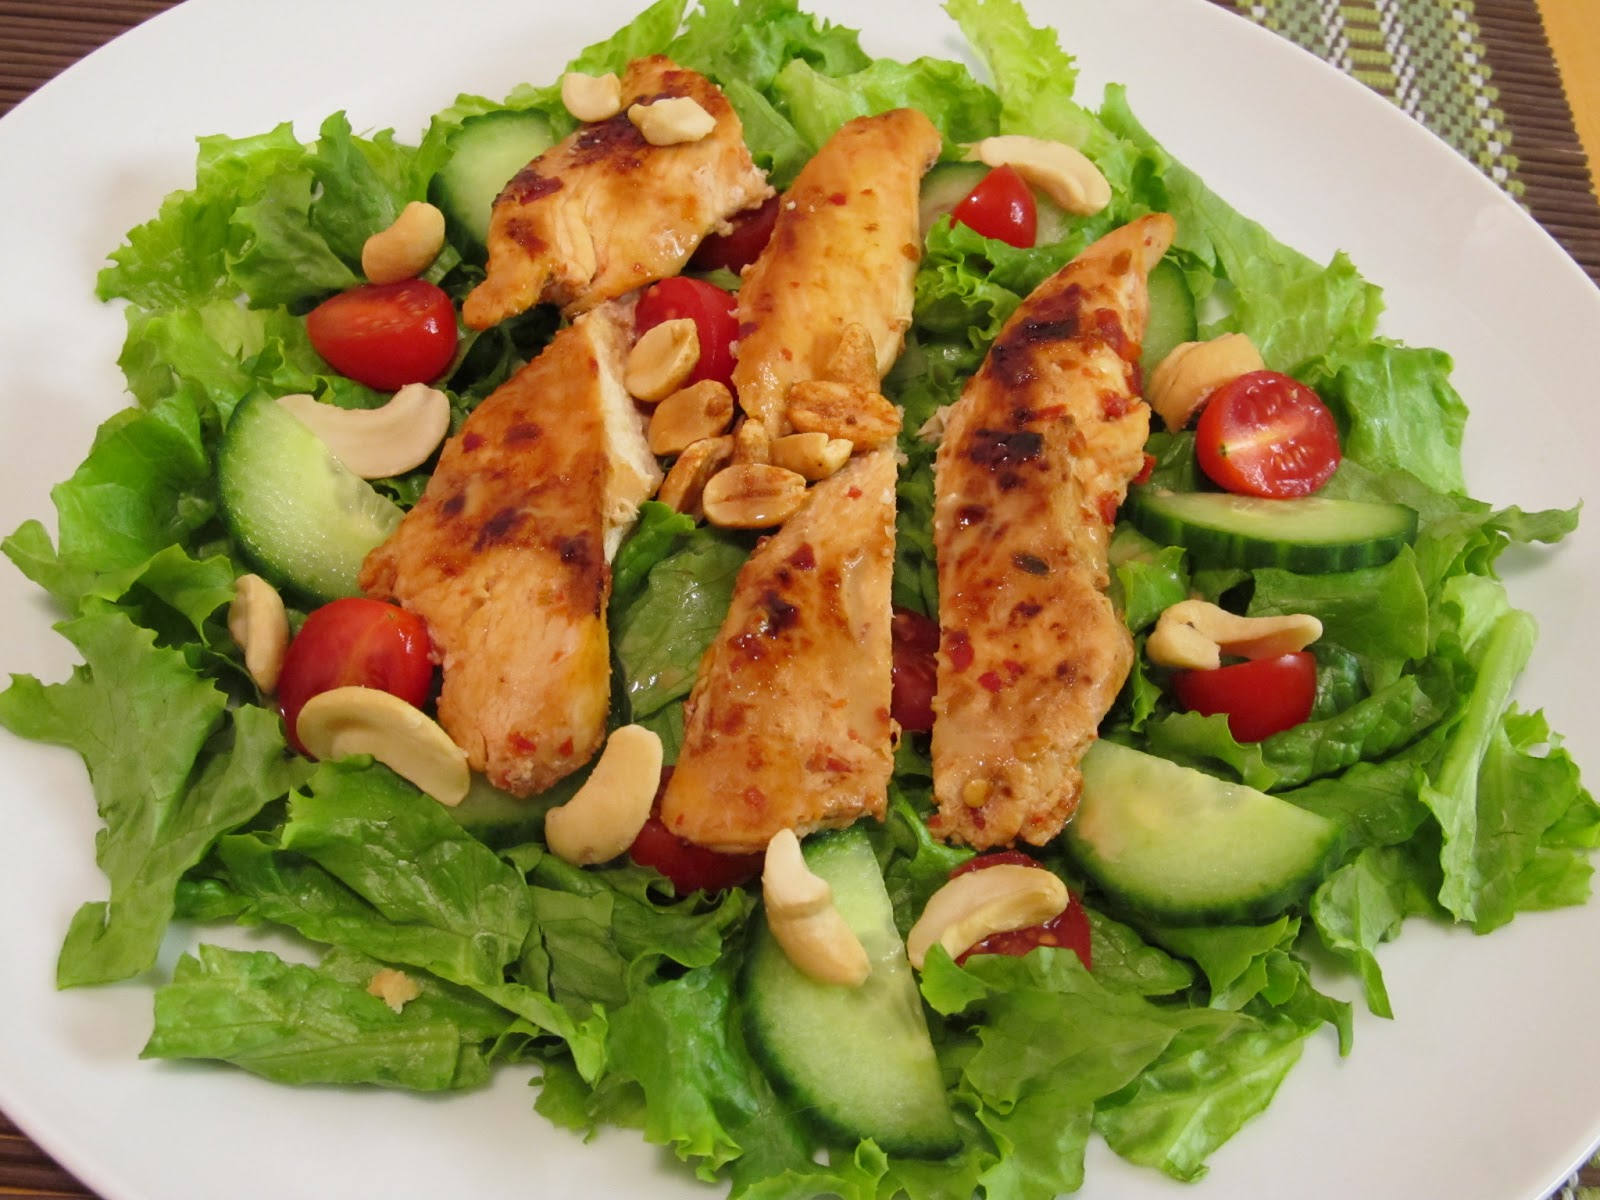
I know it's not really "salad season"...most people are craving more warm and comforting foods - Heck, even the southwest desert experienced a major cold front this past weekend (lows in the 20's, high's in the low 40's... I don't care where you are from, that's cold!!), BUT, if you are looking for a light meal that takes no time at all to prepare, no matter what time of year.... this recipe is for you. It's also a great salad to bring for lunch - just keep that dressing on the side!
Stir-Fried Chicken Salad
Adapted from Cooking Light
- Serves 2 -
Printable Recipe
Ingredients:
1 Tablespoon rice vinegar
1 Tablespoon fish sauce
2 Tablespoons soy sauce, divided
2 Tablespoons chili garlic paste (Sambal Oelek), divided
2 boneless, skinless chicken breasts, cut into 3-4 strips each
2 teaspoons vegetable or peanut oil
2-3 cups salad greens
2 Tablespoons chopped basil
cucumber slices (optional)
cherry tomatoes, quartered (optional)
1/4 cup unsalted peanuts or cashews
2-4 Tablespoons crumbled goat cheese or feta (optional) (I added some, but AFTER I took pictures... of course)
Directions:
In a measuring cup, mix together the vinegar, fish sauce, 1 tablespoon soy sauce and 1 tablespoon chili garlic paste until well combined. Rinse chicken and pat dry with a paper towel. Place in shallow dish or resealable plastic back. Pour the marinade over and place in refrigerator for at least 2 hours.
In a wok or deep, non-stick skillet, heat the oil over medium high heat. Remove the chicken from the marinade and place on a paper towel quickly to get any excess liquid off of it. Add the chicken to the hot wok and stir fry 5-8 minutes, or until the chicken is no longer pink in the middle. Remove from wok and allow to cool for 5 minutes.
Meanwhile, mix together remaining tablespoon of soy and chili garlic paste. Divide lettuce evenly between two plates or large bowls. Top with chopped basil, cucumber, tomato, peanuts, goat cheese and chicken. Drizzle with soy/chili paste mixture. Enjoy!
One Year Ago: Chicken Alambre
Two Years Ago: Biscuits and Sausage Gravy
Three Years Ago: Chorizo and Rice Casserole
On Friday, I once again, spoke of my love for mac and cheese. Today, I will speak of my love for BLT's... or in this case, BLC's. Yep, that's right. Since it's hard to get good fresh tasting tomatoes all year around, I have grown to love substituting the tomato with cucumber. English cucumber to be exact. The cucumbers give the sandwich a nice fresh taste and, it's not often you run into a bad cucumber throughout the year. So, when I saw a recipe for a BLT's with Blue Cheese-Buffalo Aioli, I knew I had to put my spin on it.
This sandwich is amazing! The perfect solution to "what's for dinner" on any busy evening.
BLC's with Goat Cheese-Buffalo Aioli
Adapted from Aaron McCargo, Jr, Food Network
Printable Recipe
Ingredients:
8 slices of your favorite bread, lightly toasted
16 strips of good quality bacon, cooked and cut in half
1/2 English cucumber (ok, you can use tomato if you want)
4 leaves (or more if needed) green leaf lettuce
For the aioli -
1/2 cup mayonnaise
1/4 cup crumbled goat cheese
2 Tablespoons hot sauce (I used Frank's)
salt and pepper
Directions:
In a small bowl, mix together all the ingredients for the aioli. Season with salt and pepper to taste.
Lay 4 slices of bread on a cutting board. Spread 2-3 teaspoons (or more) of the aioli on each slice, then top with 8 half-pieces of bacon, a few slices of cucumber and then the lettuce. Top each with another slice of toasted bread. Serve and enjoy!
One Year Ago: The Witch's Marinated Chicken with White Wine and Parsley Aioli
Two Years Ago: Herb Crusted Tilapia
Three Years Ago: Balsamic, Dijon and Garlic Chicken
Two things I loved when I was growing up - my grandma's mac and cheese and queso dip. For me, queso has either been a mixture of ground beef and Velveeta (my mom made this a lot) or Velveeta and Ro*Tel. My grandma's mac and cheese was made with Velveeta and is to this day, the best mac and cheese I've had. (although, we all have her recipe, yet none of us can duplicate it.... there must be some missing ingredient she did not tell us about, or there truly is something to be said about the "love" you put into your cooking).
Even now, as an adult, I adore both things.... you all know that I still eat mac and cheese, as I post recipes here for it all the time. But most of you probably don't know I still eat Queso any chance I can get. Hence, how the idea for this pasta came about. One weekend I was thinking of queso dip AND mac and cheese.... and wouldn't you know it... I thought "hey, why not combine the two???"
Not only was this a delicious masterpiece but also a great homage to my grandma and mom!!!!
Chicken Queso Pasta
Created by Jenn's Food Journey
Printable Recipe
Ingredients:
1-2 boneless, skinless chicken breasts, sauteed or grilled and cut into bite size pieces
2 cups elbow pasta
8 oz Velveeta cheese
5 oz Ro*Tel
1 jalapeno, finely chopped
1/4 cup half and half (or more if necessary)
garlic powder (to taste)
salt and pepper (to taste)
Directions:
Cook pasta according to package directions; drain well and return to pot. Place pot over low heat and add the Velveeta, Ro*Tel and jalapeno. Stirring to help the Velveeta melt. Stir in the half and half until you reach the right consistency. Stir in the cooked chicken. Taste for seasoning - add garlic powder, salt and pepper. Serve immediately. Enjoy!
One Year Ago: Crunchy Topped Tilapia with Po'Dunk Sauce
Two Years Ago: Spicy Crab Cakes with Lemon Aioli
Three Years Ago: Creamy Italian Sausage Pasta
Believe it or not, I have had my eye on this recipe for a very long time. Another recipe that has been sitting in my "must try" folder since 2010! (Which reminds me... can you believe it's 2013 already? Where did all the time go?) Anyway, like most recipes that seem to end up taking me years to finally make, it was not a disappointment and of course I wished I had tried to sooner. Oh the things we miss that we don't' even realize we are missing :)
Georgia Baked Chicken
Adapted from Tasty Kitchen
- Serves 2 -
Printable Recipe
Ingredients:
1/4 cup crushed Corn Flakes cereal
2 Tablespoons shredded Parmesan cheese
1/2 teaspoon dried parsley
1/4 teaspoon garlic powder
1/4 teaspoon salt
1/8 teaspoon pepper
1 Tablespoon mayonnaise
2 boneless, skinless chicken breasts
Directions:
Preheat oven to 375 degrees F. Place a wire rack inside a rimmed baking sheet and spray with non-stick cooking spray; set aside.
Mix together the Corn Flakes, Parmesan, parsley, garlic, salt and pepper until well combined and place in a shallow dish. Rinse the chicken and pat dry with a paper towel. Spread a thin layer of mayo over both sides of each piece of chicken and press into Corn Flake mixture, making sure both sides are covered. Shake off any extra and place on wire rack. Place in over and bake for 30 minutes or until the chicken reaches an internal temperature of 165 degrees F. Remove and allow to rest for 5 minutes before serving. Enjoy!
One Year Ago: Grilled Pork Chops with Mint and Pine Nut Gremolata
Two Years Ago: The Great Spam Experiment
Three Years Ago: Chicken Fried Steak