Search This Blog

Friday, March 11, 2011

Guest Blogger: Creamy Avocado Pasta

Yesterday I told you that I was going to start showcasing some guest bloggers on the Friday's I am over at Our Krazy Kitchen....and I did not lie!!  But first... don't forget to swing by Fire Day Friday and see what I've got cooking up over there.  All I'm gonna tell you is it involves beef and mustard.....yea, I know, you are curious now, aren't you???

Today I would like to introduce you to Katie, The College Culinarian.  I love Katie's site because I was once a college student myself.  And let me tell you, I was never this creative in the kitchen when I was a college student!  I love that she gets creative with minimal ingredients and on a very tight budget.  If you have not had a chance to see Katie's site, please, make it a point to go there today.  Katie shows you how to make gourmet type meals on a college students budget.  Not only is she handy in the kitchen, but she recently just announced that she would actually becoming the PhD Culinarian!!  (Big congratulations to you, Katie!!)  Now, FINALLY, without further ado...here's Katie:


College food is rife with bottled pasta sauces.  It's a quick meal after slaving for hours on term papers, chemistry labs, and um, more term papers.  Just boil some pasta and toss in the sauce---and presto! (or, perhaps more appropriately, Prego!) you've got dinner.

Yet, at least in my experience, the red sauce route often gets spurned by fatigued tastebuds.  Nothing against the Italians - I loves me some marinara - but Holy Cannoli, a creamy pasta sauce made out of avocados?  Yes, please.  I topped it with sprouts because you might as well go WH--Whole Hippie--when you're dealing with the superbly healthy avocado.

Oh, and in case you feel like pulling an early April Fool's joke, this sauce totally looks like pesto.  Use at will.

Creamy Avocado Pasta
Recipe from the kitchen of The College Culinarian
- Serves 1 -
Printable Recipe 
Ingredients:
1/2 avocado
1/2 lemon, juice and zest
1/2 garlic clove, minced
Handful of chopped fresh parsley
1 t. extra virgin olive oil
Salt and Pepper
Fettuccine or Spaghetti
Sprouts (optional)

Directions:
Cook pasta in boiling, salted water until al dente.

Meanwhile, scoop out the avocado meat and roughly chop.  Add the avocado, garlic, parsley, olive oil, lemon juice, and some zest to a food processor.  Pulse until creamy.  Season with a dash or salt and pepper.  Toss with hot pasta and top with sprouts.

One Year Ago:  Bacon and Tomato Pasta (OMG This is the BOMB!!!)

Thursday, March 10, 2011

Balsamic Glazed Fish

I have some exciting news!  Well, it's exciting to me at least!!  Starting tomorrow, while I am doing my Fire Day Friday post, I'll be showcasing a new guest blogger.  I'm excited, because, for now at least, these will be blogs that I have recently found and fell in love with.  Not only will it give me a little break so I can focus on Fire Day Friday, but it will also help you find some new and interesting blogs, if you haven't found them already!!  So don't forget to check in tomorrow for my first guest blogger....!!!  I wonder who it will be???  :)

Here is a statement you may have not heard me say before:  Balsamic glaze makes everything taste better.  Ok, maybe not everything, but this balsamic glaze does make this fish taste amazing!!  It's sweet, it's tart, it's wonderful!  This glaze would actually work on any type of fish, or it could even work on chicken, pork, or even steak...it's just that good!

Balsamic Glazed Fish
Adapted from Cooking Light
Printable Recipe 
Ingredients:
1 1/4 teaspoon ground black pepper
1/4 teaspoon salt
4 tilapia fillets (or any type of fish really)
2 Tablespoons water
2 Tablespoons balsamic vinegar
4 teaspoons brown sugar
1 Tablespoons low sodium soy sauce
1/2 teaspoons cornstarch

Directions:
In a small saucepan, combine the water, vinegar, sugar, soy, and cornstarch.  Bring to a boil and cook for 1-3 minutes, stirring constantly, or until the glaze has thickened.  Remove from heat and allow to cool just a bit.

Preheat the oven to 375 degrees F.  Spray a baking dish with nonstick cooking spray.  Rinse the fish and pat dry.  Season both sides with salt and pepper and place in prepared dish.  Spoon half of the glaze over the fish and place in the oven.  Bake for 6 minutes.  Remove from oven and pour the remainder of the glaze over the fish.  Return to oven and continue baking for another 6-8 minutes, or until the fish flakes easily with a fork.  Enjoy!


One Year Ago:  Pepper Jack Steak Sandwiches (w/Jalapeno Mayo)

Wednesday, March 9, 2011

Creamy Lemon Pasta with Chicken, Spinach, & Tomatoes

When I saw this recipe posted on The Comfort of Cooking, I knew I was going to make it, it was just a matter of when!!  Well, when happened recently and well, I must exclaim, I LOVE this dish!!!  Chris thought it was a bit too lemony but that, I am certain, was due to my error, not the error of the recipe.  You see, the other weekend, Chris and I stopped at a Farmer's Market that was down the street from our house.  One of the stands had some really nice sized lemons so I grabbed two knowing I was making this dish.  The more I thought about it, after we sat down to eat, the more I realized those lemons were much larger then normal ones I've been seeing in the store.  I mean MUCH larger, probably about double the size of the ones in the grocery store.  So, yea... I'm thinking the over lemony flavor was my bad.  (Sorry, Georgia!!)  Personally... I still loved it.  AND, I thought it was even better the next day!  The flavors had more time to meld together...it was delicious!!

Creamy Lemon Pasta with Chicken, Spinach, & Tomatoes
Adapted from Georgia, The Comfort of Cooking
Printable Recipe 
Ingredients:
2 teaspoons extra virgin olive oil
2 cloves garlic, minced
1 cup heavy cream
2 lemons, zested and juices reserved
1/2 teaspoon salt
1/4 teaspoon black pepper
1/4 teaspoon red pepper flakes
13 oz whole grain penne pasta
3 oz baby spinach
1/4 cup shredded parmesan cheese
1/2 pint cherry tomatoes, halved
1 large boneless, skinless chicken breast - grilled & cut into small bite size pieces

Directions:
Heat the olive oil in a medium saucepan over medium heat; add the garlic and cook for 1 minutes.  Add the cream, lemon zest, lemon juice, salt, and pepper.  Bring to a boil, then lower the heat and simmer for 10 minutes or until it starts to thicken.

Meanwhile, cook the pasta according to packages directions; drain and place back into the pot.  Immediately add the cream mixture and cook it over medium-low heat for 2-3 minutes or until most of the sauce has been absorbed in the pasta.

Remove the saucepan from the heat and add the spinach, parmesan, tomatoes, and chicken.  Toss well until the spinach has wilted.  Season to taste with salt and pepper; serve hot.  Enjoy!


One Year Ago:  Baked Teriyaki Fish

Tuesday, March 8, 2011

Chipotle Guacamole Rice

I made this rice to go along side my Queso Blanco Chicken Enchiladas the other night, but I inadvertently deleted those pictures...so alas, I had to make this tasty little treat again!!!  I was originally just going to make chipotle rice... but then it hit me... I still had some of those 100 calorie guacamole packs that I received from the Wholly Guacamole company... why not add it to the rice?  Can't hurt, right?  Absolutely, right!  The guacamole added just the right amount of flavor to the spicy chipotle rice.  It gave it a bit of a moisture too, which helped keep it from drying out as it sat on the plate (not that my rice dries out, but I think you know what I mean).  It was the perfect way to jazz up some rice and use up some of what was sitting in our fridge.

Chipotle Guacamole Rice
Printable Recipe 
Ingredients:
1 cup Basmati rice
2 cups chicken broth
1 garlic clove, minced
2 small bell peppers (I used 1 red, 1 green), chopped
1 canned chipotle chili in adobo sauce, minced
1 Tablespoon adobo sauce
1 teaspoon dried oregano
1 - 100 calorie Wholly Guacamole (57grams or 2 Tablespoons)

Directions:
In a saucepan, bring the chicken broth to a boil.  Add the garlic and the rice.  Cover and lower heat.  Allow to simmer for 15-20 minutes, or until all the moisture has been absorbed.  Remove from heat and add the peppers.  Cover and allow to rest for 5-8 minutes.  Fluff with a fork.  Stir in the chipotle, adobo sauce, oregano, and guacamole.  Serve warm.  Enjoy!


One Year Ago:  Oatmeal Chocolate Chip Cookies

Monday, March 7, 2011

Deep Dish Dark Chocolate Chip Brownies

Before I get to the recipe and the tragic story of over baking, I must share something with you.  It will take you away from my site, but I think it's well worth it!  Chris performed live a few weeks ago and I took video of it!!  If you'd like to see him perform Give a Little Bit by Supertramp, check out his website here.

Now on to the brownies:  I had a small problem with these brownies.  I thought they were not done enough, so I let them go to the point of "oh crap, I just over baked these"!!  So other than that, these brownies were the bomb!!  I have no patience sometimes... and I also forget to listen to my gut every now and then.  Both happened when I made these.  But, that's ok... we ate them, believe me...we ate them.  So you can imagine how wonderful they must be if you don't over bake them!!  :)

This recipe can be played with, believe me.  If you don't want dark chocolate chips in there, leave them out.  Or use white chocolate if you want.  You can easily leave out the instant coffee too, I just think that it gives chocolate that extra something!  You can even make them in a bigger pan if you think they are too thick.  The idea is, here is a good basic brownie recipe.... do what you will with it!

Deep Dish Dark Chocolate Chip Brownies
Adapted from Hersey's
Printable Recipe 
Ingredients:
3/4 cup unsalted butter, melted and slightly cooled (1 1/2 sticks)
1 1/2 cups granulated sugar
1 1/2 teaspoons vanilla extract
3 eggs
3/4 cup all-purpose flour
1/2 cup unsweetened, natural cocoa
1 1/2 teaspoons instant coffee or espresso
1/2 teaspoon baking powder
1/2 teaspoon salt
1 cup dark chocolate chips

Directions:
Preheat oven to 350 degrees F.  Grease an 8x8-inch baking dish.

In the bowl of a stand mixer (you can mix this by hand too), using a paddle attachment, add the butter, sugar, and vanilla.  Beat until fluffy and light.  Add the eggs, one at at time, making sure each one is incorporated before adding the next (don't forget to scrap down the sides).  In another bowl, add the flour, cocoa, instant coffee, baking powder, and salt; whisk to combine.  Slowly add the flour mixture, a little at a time, to the bowl of the mixer.  Beat until everything is well blended.  Remove from mixer stand and fold in the chocolate chips with a spoon.  Spread the batter evenly into the prepared pan.

Bake 40 to 45 minutes or until brownies begin to pull away from the sides of the pan.  Cool completely in pan on wire rack.  Cut into bars - makes about 16 brownies.  Enjoy!!


One Year Ago:  Szechuan Chicken

Saturday, March 5, 2011

Creamy Lime Guacamole Sauce - Fail....or did I???

This did not turn out the way I planned.  As you can see from the picture, I was trying to make a sauce that would go with my beloved Tilapia...but I didn't get there.  I went the wrong way, I should have just made this as a dip and never considered anything else.  I even wasted a bunch because I couldn't get the flavors where I wanted them to be.  The first batch I made was way too limey...the second batch...way too much like regular guacamole.  Chris said that it was still really good, but I guess I am a harsher critic.  And maybe it's not that I was being critical, maybe it was just that it did not end up coming together as I had imagined it.  As I just said, if I had made this as a dip for chips, or crackers, or veggies... it would have been spot on.  For fish...not so much.  I thought of this one the other day when I was trying to figure out how to use up some of the guacamole sent to me by the Wholly Guacamole Co.  I had an idea of how it would look, of how it would taste... and well, it didn't hit the mark.  BUT.. I wanted to post it anyway.  Maybe you will try it and like it.  Maybe you will think of a way to make it all that I had imagined.  Maybe you can make it and use it as a dip instead of a sauce for fish.  Maybe you'll just pass this one by...and that would be ok too!

So was it a failure?  In a way yes.  It was a failure as a sauce for fish...BUT...it would be a good change of pace to your standard guacamole if you used it as a dip.  Failed, yet not so much :)

Creamy Lime Guacamole Sauce
Printable Recipe 
Ingredients:
3 Tablespoons Wholly Guacamole, or fresh made guacamole
1 Tablespoon sour cream
2 teaspoons lime juice
cayenne pepper, to taste (optional)
salt, to taste
1 tsp milk

Directions:
In a small bowl, combine all the ingredients.  Stir until smooth.   Cover and refrigerate until ready for use.  (allow sauce/dip to sit at room temperature for 10 minutes before serving.  Serve as dip or sauce for chicken or fish.  Enjoy!

(In case you might be wondering, the tilapia was baked at 400 degrees for 12-14 minutes.  I seasoned it with pepper, garlic salt, and cayenne. Very simple!)

Friday, March 4, 2011

Applesauce Bars

 
When the Food Floozie posted her recipe for these Applesauce Bars, I couldn't stop thinking about them.  For some reason, that morning, as I was browsing through some of my favorite sites, I was way more hungry then usual.  When I pulled her site up, I don't know what it was about it, but my mouth started watering and my belly started yelling "We want one of those...go get one of those!!!"  Alas, Mary does not live close enough for me to just "pop in" AND even though these bars don't take a lot of time, I didn't have all the ingredients... GRRRRR!!  So, I guzzled some more coffee, hoping that would fool my stomach, but no such luck.  On my way to work and all the way up until lunch time, I couldn't stop thinking about how much I wanted one of those bars!!!  Funny how a simple post about tasty applesauce bars can make you become an obsessive freak!!

Unfortunately, this all transpired on a Tuesday, so I had to wait ALL week long before I actually got a chance to make these.  The best part...they were well wroth the wait!!  Oh, don't get me wrong, I would have loved to have had them that day (and the next and the next and the next....) but to be at home and to be able to really enjoy them, savor them.. instead of shoving them in my mouth as I'm heading out the door... Priceless!!

I changed only a few little things when I made these:  I used apple butter instead of apple jelly (but Mary confirmed that this was not a make or break ingredient in the bars and you could leave it out all together), I used all-purpose flour instead of whole wheat flour, and I topped mine with dark chocolate chips.  Why?  Why not???

Thanks Mary!  These were the BOMB!!!

Applesauce Bars
Slightly adapted from the Food Floozie
Printable Recipe 
Ingredients:
2/3 cup softened butter (I used unsalted)
1/4 cup oil (I used vegetable oil)
1/2 cup granulated sugar
1/4 cup brown sugar
1 egg
1/2 teaspoon salt
2 cups all purpose flour
1 cup applesauce
3 Tablespoons apple butter
1/4 teaspoon cinnamon
1/2 cup apple flavored instant oatmeal
1/4 - 1/2 cup dark chocolate chips

Directions:
Preheat oven to 325 degrees F.  Grease an 8x8-inch baking dish.

In a large bowl, combine the butter, oil, sugar and brown sugar; mix in the egg and the salt.  Slowly mix in the flour.  Press 2 cups of the mixture into the bottom of the prepared baking dish.
Combine the applesauce, jelly, and cinnamon in a small bowl; spread over the base.

 
Stir the oatmeal and the chocolate chips in the remaining batter; spread over the applesauce layer (I actually sort of just crumbled mine up).

 
Bake for 30 minutes or until the topping is golden brown.  Cool before cutting into bars (though I thought they were the best still slightly warm!!).  Enjoy!


One Year Ago:  Italian Style Tilapia

Thursday, March 3, 2011

Queso Blanco Chicken Enchiladas

This dish is not for those of you that may be watching your weight.  However, it is definitely for those that are looking for something comforting, filling, and delicious!!  Oh, and let's not forget simple!  Nice thing about using pre-made products is that it really does cut your prep time in half.  I know a lot of people rag on Sandra Lee because she uses so much pre-made stuff in her recipes, but you gotta give the woman credit, her goal is to teach you how to create SEMI-homemade meals.  To make meals that have the flavor and life of a true homemade meal without having to spend a ton of money or a ton of time in the kitchen.  Now, you know me, I would rather go out of my way and make my stuff fresh...for the most part...but some people don't have that luxury.  Some people don't really want to, they want easily prepared meals and don't care if half of it was pre-made somewhere else.  So for those readers....this one's for you!! :)

These enchiladas are creamy and filling and so very good.  If you want to use more queso for the top of the enchiladas, go for it.  We had just gotten to the end of what was in the container, so what I used was all I had left.  Oh, and I used medium sized tortillas (about 8" rounds) but I would recommend using at least 10"...You can fill them up a little more and they roll up easier then the smaller ones....but that's only a suggestion.


Queso Blanco Chicken Enchiladas
Printable Recipe 
Ingredients:
1 lbs boneless, skinless chicken breasts, diced or chopped
2 Tablespoons olive oil
garlic salt
pepper
1 yellow bell pepper, thinly sliced
1 red bell pepper, thinly sliced
6 Tablespoons Wholly Guacamole Queso Blanco, divided
2 Tablespoons low fat sour cream
4-6 medium tortillas (depends on how full you make them)
1 Tablespoons Wholly Guacamole Salsa
Shredded cheese - I used a Mexican blend
Diced tomatoes - I diced up about 5-6 cherry tomatoes

Directions:
Place the diced up chicken in a bowl and toss with olive oil.  Season with garlic salt and pepper.  Allow to marinate in the refrigerator for at least 30 minutes.

Preheat oven to 375 degrees F.  Spray a baking dish with cooking spray; set aside.  In a non-stick skillet, add the chicken and saute for 3-4 minutes.  Drain any excess water.  Add the yellow and red pepper and saute for another 2-3 minutes.  Remove from heat; again, draining any excess water from the pan.  Add 2 Tablespoons of Queso and the sour cream; stir to combine.  Place chicken mixture evenly on each tortilla (not too much though, remember you have to rolls these closed..I don't know exactly how much I added to each tortilla, start with about 2 tablespoons and go from there) then roll up and place in prepared baking dish.  Mix together remaining 1/4 cup queso and the salsa.  Pour over the enchiladas and top with shredded cheese and tomatoes.  Bake for 20 minutes or until the cheese and sauce are melted and bubbly.  Enjoy!


One Year Ago:  Pasta with Sausage, Basil, & Mustard

Wednesday, March 2, 2011

Jalapeno Cheddar Grilled Chicken

Ok, this was seriously good!  I'm not one to pat myself on the back too much... BUT...  DANG this was GOOOOOD!!!  What's even better about it is - it's SO simple!

I love dishes like this because you can throw it together quickly and people will never even know!  They will think you spent hours.... ok, ok, maybe not hours, but they will think that you went way out of your way for such a flavorful dish.  All you'll have to do is sit back and smile.... :)

I cooked three pieces of chicken instead of four....I was actually only going to do just one for each of us, but was worried Chris might want seconds.  So, it was just by chance that I happened to have an extra piece of chicken for an unexpected, yet ALWAYS welcomed, guest.  Served with Mustard Roasted Potatoes and a side salad, it was the perfect meal and we are all completely satisfied in the end!  I guess what I'm trying to tell you is:  even though I have the recipe written out for 3 pieces of chicken, you can easily use 4...or 2.


Jalapeno Cheddar Grilled Chicken
Printable Recipe 
Ingredients:
3 boneless, skinless chicken breasts (you can use 4)
3 Tablespoons Ranch dressing
1 Tablespoon Country Bob's Apple Chipotle Sauce (you could use Sriracha or Sambal Oelek if you don't have Country Bob's)
1 Jalapeno pepper, seeds removed, sliced into thin rounds
cheddar cheese, sliced (I used block cheese and used about 2-3 slices on each piece of chicken)
2-3 Tablespoons Wholly Guacamole Spicy Guacamole

Directions:
In a small bowl, mix together the Ranch and apple chipotle sauce.  Place the chicken in a shallow dish or a resealable plastic bag.  Pour the marinade over the chicken and let it marinate in the refrigerator for at least 1 hour (I marinated mine for 4 hours).

Preheat your grill to 400 degrees.  Oil the grill grates.  Remove the chicken from the dish/bag and place it directly over the heat.  Grill for 8 minutes.  Flip the chicken and lay the jalapeno slices on top of each piece (I used about 3 rounds per piece of chicken).

Let the chicken cook another 5-7 minutes.

Top with the cheese (make sure to cover the grill) and let the chicken cook another 1-2 minutes or until the cheese has melted.  Remove the chicken from the grill.  Top each piece with spicy guacamole and enjoy! 

One Year Ago: Caramelized Chicken with Garlic Rice

Tuesday, March 1, 2011

Grilled Chicken with Queso Sauce

My first recipe using the products that the Wholly Guacamole sent me is for grilled chicken.  You're shocked, I know.  Actually, I contemplated on how to create this meal all day.  Good for me, I wasn't in the middle of billing cause then I could let my mind wander and think about food, food, and more food!!  Too bad a full day of thinking on it only came up with this simple dish!!  But it really doesn't matter how simple it was because it was wonderful! Honestly, you could leave out the milk in this sauce because the queso would be thin enough, but, of course, I didn't want to just pour ready made queso dip over the chicken.  I had to "sauce" it up just a bit :)  If you are worried about the heat from the jalapenos, use a bell pepper instead (any color).   This is an easy way to take a pre-made product and make it taste homemade.

Grilled Chicken with Queso Sauce
Printable Recipe 
Ingredients:
4 boneless, skinless chicken breasts
3 Tablespoons mayo
1 Tablespoon lime juice
2-3 teaspoons homemade taco seasoning
1 jalapeno pepper, seeds removed and finely diced
5 Tablespoons Wholly Guacamole Classic Queso Dip
1 Tablespoon 2% milk
1 Tablespoon Wholly Guacamole Salsa (mild)

Directions:
In a small bowl, mix together the mayo, lime juice, and taco seasoning (add a teaspoon at a time until you get the flavor you like); stir until smooth.  Spread mixture over both sides of all pieces of chicken.  Allow chicken to marinate for at least 1 hour.

Preheat the grill to 400 degrees.  Rub oil on the grill grates.  Place chicken directly over the fire for 8-10 minutes per side, or until the chicken is cooked through (165 degrees).

While the chicken cooks, in a small saucepan sprayed with non stick spray, add the jalapenos over medium high heat.  Quickly saute the jalapenos for 3 minutes.  Turn the heat to medium low and add the remaining ingredients.  Cook until heated through; stirring occasionally.  Serve sauce over chicken and enjoy!

(Those are purple fingerling potatoes, by the way...strange looking but they taste just like the white ones ..Yum!)

One Year Ago:  Rosemary & Red Wine Steaks

Monday, February 28, 2011

Apple Chipotle Pork Chops

I've been looking for ways to use the Country Bob's sauces I won in the Women of the Grill contest (don't forget to enter this years contest here) and decided to do something REALLY simple.  I always think pork and apples go really good together, so when I had a craving for pork the other day, I immediately went to find the Apple Chipotle Sauce that came in my winnings. Cause not only do apples go well with pork, but so do chipotles!  This marinade is way simple and I even made a bit extra so that I could have a little sauce for dipping.  The flavors were sweet and spicy and delicious.  Not over powering on any one flavor....just perfect!

Apple Chipotle Pork Chops
Printable Recipe 
Ingredients:
3 bone-in pork loin chops (it came that way, otherwise I would have used 4)
1/4 cup Country Bob's Apple Chipotle All Purpose Sauce
1 Tablespoon Mayonnaise
1 clove garlic, finely minced
ground chipotle pepper (optional - can use cayenne)
kosher salt

Directions:
In a small bowl, combine the Apple Chipotle sauce, mayo, and garlic; mix until smooth.  Season the pork on both sides with the chipotle pepper and salt.  Place the pork in a resealable bag and pour the sauce over, seal the bag and rub the meat to make sure the sauce covers all sides.  Let marinate in the refrigerator for 4 hours.

Preheat grill to 375 degrees.  Oil the grill grates.  Remove the pork chops from the bag and discard the marinade.  Place the pork directly over the heat and grill 5-6 minutes per side or until the pork is full cooked (145 degrees F).  Carefully remove from grill and enjoy!


One Year Ago:  Devil's Food Cake Cookies

Saturday, February 26, 2011

Homemade Mayonnaise

YAY!!! I did it!!  I finally did it!!!  I actually made my own mayonnaise!!! And it actually came together perfectly!!  WOOHOO!!!

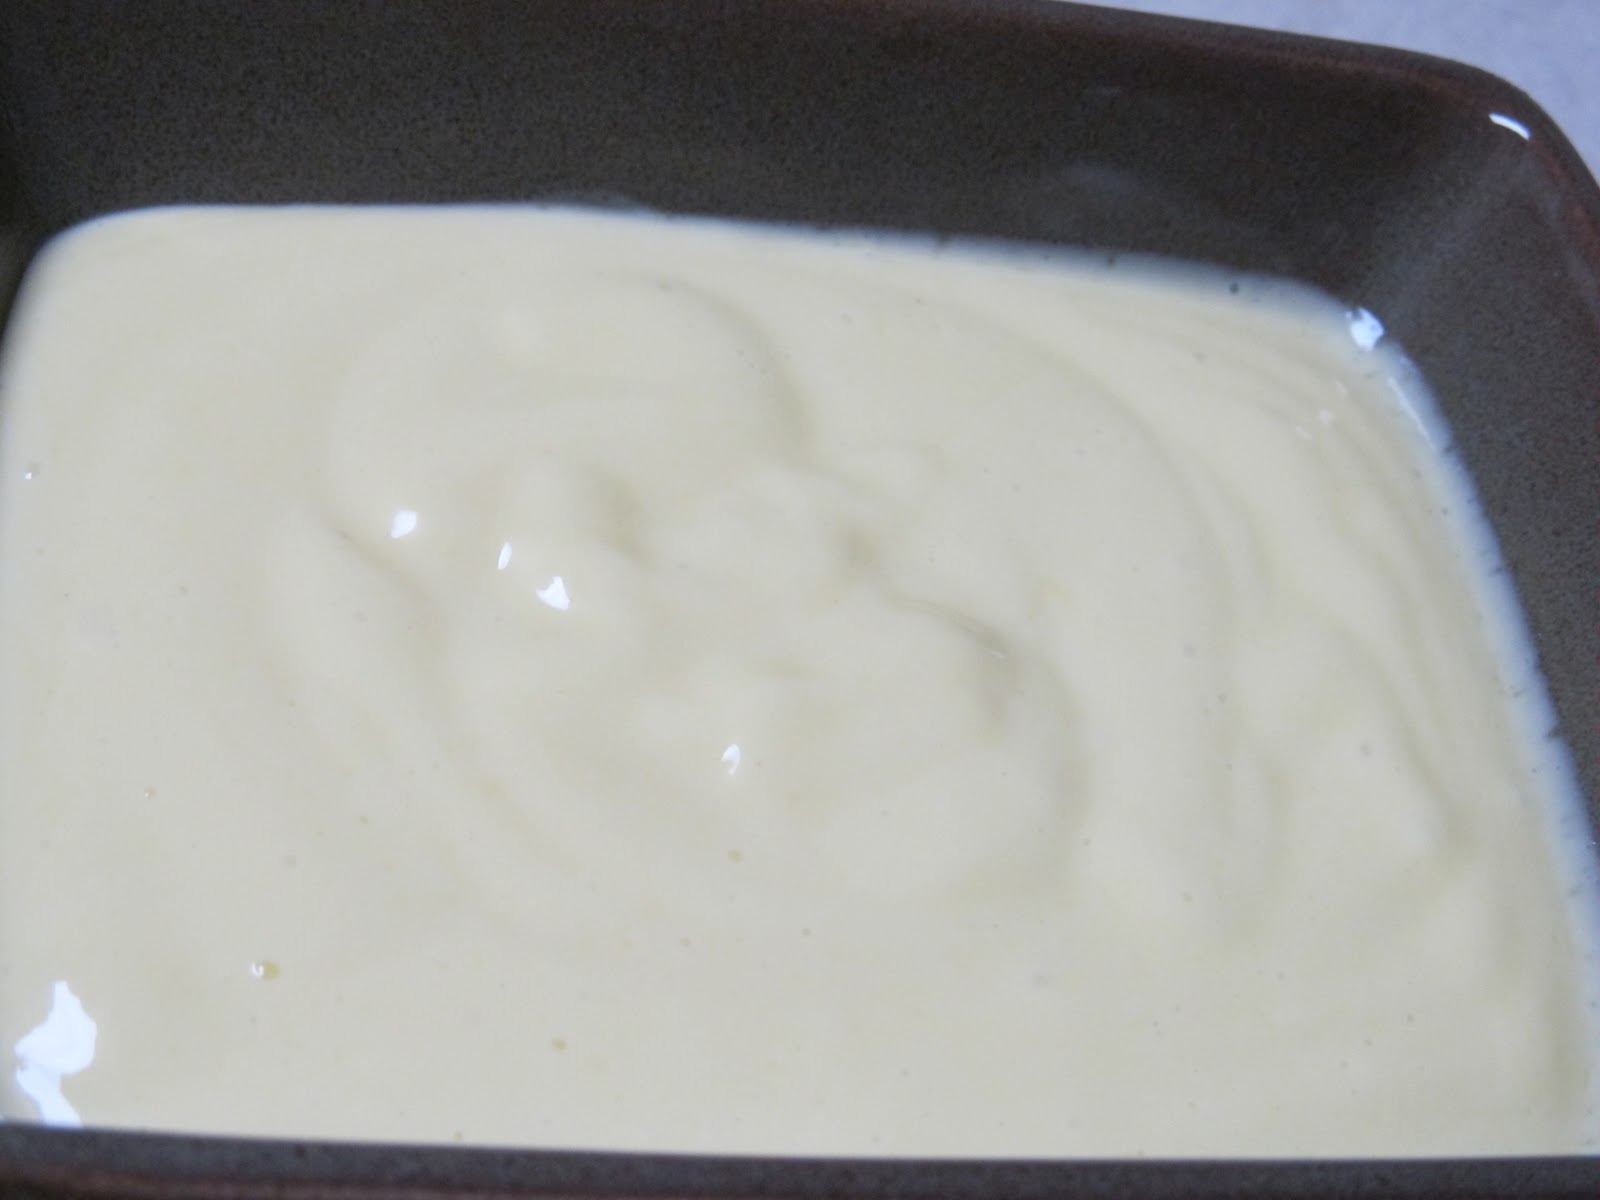
Ok, now that that is out of my system...let's talk mayo.  First, I need to apologize for the pictures...they did not turn out as great as I would have liked, but in my defense, it's really hard to take pictures of a bowl of mayonnaise!!  Second, you should know that olive oil does not work .. at least not extra virgin olive oil.  Or I should say, at least not the extra virgin olive oil I used.  Oh, it works.. I mean, you were just looking at a picture of mayo made with olive oil.  BUT, it did not taste right.  It had that distinctive flavor that extra virgin olive oil carries and it wasn't perfect.  But that's ok... I actually got it to emulsify and turn into actual mayonnaise and that was what I was going for.  The taste did leave something to be desired, but that's ok, now I know I can make it.  (YAY)

So my advice to you:  use the recommended oil... do not, I repeat, do not just use whatever you have on hand...in this case, that is a big mistake!

I have to tell you this funny story, though, before I get to the recipe.  So, I knew that my friend Andrea (The Kitchen Witch) had just recently made homemade mayonnaise, so I couldn't wait to tell her that I had made my own too.  I email her and tell her how happy I was that I got it to emulsify, but oh lordy did my arm hurt.   Her email back to me was "you did it by hand?"  Well yes, I did it by hand, I followed Alton Brown's recipes and that's what he did.  Andrea, being the true friend she is, laughed and said, wow, you are a better woman than me (or something close to that), I used my stand mixer.  WHAT???  Stand mixer???  You can use that???  LOL  Sure enough, I went back to Andrea's post and what do you know... she did it with her stand mixer.  DAMN that girl is smart!!  So even though I have left the recipe as I did it....you might want to consider using your stand mixer if you have one.  Cause I will tell you... my arm hurt for two days!!!  LOL  Either that, or hire a sous chef to help you out on this one!!  Your arm will thank you!

Homemade Mayonnaise
Recipe courtesy Alton Brown, The Food Network
Printable Recipe 
Ingredients:
1 egg yolk
1/2 teaspoons fine salt
1/2 teaspoon dry mustard
2 pinches of granulated sugar (about a 1/4 teaspoon)
2 teaspoons lemon juice
1 Tablespoon white wine vinegar
1 cup oil, corn or canola

Directions:
In a glass bowl, whisk together egg yolk and the dry ingredients.  Combine lemon juice and vinegar in a separate bowl then thoroughly whisk half into the egg yolk mixture.  Start whisking briskly, then start adding the oil a few drops at a time until the liquid seems to thicken and lighten a bit (which means you've got an emulsion on your hands..YAY!!!).  Once you've reached that point you can relax your arm a little bit (but just a little bit) and increase the oil flow to a constant, yet thin, stream.  Once half the oil is in, whisk in the remaining lemon/vinegar mixture.  Continue whisking until all the oil is incorporated.  Leave at room temperature for 1 hour.  Refrigerate up to a week.

Friday, February 25, 2011

Friday Stuff!

YAY!!! It's FRIDAY!!!... and you know where to find me right?  
Come check it out or you'll be missing this:


Stop by and say hi!!

But wait!!  Stick around for my other news first!!!  If you want...no pressure :)

The other week I told you that I was contacted by the Wholly Guacamole company and they asked if I would look at their website and give them some feed back.  I did so and then they graciously offered to send me some product for review.  I was excited, yet a little nervous.  What if I got their product and I hated it and then I would have to tell them that... AAAAAAAAA!!!

Anyway... I received their samples... check it out:

Yea, that's what I said.... there is a lot of stuff.... and it all looked good!!  Where to start, where to start???

100 calorie pack - Spicy Guacamole:

Opinion:  I have to say...I'm not one to really like manufactured, store bought products like this.  When it comes to guacamole, I definitely prefer the homemade kind.  I have tried other store bought products and, well, I have not been impressed.  This... this made me stop and go... hhhmmmmmmmm... this is actually pretty good!  I will admit that I was pleasantly surprised.  Even Chris, who really is picky about his guacamole, devoured it.  I would buy this.  I would serve this.  It's gluten free, it's kosher, it's preservative free, it was fantastic!  Ok, I wouldn't choose it over homemade, but in a pinch or in a state of laziness, hell yea, I would purchase it!

Second on the list - Classic Queso Dip:

Opinion:  YUM!  It was really good... like homemade queso.  I was, once again, a bit shocked at how good it was.  What was really cool about this queso... It didn't get hard when it started to cool down.  Ok, it got a bit thicker, but it never got hard, like Velveeta does after it's been cooled down.  So that was a nice little bonus.  A blogging friend of mine said she has tried this queso and thought it was way salty, so beware.  I didn't find that at all, but I think I have a higher tolerance for salty food.

Next up - Salsa:

Opinion:  Salsa perfection. Seriously, I'm not one for really chunky salsas...this salsa had the perfect chunky factor.  The flavors were wonderful too.


100 calorie pack - Classic Guacamole:

Opinion:  Like the spicy guac, it was a pleasant surprise at how good it was.  Chris and I both agreed....best store bought product we've tried in a long time.

So all in all... the products that the Wholly Guacamole company sent me were really good.  Now, I'm one that would rather make it or have a homemade version of these products, but hey, sometimes you just can't always have it that way...and when you can't, these are great substitutes!

Check back next week when I put some of the products to use in a few fantastic recipes!

***Please note:  The opinions stated here are just that, MY opinion.  I was not reimbursed in anyway for my product review.***

One Year Ago:  Yogurt Marinated Chicken

Thursday, February 24, 2011

Thai Peanut Chicken Stir Fry

Ok, so I've been on a bit of a peanut kick lately.  I can't help it.  There is just something about it that I'm hooked on right now!

This is one of the best peanut chicken stir fries I've made.  Though I have not posted any of them, I have tried a ton...none of them really hit the mark.  One was far too peanut buttery...thick and made your tongue stick to the roof of your mouth.  One was not peanut buttery enough...lack of any flavor.  But this one.. this was spot on.  At least for what Chris and I were looking for.  It might not be perfect for everyone, but I do believe it's at least a starting point recipe.  You can add a little of this, add a little less of that... play with it.  Seriously, you have my permission.. play with your food :)

And I have a confession to make before I go:  I did not use the velveting technique again even though I swore I would do it next time I did a stir fry (I was in a hurry...I didn't have time to wait...I'm sorry).  I lucked out this time, though, my chicken was nice and moist and tender, but if you are wanting a truly velvety piece of chicken, please add this velveting step to the directions!


Thai Peanut Chicken Stir Fry
Printable Recipe 
Ingredients:
1/4 cup creamy peanut butter
6  Tablespoons low sodium soy sauce
1/2 teaspoon sesame oil
2 teaspoons white wine vinegar
1 large garlic clove, minced
2 teaspoons brown sugar
1/4 teaspoon red pepper flakes
1 teaspoon Sriracha
3 Tablespoons water
1 lb boneless, skinless chicken breast, cut into 1-inch chunks
1 teaspoon olive oil
1/2 zucchini, cut into moons
1 red bell pepper, stem and seeds removed, thinly sliced
1/3 cup dry roasted peanuts

Directions:
Mix together the first 9 ingredients (peanut butter through water), until smooth (You can do this in a food processor if you want, it might be easier); set aside.

In a deep skillet, add the olive oil. Heat over medium-high heat and add the chicken.  Quickly stir fry about 3 minutes.  Add the pepper and cook another two minutes.  Add the zucchini and stir fry 1-2 minutes longer or until the veggies are to your liking.  Add the sauce and stir.  Cook until the sauce is thickened and heated through.  Serve over rice. Enjoy!


One Year Ago:  Garlic Cheddar Fish

Wednesday, February 23, 2011

Mac and Cheese Soup

That's right....Mac and Cheese soup.... you did not read that wrong.  Everything you love about mac and cheese but a little bit healthier and much more runnier!!  lol

Seriously, the rave about this in my Food Network Magazine was that it was like half the fat of regular mac and cheese.  That can't be bad and you know it!!!

Now, I would have liked my soup to be a little thicker, but had it been much thicker, it would have truly been just mac and cheese, so I dare not change a thing on this recipe.  The flavors were fantastic, though you do need to get a halfway decent cheddar cheese to get that...no using "no name brand" cheese.  Splurge a little and go for the good stuff.  It will truly make a difference in this.

Now there are a lot of things I thought about adding to this soup... like chipotles or regular jalapenos, or even a little chicken... but I stuck with the recipe that I was going off of, just to make sure that I could make the soup properly.  Next time... and there will be a next time...I will add the more exciting ingredients to it to help kick it up and make it that much better!

If you are a mac and cheese fan...this soup is a must try!!

Mac and Cheese Soup
Slightly adapted from the Food Network Magazine
Printable Recipe 
Ingredients:
1 cup (4oz) elbow macaroni
4 half inch thick slices baguette (I actually made 8 so we could have extras for dipping)
freshly ground black pepper
1 shallot
1 clove of garlic
1 carrot, cut into 1-inch pieces
1 stalk celery, cut into 1-inch pieces
1/4 cup all purpose flour
3 1/2 cups fat free low sodium chicken broth
1 1/4 cups 2% milk (if you want a thicker soup, you can use heavy cream)
6 oz (1 1/2 cups) shredded cheddar cheese
1/4 cup grated parmesan cheese
Cherry tomatoes, cut in half (optional)

Directions:
Preheat oven to 450 degrees (I actually just used my toaster oven for this).  Bring a medium saucepan of water to a boil.  Add the macaroni and cook per package instructions; drain and set aside.

Place the baguette slices on a baking sheet and season with salt and pepper.  Place in oven and bake until the bread is golden brown, about 5-7 minutes.  Remove from oven.

In a food processor, add the shallot, garlic, carrot, and celery.  Process until minced.  Mist a large saucepan with cooking spray or oil.  Add the vegetables and cook over medium heat until softened; about 4-5 minutes.  Add the flour and cook, stirring, 2 minutes.  Slowly whisk in the chicken broth and bring to a boil; cook, stirring, until the soup thickens, about 6-7 minutes.  Remove from the heat.

Add the milk and the cheeses, stirring until the cheese is melted and the soup is smooth.  Add the macaroni and season with pepper.  Top with a piece of the toast and two tomato halves.  Enjoy!

(Nutritional info per serving -serves 4-:  476 calories; 20g Fat; 84mg sodium; 636mg carbohydrates; 27g protein)


One Year Ago:  Hamburger Buddy