I've been on a big yogurt based marinade kick lately. There is just something wonderful that happens when you marinade chicken in it... it's like mayo, only better for you :) It gives the chicken such a moist texture, that I would rather marinade it in yogurt than brine (shhhhh, don't tell anyone!!)
This is yet another very simple recipe... throw the ingredients together, let it meld together for a few hours, toss it on the grill and you're done. The perfect solution for a busy week night!
And stop by on Friday when I share the recipe for those delicious looking potatoes with you!!
Yogurt and Lemon Marinated Chicken
Adapted from About.com
- Serves 2 -
Printable Recipe
Ingredients:
2 boneless, skinless chicken breasts
5 oz Geek yogurt
2 Tablespoons lemon juice
zest of 1 lemon
1 Tablespoon Hungarian sweet paprika
1 teaspoon Italian herb seasoning
1/2 teaspoon salt
1/2 teaspoon pepper
2 garlic cloves, minced
1 Tablespoon olive oil
Directions:
In a measuring cup or small bowl, mix together all the ingredients, except the chicken, until well combined. Place chicken in shallow dish or resealable plastic bag and pour the marinade over, making sure both sides are covered. Seal or cover and place in refrigerator for 4 hours.
Preheat grill to 375 degrees F. Clean and oil grill grates. Remove chicken from marinade, shaking off any excess. Place directly over the fire and grill 8-10 minutes per side, or until the chicken reaches an internal temperature of 165 degrees F. Remove from grill and allow to rest for 5 minutes before serving. Enjoy!
One Year Ago: Jalapeno Popper Inspired Pizza
Two Years Ago: Guest Blogger - Smoked Tri Tip and Brisket
Three Years Ago: Penne with Beef and Bell Pepper
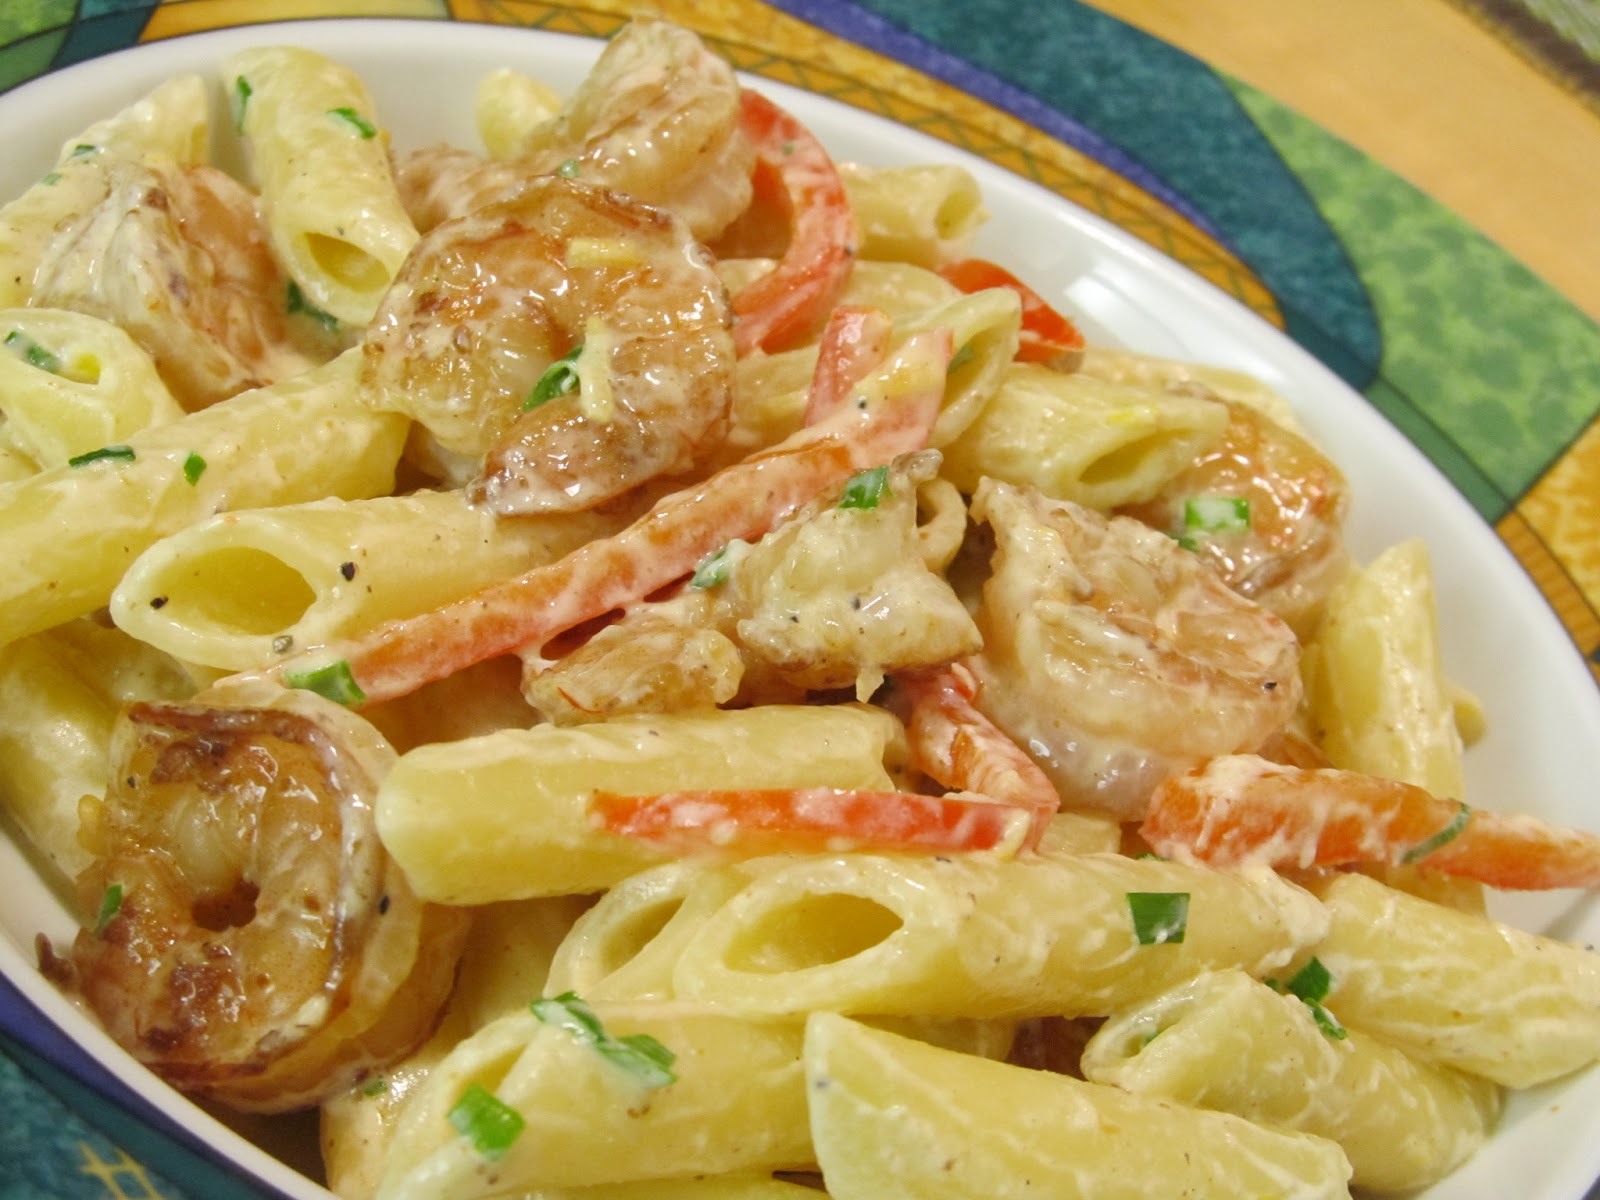
Créme Fraîche is one of those ingredients I very rarely see at my regular grocery store. It just seems they don't want to carry such a fancy ingredient - so, when I stumbled across some on a trip to Whole Foods, I immediately grabbed it and knew exactly what I was going to do with it. I had my eye on this recipe for a bit now, and was about ready to make it with just regular old sour cream. Good thing I held out just a tiny bit :) This was a fantastically simple, very flavorful dish. Although I would have liked to have had it with smoked salmon (what the original recipe called for), I knew Chris wasn't going to really like it (heck it was a stretch using shrimp), the shrimp was a nice little substitution. Even chicken would work really well with this dish. Definitely worth the try!
Smoked Paprika Shrimp with Créme Fraîche Lemon Pasta
Adapted from Whole Foods
Printable Recipe
Ingredients:
26-30 medium shrimp, peeled, deveined and tails removed
2 teaspoons olive oil
1/4 teaspoon smoked sweet paprika
1/8 teaspoon lemon pepper seasoning
10 oz mostaccioli or ziti pasta
1/3 cup créme fraîche (or sour cream)
1/4 teaspoon lemon zest
juice of 1/2 a lemon
1/4 teaspoon salt
1-2 Tablespoons chives, chopped
1 red pepper, thinly sliced
Directions:
Place shrimp in shallow dish and toss with olive oil. Sprinkle in paprika and lemon pepper seasoning, toss to coat. Cover and place in refrigerator for at least 1 hour.
Preheat grill to 375 degrees F. Remove shrimp and place on a piece of aluminum foil sprayed with non-stick spray or on a pan meant for the grill (spray with non-stick spray). Place directly over the heat and grill for 2 minutes. Flip shrimp and grill another 3 minutes, or until the shrimp is just cooked through.
Meanwhile, cook the pasta according to package directions; drain well, reserving 1/2 cup of the pasta water.
To the pasta, add the zest, lemon juice, and pepper. Toss to combine. Add the créme fraîche, the shrimp and chives, stirring to combine. Serve immediately. Enjoy!
One Year Ago: Grilled Shrimp with Wasabi Mayo Sauce
Two Years Ago: Sweet and Sour Grilled Chicken
Three Years Ago: Hoisin Barbecue Chicken
I have writers block. Yep.... it's true. I sat down to write this post over 30 minutes ago and I have written and erased at least 5 different starts to a paragraph!! I know I don't have to say anything really, but it's just frustrating when you want to sit down to write something and nothing comes to you. Or something comes and you write it down and it sounds really dumb. Anyway, I'm having one of those moments right now, so I thought if I just made the confession and rambled on a few minutes about it, I would have enough typed out to satisfy me.... and what do you know... it worked :)
This is yet another really simple meal to put together. And let me tell you, it is quite delicious too!! I would say that this was one of my favorite grilled chicken recipes in a while. Maybe it was the simplicity? Maybe it was the grilled green onions? I don't know.. it was just really really really REALLY good :)
Grilled Chili Chicken with Spring Onions
Adapted from About.com
- Serves 2 -
Printable Recipe
Ingredients:
2 boneless, skinless chicken breasts
1/4 cup Greek yogurt
1 garlic clove, crushed
1 Tablespoons paprika (I used Hungarian Sweet)
1/2 teaspoon ground chipotle powder
1/2 teaspoon ground cumin
2 Tablespoons lime juice
1/8 teaspoon cayenne
olive oil
1 bunch green onions
salt and pepper
Directions:
Mix together the yogurt, garlic, paprika, chipotle powder, cumin, lime juice and cayenne until well combined. Rinse the chicken and pat dry with a paper towel. Place in shallow dish or resealable plastic bag and pour the yogurt mixture over. Cover/seal and place in refrigerator for 2-4 hours (the longer the better on this one).
Preheat grill to 375 degrees F. Remove chicken from marinade and shake off any excess. Place directly over the fire and grill 8-10 minutes per side, or until the chicken reaches an internal temperature of 165 degrees F. Remove and allow to rest while you grill the onions.
Place the onions in a single layer on a piece of aluminum or on a pan made for the grill. Drizzle with olive oil and season liberally with salt and pepper. Grill 5-6 minutes, turning once, or until they just start to soften. Carefully remove from grill and serve alongside the chicken. Enjoy!
One Year Ago: Hoisin Wasabi Grilled Chicken
Two Years Ago: Hummus Topped Tilapia
Three Years Ago: Creamy Pesto Dip
Pasta dishes do not get much easier than this. Throw all but two ingredients into a food processor.. pulse... viola! A sauce is created and dinner is served. Seriously, cooking the pasta is the only thing that is holding this meal up from hitting the table in 2.2 seconds!
By the way... is anyone else a little disturbed that it's already May? I mean really? Doesn't it seem as if we just celebrated Christmas a few weeks ago? There was a time, when I was much, much younger, that I would have LOVED for time to move this fast (specifically when I was in school). But now, now all I keep thinking is at this rate, I'm going to be 40 WAY sooner than I expected :)
Ziti with Chicken and Roasted Red Pepper Pesto
Created by Jenn's Food Journey
Printable Recipe
Ingredients:
1 garlic clove, quartered
7 oz jar roasted red peppers
1 Tablespoon of the oil from the roasted red peppers
1/4 teaspoon granulated sugar
1/2 teaspoon red pepper flakes
1/2 teaspoon salt
1/4 teaspoon pepper
2 Tablespoons olive oil
1 Tablespoon fresh parsley
2 teaspoons grated parmesan cheese, plus more for garnishing
10 oz ziti pasta
1 cup cooked chicken, chopped
Directions:
In a food processor, add all the ingredients except the pasta and chicken. Pulse until almost smooth; set aside.
Meanwhile, cook the pasta according to package directions; drain well. Return the pasta to the pot and add the cooked chicken. Toss with the pesto and serve immediately. (if the pasta is too dry, add 1 more tablespoon of olive oil) Enjoy!
One Year Ago: Stove Top Tuna Mac and Cheese
Two Years Ago: Hoisin Chicken Stir Fry
Three Years Ago: Chicken Pesto Pizza
Now I know, there are going to be people out there that turn their nose up to this, as I'm using a canned condensed soup - BUT- This recipe is a must share. You see, there are a lot of people out there that use canned condensed soups, so why not come up with new and exciting ways to use those items? Where you might not have a can of cheddar cheese soup sitting in your pantry, there just might be someone out there that is reading this that does.... and the only idea they have, would be to make a cheese dip with it. Great idea on it's own, but why not try something like Grilled Nachos or a Cheesy Rice Casserole? Or, better yet, what about trying this delicious little concoction I came up with just the other week? This is a great way to not only use an every day pantry ingredient in a whole new way, but you get your nacho AND pizza fix all at the same time!
Nacho Grande Naan Pizza
Created by Jenn's Food Journey
- Serves 2 -
Printable Recipe
Ingredients:
1/4 lbs ground beef
1/4 lbs ground pork
2 teaspoons taco seasoning
1/4 teaspoon salt
1/4 teaspoon pepper
1-2 jalapeno, seeded and chopped
1/4 cup plus 2 Tablespoons condensed cheddar cheese soup
1/4 cup chopped black olives
3/4 cup cherry tomatoes, chopped
1-2 cups shredded pepper jack cheese
2 Naan flatbreads
Directions:
In a skillet, over medium heat, add the pork and beef; breaking it up with a wooden spoon. Cook, stirring occasionally, for 5-8 minutes, or until the meat is just cooked through. Stir in the taco seasoning, salt, pepper and jalapeno. Cook 2 more minutes. Add 2 tablespoons of the cheddar cheese soup and stir to combine. Remove from heat and set aside.
Preheat grill to 400 degrees F. Place the naan over direct heat and allow to grill for 3 minutes, or just until it turns golden brown. Carefully remove from grill and place on baking sheet. Spread the cheddar cheese soup evenly over the grilled side of each naan. Top with meat mixture, black olives, tomatoes and cheese. Return to grill and allow to naan to become golden brown on the bottom. Move to indirect heat and continue to grill until the cheese has melted. Remove from grill and allow to rest for a few minutes before slicing. Enjoy!
One Year Ago: Horseradish Crusted Steak Roulade
Two Years Ago: Alabama Barbecue Chicken
Three Years Ago: Hudson's Baked (or Grilled) Fish with Dill Sauce
Well, it's finally here again - FRIDAY!!! It feels as if it took two weeks to get here, but whatever, it's here! And like a lot of Friday's as of late, I'm going to tempt you with a delicious comfort food dish. I contemplated making Friday's "Comfort Food Friday's" (thanks to a great suggestion from Judy, by the way) here at Jenn's Food Journey, but summer is knocking at the door... excuse me.. what I meant to say was - summer has KNOCKED down the door, so I figured there might not be as many comfort food dishes making it to our tables over the next few months. For now, it's just a normal Friday..... with a deliciously comforting dish :)
I love bolognese sauce but have only made it once.. and I was in my twenties and it was just okay. Don't ask me why it took me so long to make another one, but key is, I made it again and this one was a masterpiece. What caught my eye was the word "quick". Most bolognese sauces take a lot of patience and time and I have very little of both a lot of nights! I will definitely be making this again.... and again... and again!!
Quick Bolognese Sauce
Adapted from Simply Recipes
Printable Recipe
Ingredients:
1 Tablespoon olive oil
1/2 sweet onion, finely chopped
1 carrot, finely chopped
1 jalapeno, seeded and finely chopped
1/2 lbs ground chuck
1 Tablespoons tomato paste
1/4 cup red wine
1 cup crushed tomatoes
2 Tablespoons milk or half and half
salt and pepper to taste
Directions:
Heat olive oil in a large saute pan over medium heat. Add the onion and carrots; seasoning with salt and pepper. Cook, stirring occasionally, for 4 minutes. Add the jalapeno and continue to cook another 2-3 minutes. Add the tomato paste and stir to combine. Cook for one more minute. Add the ground chuck, breaking up the meat with a wooden spoon. Season, again, with salt and pepper. Cook, stirring occasionally, until the meat is cooked through, about 8 minutes. Stir in the wine, scraping up any browned bits from the bottom of the pan. Let this boil down by half and then stir in the tomatoes. Bring sauce just to a boil and reduce heat to low. Simmer, uncovered, for about 20 minutes. Stir in the milk and taste for seasoning. Allow to cook another 2 minutes. Add a little water if the sauce begins to dry out. Serve over your favorite pasta and enjoy!
One Year Ago: Red Pepper Jelly Pork Chops
Two Years Ago: Thai Style Honey Peanut Chicken
Three Years Ago: Murphy's Hot Hamburger
Let's be honest, I seriously only came up with this recipe idea so that I could eat a ton of Sriracha mayo and not be judged - cause I really only just want to spoon it directly in my mouth - but people talk - see, this way.. I can have my cake and eat it to... so to speak :)
By the way - I know that a lot of you are still having cold temps and even some snow, but I've come to the realization that summer has begun in Arizona. The days have been in the 90's this week.... It's only April... can't wait to see what July brings! lol
Spicy Chicken Sandwich with Sriracha Mayo
Created by Jenn's Food Journey
- Serves 2 -
Printable Recipe
Ingredients:
2 teaspoons paprika
1/2 teaspoon garlic powder
1/2 teaspoon onion powder
1/8 teaspoon coriander
1/4 teaspoon salt
1/4 teaspoon cayenne pepper
1/4 teaspoon black pepper
2 boneless, skinless chicken breasts, pounded thin
2 Hoagie rolls/buns
Lettuce/tomato/cucumber
For the mayo -
1/4 cup mayonnaise
1-2 Tablespoons Sriracha (depending on taste)
Directions:
Mix together the paprika, garlic powder, onion powder, coriander, salt, cayenne and black pepper until well combined. Rinse chicken and pat dry with a paper towel. Rub a little olive oil over both sides of each piece and evenly sprinkle with rub mixture. Place on a plate and cover with plastic wrap. Place in refrigerator for 4 hours.
Meanwhile, mix together the mayo and Sriracha until well combined. Cover and place in refrigerator until ready to use.
Preheat grill to 375 degrees F. Clean and oil grill grates. Place the chicken over direct heat and grill 5-10 minutes per side or until the chicken reaches an internal temperature of 165 degrees F. Remove from grill and allow to rest for 5 minutes. (this is a good time to toast the buns on the grill if you want)
Build your sandwich however you want, just don't forget the mayo! We slathered mayo on the cut side of the bread, topped with lettuce, tomato and/or cucumber and topped with the chicken. Serve immediately and enjoy!
One Year Ago: Spicy Cashew Chicken Stir-Fry
Two Years Ago: Baked Hoisin Tilapia with Hot Mustard Sauce
Three Years Ago: Brava Steaks
Have you ever seen the movie Office Space? If not, I highly recommend finding it and watching it... especially if you have ever worked in an office with cubicals! For those of you that have seen it - remember the annoying part where they say "looks like someone's got a case of the Monday's"? Well - as silly as it sounds - I do have a case of the Monday's! It's Sunday afternoon and I already feel them creeping on. You know that feeling of just not wanting to be at work? Yep, I feel that feeling coming on fast. Not that I dislike my job, it's just that... well... I spent the entire week working on one stupid excel spreadsheet and I still have more to do!!! And THAT is why I have a case of the Monday's!! AND to top it off, The Walking Dead is not on anymore and Sunday's seem so lame without it!! LOL!
Okay, okay.. enough of the griping, right? :) You came here for the food!! And what great food I have for you today... this delicious little meal will not disappoint. I had to go to my "go-to" grill master, Chris (Nibble Me This) - I was having a total creative block, so I quickly ran through a few of his recipes and found this recipe. He paired the pork with rice pilaf, but my Chris says we eat too much rice already, so I thought I would create a little potato magic! Although Chris' pork looks WAY better than mine, I know mine tasted just as amazing... and that's what really counts!!
Greek Pork Chops with Lemon Oregano Potatoes
Pork recipe adapted from Chris, Nibble Me This
Potato recipe created by Jenn's Food Journey
- Serves 2 -
Printable Recipe
Ingredients:
1/4 cup olive oil
2 Tablespoons red wine vinegar
1 1/2 teaspoons lemon juice
1/2 teaspoon salt
1/2 teaspoon garlic powder
1/2 teaspoon dried oregano
1/4 teaspoon dried mint
1/4 teaspoon dried thyme
1/4 teaspoon black pepper
2 boneless pork loin chops
For the potatoes -
12 oz baby round potatoes, quartered
2 garlic cloves, finely minced
3-4 Tablespoons olive oil
1 teaspoon dried oregano
1-2 Tablespoons lemon juice
salt and pepper to taste
Directions:
Mix together the olive oil, vinegar, lemon, salt, garlic, oregano, mint, thyme and pepper until well combined. Rinse pork and place in resealable plastic bag or shallow dish and pour the marinade over. Seal or cover and place in refrigerator for 2-4 hours.
Preheat grill to 375 degrees F. Clean and oil grill grates. Remove pork from marinade and place directly over the fire. Grill 4-8 minutes per side or until the pork reaches an internal temperature of 145-150 degrees F. Remove and allow to rest at least 3 minutes before serving.
For the potatoes: Place the potatoes in a bowl and add 1 tablespoon of water. Cover with plastic wrap and place in the microwave for 2 minutes. Carefully remove bowl and shake the potatoes around a bit. Place in microwave for 1 more minute. Carefully remove. Check the potatoes at this point. You want them just starting to get tender. Mix together the olive oil and lemon juice and pour over the potatoes. Add the oregano and toss to coat. Season with salt and pepper. Pour into the middle of a large square of aluminum foil that has been sprayed with cooking oil. Pull the opposite sides of the foil together and fold. Fold over sides forming a packet around the potatoes. Place over direct heat and grill for 15-20 minutes, flipping the packet once. Carefully remove and allow to rest for 5 minutes before carefully opening the packet. Serve with pork and enjoy!
One Year Ago: Hamburger and Goat Cheese Pizza
Two Years Ago: Vanilla Bean Cake with White Chocolate Frosting
Three Years Ago: Tilapia Oreganata
Chicken Tikka Masala is one of my favorite dishes, so when I saw this recipe for it in pizza form, I knew I was going to have to try it. I mean, who doesn't dream of their favorite recipe being adapted to fit as a pizza topping?? I know I do... frequently actually. Some ideas work... some ideas do not. This one is definitely in the first category!! And, here's a little fun fact I learned recently... of course this makes me love the dish even more..... although the origin of chicken tikka masala is unclear, it is traditionally known as a "true British national dish". Why the extra love, you ask? Well..... I secretly used to wish I was British......... enough said :)
Before I let you go, please take note.. this recipe may look long, but it's not. I was just feeling really generous today and thought I would share two ways of making this pizza - the grilling method AND the baking method :) Now there truly is no excuse for you not to make it!!
Chicken Tikka Masala Pizza
Adapted from Rasa Malaysia: Easy Asian Recipes
Ingredients:
1 large boneless skinless chicken breast (or two small)
2 Tablespoons Greek yogurt
1 Tablespoon lemon juice
1/4 teaspoon ground cumin
1/4 teaspoon cayenne pepper
1/4 teaspoon Garam Masala
1/4 teaspoon ground ginger
1/4 teaspoon salt
1/8 teaspoon pepper
1 ball of homemade or refrigerated pizza dough
2 small jalapenos, chopped or sliced
2 (or more) cups shredded Mozzarella cheese
For the sauce -
5 oz tomato sauce
2 Tablespoons Greek yogurt
1/2 teaspoon ground cumin
1/2 teaspoon paprika
1/4 teaspoon Garam Masala
Directions:
In a bowl, mix the yogurt, lemon juice, cumin, cayenne, garam masala, ginger and salt and pepper together until well combined. Rinse the chicken and place in shallow dish or resealable plastic bag. Pour the marinade over the chicken, cover/seal and place in refrigerator for 4 hours. Preheat grill to 375 degrees F. Clean and oil grill grates. Place chicken over direct heat and grill for 5-10 minutes per side or until the chicken reaches an internal temperature of 165 degrees F. Remove and allow to cool before thinly slicing or cutting into bite size chunks.
Meanwhile, make the sauce by adding the tomato sauce, yogurt, cumin, paprika and garam masala to a small bowl and stirring to combine; set aside. (if you are making this more than 30 minutes in advance, cover and refrigerate until ready to use)
My grilling method: Preheat grill to 375 degrees F. Stretch and roll dough; brushing both sides with olive oil and placing on a large sheet of aluminum foil that has been sprayed with non-stick cooking oil. Slide the foil with the dough onto the grill and shut the lid. Grill, rotating the dough once, for 5 minutes, or until the bottom is starting to turn golden brown. Carefully remove aluminum foil with dough from grill and turn the grill temperature up to 400-425 degrees F. Flip the dough over and spread the sauce over top of it. Top with jalapenos, chicken and cheese. Slide back onto grill and allow to cook about 3-4 minutes, or until the bottom turns golden brown. Move the pizza to indirect heat and continue cooking another 5-8 minutes or until the cheese has melted. Carefully remove from grill and allow to cool a minute or two before slicing. Enjoy!
My baking method: Preheat oven to 450 degrees F. If you have a pizza stone, place in oven to preheat - if not, don't worry about it! Stretch and roll out dough, brushing both sides with olive oil and placing on a pizza pan. Spread the sauce over the crust and top with jalapenos, chicken and cheese. Reduce the temperature to 425 degrees F. Place pizza in oven and bake for 8-10 minutes or until the crust is golden brown and the cheese is warm and bubbly. Remove and allow to cool before slicing and serving. Enjoy!
One Year Ago: My Mom's Beef Goulash
Two Years Ago: Dragon Chicken
Three Years Ago: Saucy Sirloin Steak
I'm so excited that it's becoming salad season for more people!! It feels odd to be making salads when everyone else is craving casseroles and other comfort foods. Finally the weather in the rest of the country is catching up to us!! And what a great way to celebrate!! This salad is a good way to welcome in the warmer weather!! Deliciously spicy and wonderful, you will want to put this in your weekly rotation!! And what's great, you can use any other protein in place of beef...heck, toss some tofu in the dressing and toss that on! It can work in so many ways!
Spicy Basil Beef Salad
Adapted from Rasa Malaysia: Easy Asian Recipes
- Serves 2 -
Printable Recipe
Ingredients:
10-12oz boneless New York strip steak
olive oil
salt and pepper
3 Tablespoons low sodium soy sauce
2 Tablespoons lime juice
1/4 teaspoon sesame oil
1 teaspoon fish sauce
2 teaspoons Sambal Oelek chili paste
1/8 teaspoon sugar
10-12 Thai or sweet Italian basil leaves (or to taste)
4-5 cups torn green leaf lettuce
1 cup chopped cucumber
1 cup grape tomatoes, quartered or halved
Directions:
Preheat grill to 400 degrees F. Clean and oil grill grates. Drizzle olive oil over both sides of each steak and season with salt and pepper. Place the steak directly over the fire and grill 5-8 minutes per side. Remove from grill and allow to rest for at least 5-8 minutes before thinly slicing.
Meanwhile, in a measuring cup, mix together the soy, lime, sesame oil, fish sauce, Sambal and sugar until well combined; set aside.
Place the lettuce in a large bowl or plate, top with basil leaves, cucumber, tomato and steak. Drizzle with dressing and serve immediately. Enjoy!
One Year Ago: Sweet Chili Grilled Chicken
Two Years Ago: Spicy Grilled Pork Chops with Mango Pineapple Salsa
Three Years Ago: Chocolate Peanut Butter Ice Cream
Please note: This photo is of Chris' plate. He believed that his plate was much more photogenic than mine, so I agreed to snap a shot of it. It actually doesn't look too bad... I wouldn't say no to it, that is for sure!!!
There are probably a lot of you out there that do not know my love for The Simpson's. I have been a fan of them since they first appeared on the Tracey Ullman Show back in 1987! I will admit, I don't watch it as religiously as I used to... I mean at certain times of the year, it conflicts with The Walking Dead.... soooooo, you can see my dilemma! But anyway, you are probably wondering where the heck I am going with this, huh? And oh my gosh this better be good because now I'm just sort of rambling... and now it's going to be a let down.. BUT... There is a great saying that Homer is known for:
"To Alcohol! The cause of and solution to all life's problems!"
Chris and I like to say that about beer from time to time.. (jokingly, of course, mom!!).. and now we have come full circle, right? I mean it's obvious I told you that story because these are BEER marinated chicken tacos... right? Maybe, what I really mean is that these tacos are the cause of and solution to all life's problems???? I'm not sure any more.... They are pretty darn good, you know!!
Beer-Marinated Chicken Tacos
Adapted from Serious Eats
Printable Recipe
Ingredients:
1/2 cup beer
1/4 teaspoon sesame oil
1 garlic clove, minced
1/2 teaspoon dried oregano
1/2 teaspoon salt
1/2 teaspoon cumin
1/4 teaspoon black pepper
1/4 teaspoon cayenne pepper
2 chicken breasts, flattened for more even cooking
flour or corn tortillas
lettuce/tomato
shredded cheese
tortilla strips (optional) (I love these New York Texas Toast Chipotle and Cheddar)
Directions:
Mix together the beer, sesame oil, garlic, oregano, salt, cumin, pepper and cayenne. Rinse the chicken and place in plastic resealable bag. Pour the marinade over the chicken, seal the bag and place in the refrigerator for at least 2 hours (I let mine marinate for about 4 hours).
Preheat grill to 375 degrees F. Clean and oil grill grates. Remove chicken and discard marinade. Place the chicken over direct heat and grill 8-10 minutes per side or until the chicken reaches an internal temperature of 165 degrees F. Remove from grill and allow to cool before slicing. Heat the tortillas on the grill if desired.
Build the tacos by adding lettuce, tomato, cheese, or whatever you decide... top with chicken and serve! (of course I used a sauce... silly questions.. I had some of that Lone Star dry rub left over and I made the same sauce.. it worked deliciously!!!) Enjoy!
One Year Ago: Cocoa and Chili Rubbed Pork Chops
Two Years Ago: Crispy Baked Fish with Balsamic Mustard Sauce
Three Years Ago: Tilapia with Spiced Mustard Sauce
I had a bit of an emotional week, so I am ever so happy that it is Friday! Okay, I'm always happy when it's Friday, but this week more than most. AND.. not only am I happy it's Friday, but I am SOOOOO incredibly happy that I get to share this recipe with you. If you have not seen this or tried this, I HIGHLY recommend it. This is one of those recipes that has sat in my "must try" folder for years and, like most, I'm glad I finally found the time to make it. This is one of the easiest and yet flavorful sauce recipes I have ever come across. Now, there is, of course, something wonderful about sauces made from scratch that simmer for hours. But, there is always something wonderful about something that takes no time at all, yet makes everyone think you spent hours on it! This is one of those recipes.
I added cooked ground pork to my sauce because, as I have stated before, Chris is not a fan of just pasta and sauce, he likes to have a little protein in there... so I usually will try and accommodate that if I can. Hear me now, though, this sauce does not need anything else. It is perfect just the way that it is... tomatoes, butter, onion.... done and done!
Tomato Sauce with Butter and Onion
Adapted from Smitten Kitchen
Printable Recipe
Ingredients:
28 oz can crushed tomatoes
5 Tablespoons butter
1 yellow onion, peeled and halved
salt and pepper to taste
12 oz ziti or penne pasta
1/2 lbs ground pork, cooked and seasoned with garlic, salt, pepper and thyme (optional)
Directions:
Put the tomatoes, onion and butter in a heavy saucepan (it fit perfectly in a 3-quart saucepan) over medium heat. Bring the sauce to a simmer then lower the heat to keep the sauce at a slow, steady simmer for about 45 minutes, or until droplets of fat float free of the tomatoes. Stir occasionally. Remove from heat, discard the onion, add salt to taste. Keep warm while you prepare pasta. (You can add the cooked pork or any additional ingredients you may want to add at this time - but to be honest, this sauce needs nothing else. It is perfect just the way that it is!) Cook pasta according to package directions; drain and serve with sauce. Sprinkle with parmesan cheese if desired. Enjoy!
One Year Ago: Grilled Jalapeno Popper Topped Chicken
Two Years Ago: Spicy Garlic Shrimp Pasta
Three Years Ago: Steaks with Balsamic Vinegar, Dijon and Garlic Marinade
With the weather warming up throughout the country, I felt like a delicious little salad post was in order. We got on a salad kick last summer and it pretty much continued on through the winter. The salad I experimented the most with over the last year, was the Caesar salad. I tired at least three different versions and we loved them all. So, of course, when I stumbled upon this recipe on my Whole Foods app, I knew I was going to have to try it. I mean, our favorite type of salad AND delicious Asian flavors (which I LOVE) - how could I pass that up? The great thing about this salad... you could change the dressing up in so many ways to create countless different types of salads... a wasabi and soy dressing, a soy and chili paste dressing...... Ooooohhhh.... yea, this could be the start of something very, very good!!!
Asian Style Grilled Chicken Caesar Salad
Adapted from Whole Foods
- Serves 2 -
Printable Recipe
Ingredients:
1/2 teaspoon Chinese five spice
1/4 teaspoon sesame oil
1/2 teaspoon vegetable or olive oil
2 boneless, skinless chicken breasts
4-6 cups romaine lettuce (torn/shredded)
cucumber slices
1 cup cherry tomatoes, halved or quartered (optional)
Tortilla strips (optional)
For the dressing -
1 Tablespoons mayonnaise
1 Tablespoon olive oil
1 teaspoon rice vinegar
1 Tablespoon lemon juice
1/2 teaspoon Dijon mustard
1 teaspoon wasabi paste
salt and pepper
Directions:
Mix together the five spice, sesame oil and vegetable oil until well combined. Rub over both sides of each piece of chicken. (it's going to look like you don't have enough, but trust me, a little goes a long way, both five spice and sesame are packed with a ton of flavor) Place chicken on a plate and cover with plastic wrap. Place in refrigerator and allow to marinate for at least 2-4 hours.
Meanwhile, to make the dressing, place the mayo and olive oil in a small bowl or measuring cup and stir to combine. Whisk in remaining ingredients and season with salt and pepper to taste. Cover and place in refrigerator until ready to use.
Preheat grill to 375 degrees F. Clean and oil grill grates. Place the chicken over direct heat and grill for 8-10 minutes per side or until the chicken reaches an internal temperature of 165 degrees F. Remove from grill and allow to rest before slicing into strips or bite sizes pieces.
On a plate or in a bowl, add the lettuce, cucumbers, tomatoes and chicken. Top with tortilla strips if desired and drizzle on the homemade dressing. Serve immediately and enjoy!
One Year Ago: Grilled New York Strip with Balsamic Steak Sauce
Two Years Ago: Guest Blogger - Filet Mignon w/Creamy Mushroom Sauce
Three Years Ago: Best Barbecued Sticky Chicken with Lemon and Garlic
A few people commented last week on how they were excited that grilling season was upon them and it reminded me how very fortunate I am to live where I do. I can grill all year long - and I don't have to fight much more than wind and an occasional rain storm. So, of course, when I run across recipes I want to try, no matter how the original recipe was created, I will try and adapt it to the grill. I know this recipe is amazing exactly how Mary (One Perfect Bite) made it, because all I really did was change the cooking method (oh, yes, and added a sauce) - the flavors did not change and they were fantastic!! Not that I'm surprised, Mary has never steered me wrong on a recipe. Each and every one I have tried, has been a success! Mary is my Ina Garten!
Salt and Pepper Pork Chops
Adapted from Mary, One Perfect Bite
- Serves 2 -
Printable Recipe
Ingredients:
3 Tablespoons low-sodium soy sauce
1 Tablespoon cornstarch
1 teaspoon freshly ground black pepper
1 Tablespoon granulated sugar
1/4 teaspoon kosher salt
2 boneless pork loin chops
For the sauce -
3 Tablespoons low-sodium soy sauce
2 Tablespoons chili paste (such as Sambal Oelek)
1/2 teaspoon honey
drop of sesame oil
Directions:
Mix together the 3 tablespoons soy, cornstarch, pepper, sugar and salt until well combined. Rinse pork chops and pat dry with a paper towel. Place pork in a resealable plastic bag or shallow dish and pour the marinade over. Seal the bag or cover the dish and place in the refrigerator for at least 2 hours.
Preheat grill to 375 degrees F. Clean and oil grill grates. Remove pork from bag and discard the marinade. Place the pork over direct heat and grill 5-8 minutes per side (depending on thickness) or until the pork reaches an internal temperature of 145 degrees F. Remove from grill and allow to rest 3-5 minutes before serving.
While the pork is grilling, make the sauce by putting all ingredients for the sauce in a small bowl and stirring to combine. Serve along side grilled pork and enjoy!
One Year Ago: Dijon Tarragon Sauce
Two Years Ago: Braised Beef Short Ribs in Red Wine Sauce
Three Years Ago: Basil Pesto

I will admit, sometimes I come up with ideas in the kitchen and they don't turn out exactly how I had envisioned it... sometimes they don't turn out at all... but in this case... well, in this case, I hit the nail on the head so to speak. We had just a little over a handful of honey roasted peanuts left and I thought, I could totally use them for a crumb crust on chicken! Well, the idea was a great idea, but instead of chicken, I decided to try it on tilapia because I didn't know if I would have enough to cover both sides of a chicken breast. Honestly, I'm glad I went with the fish. Oh sure, it would be FANTASTIC baked on chicken - but this was simple and complimented the fish very well. Of course, I made a honey mustard sauce to go with it... you could always leave it out, but once again, why? If something so yummy can taste even better with a little sauce, why would you decide to leave it out? :) These are the things that keep me up at night! (well, not really, I sleep fairly well these days)
Hope you all have an amazing weekend! See you back here on Monday!
Honey Roasted Peanut Crusted Tilapia
Created by Jenn's Food Journey
- Serves 2 -
Printable Recipe
Ingredients:
2 Tilapia fillets
3 Tablespoons honey roasted peanuts
2 Tablespoons panko bread crumbs
1 teaspoon mayonnaise
1/2 teaspoon Dijon mustard
Honey mustard sauce -
2 Tablespoons Dijon mustard
1 Tablespoon honey
2 Tablespoons mayonnaise
dash of Worcestershire sauce
Directions:
Place the peanuts in a food processor and pulse until almost minced... you want it to be about the same size, maybe a little bigger, than the panko. Pour the peanuts into a shallow dish or bowl and add the panko; tossing to combine.
Preheat oven to 375 degrees F. Spray a baking dish with non-stick cooking spray; set aside.
In a small bowl, mix together all the ingredients for the honey mustard sauce. Cover and refrigerate until ready to use.
Rinse fillets and pat dry with a paper towel. Season both sides with salt and pepper and place in prepared baking dish. In a small bowl, mix together 1 teaspoon mayo and 1/2 teaspoon Dijon, until well combined. Spread evenly over the tops of each piece of fish. Now top each fish evenly with the peanut/panko mixture. Place in oven and bake for 15-20 minutes, or until the fish flakes easily with a fork. Serve with honey mustard sauce and enjoy!
One Year Ago: Japanese Shrimp Sauce
Two Years Ago: Cinnamon Rolls
Three Years Ago: Peanut Butter Ice Cream