Search This Blog

Saturday, July 17, 2010

Spaghetti with Hot Italian Sausage

When I was a kid, my mom would always make us a special birthday dinner.  My choices, for that special dinner, were either her tacos (homemade shells.. yum!) or spaghetti with Italian sausage.  Most often I picked tacos, but there were times where the pasta and sauce girl came out screaming!  One year my mom made it and the sausage was so incredibly hot, it was almost painful to eat...ALMOST :)

This is my simple version of that wonderful dinner.  It's not my mom's recipe, but it's close.  The sauce is very simple to make and does not need a lot of time to simmer.  I also did not have any fresh herbs when I made this, so by all means, if you have them, feel free to use them! If you have your own homemade sauce recipe, go on and use it if you want too.  One of these days I'll post my true, simmer all day and make the house smell wonderful, homemade sauce.  For now, this will have to do!


Spaghetti with Hot Italian Sausage
Printable Recipe 
Ingredients:
1 lb. dried spaghetti (you can use any kind of pasta really)
3 hot Italian sausage links - sliced
olive oil
2-3 garlic cloves, minced
1/4 sweet onion, finely diced
1 28oz can crushed tomatoes
1 teaspoon dried oregano
1 teaspoon dried basil
1 teaspoon dried parsley

Directions: 
Cook spaghetti according to package directions; drain well.

Meanwhile, in a large, deep, non-stick skillet, heat 1 teaspoon of olive oil over medium heat.  Add the sausage saute until just cooked through, about 5-8 minutes (this time will actually depend on how think of slices or chunks you use).  Remove from pan and drain on a plate lined with a paper towel.

To the same skillet heat 1 tablespoon olive oil and add the onions.  Let saute on medium-low heat until they are just starting to caramelize.  Add the garlic and saute one more minute.  Add the crushed tomatoes and spices and stir to combine.  Add the sausage back to the skillet and let simmer for 10 minutes.  Serve over pasta and enjoy!


Parsley on FoodistaParsley 

Friday, July 16, 2010

Not Quite Heinz 57 Marinade for Steaks

Will I get in trouble with Heinz for using their name in my recipe?  If you notice this post missing in a few days, you'll know I did!  (lol)  So when I made this I was trying to figure out a good name for it.  I had Chris smell the marinade because it reminded me of something, I just couldn't put my finger on what it was.  He immediately said, "it smells almost like Heinz 57."  Yep, that was what it was.  Not exactly, but close...hence the not quite part.  This marinade was sweet, savory, tart, and a tad bit spicy....all my favorite things!!  And guess what?  I didn't even make a sauce to go with it!!  I know you must see this as out of character for me, but this time, I knew I wasn't going to need it, so why bother with it?

Now I say that this marinade is for steaks, but as I sit here typing, I started thinking...this would actually be really good on chicken AND pork....so don't feel like you HAVE to use steak.

Not Quite Heinz 57 Marinade for Steaks
Ingredients:
2 Tablespoons paprika
2.5 Tablespoons Balsamic Vinegar
2 Tablespoons brown sugar
1/4 teaspoon black pepper
1/8 teaspoon salt (I used sea salt)
1/4 teaspoon Ancho chili powder
2 cloves of garlic, minced or crushed
2 Tablespoons fresh chopped rosemary
1 Tablespoon beer (you can always add more if you want)
1 lb. steak - your choice

Directions:
Mix together all ingredients but the steaks together in a small bowl.  Rub on both sides of each steak, wrap in plastic, and allow to marinate for 4-6 hours.

Preheat a grill to medium high.  Rub oil on the grates of the grill.  Place steaks on the grill and leave them alone!  Let them cook for 5-10 minutes on each side (depending on the size and how you like your steak cooked), turning only once.  Remove from grill and let rest for a few minutes before you slice into them....and enjoy!!


Thursday, July 15, 2010

Grilled Mac & Cheese with Sriracha Chicken

All right, all right...so I didn't do the ENTIRE thing on the grill, but I did "bake" it on the grill.  I probably could have done the whole thing on the grill, but I was worried about how much gas I had...for the grill that is...so I didn't want to take a chance!  You could easily do this in the oven, but I wanted so badly to say that I "baked" mac and cheese on the grill!!

My love for mac and cheese came, not from a box, but from my grandmother's kitchen.  I remember it being rich and creamy and just the best mac and cheese I ever tasted.  All she used was Velveeta and milk...though I believe when she told me that, she left something important out, but none of my family can figure out what it is! lol  She made it simple...and to this day, using Velveeta is still my preferred way of making this dish, but as an adult, I have tried to move away from that and try other recipes that use cheese sauces made with an actual cheese!  I used 2 cups of monterey jack cheese and 2 cups of a colby-jack blend cheese, but you could use any blend you want.  If you want to make it all cheddar, go for it.  I would have loved to have done a blend of mild cheddar and white cheddar but the white cheddar cheese was outrageously priced for some reason.  ANYWAY :)  What else really needs to be said about mac and cheese?  It was creamy, it was cheesy, it was good! As for the chicken I cut it up and put it in the mac...I wanted a little kick, so I marinated the chicken in sriracha.  Want to make it even easier?  Just season the chicken with some salt and pepper and throw it on the grill.  Not going to grill the mac & cheese and don't want to grill the chicken either?  Throw it in a pan...sear it then cut it.  Leave it out all together... However you decide to make it will be just perfect!

Grilled Mac & Cheese with Sriracha Chicken
Printable Recipe 
Ingredients:
1 large chicken breast
1-2 Tablespoons Sriracha
3 teaspoons honey
2 teaspoons lime juice
1 cup panko bread crumbs, toasted (heat 1 Tbls olive oil in a pan, add panko, cook until light brown and toasted)
1 teaspoon fresh chopped rosemary
1/4 teaspoon garlic powder
1 Tablespoon parmesan cheese
salt and pepper
3 cups dried elbow macaroni
4 Tablespoons unsalted butter
3 Tablespoons all-purpose flour
2 cups milk
2 cups shredded monterey jack cheese
2 cups shredded colby-jack cheese
1/4 teaspoon cayenne pepper

Directions:
Mix together the sriracha, honey and lime juice.  Pour over chicken and let marinate in the refrigerator for at least 30 minutes.  Remove from marinade and place on preheated grill until cooked through, about 5-8 minutes per side.  Remove from grill, let cool.  Slice into strips or chunks, set aside.

In a bowl, combine the toasted panko, rosemary, garlic powder, and parmesan cheese.  Season with salt and pepper, set aside.

Cook pasta according to package directions.  Drain.

Meanwhile, in a large saucepan, melt the butter over medium heat.  Add the flour and stir. Cook for 1 minute.  Slowly whisk in the milk and reduce heat to medium-low.  Add the cheese a little at a time until it is completely melted.  (Do not let the mixture boil, you will get a gritty sauce)  Add the cayenne and season with salt and pepper.  Pour the sauce mixture over the pasta and stir to combine.  Place the pasta in a 9x9 aluminum pan.  Top with panko mixture.

Place the pan directly on a preheated grill (low), cover, and let "bake" for 5 minutes.  Rotate the pan 180 degrees and allow to cook another 5 minutes.  Rotate pan one more time and cook another 5 minutes.  Remove from the grill and enjoy!!

Wednesday, July 14, 2010

Sunny Side Orzo

Friday nights are no longer what they use to be for me.  Now, that's not a bad thing, it's just an honest statement.  I'm pretty sure most of us can make that same statement.  Every other Friday night I am sitting at home creating a two week menu plan and grocery list.  I actually really enjoy it.  There's something very therapeutic about it...something very calming!  Most Friday night's are "fend for yourself" night at our house.  It's really the only night during the week that I don't plan to cook anything.  I usually end up throwing something simple together, but there is no planned meal and there is no must makes on Friday nights.  Sometimes, I use Friday's as experiment night.  I'll usually end up making something I'm not quite sure Chris will like.  Some nights they are hits...some nights they are misses....more misses then hits I'm ashamed to say.  The night I made this though... big hit, at least with me...and really...that was all I was trying to impress anyway!  I opened up my pantry and fridge and used what I had.  I ate this fantastic orzo as a meal, but you could use it as a side dish too.  It would compliment a fish dish or a simple grilled chicken dish perfectly!  Better yet, chop up some chicken or steak or pork and add it to the orzo.  Once again, there's no need to follow the recipe to the T...do what works for you, I'm just here to give you ideas!

Sunny Side Orzo
Printable Recipe 
Ingredients:
1-2 servings or 3-4 side dishes
1/2 cup orzo pasta
1 orange bell pepper, diced (you could use yellow or red, doesn't matter)
1 garlic clove, minced
1 teaspoon olive oil
1-2 key limes, juiced
1/2 teaspoon dried thyme
1 Tablespoon grated parmesan cheese
1 small Roma tomato, diced

Directions:
Cook orzo according to package; drain.  Pour into serving bowl.

Meanwhile, heat the olive oil in a small saute pan over medium heat.  Add the peppers and saute for 3-4 minutes.  Add the garlic and saute 1 more minute.  Remove from heat.  Add the pepper mixture to the orzo along with the key lime juice, thyme and parmesan.  Stir to combine.  Top with diced tomatoes, season with salt and pepper to taste and serve!

Tuesday, July 13, 2010

Strawberry Cheesecake Ice Cream

I swear that my camera has something against ice cream.  It just floors me that I have finally figured out the lighting issue I was having...but now...now I can't seem to figure out how to take a picture of ice cream... my beloved wonderful ice cream.  I took 30 pictures on two different nights and only TWO pictures came out in focus... talk about frustrating!  Guess that means I'm just going to have to make more ice cream so I can practice taking pictures :)

But I digress.....

Did you know that July is national Ice Cream month???  YAY!!  I love ice cream month!!!!  Of course, I could not let the month slip by without making a scrumptious new ice cream.  And this... this was beyond scrumptious... this was decadently luscious.  This ice cream was rich and creamy and cheesecakey good.  It would have been perfectly fine by itself, but I wanted to at least add something else, so I added some marinated and slightly smashed strawberries.  Every bite is filled with a small frozen bits of strawberry.  It's refreshing and wonderful!  Did I mention the cheesecake part?  OMG!!!  There really isn't anything else to say.......well, besides...mmmmmmmmmmmmm!!!!

Strawberry Cheesecake Ice Cream
Adapted from David Lebovitz's, The Perfect Scoop
Printable Recipe 
Ingredients:
8 oz. cream cheese
zest of 1 lemon
1 cup sour cream
1/2 cup half & half
2/3 cup sugar, plus 1 teaspoon for the strawberries
pinch of salt
1 cup diced strawberries

Directions:
Cut the cream cheese into small pieces and place in blender or food processor.  Add the lemon zest, sour cream, half & half, 2/3 cup sugar, and salt to the machine and puree until smooth.  Chill the mixture in the refrigerator for at least 1 hour.

While the mixture is chilling, add the strawberries and remaining 1 teaspoon of sugar to a small bowl.  Mix to combine.  Place in refrigerator until ready to use.

Once mixture is chilled, pour into ice cream maker and process according to manufacturer's instructions.  About 5 minutes before the ice cream is done, take the strawberries out, mash them slightly with a fork and pour them into the machine to mix into ice cream.  When done, pour into plastic containers, seal, and allow to harden up...then prepare yourself for one of the best ice cream experiences of your life!!!  YUM!!!


Monday, July 12, 2010

Pulled Pork Quesadillas

I promised Friday to give you a recipe that would use up some of that left over pulled pork from last week...and here it is.  Pulled Pork Quesadillas!!  YUM!  Unfortunately, silly little me didn't do a great job of writing this recipe down....I knew I was making these to post and I STILL didn't write down the exact amounts of the ingredients I used!!  Grrrrrr... So this is a basic guess of what I used.  Look at it this way:  I am giving you the canvas and the paint and you get to create what ever you want!!!  Yes, class, that's right, she's once again brought us back to the canvas talk.  Seriously, though, quesadillas are one of those foods that just calls for creativeness.  You can put just about anything in your quesadillas.  They are fun to build, fun to eat, and easy, easy, easy!!!

Quesadillas started off with being just cheese in a tortilla (normally a corn tortilla).  Do you know the word quesadilla actually means "cheese in tortilla"?  It's true.. look it up if you don't believe me :)  The Mexican quesadilla has been adopted in many regions of the United States. It's mostly prepared the same, but using local ingredients instead.  I have seen recipe that call for ham and cheese or shrimp and cheese.  Of course there is always the standard chicken or shredded beef too.  But today, today is all about the pulled pork.  You can use any number of ingredients as add ins.. or if you want, just stick with the cheese and pork, it would be amazingly good too.  I grilled these (of course) but you can put them on a griddle or in a large non-stick pan too and get the same results.

Pulled Pork Quesadillas
makes 2 (10-inch) quesadillas
Printable Recipe 
Ingredients:
4 (10-inch) flour tortillas
1-2 cups pulled pork
1-2 cups shredded cheese - depends on how cheesy you want it (I used a colby-jack blend)
1 roasted jalapeno, seeded and diced
1 tomato, seeded and diced
1 avocado, peeled and pit removed
lime juice
salt and pepper

Directions:
In a small bowl, smash the avocado up just a bit, add a little lime juice, salt, and pepper.  Stir to combine and set aside.

To assemble your quesadillas:  Lay out the pulled pork evenly between two tortillas.  Layer the cheese over it, then the jalapenos, and then the tomatoes.  Spread the avocado mixture on one side of the other two tortillas and lay them on top of the others, pressing down a little to seal everything in.

Place the prepared quesadillas directly on a preheated grill (low) and let cook for 1-2 minutes.  Flip them over and continue to cook until the outsides are crispy and the cheese has melted.  Remove from grill, cut into half or 4th's, and enjoy!!

Friday, July 9, 2010

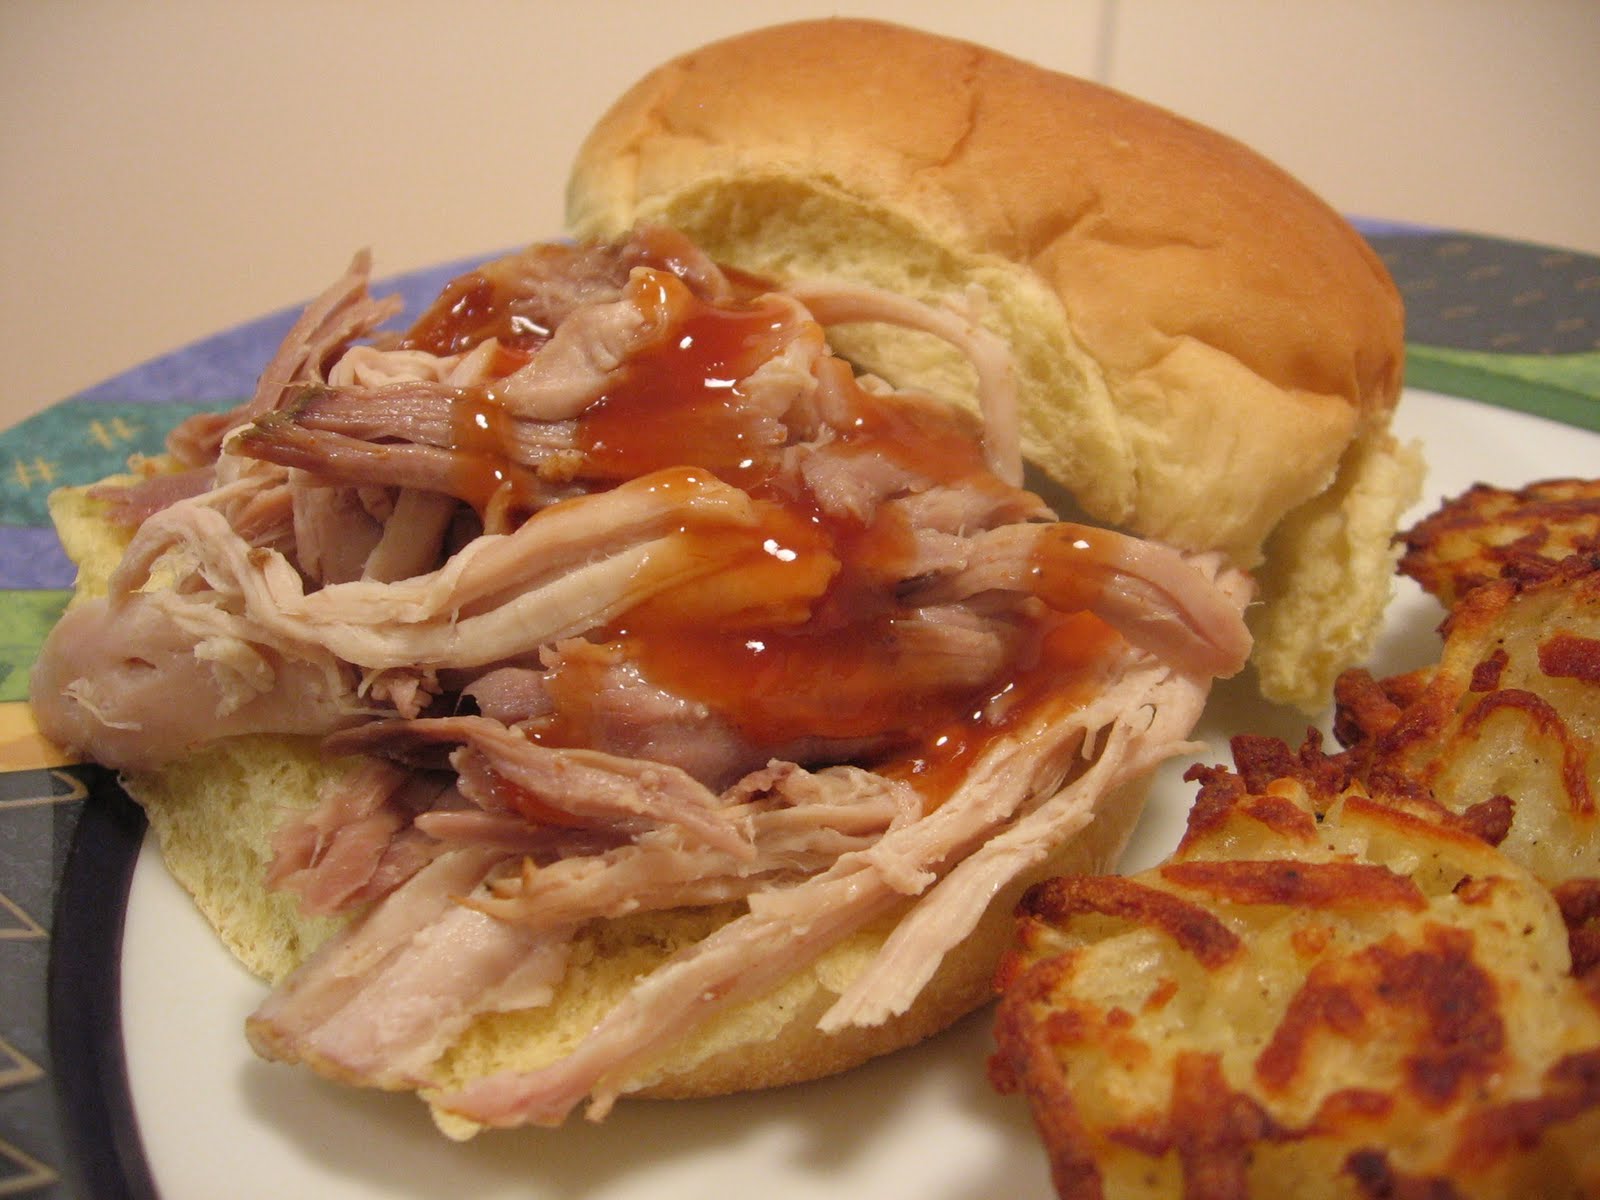
Pulled Pork Sandwiches

I have been wanting to try making pulled pork for a while now.  I saw a recipe recently that called for cooking the pork in a slow cooker and thought...perfect!!  So I decided to create my own recipe and this is what I came up with...fall off the bone, melt in your mouth, succulent pulled pork.  I can't even describe to you the flavors that hit your mouth....the meat literally just melts as it hits your tongue. I made sort of a Carolina style bbq sauce to go over it, but really, the pork was so good you really don't need it.  That's right, I, the sauce girl, once again said you don't need sauce.  What's wrong with me right?  Nothing, I'm telling you...sometimes things call for sauce, other times....like this time...NO SAUCE REQUIRED!  Now this recipe will make a lot of pork.  If you have a big family, this is perfect for you.  If you don't have a big family, say like Chris and I...you'll have a lot left over.  Never fear my loyal readers, I will help you use those leftovers.  Check back Monday for a yummy pulled pork quesadilla on the grill.....!!!  Don't want to do quesadillas?  Try making pulled pork tacos, or enchiladas, or even pulled pork crisps, the possibilities could be endless!

Just a note on time.  Though this recipe is VERY simple, it does take time (that's why they call it slow cookin' baby!).  Make sure to give yourself 8 hours for "marinating" time and 8 hours for cooking time.  Sure, you could cut the cooking time in half by cranking the crock-pot up to high, but don't, take it slow, it will be well worth the wait....I promise!!

Pulled Pork Sandwiches
Printable Recipe 
Ingredients:
3.5 lb bone-in pork butt (you can use pork shoulder also)
Salt & Pepper
Garlic Powder
Ancho Chili Powder (you can just just regular chili powder)
1 shallot, sliced
2 cups beef broth
1 cup beer (I used Bud Light) or water
For Sandwiches:
Hamburger buns
Carolina BBQ Sauce - Recipe follows

Directions:
Liberally season the pork butt with salt, pepper, garlic powder, and ancho chili powder.  Wrap in plastic wrap and refrigerate 8 hours or preferably over night.

Place the sliced shallots in the bottom of a 5 quart slow cooker.  Place the unwrapped pork on top of the shallots.  Pour the beef broth and beer (or water) over the pork and cover.  Cook on low for 8 hours.

Remove from slow cooker and allow to cool slightly. Discard bone and pan juices.  Shred the meat using a fork or two.  Place shredded pork on buns and pour bbq sauce the meat.  Enjoy!


Carolina BBQ Sauce
Ingredients:
1/4 cup cider vinegar
1/4 cup ketchup
1 Tablespoon brown sugar
1 teaspoon yellow mustard
1 teaspoon molasses
1/4 teaspoon salt
1/8 teaspoon crushed red pepper
1/4 teaspoon Worcestershire sauce

Directions:
In a bowl, combine all the ingredients and whisk well to dissolve the sugar. Place in a squeeze bottle and dress the pulled pork sandwiches to taste.

Thursday, July 8, 2010

The Obsessive Chef's Homemade Tater Tots

I'd like to take a moment to give a HUGE round of applause to Stephen over at The Obsessive Chef.  YAY Stephen!  Stephen worked diligently to create a homemade tater tot recipe.  He knew of my love for them and we once discussed making your own.  The only recipes I had seen called for deep frying the tots and we were trying to figure out a way to bake them, making them a tad bit healthier.  After one minor set back, he came up with this recipe.  Let me just say, Chris and I are die hard tot fans and we both agreed, we could eat these every day!  They were fantastic!  I think I got mine a tad bit too brown in spots, but I was completely satisfied with the outcome.  My next challenge is going to be making them with actual potatoes instead of the Simply Potatoes.  Stephen gave me a few pointers on doing just that, but I wanted to stay as close to his recipe as I could because I wanted to see if it really worked.  Now that I have a feel for how to form them and how to cook them, I'll be more likely to experiment by making some slight changes.  I can't wait!!  Thanks again Stephen..you are the tot master!!

The Obsessive Chef's Homemade Tater Tots
Slightly adapted from Stephen, The Obsessive Chef
Printable Recipe 
Ingredients:
3 cups Simply Potatoes Shredded Hash Browns
1 egg, beaten
2 Tablespoons cornstarch
2 Tablespoons olive oil
1 teaspoon salt
1 teaspoon garlic powder
1 teaspoon onion powder
1/2 teaspoon black pepper
3 Tablespoons panko bread crumbs (optional)

Directions:
In a large bowl, mix all ingredients together.  Form into tots...you would think this would be an easy task, but it can get a bit messy.  I used a small ice cream scoop to form my tots, Stephen used napkin rings.  You are just going to have to decide what works best from your kitchen.  Once the tots are formed, let them rest in the refrigerator for 30 minutes.

Preheat your oven to 425.  Place a non-stick cookie sheet in the oven for 3-5 minutes, remove.  Spray the cookie sheet with non-stick spray and place the tots on it.  Place the cookie sheet in the oven and let bake for 5 minutes.  Remove the cookie sheet and flip the tots over.  Place back into the oven  and let bake another 5 minutes.  Flip the tots one more time and turn the broiler on.  Broil for 5-8 minutes or until the tots are brown and crispy.  Enjoy! (you can check out Stephen's instructions for just broiling these bad boys, either way will work just fine!)


Wednesday, July 7, 2010

Simple Herb Marinated New York Steaks

So over the 4th of July weekend, Chris and I splurged and picked up some really nice cuts of New York steaks.  Normally, I'll grab a cut of steak that is on sale so nothing too fancy (or thick) ever hits our table.  But this night...oh, this night we went all out.  I didn't want to ruin a good cut of steak by soaking it in other flavors, I really just wanted to bring the natural flavor of the steak out and... well...ok...maybe add just a real subtle herb flavor...so I decided to marinate it with fresh herbs and garlic.  It was simple and it was fantastic!  The bad part of the night...I ran out of propane and had to finish the steaks in a pan.  UGH!!  I hate that!!  It didn't hurt the steaks a bit, but all I needed was 4 more minutes.... just 4 more minutes!!!  :)

This is a great way to get just a nice subtle flavor on the outside of the steaks before you place them on the grill.  I used rosemary and parsley because it was what I had in my refrigerator, but you could really use any mixture of fresh herbs.  As always, the longer you let them sit, the more flavor you will get! 
Simple Herb Marinated New York Steaks
Printable Recipe 
Ingredients:
2 New York steaks (together they were over a pound)
Olive oil
salt and pepper
2 large garlic cloves, thinly sliced
1 Tablespoon parsley, roughly chopped
2 Tablespoons rosemary, roughly chopped

Directions:
Rub both sides of the steaks with olive oil.  Season with salt and pepper.  On each side, place half the sliced garlic and half of the herbs on top of the steaks and press down.  Cover with plastic wrap and let sit in the refrigerator for at least 4 hours and up to 8 hours.

Preheat a grill to medium, medium-high.  Place the steaks directly on the grates and don't touch them.  Let them cook for 5-10 minutes, depending on how you like your steaks cooked, then flip them and let them cook another 5-10 minutes or until they are to your desired doneness.  Remove from the grill and let rest 3 minutes before you cut into them.  Enjoy!

Tuesday, July 6, 2010

Grilled Pork Chops with Spice Paste

First, let me welcome any new visitors and/or followers.  It's another Tuesday Tag-Along...hope you enjoy your visit here.  To my loyal followers, as always, thank you for taking time out of your day to stop by and see what I've been cooking up in my kitchen!!!  You won't be sorry you stopped by today!!! 
MMMMMMMMMMMMMMMMM...these turned out to be some incredible tasting pork chops! :)  The flavor was like others I've made before it, yet... not really.  When I first saw this recipe I thought there was a typo.... shouldn't that say SPICY paste, not SPICE paste.  lol  Like I knew what I was talkin' about or something, right?  I was wrong, it really is a spice paste. (but it's a tiny bit spicy, so beware)  I'm not always a big fan of Martha Stewart's recipes.  They have always been hit or miss with me.  Some I've loved, some I have absolutely hated (Yes, I know that's a harsh word, but it's true, I HATED them!!).  I think the episode where she basically reprimanded her guest for not using homemade marshmallows instead of store bought for her candied yam recipe sort of sent me over the top with her!  Seriously, though, these pork chops were great.  The flavor of the spices compliment the pork very well, even the tiny bit of heat from the cayenne.  I would say this ranks in the top five of my favorite pork chop recipes!

Grilled Pork Chops with Spice Paste
Adapted from Martha Stewart
Printable Recipe 
Ingredients:
4 garlic cloves, minced
3 Tablespoons olive oil
2 tablespoons light-brown sugar 
1 tablespoons kosher salt
2 teaspoons paprika
1/2 teaspoon ground pepper
1/2 teaspoon cayenne pepper
4 boneless center cut pork loin chops

Directions:
In a bowl, mix together garlic, oil, sugar, salt, paprika, pepper, and cayenne until a paste forms. Coat pork chops with paste and wrap in plastic. Refrigerate 1 hour (or up to 3).

Heat grill to medium-high; clean and lightly oil hot grates. Grill pork, covered, 5 minutes per side for medium. Let rest 5 minutes before serving. Enjoy!

Monday, July 5, 2010

Penne with Tuna and Tomatoes

I hope everyone enjoyed their 4th of July.  Hope all the barbecues and parties went off without a hitch and everyone was safe and full!!  I thought we all might need a break from the barbecuing world, so I decided to post this recipe that I made over a week ago.  When Chris sent me a text saying he was bringing home fresh tomatoes, I was thrilled!  There really is no better tomato then one taken from someone's home garden.  Chris's partner in crime at work and his wife have a great little garden going.  He's already brought Chris radishes that were fantastic and now he's sending home tomatoes!  YES!!!!  My idea was to actually make a dish called Pomodoro Crudo (simply put, a chunky fresh tomato sauce) and it did not turn out as planned.  The recipe was in my Food Network magazine and it just looked absolutely simple and fresh.  It instructed you to bring the tomatoes to a simmer in a small amount of pasta water and when I did that, my tomatoes turned to mush.  Now maybe they weren't that firm to begin with or maybe I simmered them just a tad bit longer then needed, but .. well.. I guess I'll have to try and make it again sometime and see what the outcome is.  So even though it didn't turn out like it should have, I was still pleased with what was on my plate in the end..and that is why I'm sharing it with you!
Penne with Tuna and Tomatoes
Printable Recipe 
Ingredients:
16 oz. dried penne pasta
3/4 lbs ripe tomatoes, cut into 1/2-inch dice
2 garlic cloves, minced
pinch of sugar
1 teaspoon dried oregano, divided
1 teaspoon dried parsley, divided
1/2 teaspoon dried thyme
sea salt and black pepper
2 Tablespoons extra-virgin olive oil
1 can albacore tuna (if it's in water, drain; if it's in oil do not drain)

Directions:
Sprinkle the chopped tomatoes with 1/2 teaspoon each oregano and parsley; set aside.  Cook pasta according to package; drain, reserving 1/4 cup of the pasta water.

In a medium size, deep skillet over medium heat, add 1 tsp olive oil and the garlic.  Saute for 1 minute.  Add the tomatoes and 2 Tbls of the pasta water.  Let simmer 2 minutes and then add the dried herbs and sugar; stir to combine.  Let tomatoes simmer another 2-3 minutes. Remove from heat.  Add the cooked pasta, olive oil, and tuna.  Toss to combine.  Season with salt and pepper to taste.  Enjoy!  (don't forget to top it with a little parmesan!!)


Friday, July 2, 2010

4th of July Celebration

I'm going to take a break from posting any new recipes this morning and give you a few last minute ideas for your 4th of July celebration instead.  I have picked a few of my favorites that I think would be a perfect addition to anyone's holiday cook out!


Have a safe and tasty holiday!
Jenn


Thursday, July 1, 2010

Grilled Chipotle Chicken

So what did I do with the left over chipotle peppers from yesterdays Chipotle Fish Packets, you ask? Well, I made this yummy grilled chicken.... and all I have to say is:  it was FAN-TASTIC!!!  Smokey, spicy, moist..what more could you ask for in a piece of poultry, right?  I will warn you, when I said spicy, I mean spicy. Ok, it wasn't unbelievably hot, but it was was spicy enough to wake me up a bit and I believe that spice is life :)  But don't let that stop you.  If you have ever had chipotle, you know that it's an amazing flavor that wakes up all the senses.  It's not to be missed.  And, hey, if you don't have a grill, you can pan sear the chicken or bake it...no worries, it will taste as though you grilled them anyway because of the smokey flavor the chipotle brings to it.

Grilled Chipotle Chicken
Inspired by Des at Life's Ambrosia
Printable Recipe 
Ingredients:
1 can (7oz) chipotle chili peppers in adobo sauce  (OR use what was left from the Chipotle Grilled Tilapia recipe, so it's a can minus 2 peppers and about a tablespoon of the sauce**)
1 Tablespoon honey
1 key lime, juiced
Garlic Salt
Pepper
4 boneless, skinless chicken breasts

Directions:
In a small food processor or blender, add the whole can of chipotles with sauce (or what's left of it), honey and lime juice.  Process until it becomes smooth.  Season both sides of each chicken breast with garlic salt and pepper.  Place the chicken in a resealable bag and pour the chipotle puree over it.  Seal the bag and massage the chicken so it gets fully covered with the puree.  Let marinate in the refrigerator for at least 30 minutes to an hour. (The longer it soaks in the marinade, the more flavor you are going to get)

Preheat your grill to medium high heat.  When grill is ready, remove chicken from bag and discard marinade.  Place chicken on oiled grill grates and grill for 5-8 minutes on each side depending on the thickness of your chicken, or until the chicken is cooked through.  Remove from grill and enjoy!