In case you ever need to know this - my all time favorite sandwich is a BLT. I could eat a (ok, maybe two or three) BLT every single day and never get tired of them. Seriously. I've done it before...... but don't tell my mom :)
This is a simple idea...nothing special or life changing...but still worth putting out there for you all to enjoy. I decided on this one night when I was thinking of how many BLT with fried egg sandwiches I've been seeing. It got me thinking... and this was what sprung from those thoughts.
In all reality, this should really be called BBT scrambled eggs as I used basil instead of lettuce. But I figured, I'd spend too much time explaining it, so I left it at BLT... If you wanted to add spinach instead of basil, that would work really well too.
BLT Scrambled Eggs
Created by Jenn's Food Journey
- Serves 2 -
Printable Recipe
Ingredients:
6 slices of bacon, chopped
8 eggs
1-2 Tablespoons heavy cream
1/8 teaspoon garlic salt
1/8 teaspoon pepper
dash of cayenne pepper
1 cup cherry tomatoes, quartered
6-8 large fresh basil leaves, chopped
Directions:
In a non-stick skillet, cook the bacon until crisp; about 5-10 minutes. Remove with slotted spoon and allow to drain on a paper towel. Remove all but 1 tablespoon of the bacon grease.
In a large bowl, whisk together the eggs, cream, garlic salt, pepper, and cayenne until light and foamy. Put the skillet with the grease in it over medium high heat for 1 minute. Pour the eggs straight into the middle of the pan, which will force the grease to the edges, where you want it. Stir slowly with a rubber or silicone spatula. As soon as curds (big soft lumps) of eggs begin to form, drop the heat down to low and shift from stirring to folding the curds over on themselves while gently shaking the pan with the other hand. As soon as no more liquidous egg is running around the pan, add the tomatoes and bacon and fold into eggs. Cook for 1 minute. Remove from heat and fold in basil. Serve warm and enjoy!
One Year Ago: Grilled Chicken Sandwich with Roasted Pepper and Goat Cheese Spread
Search This Blog
Friday, September 2, 2011
Thursday, September 1, 2011
Avocado Basil Pasta
Avocado, basil, and bacon... what more could you ask for in a pasta dish?? How about some tomato?
I knew I'd hook you sooner or later... :)
This was a fantastic dish...my only regret is that I did not try this sooner. This is one of those recipes that I sat on for years, actually, don't ask me why... I think that I had assumed Chris would not like it because of the avocado, but when I finally asked him about it, he was all on board to try it out. I think the bacon out weighed everything else, but hey, that's what bacon does sometimes!!
Avocado Basil Pasta
Adapted from Better Homes & Gardens
Printable Recipe
Ingredients:
12 oz whole grain penne pasta
1 avocado, chopped
1 cup grape tomatoes, quartered
6 slices bacon, chopped, cooked crisp and drained
2 Tablespoons lemon juice
1 Tablespoon olive oil
1 clover garlic, finely minced
1 can albacore tuna, drained
6 large fresh basil leaves, chopped
salt and pepper to taste
parmesan cheese - optional
Directions:
Cook pasta according to package directions; drain.
In a large bowl, combine the avocado, tomatoes, bacon, lemon juice, olive oil, and garlic. Toss in the drained pasta. Add the tuna and the basil and toss to combine. Season with salt and pepper. Sprinkle on parmesan cheese. Serve warm. Enjoy!
One Year Ago: Stuffed Pork Chops
I knew I'd hook you sooner or later... :)
This was a fantastic dish...my only regret is that I did not try this sooner. This is one of those recipes that I sat on for years, actually, don't ask me why... I think that I had assumed Chris would not like it because of the avocado, but when I finally asked him about it, he was all on board to try it out. I think the bacon out weighed everything else, but hey, that's what bacon does sometimes!!
Avocado Basil Pasta
Adapted from Better Homes & Gardens
Printable Recipe
Ingredients:
12 oz whole grain penne pasta
1 avocado, chopped
1 cup grape tomatoes, quartered
6 slices bacon, chopped, cooked crisp and drained
2 Tablespoons lemon juice
1 Tablespoon olive oil
1 clover garlic, finely minced
1 can albacore tuna, drained
6 large fresh basil leaves, chopped
salt and pepper to taste
parmesan cheese - optional
Directions:
Cook pasta according to package directions; drain.
In a large bowl, combine the avocado, tomatoes, bacon, lemon juice, olive oil, and garlic. Toss in the drained pasta. Add the tuna and the basil and toss to combine. Season with salt and pepper. Sprinkle on parmesan cheese. Serve warm. Enjoy!
One Year Ago: Stuffed Pork Chops
Wednesday, August 31, 2011
Grilled Chicken Lettuce Wraps with Fiery Sauce
I've done pork lettuce wraps and I've done shrimp lettuce wraps - now it's time for the chicken! I really didn't do anything different this time except for changing the protein.. and of course... yep, you know it.. the sauce :) And the sauce... I'm not ashamed to admit... is basically the same sauce I used on my Grilled Shrimp Po' Boy with rice vinegar added to it. I loved the flavors in that remoulade and thought the addition of rice vinegar gave it that extra Asian flavor.
I love making lettuce wraps, sure they can be a bit messy from time to time, but they are light, simple, and absolutely delicious!!
Grilled Chicken Lettuce Wraps with Fiery Sauce
Created by Jenn's Food Journey
Printable Recipe
Ingredients:
4 boneless skinless chicken breasts
1 Tablespoon Hoisin
1 Tablespoon rice vinegar
1 Tablespoon Sriracha
1 Tablespoon low sodium soy sauce
head of green leaf lettuce
1/2 English cucumber, sliced and cut into moon shapes
1 jalapeno, sliced
fresh mint leaves
2 cups cooked basmati rice
For the Fiery Sauce -
3 Tablespoons mayonnaise
2 teaspoon chili paste
2 teaspoon Sriracha
1 teaspoon lemon juice
1/2 teaspoon rice vinegar
Directions:
Rinse the chicken and pat dry with a paper towel; place in resealable plastic bag. In a small bowl, mix together the hoisin, rice vinegar, Sriracha, and soy sauce until well combined. Pour mixture over chicken, seal bag, and place in refrigerator for at least 1 hour.
To make the sauce - mix together the mayo, chili paste, Sriracha, lemon juice, and rice vinegar until well combined. Cover and store in refrigerator until ready to use.
Preheat grill to 375 degrees F. Oil the grill grates. Remove the chicken from the bag and discard the marinade. Place the chicken directly over the fire and grill for 5-10 minutes per side or until the chicken reaches an internal temperature of 165 degrees F. Remove from grill and allow to rest for 5-10 minutes. Once cooled a bit, cut the chicken into strips.
To build the wrap: Take a piece of lettuce, top with rice, cucumber slices, jalapeno slices, mint leaves, and chicken. Top with fiery sauce. Enjoy!!
One Year Ago: Chimichurri Chicken Pita Pizza
I love making lettuce wraps, sure they can be a bit messy from time to time, but they are light, simple, and absolutely delicious!!
Grilled Chicken Lettuce Wraps with Fiery Sauce
Created by Jenn's Food Journey
Printable Recipe
Ingredients:
4 boneless skinless chicken breasts
1 Tablespoon Hoisin
1 Tablespoon rice vinegar
1 Tablespoon Sriracha
1 Tablespoon low sodium soy sauce
head of green leaf lettuce
1/2 English cucumber, sliced and cut into moon shapes
1 jalapeno, sliced
fresh mint leaves
2 cups cooked basmati rice
For the Fiery Sauce -
3 Tablespoons mayonnaise
2 teaspoon chili paste
2 teaspoon Sriracha
1 teaspoon lemon juice
1/2 teaspoon rice vinegar
Directions:
Rinse the chicken and pat dry with a paper towel; place in resealable plastic bag. In a small bowl, mix together the hoisin, rice vinegar, Sriracha, and soy sauce until well combined. Pour mixture over chicken, seal bag, and place in refrigerator for at least 1 hour.
To make the sauce - mix together the mayo, chili paste, Sriracha, lemon juice, and rice vinegar until well combined. Cover and store in refrigerator until ready to use.
Preheat grill to 375 degrees F. Oil the grill grates. Remove the chicken from the bag and discard the marinade. Place the chicken directly over the fire and grill for 5-10 minutes per side or until the chicken reaches an internal temperature of 165 degrees F. Remove from grill and allow to rest for 5-10 minutes. Once cooled a bit, cut the chicken into strips.
To build the wrap: Take a piece of lettuce, top with rice, cucumber slices, jalapeno slices, mint leaves, and chicken. Top with fiery sauce. Enjoy!!
One Year Ago: Chimichurri Chicken Pita Pizza
Tuesday, August 30, 2011
Shrimp in Love Pasta
I found this recipe many years back and I happened to stumble across it again just recently. I thought I remembered it being pretty good, so I decided to give it another try. Besides the fact that something went wrong and my pasta became way too dry - the flavor was still there. Creamy and delicious but definitely not for anyone counting calories! It's an indulgence I was willing to run an extra mile for :)
Shrimp in Love Pasta
Adapted from Kraftrecipes.com
Printable Recipe
Ingredients:
3/4 lbs angel hair pasta
24 large frozen shrimp, thawed and tails removed
1 cup cherry tomatoes, quartered
5 oz cream cheese
1 cup torn baby spinach
Directions:
Cook pasta according to package directions.
Meanwhile, heat a large skillet over medium low heat. Add shrimp, tomatoes, and cream cheese; cook and stir for 4 to 5 minutes, or until shrimp are done and the mixture is well blended.
Drain pasta and place in large bowl. Add spinach and mix lightly. Stir in shrimp mixture. Enjoy!
One Year Ago: Sweet Pepper Olive Puree Over Penne and Chicken
Shrimp in Love Pasta
Adapted from Kraftrecipes.com
Printable Recipe
Ingredients:
3/4 lbs angel hair pasta
24 large frozen shrimp, thawed and tails removed
1 cup cherry tomatoes, quartered
5 oz cream cheese
1 cup torn baby spinach
Directions:
Cook pasta according to package directions.
Meanwhile, heat a large skillet over medium low heat. Add shrimp, tomatoes, and cream cheese; cook and stir for 4 to 5 minutes, or until shrimp are done and the mixture is well blended.
Drain pasta and place in large bowl. Add spinach and mix lightly. Stir in shrimp mixture. Enjoy!
One Year Ago: Sweet Pepper Olive Puree Over Penne and Chicken
Monday, August 29, 2011
Chicken in Satay Sauce
Do you remember when I raved about the Thai Style Honey Peanut Chicken that I politely borrowed from Mary at One Perfect Bite? Well, folks.. I have found a very close competitor. Enter Anna of At Anna's Kitchen Table and her Chicken in Satay Sauce. This chicken had a lovely peanut butter flavor without feeling as if we were spooning peanut butter directly into our mouths - which, I'm sorry to say, so many satay sauces can be like. I even decided to change things up a bit by adding sugar snap peas - I always forget how much I enjoy having them in stir frys - but you know you can add whatever veggies you want. Remember, it's your canvas to paint on!
This is yet another simple and delicious stir fry for those busy week nights!
Chicken in Satay Sauce
Adapted from At Anna's Kitchen Table
Printable Recipe
Ingredients:
2 Tablespoons low sodium soy sauce
2 Tablespoons brown sugar
2 Tablespoons smooth peanut butter (if you want yours a little more peanut buttery add another tablespoon)
2 Tablespoons sweet chili sauce
1 Tablespoon chili paste
1 Tablespoons lime juice
5 Tablespoons unsweetened coconut milk
1/4 teaspoon crushed red pepper flakes
2 teaspoons vegetable oil
1 pound chicken, cut into bite size chunks (you can you breasts or thighs are both, I used breasts)
2 cups sugar snap peas (or snow peas)
Directions:
In a bowl or large measuring cup, whisk together the soy sauce, brown sugar, peanut butter, sweet chili sauce, chili paste, lime juice, coconut milk, and crushed red peppers until well combined; set aside.
In a wok or deep, non-stick skillet, over medium high heat, add the oil. Once the oil is hot, add the diced chicken. Stir fry for until cooked through, about 5-7 minutes. Add the sugar snap peas and stir fry for two minutes. Add the sauce and bring to a boil, stirring to combine everything. Reduce heat to low and simmer until sauce has thickened just a little, about 1-2 minutes. Serve over rice. Enjoy!
One Year Ago: Grilled Parmesan Chicken
This is yet another simple and delicious stir fry for those busy week nights!
Chicken in Satay Sauce
Adapted from At Anna's Kitchen Table
Printable Recipe
Ingredients:
2 Tablespoons low sodium soy sauce
2 Tablespoons brown sugar
2 Tablespoons smooth peanut butter (if you want yours a little more peanut buttery add another tablespoon)
2 Tablespoons sweet chili sauce
1 Tablespoon chili paste
1 Tablespoons lime juice
5 Tablespoons unsweetened coconut milk
1/4 teaspoon crushed red pepper flakes
2 teaspoons vegetable oil
1 pound chicken, cut into bite size chunks (you can you breasts or thighs are both, I used breasts)
2 cups sugar snap peas (or snow peas)
Directions:
In a bowl or large measuring cup, whisk together the soy sauce, brown sugar, peanut butter, sweet chili sauce, chili paste, lime juice, coconut milk, and crushed red peppers until well combined; set aside.
In a wok or deep, non-stick skillet, over medium high heat, add the oil. Once the oil is hot, add the diced chicken. Stir fry for until cooked through, about 5-7 minutes. Add the sugar snap peas and stir fry for two minutes. Add the sauce and bring to a boil, stirring to combine everything. Reduce heat to low and simmer until sauce has thickened just a little, about 1-2 minutes. Serve over rice. Enjoy!
One Year Ago: Grilled Parmesan Chicken
Friday, August 26, 2011
Photo Friday - Awwwww Mom!!!
Remember when your mom would lick her finger or thumb so that she could wipe something off your face? Guess it could have been worse, right? :)
The shrimp craze continues over at Our Krazy Kitchen - stop by and check out my Fire Day Friday post - today's recipe:
Have a great weekend... and happy cooking!!
Ciao!
Jenn
The shrimp craze continues over at Our Krazy Kitchen - stop by and check out my Fire Day Friday post - today's recipe:
Have a great weekend... and happy cooking!!
Ciao!
Jenn
Thursday, August 25, 2011
Frosty Strawberry Squares
One thing I so thoroughly enjoy about food is the memories that it can spark. I love taking a bite of something and having it transport me back to my childhood or to lazy days on the beach in Hawaii. Take this recipe for example: After making this, I was transported back to many a summer days as a kid. Playing Star Wars and ghost in the grave yard with my sister and cousins at my grandma's house. The gum tree, mud pies, mulberry bushes, the swimming pool at the country club..... well, this list could go on and on.
This is a dessert that my grandma used to and my mom still makes. It's a recipe that has been in my family for quite sometime now and I have been given the ok to share it with all of you! It's so absolutely perfect for these hot summer days. It's light, it's frosty, it refreshing and it's down right delicious! Hope you enjoy it as much as we have! (by the way, the pictures don't do this dessert justice...I promise you!!)
Frosty Strawberry Squares
Recipe courtesy my mom, via my grandma, via our cousin Karen
Printable Recipe
Ingredients:
1 cup sifted flour
1/4 cup packed brown sugar
1/2 cup chopped walnuts
1/2 cup melted butter
2 egg whites
1 cup granulated sugar
2 cups sliced strawberries
2 Tablespoons lemon juice
1 cup whipping cream
Directions:
Preheat oven to 350 degrees F. Mix together the flour, sugar, walnuts and melted butter. Place in a shallow pan or baking dish and bake for 20 minutes, stirring occasionally. Remove from oven and allow to cool.
Once cooled, sprinkle 2/3 of the crumbs into a 9 x 13-inch pan.
In a large bowl, combine the egg whites, sugar, strawberries, and lemon juice. Beat on high speed for about 10 minutes. (I used a hand mixer, just like my mom and grandma, but you can use your stand mixer for this if you want)
Meanwhile, in a separate bowl, whip cream; fold into strawberry mixture. Spoon combined mixture over crumbs. Top with remaining crumbs. Cover and freeze for 6 hours or more before serving. (This makes a lot of bars - too much for just Chris and I - so I cut the recipe in half and put it in the a 8x8-inch pan and it made 9-12 bars depending how large you cut them.) Enjoy!
One Year Ago: Roasted Garlic Rigatoni with Peppers and Basil
This is a dessert that my grandma used to and my mom still makes. It's a recipe that has been in my family for quite sometime now and I have been given the ok to share it with all of you! It's so absolutely perfect for these hot summer days. It's light, it's frosty, it refreshing and it's down right delicious! Hope you enjoy it as much as we have! (by the way, the pictures don't do this dessert justice...I promise you!!)
Frosty Strawberry Squares
Recipe courtesy my mom, via my grandma, via our cousin Karen
Printable Recipe
Ingredients:
1 cup sifted flour
1/4 cup packed brown sugar
1/2 cup chopped walnuts
1/2 cup melted butter
2 egg whites
1 cup granulated sugar
2 cups sliced strawberries
2 Tablespoons lemon juice
1 cup whipping cream
Directions:
Preheat oven to 350 degrees F. Mix together the flour, sugar, walnuts and melted butter. Place in a shallow pan or baking dish and bake for 20 minutes, stirring occasionally. Remove from oven and allow to cool.
Once cooled, sprinkle 2/3 of the crumbs into a 9 x 13-inch pan.
In a large bowl, combine the egg whites, sugar, strawberries, and lemon juice. Beat on high speed for about 10 minutes. (I used a hand mixer, just like my mom and grandma, but you can use your stand mixer for this if you want)
Meanwhile, in a separate bowl, whip cream; fold into strawberry mixture. Spoon combined mixture over crumbs. Top with remaining crumbs. Cover and freeze for 6 hours or more before serving. (This makes a lot of bars - too much for just Chris and I - so I cut the recipe in half and put it in the a 8x8-inch pan and it made 9-12 bars depending how large you cut them.) Enjoy!
One Year Ago: Roasted Garlic Rigatoni with Peppers and Basil
Wednesday, August 24, 2011
Grilled Pork Chops with Adobo Paste
These chops were out of this world good! They had the right amount of spice and flavor and paired with a simple lemon aioli... well... they were gone in about sixty seconds. This was definitely one of those meals that made me sigh with sadness when it was all gone.
Grilled Pork Chops with Adobo Paste
Adapted from Epicurious.com
- Serves 2 -
Printable Recipe
Ingredients:
2 cups water
1 Tablespoon kosher salt
1 Tablespoon granulated sugar
1 Tablespoon minced garlic
1 teaspoon black pepper
2 boneless pork loin chops (about 1/4 lb or more each)
2 Tablespoons olive oil
1 Tablespoon Hungarian sweet paprika
1 teaspoon dried oregano
1/8 teaspoon garlic powder
1/4 teaspoon red pepper flakes
1/4 teaspoon black pepper
Directions:
Fill a large measuring cup with the water. Add the salt, sugar, garlic, and pepper; stirring until all the salt as dissolved. Add the pork chops to a large deep dish or resealable plastic bag. Pour the brine mixture over the pork and cover or seal. Let sit in refrigerator for at least 1 hour.
In a small bowl, mix together the remaining ingredients. Remove the pork from brine and thoroughly rinse under cool water. Pat dry with a paper towel. Rub the mixture over both sides of the pork and cover. Let sit in refrigerator for at least another hour.
Preheat grill to 375 degrees. Rub the grates with an oil soaked paper towel. Place the pork chops directly over the fire and cook for 4-5 minutes per side or until the internal temperature reaches 140 degrees F. Remove from the grill and cover with aluminum foil for 5 minutes before eating. Serve with lemon aioli if desired. Enjoy!
One Year Ago: Cinnamon Swirl Loaf
Grilled Pork Chops with Adobo Paste
Adapted from Epicurious.com
- Serves 2 -
Printable Recipe
Ingredients:
2 cups water
1 Tablespoon kosher salt
1 Tablespoon granulated sugar
1 Tablespoon minced garlic
1 teaspoon black pepper
2 boneless pork loin chops (about 1/4 lb or more each)
2 Tablespoons olive oil
1 Tablespoon Hungarian sweet paprika
1 teaspoon dried oregano
1/8 teaspoon garlic powder
1/4 teaspoon red pepper flakes
1/4 teaspoon black pepper
Directions:
Fill a large measuring cup with the water. Add the salt, sugar, garlic, and pepper; stirring until all the salt as dissolved. Add the pork chops to a large deep dish or resealable plastic bag. Pour the brine mixture over the pork and cover or seal. Let sit in refrigerator for at least 1 hour.
In a small bowl, mix together the remaining ingredients. Remove the pork from brine and thoroughly rinse under cool water. Pat dry with a paper towel. Rub the mixture over both sides of the pork and cover. Let sit in refrigerator for at least another hour.
Preheat grill to 375 degrees. Rub the grates with an oil soaked paper towel. Place the pork chops directly over the fire and cook for 4-5 minutes per side or until the internal temperature reaches 140 degrees F. Remove from the grill and cover with aluminum foil for 5 minutes before eating. Serve with lemon aioli if desired. Enjoy!
One Year Ago: Cinnamon Swirl Loaf
Tuesday, August 23, 2011
Thai Cashew Nut Shrimp
I wish I could say this dish was all my idea.... oh how I wish I could say that... but I cannot. No, this idea came straight from my favorite grilling master - Chris at Nibble Me This. Chris made this awesome stir fry with pork, but since I had shrimp on hand instead of pork, I thought.. why not??
I wish I could say that I made this stir fry on my grill like Chris did... but once again, I cannot. Does it really matter though? If it does, well... sorry, go check out Chris' version. If it doesn't... please stay!
If you stay, you will be enticed by an array of flavors that will make you want to try this with not only shrimp and pork, but chicken, beef, AND tofu :) Seriously, it's just that good.
Thai Cashew Nut Shrimp
Adapted from Chris at Nibble Me This
Printable Recipe
Ingredients:
48 large frozen shrimp, thawed and tails removed
1/4 teaspoon sesame oil
1 teaspoon vegetable oil
1 shallot, thinly sliced
1 bell pepper, thinly sliced
1 serrano pepper, thinly sliced
1 large garlic clove, minced
1 loosely packed cup of fresh basil leaves, stems removed and cut into half
2 Tablespoons soy sauce
1 Tablespoon fish sauce
1/4 cup chicken stock
1 Tablespoon granulated sugar
2 Tablespoon cold water
1 Tablespoon corn starch
1/4 cup unsalted roasted cashew halves and pieces
Directions:
Place the shrimp in a deep bowl/dish. Add the sesame oil and 1 teaspoon vegetable oil. Season with salt and pepper and toss to coat all the shrimp. Cover and allow to sit in the refrigerator for 30 minutes.
In a small bowl or measuring cup, add the soy sauce, fish sauce, chicken stock, sugar, and 1 tablespoon of water. Stir to combine. In another measuring cup, add the remaining 1 tablespoon of water and the corn starch. Stir to combine.
In a wok or a deep non-stick skillet, over medium high heat, add the remaining vegetable oil. Once oil is hot, add the shallot and quickly stir fry 1 minute. Add the bell pepper and serrano pepper; stir fry for 2 minutes. Add the garlic and stir fry for 30 seconds. Add the shrimp and quickly stir fry for 2-3 minutes. Add the sauce mixture and the corn starch slurry, stirring to coat everything. Bring to a boil and allow the sauce to thicken. Immediately remove from heat and stir in the cashews and basil. Serve over rice and enjoy!
One Year Ago: Grilled Ranch Chicken
I wish I could say that I made this stir fry on my grill like Chris did... but once again, I cannot. Does it really matter though? If it does, well... sorry, go check out Chris' version. If it doesn't... please stay!
If you stay, you will be enticed by an array of flavors that will make you want to try this with not only shrimp and pork, but chicken, beef, AND tofu :) Seriously, it's just that good.
Thai Cashew Nut Shrimp
Adapted from Chris at Nibble Me This
Printable Recipe
Ingredients:
48 large frozen shrimp, thawed and tails removed
1/4 teaspoon sesame oil
1 teaspoon vegetable oil
1 shallot, thinly sliced
1 bell pepper, thinly sliced
1 serrano pepper, thinly sliced
1 large garlic clove, minced
1 loosely packed cup of fresh basil leaves, stems removed and cut into half
2 Tablespoons soy sauce
1 Tablespoon fish sauce
1/4 cup chicken stock
1 Tablespoon granulated sugar
2 Tablespoon cold water
1 Tablespoon corn starch
1/4 cup unsalted roasted cashew halves and pieces
Directions:
Place the shrimp in a deep bowl/dish. Add the sesame oil and 1 teaspoon vegetable oil. Season with salt and pepper and toss to coat all the shrimp. Cover and allow to sit in the refrigerator for 30 minutes.
In a small bowl or measuring cup, add the soy sauce, fish sauce, chicken stock, sugar, and 1 tablespoon of water. Stir to combine. In another measuring cup, add the remaining 1 tablespoon of water and the corn starch. Stir to combine.
In a wok or a deep non-stick skillet, over medium high heat, add the remaining vegetable oil. Once oil is hot, add the shallot and quickly stir fry 1 minute. Add the bell pepper and serrano pepper; stir fry for 2 minutes. Add the garlic and stir fry for 30 seconds. Add the shrimp and quickly stir fry for 2-3 minutes. Add the sauce mixture and the corn starch slurry, stirring to coat everything. Bring to a boil and allow the sauce to thicken. Immediately remove from heat and stir in the cashews and basil. Serve over rice and enjoy!
One Year Ago: Grilled Ranch Chicken
Monday, August 22, 2011
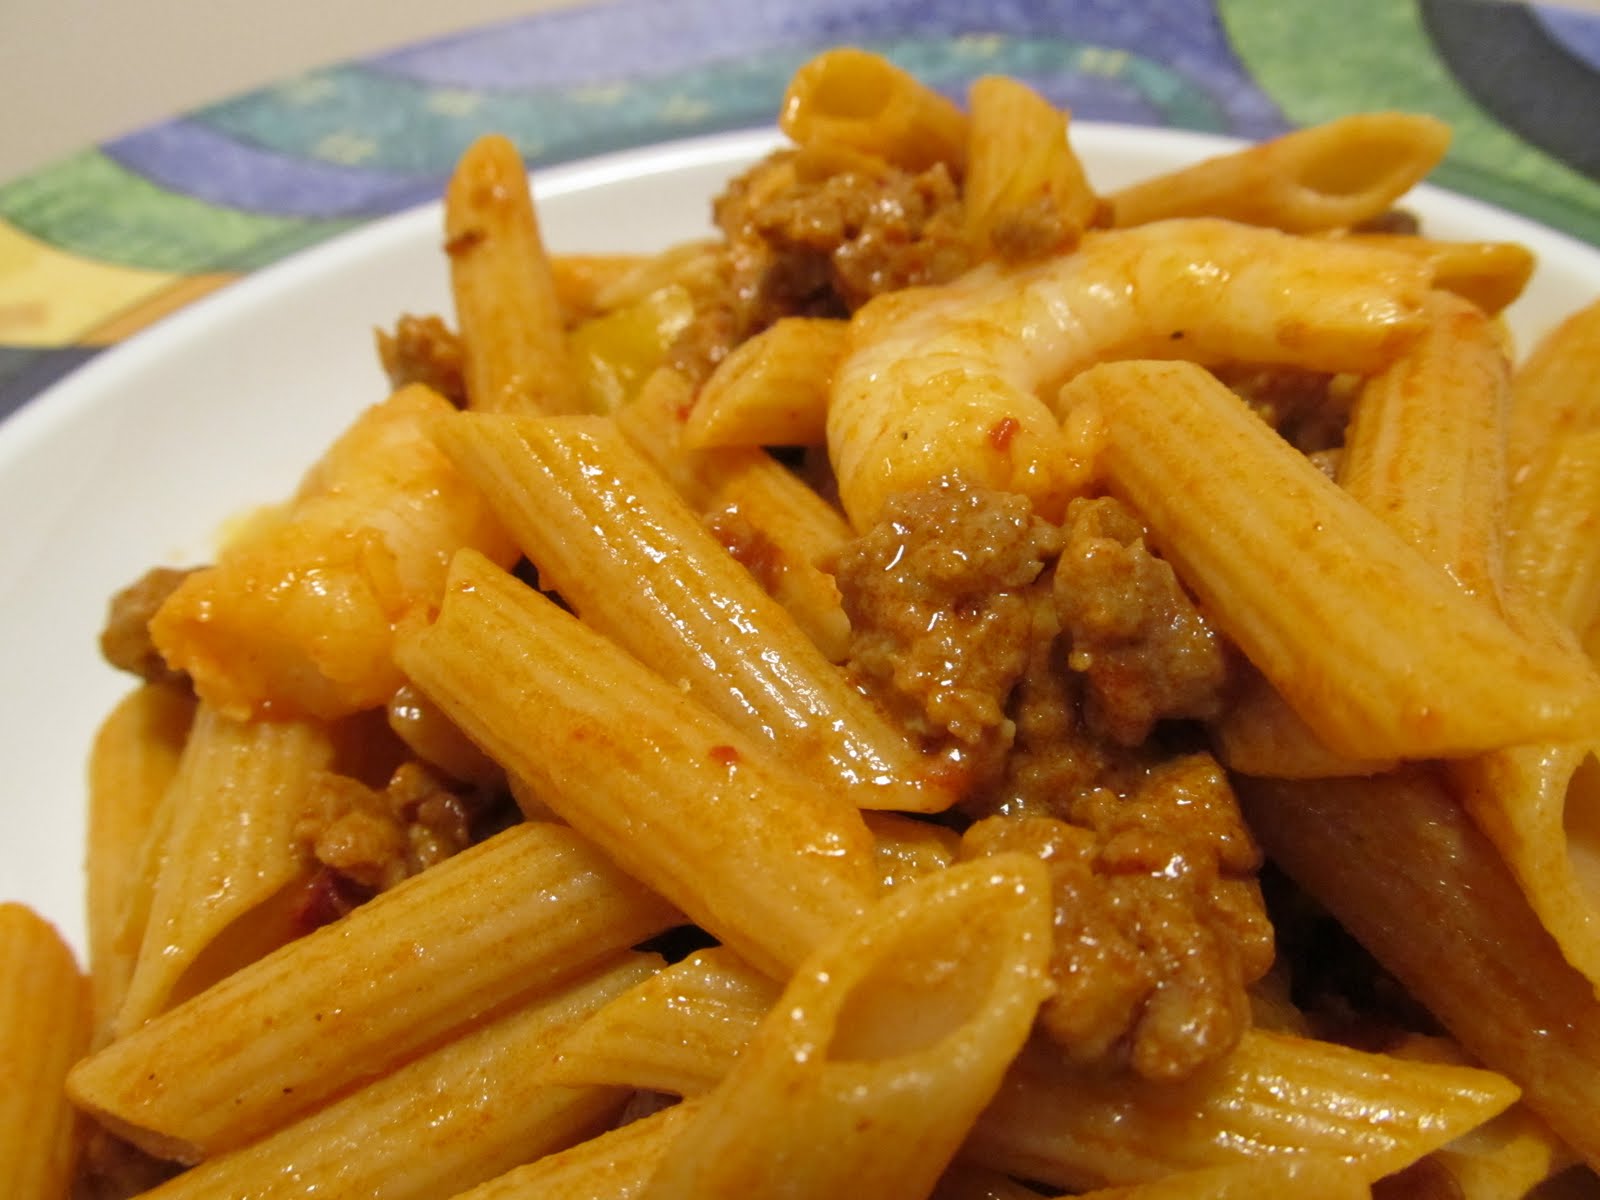
Chorizo Chipotle Pasta
I know this might make anyone from my Italian heritage cringe, but, I must admit, I would rather have chorizo with my pasta than Italian sausage. (WHAT DID I JUST SAY??? I think my Italian grandparents are rolling over in their graves right now...sorry!!) Don't get me wrong, I love, love, LOVE Italian sausage (sweet, spicy, mild, whatever) it's just that chorizo has found a very special place in my heart.... er, stomach I should say. And, let me be the first to say, although it goes so well with so many things, it really pairs nicely with pasta!
The original recipe that sparked the idea for this was from Guy Fieri. I saw his recipe for Chipotle Pasta and knew I was going to have to figure out a way to put some sort of spin on it to make it my own. I think this is a great way to enjoy Guy's pasta without all the guilt.
Chorizo Chipotle Pasta
Created by Jenn's Food Journey, Inspired by Guy Fieri
Printable Recipe
Ingredients:
12 oz whole grain penne pasta
3 Tablespoons sour cream
1 Tablespoons chipotle puree
3/4 pound ground Mexican chorizo (or use links and remove casing)
1 large yellow bell pepper, chopped
12 large frozen shrimp (thawed and tails removed)
Directions:
Cook pasta according to package directions. Drain.
In a small bowl, mix together the sour cream and chipotle; set aside.
In a skillet, over medium heat, add the chorizo, breaking it up with a wooden spoon. Cook for 4 minutes, stirring occasionally. Add the bell pepper and cook another 2 minutes. Add the shrimp and cook until warmed through, about 3 minutes. Add the sour cream mixture and stir to combine. Toss in the cooked pasta. Taste for seasoning. Enjoy!
One Year Ago: Beer Brined Pork Chops with Cheddar
The original recipe that sparked the idea for this was from Guy Fieri. I saw his recipe for Chipotle Pasta and knew I was going to have to figure out a way to put some sort of spin on it to make it my own. I think this is a great way to enjoy Guy's pasta without all the guilt.
Chorizo Chipotle Pasta
Created by Jenn's Food Journey, Inspired by Guy Fieri
Printable Recipe
Ingredients:
12 oz whole grain penne pasta
3 Tablespoons sour cream
1 Tablespoons chipotle puree
3/4 pound ground Mexican chorizo (or use links and remove casing)
1 large yellow bell pepper, chopped
12 large frozen shrimp (thawed and tails removed)
Directions:
Cook pasta according to package directions. Drain.
In a small bowl, mix together the sour cream and chipotle; set aside.
In a skillet, over medium heat, add the chorizo, breaking it up with a wooden spoon. Cook for 4 minutes, stirring occasionally. Add the bell pepper and cook another 2 minutes. Add the shrimp and cook until warmed through, about 3 minutes. Add the sour cream mixture and stir to combine. Toss in the cooked pasta. Taste for seasoning. Enjoy!
One Year Ago: Beer Brined Pork Chops with Cheddar
Friday, August 19, 2011
Grilled Steaks with Creamy Parmesan Sauce
Seriously...how can this be bad? Look at it.. the creamy sauce.... it looks a bit like heaven, don't you think?
No? Well, it's pretty darn close anyway!
Nice thing about this sauce, you can change it up by adding different cheeses... turn this into a creamy gorgonzola or goat cheese sauce. Add some chopped up mushrooms or small shrimp. Sop it up with warm bread........
I think you get the idea: This is a simple and delicious recipe that can be a canvas (ha, haven't used that term in a while, have I?) for something even more amazing!
I just made the whole post about the sauce again, didn't I? Oh, well....... :)
Grilled Steaks with Creamy Parmesan Sauce
Created by Jenn's Food Journey
Printable Recipe
Ingredients:
4 steaks - whatever cut you want - I used sirloins
olive oil
garlic salt
pepper
1 Tablespoon unsalted butter
1 garlic clove, finely minced
2 oz cream cheese
1/2 cup heavy cream or half and half
1/2 cup grated parmesan cheese
1-2 Tablespoons fresh parsley leaves, finely chopped
salt and pepper to taste
Directions:
Rub both sides of the steaks with olive oil and season with garlic salt and pepper. Preheat grill to 400 degrees. Let steaks stand at room temperature while you wait. Place the steaks on the grill and grill for 5-10 minutes per side depending on the doneness you prefer. Remove from grill and allow to rest 5 minutes before slicing into.
Meanwhile, in a small sauce pan, melt the butter over medium low heat. Add the garlic and saute for 1 minute. Stir in the cream cheese and cream or half & half. Allow the cream cheese to melt, stirring constantly. Add the parmesan cheese and simmer until all the cheese has melted. Remove from heat, add the parsley and season with salt and pepper. Server over steaks and enjoy!
One Year Ago: Guest Blogger - Posole
Thursday, August 18, 2011
Grilled Honey Chipotle Lime Shrimp
Before I get to the recipe today, I really want to share one of the most amazing animal videos I have ever seen. Now I can't figure out how to embed this video, so I apologize that you have to click on this link to see it - but, trust me, it's so worth it. Take some time..when you are done here of course... and check this out. I believe that you too will be utterly amazed!
Now...let's talk about food...
Do you know what I like about grilled shrimp? I mean besides it being so simple and delicious...??? It's all because of how versatile it is. Think about it. Toss some shrimp in olive oil and season with salt and pepper. Grill. Now, put shrimp in a bowl and add some grilled veggies, toss with sauce... Wait, what kind of sauce you ask? Honestly, any kind of sauce would work and THAT is what I love. You can create so many different flavors and so many different combinations.. the possibilities are endless!! Throw it over some rice and you have the ultimate grilled "stir-fry".... at least, that's what I did here :)
Grilled Honey Chipotle Lime Shrimp
Adapted from Guy Fieri
Printable Recipe
Ingredients:
1/4 cup barbecue sauce (homemade or store bought is fine)
2 Tablespoons honey
2 Tablespoons lime juice
1 Tablespoon vegetable oil
1 Tablespoon chipotle puree (to make puree, put entire can of chipotle in adobo sauce in a food processor and pulse until smooth)
36 extra large shrimp (31/40 count), peeled and deveined
1 red bell pepper, cut into chunks
1 yellow bell pepper, cut into chunks
wooden or metal skewers (soak wooden skewers in water for at least 30 minutes)
Directions:
Mix together the barbecue sauce, honey, lime juice, vegetable oil, and chipotle puree. Place shrimp in shallow dish and pour 2 tablespoons of the sauce over them. Toss to coat. Cover and refrigerate for at least 1 hour.
Preheat grill to 350 degrees. Oil the grill grates. Thread the shrimp and peppers on the skewers and place directly over the fire. Grill the peppers until they start to soften, about 5-10 minutes. Grill the shrimp 3-5 minutes per side or until they are cooked through and have turned pink. Carefully remove from grill and even more carefully, remove shrimp and peppers from their skewers. You can pour the sauce over the shrimp and peppers now, or allow each person to spoon on their own amount of sauce. Serve over rice and Enjoy!
One Year Ago: Guest Blogger - Wine, Garlic & Herb Chicken and Veggie Kabobs
Now...let's talk about food...
Do you know what I like about grilled shrimp? I mean besides it being so simple and delicious...??? It's all because of how versatile it is. Think about it. Toss some shrimp in olive oil and season with salt and pepper. Grill. Now, put shrimp in a bowl and add some grilled veggies, toss with sauce... Wait, what kind of sauce you ask? Honestly, any kind of sauce would work and THAT is what I love. You can create so many different flavors and so many different combinations.. the possibilities are endless!! Throw it over some rice and you have the ultimate grilled "stir-fry".... at least, that's what I did here :)
Grilled Honey Chipotle Lime Shrimp
Adapted from Guy Fieri
Printable Recipe
Ingredients:
1/4 cup barbecue sauce (homemade or store bought is fine)
2 Tablespoons honey
2 Tablespoons lime juice
1 Tablespoon vegetable oil
1 Tablespoon chipotle puree (to make puree, put entire can of chipotle in adobo sauce in a food processor and pulse until smooth)
36 extra large shrimp (31/40 count), peeled and deveined
1 red bell pepper, cut into chunks
1 yellow bell pepper, cut into chunks
wooden or metal skewers (soak wooden skewers in water for at least 30 minutes)
Directions:
Mix together the barbecue sauce, honey, lime juice, vegetable oil, and chipotle puree. Place shrimp in shallow dish and pour 2 tablespoons of the sauce over them. Toss to coat. Cover and refrigerate for at least 1 hour.
Preheat grill to 350 degrees. Oil the grill grates. Thread the shrimp and peppers on the skewers and place directly over the fire. Grill the peppers until they start to soften, about 5-10 minutes. Grill the shrimp 3-5 minutes per side or until they are cooked through and have turned pink. Carefully remove from grill and even more carefully, remove shrimp and peppers from their skewers. You can pour the sauce over the shrimp and peppers now, or allow each person to spoon on their own amount of sauce. Serve over rice and Enjoy!
One Year Ago: Guest Blogger - Wine, Garlic & Herb Chicken and Veggie Kabobs
Wednesday, August 17, 2011
Tropical Chicken Stiry Fry with Coconut Rice
Katie, The College Culinarian, has been highlighted on my blog before, but if you have not stopped by to check out her site, I highly recommend you do that after you leave here. Katie is on a small little break right now, but that doesn't mean you can't browse through her many past delicious recipes. I, for one, love her creativity in the kitchen. She just recently posted a recipe for Tropical Chicken and Coconut Rice Bowl that I was instantly drawn to. I don't know if it was the pineapple or the coconut flavored rice, but either way, I knew I was going to try this.
Now I changed this up a bit.... I made this into more of a stir fry than Katie did... but honestly, I'm thinking that no matter which recipe you try, you are going to thoroughly enjoy it. It's the perfect meal for summer!
Tropical Chicken Stir Fry with Coconut Rice
Adapted/inspired by The College Culinarian
Printable Recipe
Ingredients:
1 lbs chicken, cut into bite size chunks (I used breasts, but you could use thighs)
For the marinade -
2 Tablespoons brown sugar
1/4 cup low sodium soy sauce
1 teaspoon water
1/4 teaspoon ground ginger
1 garlic clover, minced
1 1/2 teaspoons lime juice
1 teaspoon Sriracha
For the stir fry -
1 cup pineapple chunks
1 jalapeno, stem removed and roughly chopped (remove seeds for less heat)
1 yellow pepper, diced
2 teaspoons vegetable oil
For the sauce -
2 Tablespoons pineapple juice
2 Tablespoons low sodium soy sauce
1/2 teaspoon cornstarch
For the coconut rice -
1 cup basmati or jasmine rice (uncooked)
1/2 cup water
1 cup unsweetened coconut milk
1/2 teaspoon salt
1 1/2 Tablespoons granulated sugar
Directions:
Mix all the ingredients for the marinade together in a small bowl. Place cut up chicken in resealable bag and pour marinade over. Seal bag and place in refrigerator for 2-4 hours.
To make the coconut rice: In a medium saucepan over medium heat, add the water and coconut milk and bring to a boil. Add the salt, sugar and rice. Reduce heat to simmer, cover, and allow to cook until all the water is absorbed. Remove from heat and let rest 5 minutes. Fluff with fork.
To make the stir fry: Mix all the ingredients for the sauce together. In a deep, non-stick skillet or wok, over medium high heat, add the vegetable oil and allow to heat for 1 minutes. Add the chicken and stir fry until almost cooked through, about 4 minutes. Add the peppers and stir fry for another 3 minutes. Add the pineapple chunks and the sauce mixture and bring to a boil, stirring to coat everything. As soon as the sauce thickens, remove from heat. Serve over coconut rice and enjoy!
One Year Ago: Lemon Grilled Chicken Breasts
Now I changed this up a bit.... I made this into more of a stir fry than Katie did... but honestly, I'm thinking that no matter which recipe you try, you are going to thoroughly enjoy it. It's the perfect meal for summer!
Tropical Chicken Stir Fry with Coconut Rice
Adapted/inspired by The College Culinarian
Printable Recipe
Ingredients:
1 lbs chicken, cut into bite size chunks (I used breasts, but you could use thighs)
For the marinade -
2 Tablespoons brown sugar
1/4 cup low sodium soy sauce
1 teaspoon water
1/4 teaspoon ground ginger
1 garlic clover, minced
1 1/2 teaspoons lime juice
1 teaspoon Sriracha
For the stir fry -
1 cup pineapple chunks
1 jalapeno, stem removed and roughly chopped (remove seeds for less heat)
1 yellow pepper, diced
2 teaspoons vegetable oil
For the sauce -
2 Tablespoons pineapple juice
2 Tablespoons low sodium soy sauce
1/2 teaspoon cornstarch
For the coconut rice -
1 cup basmati or jasmine rice (uncooked)
1/2 cup water
1 cup unsweetened coconut milk
1/2 teaspoon salt
1 1/2 Tablespoons granulated sugar
Directions:
Mix all the ingredients for the marinade together in a small bowl. Place cut up chicken in resealable bag and pour marinade over. Seal bag and place in refrigerator for 2-4 hours.
To make the coconut rice: In a medium saucepan over medium heat, add the water and coconut milk and bring to a boil. Add the salt, sugar and rice. Reduce heat to simmer, cover, and allow to cook until all the water is absorbed. Remove from heat and let rest 5 minutes. Fluff with fork.
To make the stir fry: Mix all the ingredients for the sauce together. In a deep, non-stick skillet or wok, over medium high heat, add the vegetable oil and allow to heat for 1 minutes. Add the chicken and stir fry until almost cooked through, about 4 minutes. Add the peppers and stir fry for another 3 minutes. Add the pineapple chunks and the sauce mixture and bring to a boil, stirring to coat everything. As soon as the sauce thickens, remove from heat. Serve over coconut rice and enjoy!
One Year Ago: Lemon Grilled Chicken Breasts
Tuesday, August 16, 2011
White Chocolate Chip & Raspberry Swirl Ice Cream
The basic idea for this recipe came from Mary over at One Perfect Bite. I loved the idea of her recipe, but wanted to simplify things a bit because.... well... I'm a bit lazy from time to time in the kitchen.... and I'm ok with admitting that!
There is something about white chocolate and raspberry that I just adore. Whenever I go to The Cheesecake Factory, I will always order the white chocolate raspberry truffle cheesecake.. it is DA BOMB!!!! So, of course, when I saw a recipe for white chocolate and raspberry ice cream, I knew I had to try it.
The best part about this ice cream was the raspberry swirl... I have a feeling I could find many, many, MANY more uses for it!
White Chocolate Chip & Raspberry Swirl Ice Cream
Inspired/adapted from One Perfect Bite
Printable Recipe
Ingredients:
1 can (14oz) sweetened condensed milk
1 1/2 Tablespoons vanilla
1 1/ cups half and half
2 cups heavy cream
1/2 cup white chocolate chips
Raspberry Puree -
6 oz fresh raspberries
1 Tablespoon granulated sugar
Directions:
Combine sweetened condensed milk, vanilla, half and half, and heavy cream in a large bowl or measuring cup. Whisk to combine. Cover and chill for at least 4 hours.
Meanwhile, add the raspberries and sugar to a blender or food processor. Process until smooth. Strain seeds from puree. Cover and refrigerate.
Pour the milk mixture into the bowl of your ice cream maker and process according to manufacturers instructions. Add the white chocolate chips in the last 5-10 minutes of churning. Spread 1/3 of the ice cream into a freezer safe dish with a lid. Cover with 1/2 of the raspberry puree. Add another 1/3 of the ice cream and top with remainder of the raspberry puree (I put 2 tablespoons aside so that I could drizzle it over the top when I served it). Top with last of ice cream. Cover and return to freezer to harden. Enjoy!
One Year Ago: Parmesan Orzo with Salmon
There is something about white chocolate and raspberry that I just adore. Whenever I go to The Cheesecake Factory, I will always order the white chocolate raspberry truffle cheesecake.. it is DA BOMB!!!! So, of course, when I saw a recipe for white chocolate and raspberry ice cream, I knew I had to try it.
The best part about this ice cream was the raspberry swirl... I have a feeling I could find many, many, MANY more uses for it!
White Chocolate Chip & Raspberry Swirl Ice Cream
Inspired/adapted from One Perfect Bite
Printable Recipe
Ingredients:
1 can (14oz) sweetened condensed milk
1 1/2 Tablespoons vanilla
1 1/ cups half and half
2 cups heavy cream
1/2 cup white chocolate chips
Raspberry Puree -
6 oz fresh raspberries
1 Tablespoon granulated sugar
Directions:
Combine sweetened condensed milk, vanilla, half and half, and heavy cream in a large bowl or measuring cup. Whisk to combine. Cover and chill for at least 4 hours.
Meanwhile, add the raspberries and sugar to a blender or food processor. Process until smooth. Strain seeds from puree. Cover and refrigerate.
Pour the milk mixture into the bowl of your ice cream maker and process according to manufacturers instructions. Add the white chocolate chips in the last 5-10 minutes of churning. Spread 1/3 of the ice cream into a freezer safe dish with a lid. Cover with 1/2 of the raspberry puree. Add another 1/3 of the ice cream and top with remainder of the raspberry puree (I put 2 tablespoons aside so that I could drizzle it over the top when I served it). Top with last of ice cream. Cover and return to freezer to harden. Enjoy!
One Year Ago: Parmesan Orzo with Salmon
Monday, August 15, 2011
Jalapeno Hot Sauce
I could have made this post about the steak...but then I would have done a HUGE injustice to the blogging world. Had I featured the steak instead of this sauce, I believe most of my followers would leave.....
So, it's about the sauce...but this shouldn't surprise you....
And this hot sauce is GOOD. No, I mean really, really, REALLY GOOD. Is there truly anything better then something so incredibly tasty taking less then 20 minutes to make?
Jalapeno Hot Sauce
Adapted from Bobby Flay
Printable Recipe
Ingredients:
3 Tablespoons vegetable oil
1/4 sweet onion, finely diced
5 jalapenos, stem removed and finely diced (for less heat, remove the seeds)
1 garlic clove, minced
1 cup rice vinegar
1/2 cup water
1 teaspoon kosher salt
3/4 Tablespoon honey
2 Tablespoons parsley leaves
Directions:
In a small saucepan, heat 1 tablespoons oil over medium heat. Add the onion and jalapenos and cook until soft. Add the garlic and cook for 30 seconds. Add vinegar and water and bring to a simmer (reduce heat if necessary); cover and allow to slowly simmer for 10 minutes. Transfer the mixture to a blender (please be careful!!!) and add the remaining oil, salt, honey, and parsley. Blend until smooth, about 2-3 minutes. Transfer to a container with a lid and refrigerate after using. Will last 2 months in the fridge. Enjoy!
One Year Ago: Mini Meatball Subs
So, it's about the sauce...but this shouldn't surprise you....
And this hot sauce is GOOD. No, I mean really, really, REALLY GOOD. Is there truly anything better then something so incredibly tasty taking less then 20 minutes to make?
Jalapeno Hot Sauce
Adapted from Bobby Flay
Printable Recipe
Ingredients:
3 Tablespoons vegetable oil
1/4 sweet onion, finely diced
5 jalapenos, stem removed and finely diced (for less heat, remove the seeds)
1 garlic clove, minced
1 cup rice vinegar
1/2 cup water
1 teaspoon kosher salt
3/4 Tablespoon honey
2 Tablespoons parsley leaves
Directions:
In a small saucepan, heat 1 tablespoons oil over medium heat. Add the onion and jalapenos and cook until soft. Add the garlic and cook for 30 seconds. Add vinegar and water and bring to a simmer (reduce heat if necessary); cover and allow to slowly simmer for 10 minutes. Transfer the mixture to a blender (please be careful!!!) and add the remaining oil, salt, honey, and parsley. Blend until smooth, about 2-3 minutes. Transfer to a container with a lid and refrigerate after using. Will last 2 months in the fridge. Enjoy!
One Year Ago: Mini Meatball Subs
Subscribe to:
Posts (Atom)