Search This Blog

Wednesday, October 13, 2010

Chipotle Mexican Rice

We eat a lot of rice in our house.  I love it.  It's something my picky eater will eat too, so it's a staple!  I don't normally dress the rice up too much...I just mix in some veggies and garlic.  But, lately, I've been wanting to be a bit more adventurous when it comes to our side dishes. I got the idea for this from a recipe I saw on Nibble Me This.  Chris (not to be confused with my non cooking boyfriend Chris) made a yummy looking Adobo Mexican Rice a few weeks back that I knew I had to twist and make my own!  Ok, ok, so I confess, I really just simplified his recipe because I really was feeling quite lazy the night I made this...I'm not ashamed to admit it.

I cooked my peppers on the grill, but just long enough to make them tender, and then diced them.  If you want to leave them raw or just saute in a pan until tender to save a step, by all means do it.  I just really wanted that fire roasted flavor in the rice to go along with the smokiness of the chipotle.  And speaking of the chipotle, I made a puree instead of chopping up the pepper by hand.  I actually took 4 canned chipotle peppers in adobo sauce and 2 Tbls of the sauce and placed them in a blender and pureed.  If you want to save even more time, you can use 1 Tbls of sauce and 1 pepper, finely diced.  Once again, feel free to put your own twist on it, I know I did!

Chipotle Mexican Rice
Printable Recipe 
Ingredients:
1 Tablespoon olive oil
1 large garlic clove, minced
1 cup Basmati rice
1 Tablespoon chipotle puree
2 cups chicken broth
1 red pepper, cut in half, seeds and stem removed
1 jalapeno pepper, seeds and stem removed
Garlic salt and pepper (optional)

Directions:
In a medium saucepan, heat the olive oil over medium heat.  Add the garlic and allow to cook for 1 minute.  Add the rice and saute for 1 minute.  Stir in the chipotle puree and saute for 1 more minute.  Slowly add the chicken broth, turn up heat to high and bring to a boil.  Cover and turn down heat to low.  Simmer for 15 minutes or until all the water is absorbed.  Remove from heat and allow to sit for 5 minutes.  

While the rice is cooking, heat your grill or broiler.  Rub olive oil on the peppers, sprinkle with salt and pepper, and place directly on grill grates, or on a broiler pan under the broiler.  Let them cook until just starting to soften, about 5-8 minutes.  Remove and dice.

When the rice is ready, add the peppers to it and fluff with a fork.  Season with garlic salt and pepper if you desire.  Enjoy!

Oh...and for those of you that stuck around until the end...I have some kick ass news!  Only, to find out the news, you are going to have to go check out yesterday's Nibble Me This post....of course I want you to check out the recipe Chris posted (the chicken looks so frickin' good, I wish I had eat-a-vision...you know, where you can just reach your hand into the screen and pull out that yummy piece of chicken...eat-a-vision) but I also want you to go all the way to the very bottom of the post....the last little part there about the guest post heads up....!! Go on...read it....I am excited to say the least :)

Tuesday, October 12, 2010

Grilled Chicken with Mustard Tarragon Sauce

Mustard and tarragon.  What a wonderful combination.  I know this sounds a lot like my Grilled Pork Chops with Mustard Tarragon Butter but it's still worth posting.  It's different enough, believe me!  I guess I have been in the mood for tarragon lately, what can I say?  The tang of the Dijon and the licorice-y taste of the tarragon blend together to make a delicious sauce.  This is a very simple dish.  And don't worry, you don't have to grill the chicken, you can pan sear it or bake it, or a mixture of both.  The seasoning you use on the chicken can actually be whatever you choose, because, honestly, the star of this show is the sauce!  But that doesn't surprise those of you that have been following my journey for a while now....you are very aware of my sauce addiction and also should be aware that there is no rehab for this addiction...I will continue to supply it....don't even try to stop me!! :)

By the way, the potatoes are actually sweet potatoes tossed with olive oil and salt and pepper, and then grilled just like my Grilled Potato Rounds.  They were fantastic!

Grilled Chicken with Mustard Tarragon Sauce
Adapted from Cooking Light
Printable Recipe 
Ingredients:
4 boneless, skinless chicken breasts
extra virgin olive oil
garlic salt and black pepper, to taste
3 Tablespoons Dijon mustard
2 Tablespoons red wine vinegar
1 Tablespoon water
1 Tablespoon olive oil
1/2 teaspoon dried tarragon
1/2 teaspoon sugar

Directions:
Preheat grill to medium.  Rinse chicken and pat dry.  Rub olive oil on both sides of the chicken.  Season both sides with salt and pepper.  Place on grill grates directly over the heat and grill for 5-8 minutes per side, or until chicken is cooked through.

Meanwhile, in a small bowl, mix together the Dijon, red wine vinegar, water, olive oil, tarragon, and sugar until well combined; set aside.

When chicken is cooked, remove from grill and allow to rest for 3 minutes.  Serve with sauce drizzled over top.  Enjoy!

Monday, October 11, 2010

Oven Baked Fish 'N Chips

I'm a big fan of fish and chips, I'm just not a big fan of all the fat and calories that go along with them.  But they do make a really good bar food, that is for sure.  I crave bar food every now and then, is that a bad thing?  Well, instead of actually going out and getting bar food, I thought I might sort of bring the bar food to my house, but leave most of the fat and calories at the bar!  I'll consume enough extra calories from drinking a beer with my meal!  Now I'll admit, oven baked just doesn't have the same yummy goodness as something that has been deep fried, but they still have their own level of yummy goodness.  The fish was nice and crispy on the outside and moist and flakey on the inside.  The chips...well, you've seen these before on my site, I didn't stick with the standard french fry type of chip, I went with homemade potato chips.  So, needless to say, this is not a traditional style fish and chips, but it is a healthier and yet still tasty version you can make at home, with much less guilt!

Oven Baked Fish 'N Chips
Ingredients:
1-2 russet potatoes
olive oil
pepper
garlic salt
2 catfish fillets
1 cup panko bread crumbs
1/4 teaspoon pepper
1/2 teaspoon garlic salt
1/2 teaspoon paprika
2 Tablespoons all-purpose flour
1 egg white
1 Tablespoon water

Directions:
For the Chips:  Preheat oven to 425 degrees.  Thinly slice the potatoes into rounds (I used the thinnest setting on my mandoline).  Place in pot and cover with cold water.  Let sit for 10 minutes.  Place the pot on the stove over high heat.  Just as it's starting to boil, set the time for 4 minutes.  Remove from heat and drain.  Toss with olive oil..enough to coat them...and then season with pepper and garlic salt.  Place the potatoes, in a layer, on a baking sheet.  Roast for 5 minutes, then rotate the baking sheet and roast another 5 minutes.  Remove from oven and flip the potatoes over.  Place back in the oven and roast another 5 minutes, rotate the sheet and then cook until chips are crispy and brown.  Remove from oven and let rest 5 minutes.

For the Fish:  (these will go in your already preheated oven at 425 degrees) Cut the catfish fillets into strips.  On a plate or shallow dish, add the flour and season with salt and pepper.  In another shallow dish mix together the panko, pepper, garlic salt, and paprika.  In yet another small bowl or shallow dish, whisk the egg white and water together.  Dredge the fish in the flour, then the egg wash, and then the panko; pressing down to make sure they are well covered with the panko mixture.  Place on a non-stick baking sheet.  Repeat with the rest of the fish.  Place in oven and bake for 5 minutes.  Remove and turn the fish over.  Place back in the oven and bake another 5 minutes.  Turn the broiler on (you don't have to move the rack up) and let broil for another 3-5 minutes or until the fish are golden brown.  

Serve with chips.  I also made a spicy tartar sauce to go with it.  I just made regular tartar sauce using mayo, sweet pickle relish, and lemon juice and then added some Sriracha hot sauce to it.  I even dipped my chips in it!!!  Enjoy!

Sunday, October 10, 2010

A cozy spot

 
"What?  With the weather becoming more fall like, I prefer the warmth of these denim shorts over the coolness of the bathroom tile.  Why does that silly human feel this is picture worthy??" 
- Bailey -

Saturday, October 9, 2010

Pink Ribbon Giveaway Winner.....

And the winner of the pink ribbon giveaway is:


Andrea of Andrea The Kitchen Witch!!  Yay!!  Congratulations to you, Andrea.  Please email me at jennsfoodjourney(at)gmail(dot)com with your address and I'll get your gift out to you right away! 

Thanks to everyone for entering!  Breast cancer awareness affects me deeply and it's good to see that so many others also support the fight for a cure!

I can't say it enough:  Early detection saves lives!!

(No food today...I've been a bit "off" in the kitchen lately.  My company is moving to a new office on the 16th and I've just been beat when I get home at night.  I have low to no motivation lately....But don't you worry, I'll be back on Monday with a new recipe just for you!!  Ciao!)

Friday, October 8, 2010

Penne with Ground Beef, Zucchini, and Goat Cheese

****Remember, you only have until 8pm Eastern Standard time tonight (Friday) to enter my Pink Ribbon Giveaway in support of National Breast Cancer Awareness month****
________________________________________________________
Rich, creamy, hearty, DE-LIC-IOUS....yes, those would be words that I would use to describe this meal.  I found this a while back on The Meat and Potatoes Foodie website.  I've been putting off trying it because I knew it would be a heartier meal and I should save it for more "fall like" weather.

When I first saw the ingredients of this recipe I noticed that all Alisa used was tomato paste.  No tomatoes, no crushed tomatoes, no diced tomatoes.....No Tomatoes!  This, of course, intrigued me.  When I'm intrigued by a recipe, I know it will go on the MUST try list!  I did change somethings from her original recipe.  I added a little red wine to the tomato paste and did not use as much as she did.  Alisa used feta cheese, but I used goat cheese.  They are definitely different cheeses, so it's up to you what you'd like to use.  Personally, I'm not a huge feta fan.  I like it, but for some reason I wasn't in the mood for it when I was grocery shopping...so I went for the goat cheese.  It is what gave the pasta that wonderful creamy part!

No matter how you choose to make it..with feta or with goat cheese, or with no cheese...just make it!  Oh, and have some yummy, warm, crispy bread with it....that just makes all pasta dishes better!!

Penne with Ground Beef, Zucchini, and Goat Cheese
Adapted from The Meat and Potatoes Foodie
Printable Recipe 
Ingredients:
1 Tablespoon olive oil
1 shallot, finely diced
2 garlic cloves, minced
salt and pepper
1 medium zucchini, diced
1 pound ground beef/sirloin (I used 93/7)
1/2 teaspoon red pepper flakes
1 teaspoon dried oregano
pinch of nutmeg
1/4 cup (4 Tbls) tomato paste
2 Tablespoons red wine
13 oz. whole grain penne pasta
4 oz. goat cheese, crumbled
2 Tablespoons fresh chopped parsley
shredded or grated parmesan cheese

Directions:
Cook pasta according to package directions.

While pasta is cooking, heat the olive oil over medium heat in a dutch oven or large, deep skillet.  Add the shallots.  Cook about 3 minutes (you may have to adjust heat, do not let them burn).  Add the garlic and let cook 1 minute.  Add the ground beef, red pepper flakes, oregano, and nutmeg.  Stir to combine.  Season with salt and pepper.  Cook until beef is just cooked through.  Add the zucchini about 5 minutes before the beef is cooked through - if you want your zucchini cooked through more, add it with the shallot or just after adding the ground beef.  Add the tomato paste and stir until well combined.  Add the wine and cook for about 2 minutes.  Turn the heat to low.

Drain the pasta, reserving about 2 ladles full of the pasta water.  Add the pasta to the sauce and then add the reserved pasta water a little at a time, until it is the consistency that you like.  Stir in the goat cheese and parsley.  Top with parmesan cheese.  Enjoy!

Thursday, October 7, 2010

Grilled Chicken Saté with Peanut Sauce

****October is Breast Cancer Awareness month.  Be sure to stop by and sign up for my Pink Ribbon (Bag) giveaway.  And remember - Early detection saves lives!****
_________________________________________________________
My apologies for not having a good picture of the peanut sauce.  It did not look as appetizing as it actually was.  I had a bit of a problem with the presentation and I didn't make it look all that appetizing....but it was...oh, yes, you better believe it was damn good!  But I like peanut sauces... oh, hell, fine, I like sauces of all kind, but still, I do like peanut sauces...so I might be a bit bias!

There is a Thai restaurant out here called the Pink Pepper.  They used to serve (I say used to because I haven't actually been there in years, they may not serve it anymore, or it might not be as good as I claim it to be) a Chicken Saté with Peanut Sauce that was out of this world good.  It also came with a side of a cucumber salad, which, one of these days, I will try to duplicate also.  It was cucumber in a sweet rice wine vinegar...or something along those lines.  Anyway, the chicken saté (or satay) was fantastic!  I have been wanting to make a version of it for a while now and finally stumbled across a recipe that was simple to recreate.  Not only was this simple, but it used things that I already had in pantry...no need to run out to the store to pick up something extra!

Traditionally, in this dish, the chicken is cut into strips, flattened a bit, and then threaded on to skewers.  I simplified the dish by just using two large chicken breasts and cutting them in half.  Believe me, it does nothing to alter the flavors...see, sometimes it's ok not to stick with traditions!

Grilled Chicken Saté with Peanut Sauce
Adapted from Cooking Light  - Serves 2 -
Printable Recipe 
Ingredients:
1 Tablespoon chili paste with garlic (Sambal Oelek)
2 teaspoons low sodium soy sauce
1 teaspoon fish sauce
1 Tablespoon creamy peanut butter
1 teaspoon lime juice
2 large boneless, skinless chicken breasts - cut in half
For the Peanut Sauce-
1/4 cup creamy peanut butter
3 Tablespoons water
1 1/2 Tablespoons lime juice
1 1/2 teaspoons low sodium soy sauce
1 teaspoons brown sugar
1/2 teaspoon paprika (I used Hungarian Sweet Paprika)
1 teaspoon (or more if you want it hotter) Sriracha

Directions:
In a bowl, combine the chili paste, soy, fish sauce, peanut butter, and lime juice.  Place the chicken in a Ziploc bag and pour the marinade over it.  Seal the bag and marinate in refrigerator for at least 30 minutes.  Remove chicken from bag and discard marinade.

Meanwhile, in a small bowl, combine all the ingredients for the peanut sauce until smooth. Set aside.

Preheat your grill to medium.  (if you are baking, preheat oven to 400 degrees, bake chicken for 12-18 minutes, or until chicken is no longer pink)  Coat the grill grates with oil.  Place the chicken directly over the fire and grill for 5-8 minutes per side or until chicken is cooked through and no longer pink.  Remove from grill and allow to sit for 3 minutes.  Serve with peanut sauce and enjoy!

Wednesday, October 6, 2010

Fish with Red Pepper, Macadamia, and Thyme Relish

 
****October is Breast Cancer Awareness month. Don't forget to stop by and check out my Pink Ribbon Giveaway.  And remember, early detection saves lives!****
_______________________________________________________
Remember how just the other day I was complaining about the heat?  Well, not only did it not even reach 90 degrees yesterday, but it rained...big time rain too!!! YAY!!  Finally, a little break from the heat!  Maybe we'll even stay under 100 from here on out???  Hey, a girl can dream, right???

My biggest complaint about this dish was that I could not find Hazelnuts...you see, the original recipe called for Hazelnuts, and wouldn't you know, my grocery store did not have any.  Ok, so I should have gone to a more specialty store, but I didn't want to run around to 10 different places just to make this dish.  I did want to use something outside of the same old almonds or walnuts, though.  My thought....macadamia nuts!  I do love them, but as you know they have a much different flavor then the hazelnut.  If you can find hazelnuts...use them, but if not...the macadamia nuts worked beautifully!  You could really use any nut that you think would work well with these flavor combinations.....canvas, remember!

Aside from not having hazelnuts, this dish was perfect!  The relish worked really well with the fish, though it would also lend itself very well to pork or chicken.  I mean what's not to love....roasted red peppers, toasted macadamia nuts, fresh thyme....YUM!

Fish with Red Pepper, Macadamia, and Thyme Relish
Adapted from Cook's Illustrated
Printable Recipe 
Ingredients:
4 Tilapia fillets (or any other white fish)
garlic salt and pepper
3 teaspoons olive oil
1/3 cup macadamia nuts
1/2 cup roasted red peppers, drained and coarsely chopped
1 garlic clove, cut into quarters
4 teaspoons lemon juice
1/4 cup extra virgin olive oil
1 teaspoon fresh thyme, chopped
2 Tablespoons fresh parsley, chopped
1/4 teaspoon smoked paprika
salt and pepper

Directions:
In a small, non-stick skillet, toast the macadamia nuts until just browning.  Let cool.

In a food processor, add the nuts and pulse a few seconds.  Add the peppers and garlic and process until finely chopped.  Transfer to a bowl and stir in the lemon juice, olive oil, thyme, parsley, and paprika.  Season to taste with salt and pepper; set aside.

In a skillet (I used non-stick) add the oil and heat over medium heat.  Season the fish with garlic salt and pepper on both sides.  Add to skillet and cook 3-4 minutes on each side or until the fish flakes easily with a fork.  Spoon relish over fish and enjoy!

Tuesday, October 5, 2010

Grilled Pork Chops with Tarragon Mustard Butter

****October is National Breast Cancer Awareness month, don't forget to stop by and check out my Pink Ribbon Giveaway.  And remember, early detection saves lives!****
_________________________________________________________
Once again I found myself not in the mood to make what I had planned to make.  Once again I ventured into the kitchen to see what kind of an idea I could come up with.  I had really thin, boneless pork loin chops just begging to be used, so I thought back to my Spicy Thai Pork Chops and the light bulb went off.  How about doing that same thing but with a different flavored butter.  BINGO!  So I mixed together a little mustard, a little tarragon...and this is what we had.  It was DEEEEEE-LICIOUS!!  I will admit I liked the spicy Thai ones better, but this was a very close second.  I guess the biggest point of posting this recipe is to show you all that you too can be creative in the kitchen... you CAN think passed a recipe and mix your own flavors together to create your own masterpiece!  Seriously, if I can, anyone can!

Grilled Pork Chops with Tarragon Mustard Butter
Recipe inspired by America's Test Kitchen 
Printable Recipe 
Ingredients:
4 boneless pork loin chops (mine were about a 1/2 inch thick)
salt and pepper
4 Tablespoons unsalted butter, divided
1 teaspoon brown sugar
1/2 teaspoon pepper
1 teaspoon Dijon mustard
1/4-1/2 teaspoon dried tarragon
1/4 teaspoon lemon juice

Directions:
Pat the chops dry with a paper towel and season with salt and pepper.  Arrange on a wire rack set inside rimmed baking sheet and freeze until chops are firm, at least 30 minutes but no longer then 1 hour.

Combine 2 tablespoons butter, brown sugar, and pepper in a small bowl; set aside.  Mix remaining butter, Dijon, tarragon, and the lemon juice in another small bowl and refrigerate until firm, about 15 minutes. (Tarragon butter can be made and refrigerated 1 day prior to use)

Preheat your grill to medium.  Remove chops from freezer and pat dry.  Spread softened butter-brown sugar mixture evenly over both sides of each chop.  Grill, covered, over hot fire until well browned and the meat registers 145 degrees, 3 to 4 minutes per side.  Transfer chops to platter and top with chilled butter-cilantro mixture.  Tent with foil and let rest 5 minutes.  Enjoy!

Monday, October 4, 2010

Lemon and Oregano Rubbed Grilled Chicken

****October is National Breast Cancer Awareness month.  Don't forget to stop by and check out my Pink Ribbon Giveaway.  And remember, early detection saves lives!****
_________________________________________________________
When I put this idea on my menu plan, I accidentally typed out orange instead of oregano.  Boy, was I in a fit when I read what the nights plan was and realized I had not picked up an orange at the grocery store. lol  Normally this wouldn't have bothered me much, but I have been really bad at making my grocery lists lately.  I don't know what it is really, but it never fails, in the last month I have forgotten at least 2 important ingredients when we did our shopping.  Talk about frustrating!  So, after bitching and getting all red in the face, I slowed down a bit, took another look at the recipe and realized...that's not ORANGE...it's OREGANO!!!  WHEW... Angry Jenn ran away with her tail between her legs and I FINALLY got on my way with preparing dinner! lol

I loved this recipe.  It was like a lot of chicken recipe I have tried recently.  It was tart from the lemon and mixed with the oregano, it had a wonderful fresh flavor to it.  It was simple to throw together too, always good for a week night! And let's not forget healthy...I mean what else could you want from your meal?  You could also start this in a oven proof skillet, quickly sear both sides of the chicken and then finish off in a 375-400 degree oven.  Believe it or not, I'm still grilling away :)  It's still in the low 100's here....it might be fall, but someone forgot to tell Arizona!!!

Lemon and Oregano Rubbed Grilled Chicken
Adapted from Cooking Light
Printable Recipe 
Ingredients:
4 boneless, skinless chicken breasts
1 lemon cut into 4 wedges
1 teaspoon lemon zest
2 teaspoons dried oregano
1/2 teaspoon salt
1/4 teaspoon pepper
2 garlic cloves, finely minced
1/4 teaspoon water

Directions:
Squeeze one wedge of lemon over each piece of chicken.  Mix together the zest, oregano, salt, pepper, garlic and water.  Rub all over both sides of each piece of chicken.  Let sit in the refrigerator for 15 minutes.

Preheat your grill to medium.  Rub the grates with oil.  Place the chicken directly over the fire and cook 5-8 minutes per side or until the internal temperature reaches 165 degrees and juices run clear.  Enjoy!

Saturday, October 2, 2010

Awareness....

Most of you may already know that October is National Breast Cancer Awareness month.  I am a supporter of the cure.  Though, I do not believe that I do enough for the cure, I know that I can change that if I really want to.  Two years ago, my aunt was diagnosed with breast cancer.  I can remember the phone conversation my other aunt and I had regarding this life threatening news.  My heart sank.  It had finally touched my family...breast cancer.  How frightened and shocked and devastated my aunt must feel.  How utterly scared she must be.  It was hard to take in.  Not that I hadn't been affected by breast cancer before this.  I watched the wife of a co-worker go through the same diagnosis the year before.  It's just that it had never been MY family before...it was always something I could walk away from and not really have to face...until now.  I knew my aunt had a long road a head of her...she still does...but I also knew, since she was family, that she'd be strong and face what she needed to face.

Today my aunt is doing fine...I'm excited that I get to see her at Christmas this year!  Though I don't call her or email her as much as I should, I am always thinking of her.  I wear a small pink band on my finger each and every day as a reminder of her strength and her courage.

Did you know that 1 out of every 7 women will be diagnosed with breast cancer in their lifetime?  Despite that number this is a disease that CAN be beat, but it must be detected early.  Let's also not forget, this disease affects men too.  No one is immune.  Self breast examinations (and I'm mainly talking to all the ladies out there) are a very important step in early detection.  Be aware of your body and notice changes.  This is a huge must ladies.  A doctor who examines you once a year is not going to be a good judge of change.  Monthly self breast exams are recommended, I mean how hard is that???  Isn't your life and not to mention those great tatas worth it? :) 

So, in honor of my aunt and of breast cancer awareness month, I am hosting another giveaway!!!  One lucky reader will receive this 100% polyester microfiber bag:

All you have to do is 1.) be a follower of this blog through Google friend connect (no anonymous comments please) and 2.) leave a comment here telling me you are a follower and which bag you'd rather have, the one ribbon version or the all over ribbon version.  Unfortunately, this is limited to my friends in the United States and Canada only.  You have until 8:00pm Eastern Standard Time on Friday, October 8th to enter to win.  The winner will be announced on the morning of Saturday, October 9th.

So Spread the word....be aware.... and let's do what we can to help find a cure!!

Friday, October 1, 2010

Catfish with Curry Crumb Topping

Curry...I believe it's something either people like, or they do not like, there really aren't too many people in between.  Personally, I love it, but I do have to be in the mood for it.  Lucky for me, the night I made this, I was in the mood :)  Seriously though, this curry topping was wonderful.  You could use this to top any type of fish...or even chicken...it would even be great on chicken...a little curry breaded oven baked (or even fried..yum!) chicken... mmmmmmmmmm!!

Catfish with Curry Crumb Topping
Printable Recipe 
Ingredients:
4 catfish fillets
garlic salt and pepper
1/2 cup panko bread crumbs
2 Tablespoons shredded parmesan cheese
1 teaspoon curry powder
1/4 teaspoon dried parsley
1 Tablespoon olive oil

Directions:
Preheat oven to 425 degrees.  Rinse catfish fillets and pat dry with a paper towel.  Sprinkle both sides with salt and pepper.  Place fillets in a baking dish sprayed with non-stick cooking spray.

In a small bowl, add the panko, parmesan, curry, and parsley.  Lightly mix.  Drizzle in the olive oil end stir to combine.  Top fish with the crumb topping.  Bake for 14-18 minutes or until the fish flakes easily with a fork.  Enjoy!


Drumroll Please...........

And the winner of the $55 CSN gift certificate is (sorry, the video isn't the greatest):


Congratulations to Jennifurla of Indigo's Sugar Spectrum!  To receive your gift certificate, please email me at jennsfoodjourney(at)gmail(dot)com.

Another big thanks goes out to the people at CSN Stores, with out them, this giveaway would not have been possible :)  Seriously, though, I really appreciate the opportunity to endorse their site!

And, of course, thanks to all of you who participated!  I loved to see what was on everyone's wish list!

Now wait a minute...did you really think that I was going to walk away without giving out a second gift?  I mean it's the least I could do for all of those that participated in this contest!  I did not get this on video, this was sort of a last minute idea, so you are just going to have to trust me here :)  This is for a $25.00 Amex gift card.  You can use this card anywhere, anytime, for whatever you want.  There are no fees, service charges, etc.  It's just free money...and all because you visited my site!

The winner of the $25 Amex gift card is:

And the 34th comment on the giveaway post was Annie Miller!!  Annie, please email me at jennsfoodjourney@gmail.com so you can claim your prize!

Again, thank you to everyone...I'm grateful to have been able to give such great giveaway gifts for you all!

Thursday, September 30, 2010

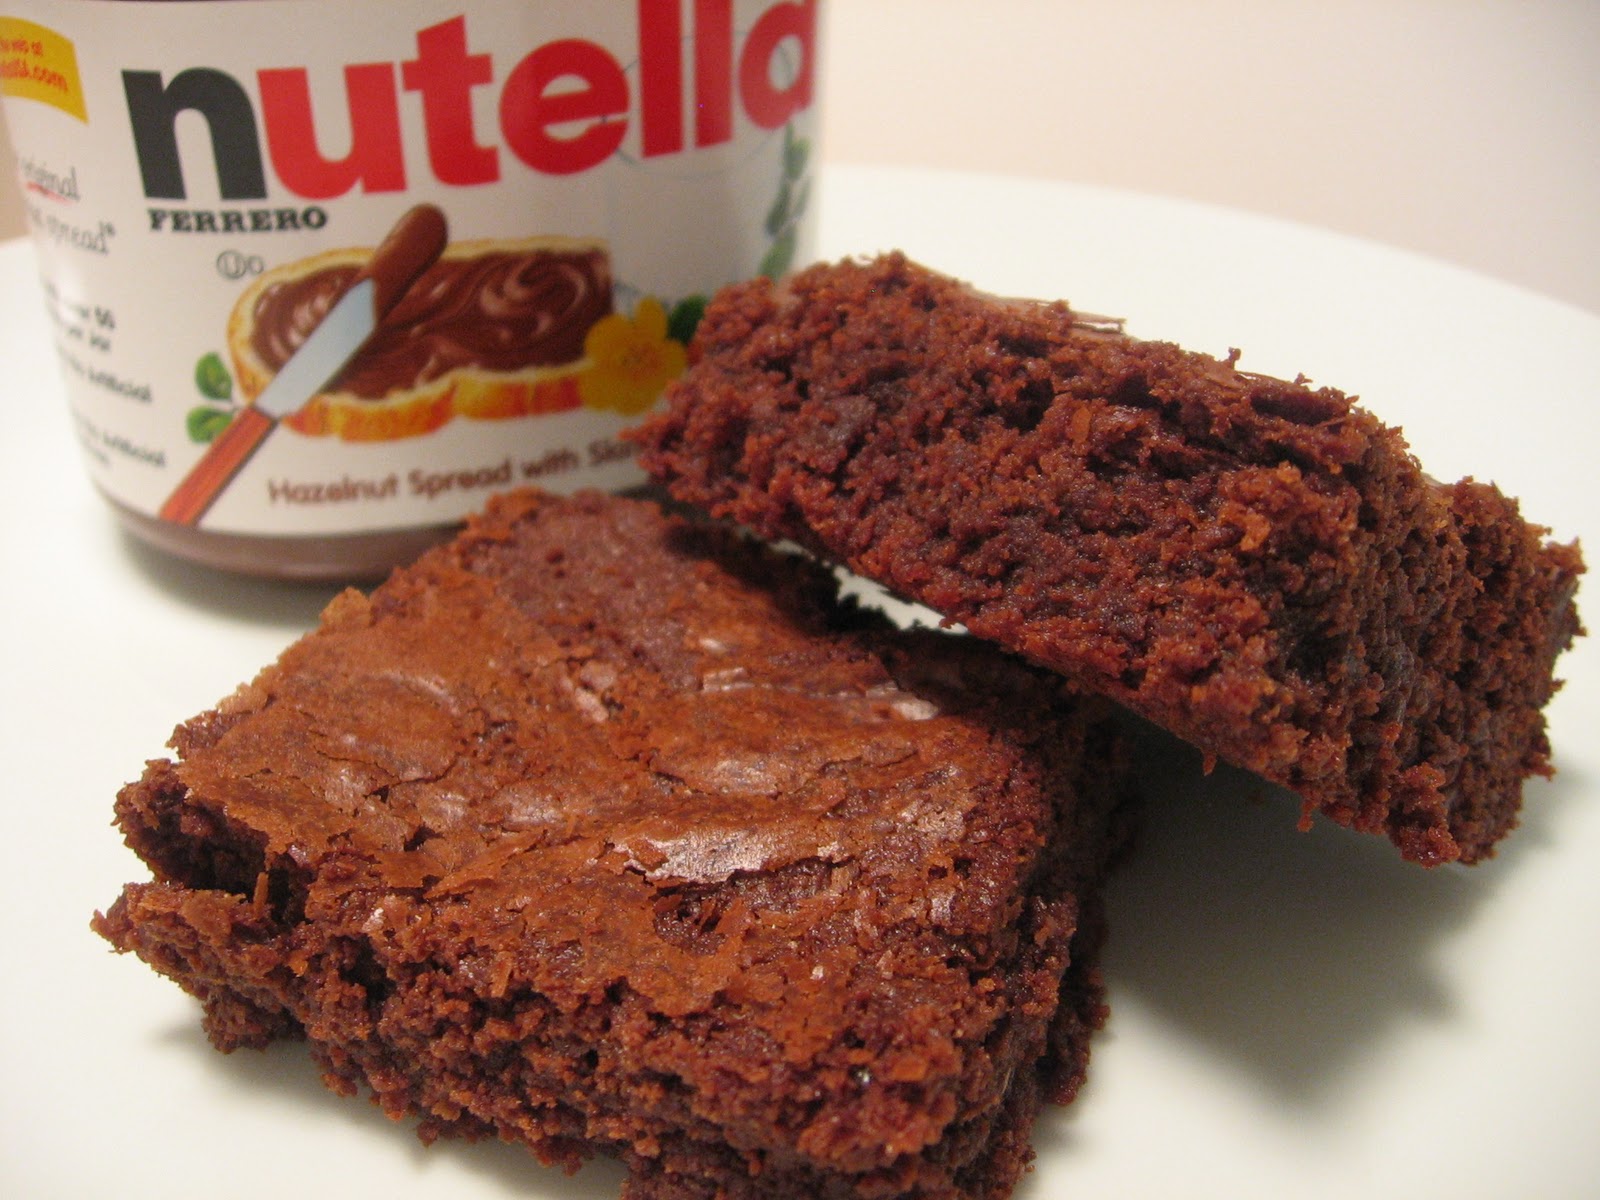
Nutella and Peanut Butter Brownies

Two Sunday's ago, I had this strange feeling come over me.  I hadn't had a feeling like this in a while...at least not since the summer started.  I had that feeling that I just needed to bake something.  Yes, bake....even though it's still in the 100's here, I actually wanted to bake.  I think I'm jealous of all the other blogs I read that talk about all the fall like weather they are having!!  The downside of this need/want was that I didn't want to go to the store, that could be a a problem. I looked in my pantry to see what I had...flour, yes, baking powder and/or soda, yes, vanilla, yes, and so on and so on.  But then I saw the Nutella gazing at me from beside the peanut butter.  I wonder......................  I went to my computer and typed in Nutella, peanut butter, recipe... and behold the creation of Nutella and Peanut Butter Brownies!!!  YES!!! Not only were these absolutely delicious, they were WAY simple to make.  Though I do seem to be having a problem with timing lately and this was no exception.  The recipe called for 20-25 minutes at 350 degrees.  Mine took about 40 minutes at that temp.  Had I thought about it a bit more, I would have increased the heat to 375 and just watched them closely.  But no matter, these little gems were wonderful.  Nice and chocolatey with a tad bit of peanut butter, but I didn't get a lot of the hazelnut flavor from the Nutella.  Next time I might cut the cocoa powder down and add a bit more Nutella...I don't know.  If you could find actual hazelnuts, you could chop them up and add them to the mix....These are actually so incredibly easy, that experimenting with the recipe would be extremely fun!

Nutella and Peanut Butter Brownies
Adapted from The Craving Chronicles 
Printable Recipe 
Ingredients:
1/2 cup of butter, melted and cooled
1 cup of sugar (granulated)
1 teaspoon vanilla extract
2 eggs
1/2 cup of flour
1/2 cup of cocoa powder
1/4 teaspoon baking powder
pinch of salt
1/4 cup creamy peanut butter
1/4 cup Nutella chocolate hazelnut spread

Directions:
Preheat oven to 350 degrees.  Line an 8x8-inch baking dish with parchment paper (or spray with non-stick spray and coat with a little cocoa powder).

Sift together the flour, cocoa powder, baking powder, and salt in a bowl.

In a bowl of a standing mixer, cream together the butter and the sugar.  Beat in the eggs one at a time and then stir in the vanilla.  Add the dry ingredients a little at a time, mix until combined.

In a small bowl, add the peanut butter and Nutella.  Microwave about 10-15 seconds, just enough to get them to combine smoothly.  Fold into the brownie mix.  Pour mixture into prepared pan and bake for 30-40 minutes, rotating the pan every 10 minutes, or when a toothpick poked into the center comes out mostly clean; start checking doneness after 25 minutes.  Remove from oven and allow to cool before cutting into squares.  Enjoy!

****Today is the last day to enter to win a $55 CSN gift certificate.  You have until 8:00pm Eastern Standard time tonight.  Click HERE for all the details!****

You might also want to swing by Bo's Bowl and enter his cookbook giveaway!!  Oh, go on, you know you want it... go check it out, I'm done here :)

Wednesday, September 29, 2010

Smokey Grilled Pork Chops

****Before I get started on today's delicious post, I just want to say HAPPY BIRTHDAY to my Mom!!  Wish I could be there with you, Mom, but you'll be here soon enough and we can celebrate then!  Hope you have a fantastic day...Love you!!****

Ok, so what did I learn this time when I used my smoker?
1.  I learned that I needed bigger, thicker pork chops then what I had purchased...but unfortunately, they were the thickest ones I could find (grrrrr).
2.  I learned that mopping or brining would have helped to ensure these pork chops stayed nice and moist.
3.  I learned that from here on out, any time I use my smoker, I am going with my gut feeling!

Although these chops did not turn out exactly as I had intended them too, they were still very good.  The flavor was amazing!  The smokey sweet flavor of the apple wood chips blended well with the spicy rub and sauce.  I have changed a few things...things that I did wrong..things that I believe would work better.  I did over cook these just a tiny tiny bit, they were still wonderful, but they were a bit on the dry side.  I think if I had not thrown them on the grill in the end, they would have stayed moist, but I wanted them to have a darker exterior.  I think thicker chops would have made a difference too.  I also believe that if I had brined these (or even marinated them actually), they would not have been dry.  I guess my pal Stephen is right, sometimes meat just really needs to be brined!

So even though I have not had the best luck with timing when it comes to my smoker, I still LOVE IT!!  I can't thank Chris at Nibble Me This for the AWESOME giveaway gift!  And, I MUST keep working at getting the timing right because my mom and dad are coming for Thanksgiving and I want to smoke the turkey!!  I can't wait!


Now, I know most of you do not have smokers yourself, so you can easily do these on the grill.  You can still cover it with the spice rub and then mop the sauce on as it grills.  Ok, you won't get the smokey flavor like we had, but you will still get a good pork chop when it's all said and done!  Oh, and one more thing....I changed this recipe from how I did it, it should make everything much better!!

Smokey Grilled Pork Chops
Printable Recipe 
Ingredients:
1 Tablespoon paprika
1 teaspoon cayenne pepper
1 teaspoon brown sugar
1/2 teaspoon garlic powder
1/2 teaspoon kosher salt
1/4 teaspoon pepper
4 bone-in pork loin chops 1-inch thick
1 cup buttermilk
1/4 cup honey
2 Tablespoons beer
1 Tablespoon Sriracha
1 teaspoon lime juice
1 teaspoon Hoisin

Additional Items for smoking:
Apple wood chips (about a cup), soaked in water for 30 minutes
Apple juice or beer 2 cups

Directions:
In a small bowl, mix the paprika, cayenne, brown sugar, garlic powder, salt, and pepper together until well combined.  Rub over both sides of each pork chop.  Allow to rest in the refrigerator for 1 hour.  Pour buttermilk over the chops and continue marinating for 2-4 more hours.

In another bowl, mix together the honey, beer, Sriracha, lime juice, and Hoisin.  Set aside.

Heat smoker to 220 degrees.  Remove pork from marinade; discard marinade.  Place the pork on the top rack of the smoker.  Smoke for 30 minutes.  Mop both sides of the pork with the Sriracha sauce.  Continue smoking another 30 minutes, mopping with sauce every 10 minutes.

Preheat grill to medium high.  Remove pork from smoker and place directly on the grates (rub oil on the grates first) and cook directly over the fire for 2-3 minutes on each side, or until the pork is cooked through, 160 degrees.  Enjoy!

****Don't forget to enter for your chance to win a $55 CSN gift certificate.  Check out the giveaway post here for all the details****