Search This Blog

Sunday, October 31, 2010

Halloween: Our Tradition

Chris and I have been together for 3 years now.  I know this for certain because this is the third year that we have....well, actually, he has...carved pumpkins (hey, I help clean them out!!).  I just couldn't let the day go by without showcasing the past three years awesome pumpkins:

First up...Year One:

The Headless Horseman

Go Big Red!! Our first OU vs. NU rivalry game together!!

Next up...Year Two:

The cat (Really love this one!!!)

The spooky haunted house...oooohhhhhh!!!

And finally...Year Three:

And the master begins....

Almost there....

Finishing touches.....

And the witch is born....!!!

And of course, we need a traditional looking pumpkin too!
 
Have a fun and safe Halloween!!

Saturday, October 30, 2010

Potato Leek Soup with Poblano and Bacon

Believe it or not, this is a redux recipe.  I made a Leek Potato Soup way back in February.  I didn't have many followers back then, so I thought I would do a redux.  This soup is slightly different then the one I originally posted...it's definitely worth sharing....I mean it's got bacon and poblano peppers in it...how can that be a bad thing???

We haven't had what most people would consider fall weather, but it is definitely as fall as we really get here in the desert.  The days have been in the 80's and then nights have fallen into the high 50's and low 60's.  With the cool down we are having, I have been craving soups....rich, creamy, comforting soups!  I made this over the weekend that I participated in our office move.  My body ached and it just sounded like the best thing.  This soup was perfect for that.  Not only was it comforting and warming, but it was incredibly easy and you can never go wrong with easy!

Potato Leek Soup with Poblano and Bacon
Adapted from Rick Bayless
Printable Recipe 
Ingredients:
1 large poblano chili
8 slices thick-sliced bacon, diced
2-3 large leeks, thinly sliced (white and pale green part only)
3 large Yukon potatoes, peeled and diced
2 garlic cloves, minced
4 cups chicken broth
1/2 teaspoon dried thyme
1/4-1/2 milk or cream

Directions:
Roast the poblano over an open flame or 4-inches below a broiler, turning regularly until blistered and blackened all over, about 5 minutes for open flame and 10 minutes for broiler.  Place in bowl and cover with plastic wrap.  Let cool until you are able to handle them.  Rub/pull the blackened skin off, pull out the stem and seed pod.  Cut into small dice and set aside.

Place the diced bacon in a large stockpot or dutch oven over medium high heat and cook until the bacon is crispy.  Remove from the pot and place on a paper towel lined plate to cool.  Leave 2 tablespoons of bacon grease in the pot.  Add the leeks and cook until softened, about 5-10 minutes.  Add the potatoes, garlic, stock and thyme, bring it back to a boil, then lower the heat to medium low and cook for about 20 minutes or until the potatoes are completely soft.

Using an immersion blender or countertop blender (you'll have to do it in batches if you use the countertop blender), puree the soup until smooth.  Slowly stir in the cream and then the diced poblano.  Bring the soup back to a simmer and cook for 5 more minutes so that all the flavors meld together.  Taste and season with salt and pepper.  Spoon into bowls and top with crispy bacon pieces.  Enjoy!!

***Today is Andrea the Kitchen Witch's birthday...stop on by her site and wish her happy birthday!!***

***Also, don't forget to check out The Great Cover Song Challenge over on Chris's site.  Vote for your favorite song, your favorite vocal, and the best interpretation!  There is some true talent in this contest, it might be hard to choose!!***

Friday, October 29, 2010

Chocolate Chocolate Chip Muffins

Before I get to the food I have two things I want to talk to you about:
First...tomorrow is Andrea the Kitchen Witch's birthday!!  WOO HOO!  I would like you all to make sure that you swing by Andrea's site and wish her a happy birthday!  You can even tell her that Jenn sent you :) 

Happy Birthday, Andrea!!! Hope you have a fantastic day!!

Second...It's time to finally brag about Chris!!  Most of you probably do not know that Chris is a musician.  And a damn good one too!  The man is amazingly talented.  He can play numerous instruments AND he sings!  But I could go on and on about him....what I really wanted to tell you about is a little cover song challenge that he has going on over on his website.  He knows a ton of other extremely talented musicians and put the word out to them that he was going to host The Great Cover Song Challenge (Second annual by the way). So head on over to his site (which he built himself...see, talented!!) when you have some time and vote for your favorite song...the winner gets to boast for a year that they are the CCRecords champion of the world....or something like that!
Now the muffins....
Most of you know that my company moved to a different office on the 16th of this month.  I wanted to do something nice for the people that actually had to get up early on a Saturday morning (a Nebraska football Saturday by the way), so I thought I'd make muffins.  I threw a few ideas I had on which muffins I wanted to make at my boss and the one that got the biggest and best reaction was Chocolate Chocolate Chip Muffins.  Well, by the time I got home from work on Friday night, I was really not in the mood to spend more then 15 minutes in the kitchen.  So I did a quick search for CCC muffins and this was the first recipe that popped up.

What you should all be aware of, is that this recipe is by my arch nemesis....Nigella Lawson.  That's right... Chris has a HUGE crush on Nigella..and well, no other woman should entice my man with her food the way she does (LOL...for those who don't know me we, I'm being silly here, I am not that jealous of person, believe me)!!! Seriously...she is trying to lure him away with making anything from her kitchen sound erotically fascinating...  Her and her round curves and her insatiable love for food!!!  Grrrrr.......But I digress... :)  These muffins were extremely easy to make...that was why I picked this recipe.  Nigella prides herself in creating simple yet delicious recipes.  The less work in the kitchen, the better.  I was not disappointed in the ease of this recipe....what I was disappointed in was the flavor.  I wanted them to be more chocolately then they were.  Don't get me wrong, they were really good, but I guess I just expected...or wanted... more!  I figure, if I make these again, of if you want to try it yourself, I would add a bit more cocoa to the mix....that should help with the more that I was looking for!


Chocolate Chocolate Chip Muffins 
Ingredients: 
1 3/4 cups all-purpose flour
2 teaspoons baking powder
1/2 teaspoon baking soda
2 Tablespoons good quality cocoa powder
3/4 cup granulated sugar
3/4 cup semisweet chocolate chips, plus 1/4 cup for sprinkling
1 cup milk
1/2 cup plus 2 teaspoons vegetable oil
1 egg
1 teaspoon pure vanilla extract

Directions: 
Preheat oven to 400 degrees F.  Line a muffin tun with muffin cups or spray with non-stick cooking spray.

Put the flour, baking powder, baking soda, cocoa, sugar, and 3/4 cup of the chocolate chips into a large bowl.  Pour all the liquid ingredients into a measuring cup.  Mix the dry and wet ingredients together, remember that a lumpy batter makes the best muffins.  Spoon into the prepared muffin tins.  Sprinkle the remaining 1/4 cup chocolate chips on top and bake for 15-20 minutes or until the muffins are dark, risen and springy.  Enjoy!


Thursday, October 28, 2010

Creamy Chipotle Cheddar Chicken

First off, I have to say that I'm sorry that I have not posted any Halloween recipes.  I have been so busy with work and other things at home that I just never got into the "mood" to make Halloween goodies.  So, if you are looking for some fun Halloween ideas, you will not find them here, I'm sorry, but please, don't go away, I still have wonderful, yummy recipes to share with you!

I think I have found some of the yummiest recipes on some of my all time favorite blogs.  What's really nice about that, I have become friends with a lot of those who host those all time favorite blogs.  It's been so fun trading ideas and nabbing recipes from them.  I believe that Alisa aka The Meat and Potatoes Foodie and I are kindred spicy blogging spirits.  That's right, I said it, and I hope it doesn't offend anyone...but I think it's true.  She and I have a love for Chipotle and Sriracha that I have seen in no other blog.  When I saw her Enter The Ring of Fire post, I KNEW it was another one I was going to have to try.  I mean, come one people... chipotle...cheddar.... you know I'm ALL OVER THAT.  Really the only thing missing for a true heaven would be the chocolate, but I really don't think it would even go with this.......then again, mmmmmaybe it would??  Anyway....this is a nice spicy, creamy, delicious dish.  If you can stand the heat, I highly recommend this one!!!  It's perfect for a cool fall/winter evening meal...and simple enough to make it into the week night rotation!


Creamy Chipotle Cheddar Chicken
Adapted from The Meat and Potatoes Foodie
Printable Recipe 
Ingredients:
4 boneless, skinless chicken breasts
1/2 cup milk
3 canned chipotle chili peppers in adobo sauce, finely chopped
1 Tablespoon adobo sauce
3/4 cup sour cream
2 large garlic cloves, minced
1/4 teaspoon onion powder
1/4 teaspoon cumin
1/4 teaspoon kosher salt
2 Tablespoons milk or half and half
2 Tablespoons cornstarch
3/4 cup shredded cheddar cheese (I used sharp)

Directions:
Preheat oven to 375 degrees.  Spray a glass or ceramic baking dish with non stick cooking spray.  Sprinkle both sides of the chicken with salt and pepper and place in baking dish.  Bake the chicken for 6 minutes.

While the chicken is baking, in a saucepan over medium-high heat, add the 1/2 cup of milk, chipotles, adobo sauce, sour cream, garlic, onion powder, cumin and salt; stirring every so often so sauce does not burn at the bottom.

In a small bowl or measuring cup, mix together the 2 Tbls of milk and the cornstarch.  Once the milk mixture is boiling, add the cornstarch slurry; continue to stir.  Let simmer for 2 minutes or until the mixture has thickened.

Remove the baking dish from the oven, pour the sauce over the chicken, and cover with the cheese.  Return dish to oven and continue to bake another 10-12 minutes or until the chicken is cooked through and the cheese is golden and bubbly.  If you want a nice brown cheesy top, turn broiler on for 2-3 minutes.  Enjoy!  (and believe me, you will!!)

Wednesday, October 27, 2010

There was a man...

Today is not about food.  Today I'm stepping away from my normal routine to tell you a story about a man.  A man who impacted my life even though I never had the privilege of meeting him.  This is his story:

In Newark, New Jersey, on May 25th, 1922 a baby boy was born.  That baby boy was given the name Robert Michael LaMotta... he would one day become my grandfather.

 (That's my grandfather on the left in front...check out Eisenhower in the car behind him!)

My grandfather, Bobby LaMotta, was a police officer.  He served with the Newark Police Department for 16 years and was assigned to the Traffic Division.  He was a motorcycle cop.  On October 26, 1967, a motorist pulled out in front of my grandfather as he was following two police cars on a call to assist another officer.  He was thrown from his motorcycle and over the car with such force that his helmet flew off, giving him no protection when his head hit the pavement.  He was rushed to Presbyterian Hospital with massive head injuries where he would succumb to those injuries the following day. He was 45 years old.  He died less then a month after my mom turned 21...just 6 years before I was born.  (I unfortunately, never got to meet either one of my grandfathers, both dying far too young.)  My grandmother was left a widow and a single parent in an instant.  Although my mom had just turned 21, her sisters (my aunts) were only 13 and 7.

 (That's my grandfather on the right)

Bobby LaMotta served in the army during WWII.  He was an MP serving in both Alaska and Scottsbluff, Nebraska (talk about two extremes!).  He actually worked in POW camps located there.  That is where he met my grandmother, Phyllis Welch.  She worked as a telephone operator at the POW camp in Scottsbluff, NE.  They married in Scottsbluff on January 6, 1946.  After my grandfather left the army, they moved back to New Jersey, where my grandfather was originally from.  There, they lived a wonderful life together with their three daughters, Sharon, Debbie, and Pam, until his death in 1967.

 (My grandma Phyllis and grandpa Bob on their wedding day) 
(My mom and her father) 
Today, on the anniversary of my grandfather's death, I wanted to write this post to honor him and all of the officers that have fallen in the line of duty.  They do what most will not.  They face perils every day they go to work, never knowing if they will return home.  They keep us safe, while they put their own lives at risk.  I am truly honored to come from a family of police officers.  Not only was my grandfather on the force, but I have an uncle and cousins that are serving even now. I am proud of all of them.  I am honored to know them.

My grandfathers' information is on a site dedicated to fallen officer.  The Officer Down Memorial Page, is an amazing site where you can find information on fallen officers, leave comments and thank yous, donate, and you can even purchase personal keepsakes.  It's a fantastic website that, even just this week, got my mom in touch with a gentleman from the Fraternal Order of Police in New Jersey.


Jenn's Food Journey proudly salutes all officers, fallen and serving - Thank you for all you do!

Tuesday, October 26, 2010

Sour Cream Corn Muffins

I love corn muffins.  I honestly could eat my weight in them.  Seriously, I love them that much!  But I am picky about my corn muffins... I do not like them to have actual corn kernels in them.  I know, I know, that may sound silly and even sacrilegious to some, but it's the truth....and I'm all about baring my soul here!!  The only corn I want in my muffins is in the corn meal!  lol  If you must have kernels in your corn muffins, go ahead and add them, it's not going to hurt these at all.  These muffins were extremely easy to make.  They were good, but lacked a bit of "something".  I can't pinpoint the exact thing...maybe a little bit more sugar to help sweeten them up a bit?  I'm not sure...But what I am sure of is this:  Slap a little butter them and drizzle them with some honey....and they are HEAVEN!

Sour Cream Corn Muffins
Recipe Courtesy of Land O Lakes
Printable Recipe 
Ingredients:
1/4 cup butter, softened
3 Tablespoons sugar (I would use 4 if I made these again)
2 eggs
1/2 cup sour cream
1/2 cup milk
2/3 cup yellow cornmeal
1 cup all purpose flour
1 1/2 teaspoon baking powder
1/2 teaspoon salt

Directions:
Preheat oven to 425 degrees.

Combine butter and sugar in a bowl of a standing mixer.  Beat at medium speed, scraping down side of bowl often, until creamy.  Add 1 egg at a time, beating well after each addition.  Stir in sour cream and milk.  Slowly add all remaining ingredients.  Reduce speed to low; beat just until mixed.

Spoon batter into 12 greased or paper-lined muffin cups.  Bake for 15-18 minutes or until golden brown.  Enjoy!

Monday, October 25, 2010

Goat Herder's Mac and Cheese

WARNING:  If you are worried at all about your weight or your intake of fat and calories per day, do not continue reading this post.  I say do not continue because once you start, you are going to find yourself thinking about this recipe and sooner or later you WILL make it!!  And once you make it, you'll want to make it nightly!

You have been warned.

I found this little gem of a recipe on One Perfect Bite.  I have raved about Mary's site before and this time is no exception.  Mary can take something that I don't even like (like her blue cheese dip) and make it into something that makes my mouth water!  I love the excitement of clicking on her site and seeing what she has in store for us next!  When I saw her post for this Goat Herder's Mac 'N' Cheese, I knew it was yet another mac & cheese recipe I was going to have to try.  I mean goat cheese....mmmmmmm...you know it's just going to be decadent and amazingly good!  Now Mary uses 3 cups goat's milk in her recipe and I used about 2 cups of evaporated goats milk...I don't know how much of a difference that makes, but the evaporated kind was all I could find....either way, this turned out amazingly well and I will be making it again......SOON!!!


Goat Herder's Mac and Cheese
Slightly adapted from One Perfect Bite
Printable Recipe 
Ingredients:
2 cups evaporated goats milk
1/2 teaspoon salt
1/4 teaspoon pepper
2 Tablespoons butter
2 Tablespoons flour (all purpose)
1 Tablespoon lemon juice
1 jalapeno pepper, seeded and finely diced
1 Roma tomato, seeded and finely diced
4 oz crumbled goat cheese
8 oz elbow macaroni

Directions:
Cook pasta according to package directions.  Drain.

In a saucepan, combine the butter and flour.  Whisk until a roux forms.  Slowly whisk in the goats milk and bring to a simmer.  Let simmer until sauce thickens.  Add the lemon juice, jalapeno, tomato, and goat cheese and stir until cheese melts and sauce becomes smooth.  Add the pasta and cook until warmed through.  Check for seasoning....and enjoy!!

Friday, October 22, 2010

Guest Post: Calzones

****I am extremely excited about today's post.  Today you are all in for a real treat!  Long time follower Wayne Hoxie has agreed to share his amazingly delicious Calzone recipe with us.  I love calzones, but rarely find the time to actually make them.  With only two of us in the house, I always convince myself that it's just too much work....but no longer.  Wayne makes it sound incredibly easy...and the pictures make them look too delectable to not try!!  A big thanks to Wayne for taking the time to not only write out the recipe AND take pictures, but to also give us a nice little story that goes along with it!  I hope you all enjoy this as much as I did!  Take it away Wayne....****

I am not eloquent enough to be a blogger, but I will try and tell the story of how these delicious little beauties came into being, and ultimately, how a hungry mob of family members devoured them. (Sorry, I just read a comic called "The Walking Dead", and it has colored the way I look at things all day.)

I woke up this morning craving cheese. Weird, and kind of gross, I know, but true nonetheless. Then I started thinking about a golden, slightly crunchy, light buttery bread and I thought, "A-ha! I must want grilled cheese!"  No sooner had I thought that than I realized I wanted something with meat and some kind of sauce, as well. Confused, I sat down to my breakfast of oatmeal and scrambled egg whites. (Okay, that's what I should have had, instead of the bowl of lucky charms that I actually ate.)  Then it hit me - "Calzones!"  They have homemade bread, a simple tomato sauce, as much cheese as I want to put in them, and any meat that I feel like eating. As a kid growing up in Tahlequah, Oklahoma, I fell in love with calzones after sampling them at a local restaurant called Roni's pizza. Excited, I started rummaging through my pantry for ingredients. As this recipe is pretty simple, I had everything I needed. (Which never happens)

I quickly ran into a snag. My yeast was no good. I had three packages, and all three wouldn't foam for me when I tested them.  After a quick grocery run (I knew it was too good to be true),  I was back in business. I like to make my calzones with pepperoni and sausage. Sometimes I mix hamburger meat with sausage, which is what I did today. I usually chop up some green peppers and add them to the mix, but our 6 week old, breast -fed son would have objected, so they were left out. I likewise didn't add mushrooms, because mushrooms are disgusting. Okay, everyone but me LOVES mushrooms, but I am cooking and I don't even like the way mushrooms look, much less taste, so -no mushrooms. I use lots of mozzarella and just a pinch of cheddar in my calzones. The sauce is easy - just a can of tomato sauce, some minced garlic, oregano, and basil. I have an herb garden running along the side of the house, but have found that the sauce is still delicious if you use dried herbs.

The hardest part about making these is folding them over and pinching them shut once you have added all the goodies. I usually end up folding and pinching the edges 2 - 3 times to ensure the filling won't seek freedom. I also sprinkle a little of the grated parmesan cheese that comes in the green plastic cans on the top of these just before baking. I have yet to meet anyone who does not like these. I have made them with a green pesto sauce, with pineapple and Canadian bacon (an abomination in my wife's opinion), and countless other variations. They are so versatile, you should be able to please anybody. If your child or loved one likes pizza, they will love these. I have a 3 yr old picky eater in the house. I was going to lie and say that he ate and loved these, but he wouldn't even touch them. "Those are yucky" he said, "They have red on the inside and blue is my favorite color." Of course,  he flushed a handful of hot wheels down the toilet the other day, so his opinion on what is or isn't good doesn't carry a lot of weight right now.

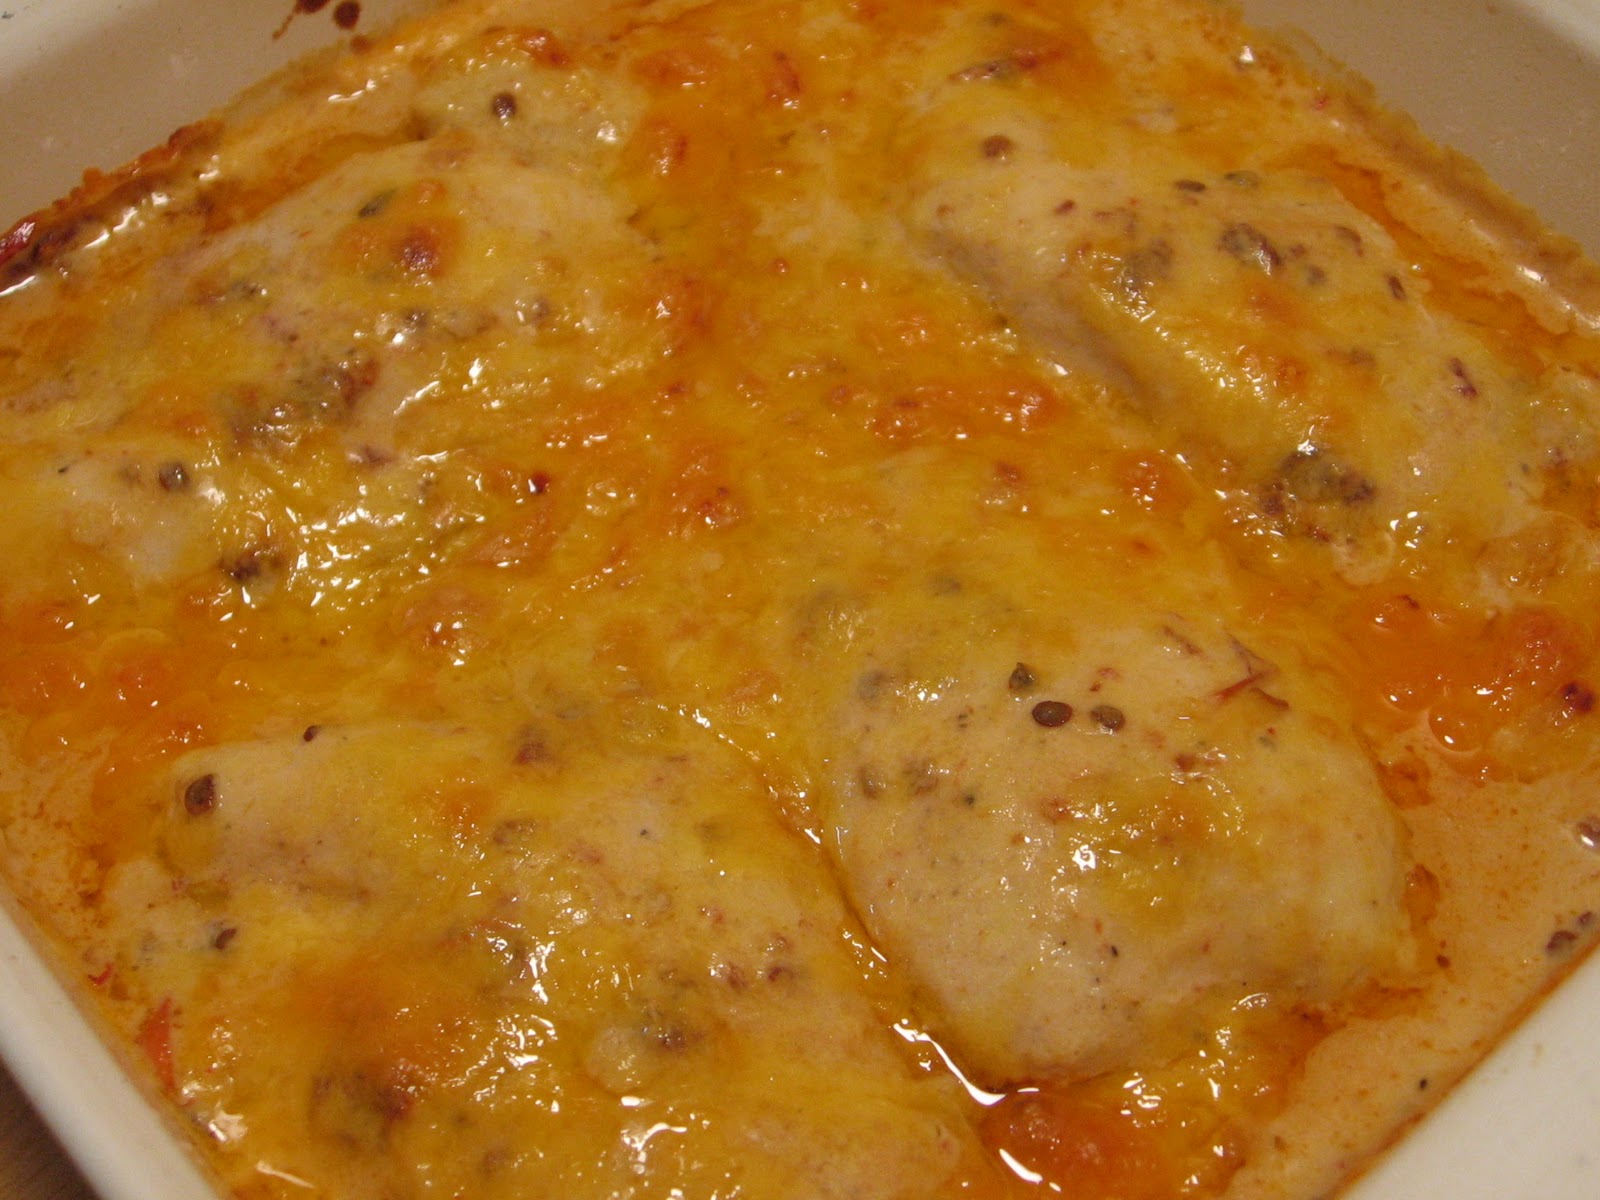
One last tip - when you brush on the egg right before you bake them, I have found that a cheap, small 1/2 inch, soft bristled paintbrush works better than the basting brushes that you find in the kitchen store. The egg goes on smoother, more uniformly, and you are much less likely to poke a hole in your dough with the brush.

Everyone tore into these like it was  their last meal, and none of the calzones survived.  Around the table, we all were happy and full - even the 3yr old, who was alternating dunking a hot dog in yogurt and then honey. At the end of the day, you'll find this is a simple meal that everyone will enjoy!

Calzones
From the kitchen of Wayne Hoxie, loosely adapted from Betty Crocker Cookbook
Ingredients:
Pizza Dough (see below)
1 can (8 oz) tomato sauce
4 oz chopped mushrooms (optional)
1 Tablespoon fresh chopped basil leaves (or 1 tsp dried)
1 Tablespoon fresh chopped oregano leaves (or 1 tsp dried)
1 clove garlic, crushed
8 oz sliced pepperoni - (i like the prepackaged hormel brand)
1/2 cup finely chopped green bell pepper
shredded mozzarella cheese (maybe 2 cups)
1 egg, beaten
1 lb ground beef
1 tsp salt
1 medium onion, finely chopped

Directions:
Preheat oven to 375 degrees.

Brown the ground beef, salt, and onion together.  Drain excess grease.  Set mixture aside for later.

Prepare pizza dough.  Punch down dough. Divide into 6 equal parts.  Roll each part into 7 inch circle on lightly floured surface. Mix tomato sauce, mushrooms, basil, oregano, and garlic.  Spread over half of each circle to within 1 inch of edge.  Top with small amount of beef mixture, bell peppers, pepperoni, and mozzarella cheese.  Fold dough carefully over filling, pinching edges to seal securely.  (can also then crimp with a fork for added holding power)  Place calzones on greased cookie sheet.  Let rest for 15 minutes and then brush each with egg.  Bake 25 minutes or until golden brown.


Pizza Dough
Ingredients:
1 package regular or quick-acting active dry yeast
1 cup warm water (105 - 115 degrees)
1 Tablespoon sugar
2 Tablespoons vegetable oil
1/2 teaspoon salt
2 3/4 to 3 1/4 cups all-purpose flour

Directions:
Dissolve yeast in warm water in large bowl.  Stir in sugar, oil, salt, and 1 cup flour.  Beat until smooth.  Mix in enough flour to make the dough easy to handle.

Turn dough into lightly floured surface.  Knead until smooth and elastic.  Place in greased bowl and turn grease side up.  Cover and let rise in a warm place until almost double.

***Calzones are approximately 550-600 calories each***

Thursday, October 21, 2010

Tilapia with Orange Glaze

Our office moved last Saturday...not the way I wanted to spend one of my weekend days, but it's over.  I am actually pretty settled into the new space too...so that feels pretty good.  But let me tell you, I am one exhausted chick.  Yesterday, I even had to actually sit down at a desk and do my actual job.  Yea, I know, weird, but true!!  Seriously, the week before we moved, I don't think I did any actual accounting work.  Now it's back to the grind and hopefully a more normal paced life!!

But enough of me, let's talk about orange glazed tilapia, shall we?

I love orange chicken... I love orange beef...I had an orange in the refrigerator that needed to be used....I now love tilapia with orange glaze!  To be honest with you, I really want to make orange chicken, now, using this sauce.  I was surprised at how wonderful it turned out!  Nice and tangy and fresh.  It was perfect!

Tilapia with Orange Glaze
Printable Recipe 
Ingredients:
1 teaspoon grated orange zest
1/2 cup orange juice (about 2 oranges)
2 Tablespoons soy sauce
2 Tablespoons honey
1-2 cloves garlic, finely minced
1/4 teaspoon ground ginger
4 Tilapia fillets

Directions:
Mix together all ingredients except the fish.  Pour half into a small saucepan and set aside.  Place the fillets in a resealable bag or a shallow baking dish and pour the remainder or the marinade over them.  Let marinate in refrigerator for 30 minutes.  Remove fillets from bag and discard marinade.

Place the small saucepan with the remaining sauce over medium low heat and simmer until it has thickened.

In a non-stick skillet sprayed with just a bit of non-stick spray, add the fillets.  Cook, covered, for 4 minutes per side or until the fish flakes easily with a fork. Drizzle the sauce over top of the fish and enjoy!

Wednesday, October 20, 2010

Raspberry Chipotle Chicken

Quite a few years back, when I used to have a Costco card, I found the most amazing sauce every.  It was a Roasted Raspberry and Chipotle sauce.  That was before chipotle was the "in" thing :)  I used to marinate chicken in the sauce and then grill it.  Sometimes I'd eat it just like that, other times I'd make lettuce wraps out of them.  My lettuce wraps consisted of rice, grilled raspberry chipotle chicken, cucumber, mint, and a squirt of Sriracha.  They were fantastic!  I would eat that pretty much every night...and then I just got tired of the whole process, so I stopped making them....and then I found other wonderful things to make and had sort of forgotten about it...mainly because I wasn't going to Costco anymore to purchase the decadent sauce!  Then one day I was browsing through my favorite blogs when I stumbled upon this recipe for Raspberry BBQ Sauce on Nibble Me This.  I immediately thought of that sauce and then giggled when I realized that I could actually make my own now!!

So this is my version of that lovely sauce.  It's simple, it's delicious, and you can use it on just about anything!!

Raspberry Chipotle Chicken
Printable Recipe 
Ingredients:
2 canned chipotle peppers in adobo sauce
1 Tablespoon adobo sauce
5 Tablespoons seedless raspberry jam
1 Tablespoon balsamic vinegar
4 boneless, skinless chicken breasts

Directions:
In a food processor, add the chipotles, adobo sauce, raspberry jam and balsamic vinegar and pulse a few times until almost smooth.  Place the chicken in a resealable bag, pour the marinade over the chicken, and seal the bag.  Let marinate in the refrigerator for at least 2 hours, though 4-8 would be more ideal.

Preheat grill to 400 degrees.  Remove chicken from bag and discard marinade.  Place the chicken directly on the grates over the fire and cook for 5-8 minutes on each side or until the chicken is no longer pink in the middle.

To bake: Preheat oven to 425 degrees.  Place in baking dish sprayed with non-stick cooking spray.  Bake, uncovered, for 15-20 minutes or until the chicken is cooked through.  You can also quickly pan sear each side for about 2-4 minutes, then place in oven to finish cooking.

Tuesday, October 19, 2010

Sweet Balsamic Grilled Chicken

I saw this recipe on Bo's Bowl a while back and finally got it on my menu for the week. The day I was planning on making this dish, I was driving home from work thinking about dinner.  I knew the recipe called for balsamic (obviously) and honey, but wasn't 100% sure of the other ingredients.  I started thinking... mmmmm, yea, some garlic would go really good in it...and let's not forget some red pepper flakes for some spice.  Yes, that sounds good!  When I got home and I pulled up the recipe, I had to laugh because I had actually thought of exactly the same ingredients that were in the recipe!  Whether it was subconsciously since I had seen the ingredients already, or if it's just really a matter of "great minds think alike", this is a recipe you need to try.  The flavor combinations are wonderful! Tart and sweet with just a tad bit of spice...beautiful!

Sweet Balsamic Grilled Chicken
Slightly adapted from Bo's Bowl
Printable Recipe 
Ingredients:
4 boneless, skinless chicken breasts
1/4 cup balsamic vinegar
2 Tablespoons olive oil
2 Tablespoons honey
1/2 - 1 teaspoon red pepper flakes
2 garlic cloves, crushed and minced

Directions:
Rinse chicken and pat dry.  Place in a resealable bag or baking dish.  In a small bowl, mix together the remaining ingredients.  Pour over the chicken, cover or seal, and let marinate in the refrigerator for at least 2 hours.  Remove chicken from bag and discard marinade.

Preheat your grill to medium.  Rub oil on grill grates.  Place the chicken directly over the fire and cook for 5-8 minutes on each side or until the chicken is no longer pink in the middle.  Enjoy!

Monday, October 18, 2010

Smoked Beef Tri-Tip

I know, I know...I can hear you all now:  "Not another smoker recipe... I don't have a smoker, why does she keep posting recipes when she KNOWS most of us don't have smokers?"  I'm sorry, my loyal readers, but this one is a MUST post.  Chris and I both agreed, this is by far the best meal that has come out my smoker.

And speaking of my smoker...have I mentioned lately how much I LOVE it???  No, well, there you go, I just told you then... I LOVE it!!  I have never had a charcoal or wood smoker, and I'm sure that there is something about those methods that could be even more satisfying then mine, but this Electric Smoker by Masterbuilt is one of the easiest things I've used.  And clean up is a piece of cake (mmmmmm...cake!!!).  I love that I can start up the smoker and in about 30 minutes (or less sometimes), it's preheated and ready to go!  No having to wake up at the butt crack of dawn to start the fire!  If you are looking to purchase a smoker, I highly suggest looking into this one.  (This is the opinion of Jenn's Food Journey only.  In no way have I been compensated for my review of this product.)

I got the idea in my head that I was going to make a smoked brisket.  So, I ventured to the grocery store and was once again shocked at not only how big.... wait... how HUGE the cuts of brisket were, but how expensive they were too.  OUCH!  I asked my butcher if he'd be willing and/or able to cut the smallest one I found in half.  I mean come on, 8lbs of brisket for just Chris and I...geez, oh, we'd be eating until next year!!  Anyway, he informed me that with the way they were packaged, he could not oblige.  FINE..whatever, I said Thanks anyway, you big jerk - Wait - Ok.. I said that in my head, but in reality I just thanked him politely and walked away.  Now the dilemma....I'm not spending $35 on a cut of meat but I really wanted to smoke something.  Do I go with something I've done before such as ribs or chicken??  UGH.....I don't know, I don't know!!  And then I saw the cuts of beef tri-tip sitting right next to the brisket.  Mmmmmm...Tri-Tip... I've had that at BBQ places before and liked it a lot...why not give it a shot?  A quick call to Chris verified that he was all for trying it, and I was sold.  I've never made tri-tip before.. not grilled, not in a crock pot, not baked, not anything... never never... so I wasn't quite sure what to expect.  What I didn't expect was for it to turn out to be so wonderful!  A little sweet, a lot smokey, VERY tender...Perfect!  And as I said in the beginning of this post, this was the best thing to come out of my smoker yet!  Dare I say perfection????

Smoked Beef Tri-Tip
Printable Recipe 
Ingredients:
2 1/4 lbs beef tri-tip
For the rub -
1 1/2 Tablespoons Hungarian Sweet Paprika
1 1/2 teaspoons brown sugar
1 teaspoon cocoa powder
1/2 teaspoon onion powder
1/2 teaspoon garlic powder
1/2 teaspoon cayenne pepper
1/2 teaspoon kosher or sea salt
1/2 teaspoon black pepper
For the mop - 
2 Tablespoon your favorite barbecue sauce
3 Tablespoons apple juice

Additional items needed for smoking:
1-2 cups hickory chips (soaked in water for at least 30 minutes)
1 cup apple juice
1 bottle beer (I used Samuel Adam's Oktoberfest)

Directions:
In a small bowl, mix together the ingredients for the rub together.  Rub on both sides of the tri-tip.  Wrap in plastic and let marinate in the refrigerator for 4-24 hours.

Preheat smoker to 225 degrees.  Add the beer and apple juice to the water pan of the smoker.  Add the wood chips.  In a small bowl, mix together the ingredients for the mop and set aside.

Place the tri-tip on the top shelf of your smoker and allow to smoke for 2-4 hours (depending on desired doneness), mopping with sauce very 20-30 minutes, or until the meat registers 140-145 degrees (medium).  Remove from smoker and let rest for 5 minutes before cutting it.  Enjoy!


Friday, October 15, 2010

Fire Day Friday Guest Post

Despite the fact that my office is moving tomorrow...despite the fact that today and tomorrow are going to be long and exhausting...despite the fact that I seriously just want it to be Sunday already (that way everything is done and behind me except the unpacking part)... Yes, despite all that... I am extremely excited because today marks my first ever guest post!!  And what better day to have my debut guest post then on a day dedicated to all things cooked over fire!!  That's right, I am filling in for Chris at Nibble Me This while he and his wife are at Eggtoberfest.

So, head on over to Fire Day Friday and check out the delicious little number that I have saved up just for this occasion.  Heck, while you're there, check out past Fire Day Friday posts from Chris and all the other recipes and tips on Our Krazy Kitchen.

 (That's me in '07...I love fire so much, I even spin it!)

For those of you stopping by from Fire Day Friday, don't forget to check out my other great grilling recipes....and thanks for checking out my site!  Hope what you've seen keeps bringing you back!  Ciao! 

Thursday, October 14, 2010

Ancho Chili Spiced Tilaipa with Chipotle Rémoulade

So my biggest dilemma when I purchase a can of chipotle peppers is what to do with the rest of the can after I use my 1, maybe 2 peppers.  Most recipes do not call for much more then that.  I never like to waste food if I don't have to, so I try and find a few recipes I can utilize them in during that week.  This is how I used the rest of my chipotle puree from the Chipotle Mexican Rice.  I served that rice with this fish...top it with the sauce....you know it's gonna be good! The entire dish was very flavorful and yet, surprisingly, not too fiery...at least for us...it was perfect!

Ancho Chili Spice Tilapia with Chipotle Rémoulade
Printable Recipe 
Ingredients:
1/2 teaspoon Ancho chili powder
1/2 teaspoon salt
1/2 teaspoon cayenne pepper
1/4 teaspoon cumin
1/4 teaspoon garlic powder
1/2 teaspoon oregano
4 Tilapia fillets
For the Chipotle Rémoulade
2 Tablespoons chipotle puree
1/4 cup mayonnaise
1 teaspoon lime juice
1/4 teaspoon oregano

Directions:
In a small bowl, mix together all the ingredients for the remoulade.  Mix until smooth.  Cover and place in refrigerator until ready to use.

In another small bowl, mix together the ancho chili powder, salt, cayenne, cumin, garlic powder, and oregano.  Rinse fish and pat dry.  Sprinkle the seasoning over both sides of each fillet.

Place the fillets in a non-stick skillet, sprayed with non stick spray, over medium heat.  Cover and let cook for 3-4 minutes (you may need to reduce the heat at this point, you don't want to burn them).  Flip the fillets, replace the cover, and continue to cook for another 3-4 minutes or until the fish flakes easily with a fork.  Serve with chipotle remoulade and enjoy!