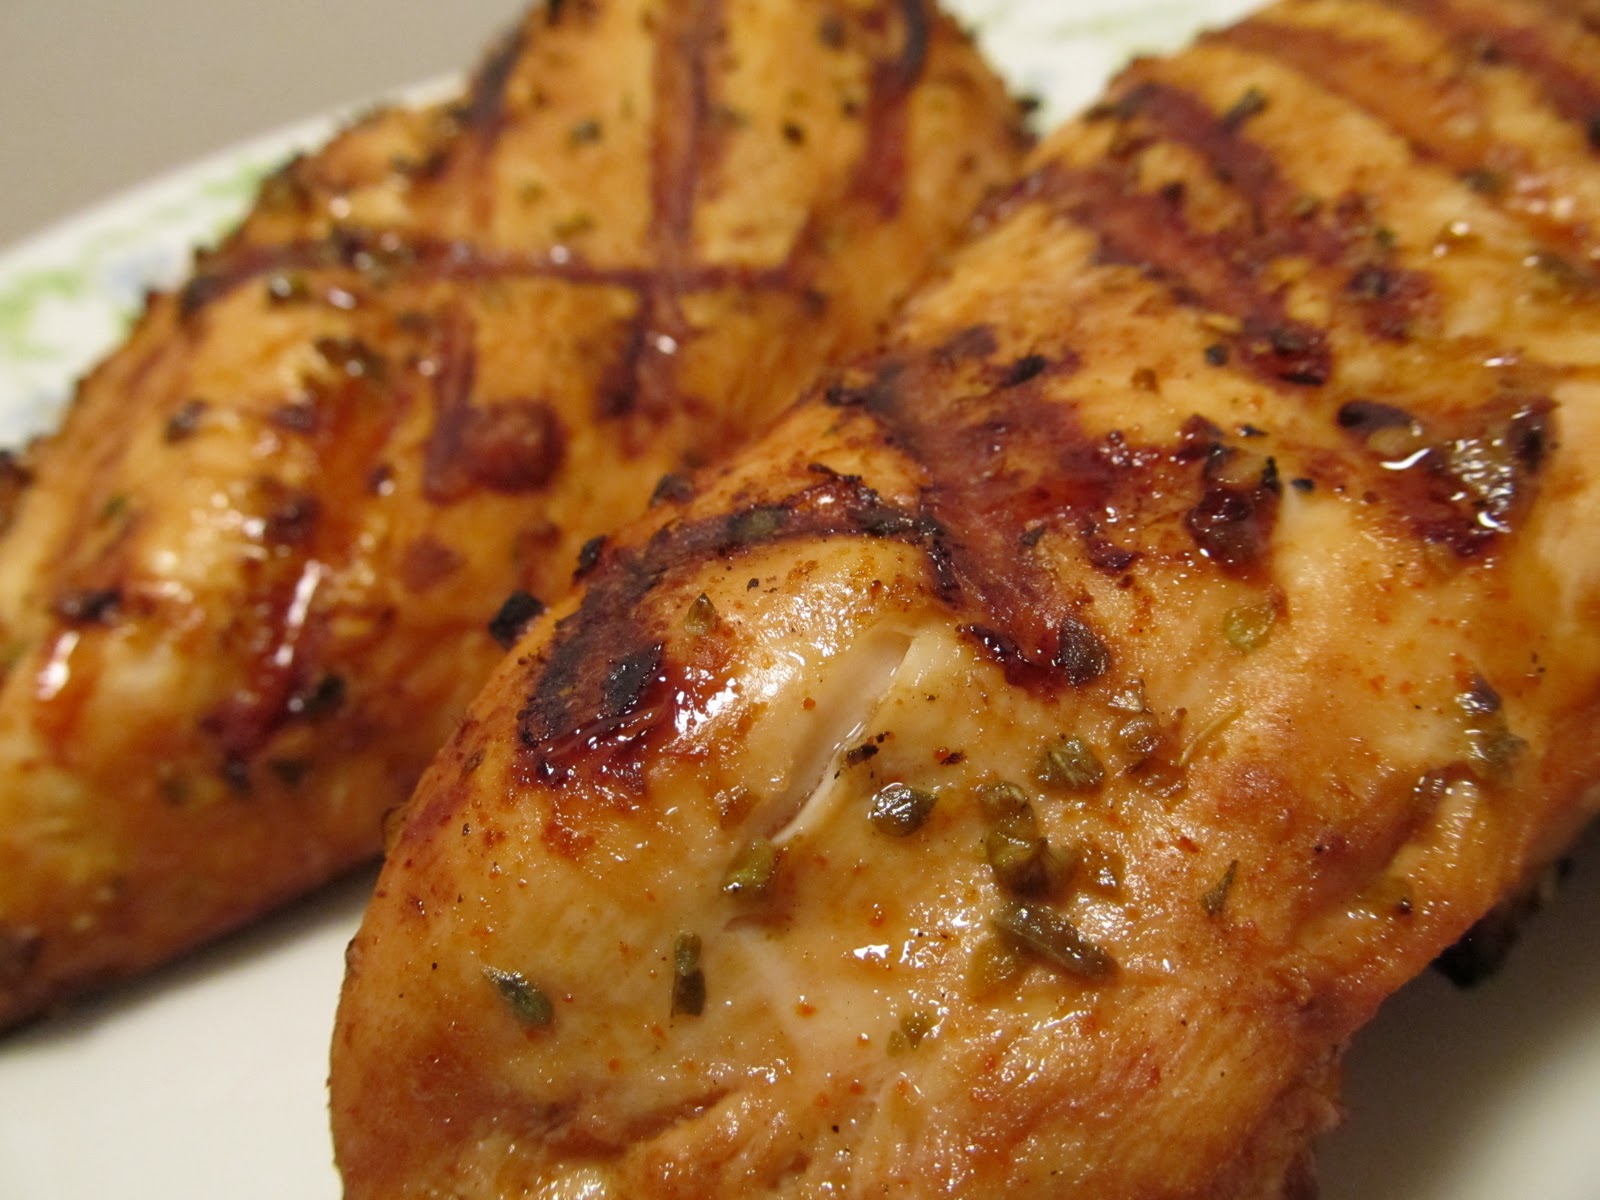
While preparing for our big move, I have tried to keep dinners simple - Ok, as most of you know, I try to do that all the time, but the last two weeks have been even more on the simple side each and every night. Some dinners aren't post worthy, but that's ok, you have to have a few of those every now and then, right? But this one.. this one is definitely worth posting. It's simple and full of flavor - my favorite type of meal!
And, just in case you are not aware (because, trust me, I was not) Peruvian cuisine reflects local cooking practices, ingredients, and through immigration influences from Spain, China, Italy, West Africa, and Japan. A big mix there to equal amazing flavors!
Peruvian Grilled Chicken
Adapted from Epicurious.com
Printable Recipe
Ingredients:
2 boneless, skinless chicken breasts
1/4 cup soy sauce
2 Tablespoons lime juice
1 Tablespoon vegetable oil
2 cloves of garlic, minced or crushed
1/2 teaspoon cumin
1/2 teaspoon paprika
1/2 teaspoon dried oregano
Directions:
Rinse chicken and pat dry with paper towel. In a measuring cup, add the remaining ingredients and stir to combine. Place the chicken in a resealable bag and pour the marinade over the chicken. Seal and refrigerate for at least 2 hours, preferably 4.
Preheat grill to 375 degrees and oil grill grates. Remove the chicken from the bag and discard the marinade. Place the chicken directly over the fire and grill for 6-10 minutes per side depending on how thick your pieces are. Chicken is done when internal temperature reaches 165 degrees. Remove from grill and allow to rest for 3 minutes before serving. Enjoy!
One Year Ago: Creamy Taco Mac
Search This Blog
Tuesday, November 15, 2011
Monday, November 14, 2011
Grilled Romaine Lettuce with Creamy Herb Dressing
A simple and delicious side dish that should have been made a LONG time ago.... I have grilled Romaine lettuce before, but not since Chris and I met. I guess I thought he might not enjoy it - I don't know why I thought that - no matter - I made it, he loved it, I'll definitely be making it again!
Grilled Romaine Lettuce with Creamy Herb Dressing
Created by Jenn's Food Journey
Printable Recipe
Ingredients:
1 small head Romaine lettuce (leaves separated, rinsed and dried)
olive oil
salt and white pepper
2 Tablespoons sour cream
1 Tablespoon milk or cream
1 Tablespoon mayonnaise
1 teaspoon white wine vinegar
1/8 teaspoon garlic powder
1 1/2 teaspoon freshly minced chives
1 Tablespoon freshly chopped parsley
Directions:
Preheat grill to 325 degrees F. Drizzle lettuce with olive oil and season with salt and pepper. Place on the grill and allow to grill for about 3 minutes per side or until the lettuce just starts to wilt. Remove from grill. Serve with cream herb dressing.
To make the dressing: In a small bowl or measuring cup, add the sour cream, milk, mayo, vinegar and garlic powder; stir until smooth. Gently stir in herbs. Season with salt and white pepper to taste. Cover and refrigerate until ready to use. Enjoy!
One Year Ago: Tilapia with Hash Browns
Grilled Romaine Lettuce with Creamy Herb Dressing
Created by Jenn's Food Journey
Printable Recipe
Ingredients:
1 small head Romaine lettuce (leaves separated, rinsed and dried)
olive oil
salt and white pepper
2 Tablespoons sour cream
1 Tablespoon milk or cream
1 Tablespoon mayonnaise
1 teaspoon white wine vinegar
1/8 teaspoon garlic powder
1 1/2 teaspoon freshly minced chives
1 Tablespoon freshly chopped parsley
Directions:
Preheat grill to 325 degrees F. Drizzle lettuce with olive oil and season with salt and pepper. Place on the grill and allow to grill for about 3 minutes per side or until the lettuce just starts to wilt. Remove from grill. Serve with cream herb dressing.
To make the dressing: In a small bowl or measuring cup, add the sour cream, milk, mayo, vinegar and garlic powder; stir until smooth. Gently stir in herbs. Season with salt and white pepper to taste. Cover and refrigerate until ready to use. Enjoy!
One Year Ago: Tilapia with Hash Browns
Friday, November 11, 2011
Pomegranate Balsamic Pork Chops
Before I get into this delicious recipe, I want to say just two thing :)
I want to extend a HUGE thank you to all the veterans out there. (My dad especially!!!) It's Veteran's day and I thought it would be the perfect time to thank those that have served and are still serving this country. You are amazing people in my book! Thank you!!
I also want to quickly draw your attention to this fantastic website that has the best vanilla beans around for the most amazing price you will ever find. Whitney, with IndriVanilla, contacted me a few weeks ago to see if I would be interested in some vanilla bean samples. Well, considering how much vanilla beans cost, and she was willing to send them to me for free, how could I pass them up, right? Whitney proceeded to tell me that she sells these wonderful vanilla beans for 50cents to $1.00 EACH! WHAT? Ok, what's the catch, right? Vanilla beans for 50cents??? Come on.... Seriously, though, that's how much they are and they are every bit as wonderful as other vanilla beans that sell for $5-$10 each! Whitney also told me that she is located right here in Arizona... In Tempe, Arizona to be exact... and well, any chance I can get to help out local merchants, I'm all over that.... especially with something so wonderful as vanilla beans!! Now, I haven't actually cooked with these beans yet, I know that might sound cheesy, but it's true. But, that's how confident I am in these beans.. I'm willing to tell you about them without actually ever using them. I have seen them, I have smelled them... I know you'll be just as amazed as I was with the quality of them. So, hang in there until we get moved in and I plan on not only making a few deliciously sweet dishes, but I also plan on trying my hand at adding the vanilla beans into more savory dishes.... You'll definitely want to hang around for that :)
Finally, I will tempt you with this fantastic piece of meat. Behold the thick cut pork chop! I couldn't believe that I actually found two packed THICK cut chops. And bone in, nonetheless. So, when I saw these beauties sitting in the meat department at my local grocery store, I could not help but get just a tad bit excited.... Oh the possibilities!!! And, although there were a ton of possibilities, I kept this very simple. No need to go too over board, you want to taste the meat too sometimes :) If you find yourself with no pomegranate balsamic vinegar, you can use regular balsamic in its place... it will work just as well, I promise. One thing you don't want to change or skip, though, is the brining. You must brine, it will make all the difference in the world with these wonderfully thick chops! Plan ahead with this recipe, but I not only have you brining the chops, but I have you marinating them too!! Oh the flavor!!!!
Pomegranate Balsamic Pork Chops
Created by Jenn's Food Journey
- Serves 2 -
Printable Recipe
Ingredients:
2 bone-in 1" (or more) thick pork loin chops
For the brine -
3 cups water
1 1/2 Tablespoons kosher salt
1 Tablespoon sugar
2 garlic cloves, minced or chopped
1 teaspoon black pepper
For the marinade -
1 garlic clove, smashed
1 Tablespoon pomegranate balsamic vinegar
1 Tablespoon brown sugar
1/4 teaspoon cayenne pepper
For the glaze -
2 Tablespoons pomegranate balsamic vinegar
1 1/2 Tablespoons brown sugar
1 Tablespoon water
Directions:
In a large measuring bowl, add all the ingredients for the brine and stir to combine. Place the pork in a resealable bag set in a bowl or dish and pour the brining liquid over it. Seal and place in refrigerator for 2 hours. Remove from brine and rinse pork thoroughly under cool running water. Pat with towel to dry and place pork in a shallow dish.
In a small bowl, add all the ingredients for the marinade and stir until the sugar has dissolved. Pour mixture over the pork and cover. Refrigerate for at least 1 hour.
Meanwhile, in a small saucepan over medium heat, add the remaining ingredients for the glaze. Stir to dissolve the sugar. Allow mixture to come to a bowl and thicken; stirring often. When sauce has thickened, remove from heat and allow to cool.
Preheat grill to 375 degrees and oil the grill grates using long tongs to soak a wad of paper towels in oil. Place the pork chops directly over the fire; brush with glaze. Allow to grill for 5 minutes and flip; brushing the other side with the glaze. Allow to grill another 5 minutes and flip again; brush with glaze. Turn down the heat and continue to grill until the pork is cooked through and the internal temperature reads 145 degrees. Remove from gill and allow to rest for 3-5 minutes before serving. Enjoy!
One Year Ago: Potato and Chipotle Chowder
I want to extend a HUGE thank you to all the veterans out there. (My dad especially!!!) It's Veteran's day and I thought it would be the perfect time to thank those that have served and are still serving this country. You are amazing people in my book! Thank you!!
I also want to quickly draw your attention to this fantastic website that has the best vanilla beans around for the most amazing price you will ever find. Whitney, with IndriVanilla, contacted me a few weeks ago to see if I would be interested in some vanilla bean samples. Well, considering how much vanilla beans cost, and she was willing to send them to me for free, how could I pass them up, right? Whitney proceeded to tell me that she sells these wonderful vanilla beans for 50cents to $1.00 EACH! WHAT? Ok, what's the catch, right? Vanilla beans for 50cents??? Come on.... Seriously, though, that's how much they are and they are every bit as wonderful as other vanilla beans that sell for $5-$10 each! Whitney also told me that she is located right here in Arizona... In Tempe, Arizona to be exact... and well, any chance I can get to help out local merchants, I'm all over that.... especially with something so wonderful as vanilla beans!! Now, I haven't actually cooked with these beans yet, I know that might sound cheesy, but it's true. But, that's how confident I am in these beans.. I'm willing to tell you about them without actually ever using them. I have seen them, I have smelled them... I know you'll be just as amazed as I was with the quality of them. So, hang in there until we get moved in and I plan on not only making a few deliciously sweet dishes, but I also plan on trying my hand at adding the vanilla beans into more savory dishes.... You'll definitely want to hang around for that :)
Finally, I will tempt you with this fantastic piece of meat. Behold the thick cut pork chop! I couldn't believe that I actually found two packed THICK cut chops. And bone in, nonetheless. So, when I saw these beauties sitting in the meat department at my local grocery store, I could not help but get just a tad bit excited.... Oh the possibilities!!! And, although there were a ton of possibilities, I kept this very simple. No need to go too over board, you want to taste the meat too sometimes :) If you find yourself with no pomegranate balsamic vinegar, you can use regular balsamic in its place... it will work just as well, I promise. One thing you don't want to change or skip, though, is the brining. You must brine, it will make all the difference in the world with these wonderfully thick chops! Plan ahead with this recipe, but I not only have you brining the chops, but I have you marinating them too!! Oh the flavor!!!!
Pomegranate Balsamic Pork Chops
Created by Jenn's Food Journey
- Serves 2 -
Printable Recipe
Ingredients:
2 bone-in 1" (or more) thick pork loin chops
For the brine -
3 cups water
1 1/2 Tablespoons kosher salt
1 Tablespoon sugar
2 garlic cloves, minced or chopped
1 teaspoon black pepper
For the marinade -
1 garlic clove, smashed
1 Tablespoon pomegranate balsamic vinegar
1 Tablespoon brown sugar
1/4 teaspoon cayenne pepper
For the glaze -
2 Tablespoons pomegranate balsamic vinegar
1 1/2 Tablespoons brown sugar
1 Tablespoon water
Directions:
In a large measuring bowl, add all the ingredients for the brine and stir to combine. Place the pork in a resealable bag set in a bowl or dish and pour the brining liquid over it. Seal and place in refrigerator for 2 hours. Remove from brine and rinse pork thoroughly under cool running water. Pat with towel to dry and place pork in a shallow dish.
In a small bowl, add all the ingredients for the marinade and stir until the sugar has dissolved. Pour mixture over the pork and cover. Refrigerate for at least 1 hour.
Meanwhile, in a small saucepan over medium heat, add the remaining ingredients for the glaze. Stir to dissolve the sugar. Allow mixture to come to a bowl and thicken; stirring often. When sauce has thickened, remove from heat and allow to cool.
Preheat grill to 375 degrees and oil the grill grates using long tongs to soak a wad of paper towels in oil. Place the pork chops directly over the fire; brush with glaze. Allow to grill for 5 minutes and flip; brushing the other side with the glaze. Allow to grill another 5 minutes and flip again; brush with glaze. Turn down the heat and continue to grill until the pork is cooked through and the internal temperature reads 145 degrees. Remove from gill and allow to rest for 3-5 minutes before serving. Enjoy!
One Year Ago: Potato and Chipotle Chowder
Thursday, November 10, 2011
Grilled Jalapeno Tartar Sauce - And Giveaway Winner!
You knew it was only a matter of time before I figured out a way to create a "grilled" sauce, didn't you??
I guess you could say that I aim to please!!
And speaking of pleasing - the winner of the Bertolli olive oil giveaway is:
Miss Meat and Potatoes (aka Alisa) - "Eek! I almost missed your giveaway!! And yes please - count me in for a chance to lasso that lovely liquid gold!!"
Grilled Jalapeno Tartar Sauce
Created by Jenn's Food Journey
Printable Recipe
Ingredients:
1 medium to large jalapeno, stem removed, cut in half and seeds removed
1/4 cup mayonnaise
1 teaspoon jalapeno hot sauce (I used Arizona Gunslinger)
1 1/2 teaspoon white wine vinegar
1/8 teaspoon garlic powder
white pepper
kosher salt
Directions:
Preheat grill to 400 degrees. Place the jalapeno halves directly over the fire and allow to grill for 3-4 minutes per side, or until the jalapeno is softened but not completely charred (you might need to adjust your flame). Remove from grill and allow to cool. Once cooled enough to handle, chop or mince.
In a small bowl, mix all the ingredients together until well combined. Taste for seasoning. Cover and refrigerate until ready to use. Use on fish, chicken, sandwiches, whatever you want... just make sure to Enjoy!
One Year Ago: Chorizo and Eggs
I guess you could say that I aim to please!!
And speaking of pleasing - the winner of the Bertolli olive oil giveaway is:
Miss Meat and Potatoes (aka Alisa) - "Eek! I almost missed your giveaway!! And yes please - count me in for a chance to lasso that lovely liquid gold!!"
Congratulations to Alisa! Thanks to everyone for participating and of course, thanks to Bertolli for supplying the giveaway winnings!
Grilled Jalapeno Tartar Sauce
Created by Jenn's Food Journey
Printable Recipe
Ingredients:
1 medium to large jalapeno, stem removed, cut in half and seeds removed
1/4 cup mayonnaise
1 teaspoon jalapeno hot sauce (I used Arizona Gunslinger)
1 1/2 teaspoon white wine vinegar
1/8 teaspoon garlic powder
white pepper
kosher salt
Directions:
Preheat grill to 400 degrees. Place the jalapeno halves directly over the fire and allow to grill for 3-4 minutes per side, or until the jalapeno is softened but not completely charred (you might need to adjust your flame). Remove from grill and allow to cool. Once cooled enough to handle, chop or mince.
In a small bowl, mix all the ingredients together until well combined. Taste for seasoning. Cover and refrigerate until ready to use. Use on fish, chicken, sandwiches, whatever you want... just make sure to Enjoy!
One Year Ago: Chorizo and Eggs
Wednesday, November 9, 2011
Spicy Chipotle Shrimp Stir Fry
Back in July, I posted a Fire Day Friday recipe for chicken with orange chipotle glaze, and ever since, I have wanted to use that flavor combination again. Enter my spicy chipotle shrimp stir fry. It combines that heat of the chipotle and that tangy flavor of the orange juice to create the perfect sauce for this simple stir fry.
***The Bertolli extra virgin olive oil giveaway ends tonight at 11pm (EST) - don't forget to enter - you have two chances to win - Click here for details***
Spicy Chipotle Shrimp Stir Fry
Created by Jenn's Food Journey
Printable Recipe
Ingredients:
1/4 cup barbecue sauce
1 Tablespoon chipotle puree (to make puree, pour entire content of chipotle in adobo sauce can into a food processor and pulse until pureed)
3 Tablespoons orange juice
1 teaspoon sour cream
1 teaspoon vegetable oil
48 large frozen shrimp, thawed and tails removed
1 red pepper, chopped
1 jalapeno, chopped
5-6 slices of bacon, cooked and crumbled
Directions:
In a measuring cup or small bowl, add the barbecue sauce, chipotle puree, and orange juice; stir to combine. Fold in the sour cream; set aside.
In a wok or large, deep skillet, heat the vegetable oil over medium high heat. Add the red pepper and jalapeno. Stir fry until just starting to soften, about 3 minutes. Add the shrimp and stir fry until the shrimp is heated through, about another 3 minutes. Once the shrimp and veggies are cooked to your liking - add the sauce and stir to coat. Allow to cook another 1-2 minutes, or until the sauce is heated. Add the bacon and stir to combine. Serve over rice. Enjoy!
One Year Ago: Ranch Chicken Pizza
***The Bertolli extra virgin olive oil giveaway ends tonight at 11pm (EST) - don't forget to enter - you have two chances to win - Click here for details***
Spicy Chipotle Shrimp Stir Fry
Created by Jenn's Food Journey
Printable Recipe
Ingredients:
1/4 cup barbecue sauce
1 Tablespoon chipotle puree (to make puree, pour entire content of chipotle in adobo sauce can into a food processor and pulse until pureed)
3 Tablespoons orange juice
1 teaspoon sour cream
1 teaspoon vegetable oil
48 large frozen shrimp, thawed and tails removed
1 red pepper, chopped
1 jalapeno, chopped
5-6 slices of bacon, cooked and crumbled
Directions:
In a measuring cup or small bowl, add the barbecue sauce, chipotle puree, and orange juice; stir to combine. Fold in the sour cream; set aside.
In a wok or large, deep skillet, heat the vegetable oil over medium high heat. Add the red pepper and jalapeno. Stir fry until just starting to soften, about 3 minutes. Add the shrimp and stir fry until the shrimp is heated through, about another 3 minutes. Once the shrimp and veggies are cooked to your liking - add the sauce and stir to coat. Allow to cook another 1-2 minutes, or until the sauce is heated. Add the bacon and stir to combine. Serve over rice. Enjoy!
One Year Ago: Ranch Chicken Pizza
Tuesday, November 8, 2011
Lemon Sage Chicken
Simple, savory, and delicious. Need I say more? I'm hoping not, because honestly, I don't know what else to say about it..... Well, except that I included a lemon sage aioli, which just made the chicken that much better!!
I seem to be short on words lately, and I apologize for that... once we finally get moved and I get settled into a new kitchen and a new routine, I know that will change... so hang in there with me for just a bit longer :)
***There is still a chance to enter to win a free 17oz bottle of Bertolli extra virgin olive oil. Click here for details. Giveaway ends 11pm Wednesday, November 9th, so hurry!!***
Lemon Sage Chicken
Created by Jenn's Food Journey
- Serves 2 -
Printable Recipe
Ingredients:
zest of 1 lemon (about 1/2-1 Tablespoons)
juice of 1 lemon (about 1/4 cup)
2 Tablespoons olive oil
1 garlic clove, finely minced
1 Tablespoon honey
1 Tablespoon dried sage
1/4 teaspoon salt
1/8 teaspoon pepper
2 boneless, skinless chicken breasts
For the lemon sage aioli -
1/4 cup mayonnaise
1 Tablespoon lemon juice
1/4 teaspoon lemon zest
1/4 teaspoon lemon pepper seasoning
1/2 - 1 teaspoon dried sage
Directions:
Mix together the lemon juice, zest, oil, garlic, honey, sage, salt and pepper until combined. Rinse the chicken and pat dry. Place in a resealable bag and pour the mixture over it. Massage it to coat the chicken, seal the bag, and place in refrigerator for at least 2 hours.
Meanwhile, in a small bowl, mix together all the ingredients of the aioli until well combined. Cover and place in refrigerator until ready to use.
Preheat grill to 375 degrees F. Oil grill grates. Remove the chicken from the marinade and place directly over the fire. Grill 8-10 minutes per side or until the chicken is cooked through (165 degrees F.) Remove from grill and allow to rest for 4 minutes. Serve with aioli. Enjoy!
I seem to be short on words lately, and I apologize for that... once we finally get moved and I get settled into a new kitchen and a new routine, I know that will change... so hang in there with me for just a bit longer :)
***There is still a chance to enter to win a free 17oz bottle of Bertolli extra virgin olive oil. Click here for details. Giveaway ends 11pm Wednesday, November 9th, so hurry!!***
Lemon Sage Chicken
Created by Jenn's Food Journey
- Serves 2 -
Printable Recipe
Ingredients:
zest of 1 lemon (about 1/2-1 Tablespoons)
juice of 1 lemon (about 1/4 cup)
2 Tablespoons olive oil
1 garlic clove, finely minced
1 Tablespoon honey
1 Tablespoon dried sage
1/4 teaspoon salt
1/8 teaspoon pepper
2 boneless, skinless chicken breasts
For the lemon sage aioli -
1/4 cup mayonnaise
1 Tablespoon lemon juice
1/4 teaspoon lemon zest
1/4 teaspoon lemon pepper seasoning
1/2 - 1 teaspoon dried sage
Directions:
Mix together the lemon juice, zest, oil, garlic, honey, sage, salt and pepper until combined. Rinse the chicken and pat dry. Place in a resealable bag and pour the mixture over it. Massage it to coat the chicken, seal the bag, and place in refrigerator for at least 2 hours.
Meanwhile, in a small bowl, mix together all the ingredients of the aioli until well combined. Cover and place in refrigerator until ready to use.
Preheat grill to 375 degrees F. Oil grill grates. Remove the chicken from the marinade and place directly over the fire. Grill 8-10 minutes per side or until the chicken is cooked through (165 degrees F.) Remove from grill and allow to rest for 4 minutes. Serve with aioli. Enjoy!
One Year Ago: Tequila Lime Chicken
Monday, November 7, 2011
A New iPhone App and Bertolli Olive Oil Giveaway
I find it unusual that I am about to talk about iPhone app, considering I don't even own an iPhone. BUT, I do love olive oil and I do love free stuff, so here I am talking about something I can't honestly give you my opinion on one way or another. Is that selling out? lol Well, if so, I guess I'm a sell out. Sometimes, you do selfish things... I think this might be one of those times for me! :)
A few weeks ago, I was contacted by a representative of Bertolli products asking me if I'd be interested in testing out the new iPhone app that featured chef Fabio Viviani along with some incredible recipes, videos, and photos. I, of course, had to turn them down because as I said previous, I do not own an iPhone. Regardless of my lack of technological gadgets, they sent me a sample bottle of their olive oil anyway. They also have been kind enough to offer YOU, my loyal readers, a 17oz bottle of their extra virgin olive oil too!! So, not only was I selfish in wanting a bottle, but I was also very generous, cause I got one for you too :)
The only thing you have to do.... leave a comment here on my site telling me you want this bottle. I'm going to also go out on a limb and give you an extra chance to win by leaving me a comment on my facebook page too. You have until 11:00pm (eastern standard time) Wednesday, November 9th to enter. Winners will be announced the morning of Thursday, November 10th. Good luck!
One Year Ago: Frosted Sour Cream and Chocolate Drops
A few weeks ago, I was contacted by a representative of Bertolli products asking me if I'd be interested in testing out the new iPhone app that featured chef Fabio Viviani along with some incredible recipes, videos, and photos. I, of course, had to turn them down because as I said previous, I do not own an iPhone. Regardless of my lack of technological gadgets, they sent me a sample bottle of their olive oil anyway. They also have been kind enough to offer YOU, my loyal readers, a 17oz bottle of their extra virgin olive oil too!! So, not only was I selfish in wanting a bottle, but I was also very generous, cause I got one for you too :)
The only thing you have to do.... leave a comment here on my site telling me you want this bottle. I'm going to also go out on a limb and give you an extra chance to win by leaving me a comment on my facebook page too. You have until 11:00pm (eastern standard time) Wednesday, November 9th to enter. Winners will be announced the morning of Thursday, November 10th. Good luck!
Oh.. and before I go... if you are interested in checking out this new app - here are some details (this information comes directly from a press release dated 8/24/11):
Celebrity chef, restaurateur and Top Chef fan favorite, Fabio Viviani, has partnered with Bertolli Olive Oil to offer an engaging and enlightening app, “Let’s Cook!”, to at-home chefs, now available for download on the App Store SM for iPad, iPhone and iTouch®. “Let’s Cook!” brings Chef Fabio’s famously infectious style right into the kitchen and has all the tools to learn to cook with passion, skill and confidence in an easy, personalized way.
“Let’s Cook!”, available for $.99, features 16 step-by-step video recipes by Chef Fabio in stunning full-screen, HD video, with no streaming required. Watch and cook alongside Chef Fabio as he brings flavors to life in some of his favorite dishes featuring Bertolli Olive Oil. In more than five hours of video, Chef Fabio also gives menu suggestions, cooking and entertaining tips, and more. There’s a special section devoted solely to the wonders of olive oil and more than 100 recipes hand-selected by Chef Fabio, which feature Bertolli Olive Oil. Additional features include:
- Elegant, intuitive design
- Full screen photography
- Full recipes with prep and cooking times and serving sizes
- Wine pairings
- Recipe searchability
- Favorites list
- E-mail ingredients for easy shopping
- Links to share via Facebook and Twitter
- No Internet connection required once downloaded
One Year Ago: Frosted Sour Cream and Chocolate Drops
Friday, November 4, 2011
Guest Blogger - Healthy Meal Plans: Good for You, Good for Your Taste Buds
Today I'm stepping away from my usual Photo Friday post - instead, I am featuring a new guest blogger. Say hello to Sean. Sean contacted me a few weeks ago and asked if I would be interested in featuring a post from him. He talked about healthy eating and how important it is and how "not so boring" it can truly be. Because I believe in a lot of what he is writing about, and because I think this is a reminder we all need... I immediately agreed to post his writings. So, without further ado, Sean - take it away:
Look at your new plate - so many colors and textures and tastes! Without really trying to, you have managed to create a meal that includes various nutrients and vitamins. Just by trying out these three tips, you are well on your way to a lifetime of healthy eating. You've learned to be more mindful of how much you eat and about the importance of variety. Use these lessons as a foundation as you explore the delicious world of healthy meal plans.
-------------------------------------------------------------------------
Thanks so much to Sean - Hope you all enjoyed the little tid bits about healthy eating! I know we can all use the reminders every now and again!
Oh.. and speaking of not so healthy :) - don't forget to check out what's cookin' over at Fire Day Friday - It's another spin on my favorite sandwich:
One Year Ago: Chipotle Cheddar Corn Bread
Healthy Meal Plans: Good for You, Good for Your Taste Buds
Often, it's hard to shake a first impression. For many people, their first introduction to health food was something like a wilted celery stick, a bland rice cake, or an unappetizing iceberg lettuce salad. So, for them, healthy meal plans conjure up the simple "do not want," a completely understandable instinct. But you can alter your first impression. Eating well does not require a diet devoid of flavor. Once you decide to try healthy eating, you'll soon realize that "delicious" and "healthful" can coexist. Here are some ideas to get you started.
1. Share, Share, Share
One simple way to start on the road to healthy meal plans is to eat less. You do not have to worry about adding or subtracting foods from your diet, just notice how much you are eating. Divide dessert with a friend. Share you entree with your date. Split popcorn with your movie companion. As you do this, you begin to appreciate that you don't need to eat as much as you thought you did. Where before you'd finish that entire dessert, now you get the same enjoyment from the smaller portion.
2. Monitor Portion Sizes
You have proven to yourself that you can survive on less food. Now it is time to get more specific about portion size. The best way to monitor portion size is a food scale. But sometimes it is not feasible to measure your food that way. It is helpful to learn some quick comparisons for portion size: a serving of meat is equivalent to a deck of cards, a serving of pasta is like a tennis ball, and a tablespoon is about a poker chip.
3. Fill up the Extra Space on your Plate with Healthy Foods
As you implement these changes, you will start to notice that your plate is beginning to change. Where before a large slab of fatty meat took up the entire space, now you have an appropriate portion and plenty of blank space. Great! Fill that blank space up the right way. Add some vegetables, a scoop of rice or potatoes, and a fruit salad.
-------------------------------------------------------------------------
Thanks so much to Sean - Hope you all enjoyed the little tid bits about healthy eating! I know we can all use the reminders every now and again!
Oh.. and speaking of not so healthy :) - don't forget to check out what's cookin' over at Fire Day Friday - It's another spin on my favorite sandwich:
One Year Ago: Chipotle Cheddar Corn Bread
Thursday, November 3, 2011
Chipotle Meatballs
As soon as I saw the name of this recipe, I knew I was going to make it. Oh, you all know those recipes. The recipes where you see the name even before you see the photo and you know you will like it... scratch that... you know you will LOVE it! Well, this was one of those recipes. And, I'm so very glad I didn't wait to try this one... it was such a wonderful little twist on one of my all time favorite classics.
This makes 42, 1-inch round meatballs - I used about half and froze the rest for another day.... mmmmmm.. I'm already dreaming of that day!!
Chipotle Meatballs
Adapted from Simply Recipes
- Makes 42 (1-inch round) meatballs -
Printable Recipe
Ingredients:
For the meatballs -
2 slices bacon, minced
1 garlic clove, finely minced
1 egg
1/4 cup plain bread crumbs
1 teaspoon salt
1 pound ground pork
2 teaspoon dried oregano
1 teaspoon chipotle powder
For the sauce -
1 teaspoon olive oil
1 garlic clover, minced
1-2 Tablespoons chipotle puree
1 28oz can fire roasted crushed tomatoes
2 teaspoons dried oregano
pinch of sugar
1/2 teaspoon salt
1/4 teaspoon pepper
Directions:
In a large bowl, add all the ingredients for the meatballs. With your hands (you might want to wet them or rub some oil on them first), mix everything together until just combined. Form meatballs and place on plate or platter. Cover and let sit in refrigerator for at least one hour.
Remove the meatballs from the refrigerator and allow to sit at room temperature for 10 minutes. Preheat oven to 400 degrees F. Place the meatballs in a baking dish or a sheet pan with a large lip sprayed with non-stick cooking spray. Bake the meatballs for 15 minutes, rotating pan halfway through cooking time.
To make the sauce: In a large pot, heat the olive oil over medium heat. Add the garlic and cook for 1 minute. Add the tomatoes, chipotle puree, oregano, and sugar. Stir to combine and bring to a boil. Reduce heat to simmer and taste for seasoning. Add salt and pepper as needed.
Add the meatballs to the sauce and simmer for 30 minutes. Serve over pasta or rice. Enjoy!
One Year Ago: Tuna Pasta Ponza
This makes 42, 1-inch round meatballs - I used about half and froze the rest for another day.... mmmmmm.. I'm already dreaming of that day!!
Chipotle Meatballs
Adapted from Simply Recipes
- Makes 42 (1-inch round) meatballs -
Printable Recipe
Ingredients:
For the meatballs -
2 slices bacon, minced
1 garlic clove, finely minced
1 egg
1/4 cup plain bread crumbs
1 teaspoon salt
1 pound ground pork
2 teaspoon dried oregano
1 teaspoon chipotle powder
For the sauce -
1 teaspoon olive oil
1 garlic clover, minced
1-2 Tablespoons chipotle puree
1 28oz can fire roasted crushed tomatoes
2 teaspoons dried oregano
pinch of sugar
1/2 teaspoon salt
1/4 teaspoon pepper
Directions:
In a large bowl, add all the ingredients for the meatballs. With your hands (you might want to wet them or rub some oil on them first), mix everything together until just combined. Form meatballs and place on plate or platter. Cover and let sit in refrigerator for at least one hour.
Remove the meatballs from the refrigerator and allow to sit at room temperature for 10 minutes. Preheat oven to 400 degrees F. Place the meatballs in a baking dish or a sheet pan with a large lip sprayed with non-stick cooking spray. Bake the meatballs for 15 minutes, rotating pan halfway through cooking time.
To make the sauce: In a large pot, heat the olive oil over medium heat. Add the garlic and cook for 1 minute. Add the tomatoes, chipotle puree, oregano, and sugar. Stir to combine and bring to a boil. Reduce heat to simmer and taste for seasoning. Add salt and pepper as needed.
Add the meatballs to the sauce and simmer for 30 minutes. Serve over pasta or rice. Enjoy!
One Year Ago: Tuna Pasta Ponza
Wednesday, November 2, 2011
Grilled (or Baked) Fish with Remoulade
I've posted different Remoulade recipes here before, but you know me, I never think you can have too many sauce recipes! I just figured, if I changed it up a bit, it would be worth posting all over again... right? :) Either way, here is another delicious sauce recipe for you to enjoy! As for the fish... do what you wish with it. I grilled them in foil packets with a simple salt, pepper, paprika seasoning. If you want to bake them or pan sear them, go for it. Whichever way you choose... it will all go well with the sauce!
Grilled (or Baked) Fish with Remoulade
Created by Jenn's Food Journey
Printable Recipe
Ingredients:
1/4 cup mayonnaise
1 teaspoon Dijon mustard
1 teaspoon hot sauce (I used chili garlic Cholula)
1 teaspoon white wine vinegar
1/4 teaspoon paprika
1/4 teaspoon cayenne pepper
1/4 teaspoon salt
1 Tablespoons fresh chives, chopped or minced
4 tilapia fillets
lemon juice
salt, pepper, paprika to taste
Directions:
In a bowl, mix together the mayo, mustard, vinegar, paprika, cayenne, salt, and chives until well combined. Cover and refrigerate until ready to use.
To grill fish: Preheat grill to 350 degrees F. Place one piece of fish each on a piece of aluminum foil. Drizzle on lemon juice and season each piece with salt, pepper, and paprika. Fold the edges of the foil together to create a packet. Place directly over the fire and cover. Grill for 12 minutes, turning half way through. Carefully remove from the grill and foil packet. Serve with remoulade. Enjoy!
To bake fish: Preheat oven to 375 degrees F. Spray a baking dish with non-stick cooking spray. Place the fish in the dish and drizzle with lemon juice. Season with salt, pepper, and paprika. Bake, uncovered, for 14-15 minutes, turning baking dish halfway through. Serve with remoulade. Enjoy!
One Year Ago: Simple Chicken Stir Fry
Grilled (or Baked) Fish with Remoulade
Created by Jenn's Food Journey
Printable Recipe
Ingredients:
1/4 cup mayonnaise
1 teaspoon Dijon mustard
1 teaspoon hot sauce (I used chili garlic Cholula)
1 teaspoon white wine vinegar
1/4 teaspoon paprika
1/4 teaspoon cayenne pepper
1/4 teaspoon salt
1 Tablespoons fresh chives, chopped or minced
4 tilapia fillets
lemon juice
salt, pepper, paprika to taste
Directions:
In a bowl, mix together the mayo, mustard, vinegar, paprika, cayenne, salt, and chives until well combined. Cover and refrigerate until ready to use.
To grill fish: Preheat grill to 350 degrees F. Place one piece of fish each on a piece of aluminum foil. Drizzle on lemon juice and season each piece with salt, pepper, and paprika. Fold the edges of the foil together to create a packet. Place directly over the fire and cover. Grill for 12 minutes, turning half way through. Carefully remove from the grill and foil packet. Serve with remoulade. Enjoy!
To bake fish: Preheat oven to 375 degrees F. Spray a baking dish with non-stick cooking spray. Place the fish in the dish and drizzle with lemon juice. Season with salt, pepper, and paprika. Bake, uncovered, for 14-15 minutes, turning baking dish halfway through. Serve with remoulade. Enjoy!
One Year Ago: Simple Chicken Stir Fry
Tuesday, November 1, 2011
Penne with Pork Ragu
Sometimes I crave comforting meals. I don't think that will shock anyone that is reading this, but it had to be said. Comforting to me is pasta. Pasta reminds me so much of growing up and I hope I never truly grow out of that!
This ragu is filling and definitely comforting. It's a very simple dish to put together, but you'll have everyone believing you spent the entire day cooking :)
Penne with Pork Ragu
Created by Jenn's Food Journey
Printable Recipe
Ingredients:
13oz whole grain penne pasta
2 red sweet peppers, stem and seeds removed, roughly chopped
1/2 sweet onion, roughly chopped
2 garlic cloves, quartered
1 lbs ground pork
1 14.5 oz can diced tomatoes
1 teaspoon dried oregano
2 teaspoons Italian herb mix
1/4 teaspoon crushed red pepper flakes
8 oz can tomato sauce
1 teaspoon tomato paste (you may need just a tad bit more)
1-2 Tablespoons fresh parsley, chopped
1 sprig fresh rosemary (optional)
1 Tablespoon red wine (optional)
Directions:
Cook pasta according to package directions; drain. In a food processor, add the peppers, onion, and garlic. Pulse until finely minced.
In a large non-stick skillet, over medium heat, add the ground pork; breaking up with a wooden spoon. Allow to cook for about 4 minutes. Add the minced vegetables. Cook another 3 minutes or until the pork is cooked through. Add the diced tomatoes, oregano, Italian herb mix, and red pepper flakes. Lower heat and simmer, covered, for 30 minutes. Add the tomato sauce, tomato paste, and parsley; stirring to combine. Add the rosemary sprig if using, cover and let simmer another 30 minutes. Stir in the red wine is using. Season to taste with salt and pepper. Add more tomato paste is sauce is too watery. Remove rosemary sprig before serving. Serve over pasta and enjoy!
One Year Ago: Pan Seared Fish with Tomato and Cucumber Salsa
This ragu is filling and definitely comforting. It's a very simple dish to put together, but you'll have everyone believing you spent the entire day cooking :)
Penne with Pork Ragu
Created by Jenn's Food Journey
Printable Recipe
Ingredients:
13oz whole grain penne pasta
2 red sweet peppers, stem and seeds removed, roughly chopped
1/2 sweet onion, roughly chopped
2 garlic cloves, quartered
1 lbs ground pork
1 14.5 oz can diced tomatoes
1 teaspoon dried oregano
2 teaspoons Italian herb mix
1/4 teaspoon crushed red pepper flakes
8 oz can tomato sauce
1 teaspoon tomato paste (you may need just a tad bit more)
1-2 Tablespoons fresh parsley, chopped
1 sprig fresh rosemary (optional)
1 Tablespoon red wine (optional)
Directions:
Cook pasta according to package directions; drain. In a food processor, add the peppers, onion, and garlic. Pulse until finely minced.
In a large non-stick skillet, over medium heat, add the ground pork; breaking up with a wooden spoon. Allow to cook for about 4 minutes. Add the minced vegetables. Cook another 3 minutes or until the pork is cooked through. Add the diced tomatoes, oregano, Italian herb mix, and red pepper flakes. Lower heat and simmer, covered, for 30 minutes. Add the tomato sauce, tomato paste, and parsley; stirring to combine. Add the rosemary sprig if using, cover and let simmer another 30 minutes. Stir in the red wine is using. Season to taste with salt and pepper. Add more tomato paste is sauce is too watery. Remove rosemary sprig before serving. Serve over pasta and enjoy!
One Year Ago: Pan Seared Fish with Tomato and Cucumber Salsa
Monday, October 31, 2011
Simple Shrimp Stir Fry and the Giveaway Winner!!
Ok.. I know it's not "Halloween" food, but honestly, we have been so busy getting ready to move into a new house that we have sort of conveniently forgotten about Halloween. I know, it's sacrilegious, right? I'm sorry, but sometimes life even gets in the way of my favorite holiday...it's sad but true. The great thing about this stir fry, is it can be perfect for Halloween night. I mean it's ready in less than 20 minutes. And everyone knows you don't get a lot of time in the kitchen on Halloween because you are either taking the kids out trick or treating, or you are handing out candy. So, it might not be orange and black, but it sure does give you something you need on this hauntingly busy night!! (And, of course, you can use chicken instead of shrimp - it would be just as tasty!)
Ok... I know you are all waiting for it... the winner of the cookbook giveaway is......
#7 is - Michael Tao: "I am very excited for Stephen's cookbook. Great review as well Jenn. I like cookbooks with witty stories and instructions. My favourite cookbook is How To Eat by Nigella Lawson."
Congrats to Michael - I will get your winnings out to you as soon as possible! And thanks to everyone for commenting!
Simple Shrimp Stir Fry
Created by Jenn's Food Journey
Printable Recipe
Ingredients:
3 Tablespoons hoisin sauce
3 Tablespoons Sambal Oelek (chili paste)
1 teaspoon honey
1 teaspoon mirin
3/4 lbs 61/70 count frozen shrimp, thawed and tails removed
1/4 cup cooked chicken, chopped (optional - I had some chicken I needed to get rid of, so I used it, it's not necessary, so don't sweat it)
sesame oil
1 teaspoon vegetable oil
2 sweet bell peppers (I used yellow and orange), chopped or diced
Directions:
Mix together the hoisin, chili paste, honey, and mirin until well combined; set aside. In a bowl, toss together the shrimp, chicken, and about 3-4 drops of sesame oil.
In a wok or large, deep skillet, heat the vegetable oil over medium-high heat. Add the pepper and stir fry for 3 minutes. Add the shrimp and chicken and cook for another 3 minutes or until the shrimp and chicken are heated through. Stir in the hoisin mixture, making sure to coat everything. Once sauce is heated, remove from heat and serve over rice. Enjoy!
One Year Ago: Halloween - Our Tradition
Ok... I know you are all waiting for it... the winner of the cookbook giveaway is......
#7 is - Michael Tao: "I am very excited for Stephen's cookbook. Great review as well Jenn. I like cookbooks with witty stories and instructions. My favourite cookbook is How To Eat by Nigella Lawson."
Congrats to Michael - I will get your winnings out to you as soon as possible! And thanks to everyone for commenting!
Simple Shrimp Stir Fry
Created by Jenn's Food Journey
Printable Recipe
Ingredients:
3 Tablespoons hoisin sauce
3 Tablespoons Sambal Oelek (chili paste)
1 teaspoon honey
1 teaspoon mirin
3/4 lbs 61/70 count frozen shrimp, thawed and tails removed
1/4 cup cooked chicken, chopped (optional - I had some chicken I needed to get rid of, so I used it, it's not necessary, so don't sweat it)
sesame oil
1 teaspoon vegetable oil
2 sweet bell peppers (I used yellow and orange), chopped or diced
Directions:
Mix together the hoisin, chili paste, honey, and mirin until well combined; set aside. In a bowl, toss together the shrimp, chicken, and about 3-4 drops of sesame oil.
In a wok or large, deep skillet, heat the vegetable oil over medium-high heat. Add the pepper and stir fry for 3 minutes. Add the shrimp and chicken and cook for another 3 minutes or until the shrimp and chicken are heated through. Stir in the hoisin mixture, making sure to coat everything. Once sauce is heated, remove from heat and serve over rice. Enjoy!
One Year Ago: Halloween - Our Tradition
Friday, October 28, 2011
Stove Top Chorizo Mac & Cheese
Wanna know the key to the creamiest mac and cheese EVER? Evaporated milk! Yep.. that's right... oh.. and eggs. Yep, those two very simple ingredients make the standard old mac and cheese that much more creamier and decadent! Unfortunately, I may never make mac and cheese another way again, but that's neither here nor there. For now, just trust me that this is one killer mac and cheese recipe.
This would have been perfect just by itself...but you know me, I'm never satisfied, I needed to make it be that much more. So for a little kick, I added chorizo and some Cholula hot sauce. How can you really go wrong there, right?
***Remember, today is the last day to enter the cookbook giveaway - Click HERE for details. Winners will be announced Monday morning. Good luck!***
Stove Top Chorizo Mac & Cheese
Adapted from Alton Brown
Printable Recipe
Ingredients:
8 oz whole grain penne pasta
1/4 cup unsalted butter
2 eggs
6 oz evaporated milk
1 teaspoon hot sauce (I used Chili Garlic Cholula)
1 teaspoon kosher salt
1/4 teaspoon black pepper
3/4 teaspoon dry mustard
10 oz shredded cheddar cheese
1 red sweet pepper, diced
1/2 lb. Mexican ground chorizo, cooked
Directions:
Cook the pasta according to package directions; drain. Add butter to bottom of the same pot and put the pasta back into it; tossing to coat.
Whisk together the egg, evaporated milk, hot sauce, salt, pepper, and dry mustard until well combined. Stir into the pasta and add the cheese. Continue to cook over low heat until the cheese has melted. Add the pepper and cooked chorizo and toss to combine. Enjoy!
One Year Ago: Creamy Chipotle Cheddar Chicken
This would have been perfect just by itself...but you know me, I'm never satisfied, I needed to make it be that much more. So for a little kick, I added chorizo and some Cholula hot sauce. How can you really go wrong there, right?
***Remember, today is the last day to enter the cookbook giveaway - Click HERE for details. Winners will be announced Monday morning. Good luck!***
Stove Top Chorizo Mac & Cheese
Adapted from Alton Brown
Printable Recipe
Ingredients:
8 oz whole grain penne pasta
1/4 cup unsalted butter
2 eggs
6 oz evaporated milk
1 teaspoon hot sauce (I used Chili Garlic Cholula)
1 teaspoon kosher salt
1/4 teaspoon black pepper
3/4 teaspoon dry mustard
10 oz shredded cheddar cheese
1 red sweet pepper, diced
1/2 lb. Mexican ground chorizo, cooked
Directions:
Cook the pasta according to package directions; drain. Add butter to bottom of the same pot and put the pasta back into it; tossing to coat.
Whisk together the egg, evaporated milk, hot sauce, salt, pepper, and dry mustard until well combined. Stir into the pasta and add the cheese. Continue to cook over low heat until the cheese has melted. Add the pepper and cooked chorizo and toss to combine. Enjoy!
One Year Ago: Creamy Chipotle Cheddar Chicken
Thursday, October 27, 2011
Grilled Parmesan Green Beans
This an extremely simple side that everyone will enjoy! Don't want to do it on the grill? No worries, you can get the same results in the oven. Trust me, I'm all about versatility - and this is yet another one of those recipes!
Oh... and by the way... thanks so much to everyone for the wonderful birthday wishes last week! I had a great day and of course had an even better time thanks to my mom and dad being here! It was so great to spend time with them and so very hard to say goodbye.
Guess that's a sign that I'm grown up :)
***There's still a chance to win a copy of Stephen Crout's new cookbook - A Cook's Book for Cooks. Click HERE for details***
Grilled Parmesan Green Beans
Created by Jenn's Food Journey
Printable Recipe
Ingredients:
12-14 oz green beans
1 Tablespoon lemon juice
2 Tablespoons olive oil, divided
1 Tablespoon water
1 Tablespoon grated parmesan cheese
1/4 teaspoon red pepper flakes
garlic powder
pepper
Directions:
Preheat grill to 350 degrees. Rinse green beans and snap off ends if necessary. Place in large bowl. Pour lemon juice, 1 tablespoon olive oil, and water over the beans and toss to coat. Add the parmesan, red pepper flakes, and garlic powder and pepper to taste. Toss again to coat.
Fold a 36x18-inch piece of heavy foil in half to make an 18-inch square. Spray with non-stick cooking spray. Pour the beans into the middle of the square. Bring together 2 opposite edges of foil; seal with a double fold. Fold remaining edges together to enclose beans, leaving a little space for steam to build. Place packet on grill and roast for 15 minutes, flipping packet halfway through the cooking time. Carefully remove from grill and enjoy!
One Year Ago: There was a man...
Oh... and by the way... thanks so much to everyone for the wonderful birthday wishes last week! I had a great day and of course had an even better time thanks to my mom and dad being here! It was so great to spend time with them and so very hard to say goodbye.
Guess that's a sign that I'm grown up :)
***There's still a chance to win a copy of Stephen Crout's new cookbook - A Cook's Book for Cooks. Click HERE for details***
Grilled Parmesan Green Beans
Created by Jenn's Food Journey
Printable Recipe
Ingredients:
12-14 oz green beans
1 Tablespoon lemon juice
2 Tablespoons olive oil, divided
1 Tablespoon water
1 Tablespoon grated parmesan cheese
1/4 teaspoon red pepper flakes
garlic powder
pepper
Directions:
Preheat grill to 350 degrees. Rinse green beans and snap off ends if necessary. Place in large bowl. Pour lemon juice, 1 tablespoon olive oil, and water over the beans and toss to coat. Add the parmesan, red pepper flakes, and garlic powder and pepper to taste. Toss again to coat.
Fold a 36x18-inch piece of heavy foil in half to make an 18-inch square. Spray with non-stick cooking spray. Pour the beans into the middle of the square. Bring together 2 opposite edges of foil; seal with a double fold. Fold remaining edges together to enclose beans, leaving a little space for steam to build. Place packet on grill and roast for 15 minutes, flipping packet halfway through the cooking time. Carefully remove from grill and enjoy!
One Year Ago: There was a man...
Monday, October 24, 2011
A Cook's Book For Cooks
So today I will not be posting any recipes. I'm sorry, but it's true! Today is a good day though - today I have the great honor of introducing my friend Stephen's (The Obsessive Chef) new cook book - A Cook's Book For Cooks! Yes, it's true, the Obsessive Chef is now in print! I am even more excited to tell you all that I was truly the first one to purchase this little gem. I've never had the first copy of any book, trust me.
Anyway, Stephen has been working hard at putting his idea into print. I've walked with him a bit through this process... well, as much as someone 2,400 miles away can - and I know this was not an easy task, so that makes my showcasing this book here even more amazing to me.
I will admit that I'm not 100% done reading the book, but I'm far enough along to know I love it. Yes, Stephen can get a bit rambling sometimes and he can even be a bit in your face, but it's witty and informative and I loved the read. Stephen has a wealth of knowledge when it comes to cooking. What I think some people might not appreciate as much as myself, is the fact that some of his amounts of ingredients are "figure it out for yourself" type of thing. What I mean by this is that he will sometimes give you exact measurements and other times just give you the ingredients you need to use. This can frustrate some people - but the point he constantly tries to make throughout the book is that you need to experiment - you need to make things to match your tastes (not his) - you do NOT need to follow recipes to the "T" to make a delicious meal.
Wanna get a copy of your own so you can see what all the hypes about? Well, it's your lucky day! Today, I'm giving away a copy of Stephen's first published cookbook - All you have to do is leave a comment here telling me what your favorite cookbook is. You have until Friday, October 28th at 9:00pm eastern standard time to enter to win. Winners will be picked randomly and will be announced on the follow Monday morning. Anonymous comments will not be counted, so if you have to leave it as anonymous, please make sure you leave your name and email address. Good luck!
One Year Ago: Sour Cream Corn Muffins
Anyway, Stephen has been working hard at putting his idea into print. I've walked with him a bit through this process... well, as much as someone 2,400 miles away can - and I know this was not an easy task, so that makes my showcasing this book here even more amazing to me.
I will admit that I'm not 100% done reading the book, but I'm far enough along to know I love it. Yes, Stephen can get a bit rambling sometimes and he can even be a bit in your face, but it's witty and informative and I loved the read. Stephen has a wealth of knowledge when it comes to cooking. What I think some people might not appreciate as much as myself, is the fact that some of his amounts of ingredients are "figure it out for yourself" type of thing. What I mean by this is that he will sometimes give you exact measurements and other times just give you the ingredients you need to use. This can frustrate some people - but the point he constantly tries to make throughout the book is that you need to experiment - you need to make things to match your tastes (not his) - you do NOT need to follow recipes to the "T" to make a delicious meal.
Wanna get a copy of your own so you can see what all the hypes about? Well, it's your lucky day! Today, I'm giving away a copy of Stephen's first published cookbook - All you have to do is leave a comment here telling me what your favorite cookbook is. You have until Friday, October 28th at 9:00pm eastern standard time to enter to win. Winners will be picked randomly and will be announced on the follow Monday morning. Anonymous comments will not be counted, so if you have to leave it as anonymous, please make sure you leave your name and email address. Good luck!
One Year Ago: Sour Cream Corn Muffins
Subscribe to:
Posts (Atom)