Wednesday, November 30, 2011

Vanilla Bean Sugar Cookies

I cheated... yes, that's right, you caught me.  I have posted this recipe for sugar cookies before.... BUT, in my defense, I did not use vanilla bean in them - Hence, the cheating re-posting :)

These are truly the easiest (and best) sugar cookies I have made.  I got this yummy recipe from Andrea the Kitchen Witch and decided that when I made them this time, I would not only use the vanilla extract, but I would use a fresh vanilla bean too... just to make them that much more vanilla-y (and yes that is a word in my book, thank you!).

If I had more time over the weekend, I would have made a wonderful vanilla bean frosting to top these, but alas, I did not get that far.  If you wanted to make it, feel free, I would have made a cream cheese frosting using 1 vanilla bean, 4-6oz cream cheese, and powdered sugar (until you get the desired consistency and sweetness)... this frosting is not needed of course, it just would have made these delicious little cookies even better!

Vanilla Bean Sugar Cookies
Adapted from Andrea the Kitchen Witch
Printable Recipe 
Ingredients:
1 1/4 cup granulated sugar (I used vanilla sugar)
2 sticks (1 cup) unsalted butter, softened
2 egg yolks
1 Tablespoon vanilla extract
1 vanilla bean, split and scraped
2 1/2 cups all purpose flour
1/2 teaspoon cream of tartar
1 teaspoon baking soda
1/4 teaspoon salt
1/4 cup granulated sugar (for rolling) 

Directions:
Cream the butter and sugar together in a stand mixer with the paddle attachment until very light and fluffy, about 5 minutes on medium speed.

Scrape down the sides and add the vanilla and vanilla bean. Mix until incorporated. Add the egg yolks one at a time, beating well between each addition and scraping sides of bowl and paddle after each addition.

Mix the flour, baking soda, cream of tartar and salt together in a bowl. Slowly add the dry ingredients to the wet ingredients, scraping down the sides after each addition.

Preheat the oven to 350 degrees. Scoop balls of dough and roll into sugar, coating all sides. Place balls of dough on cookie sheet and bake for 11 minutes or until just set. You do not want these to brown, brown means they will not be soft and chewy in the middle. Let cool on cookie sheet for 2 minutes and then move to wire rack to finish cooling. Enjoy!


One Year Ago:  Kung Pao Chicken

Tuesday, November 29, 2011

Vanilla Balsamic Chicken over Pasta with Garlic Vanilla Cream Sauce

I am so excited to share this recipe with you.  When I was approached by Whitney at IndriVanilla, who asked if I would interested in some free vanilla bean samples, I couldn't pass it up.  I had all these ideas of all these yummy desserts I could make... then it hit me.  Why not try and create a savory dish with them?  I very rarely see savory dishes that call for vanilla beans, outside of certain curry dishes, that is.  So I set out to do just that.

My first test....vanilla balsamic chicken - grilled of course - but I wanted to go a bit further.  You know me and my love for sauces.... why not create a sauce to go over it.  Enter the garlic vanilla cream sauce... mmmmm!!!  Put it all over a bit of pasta and you have yourself a savory dish using vanilla beans!

How did it turn out?  Well, honestly.. the chicken was kick ass.  It had this perfect mixture of tanginess and sweetness, that worked together amazingly well.  The sauce.. the sauce was just a tad bit too sweet... but that can easily be fixed, so all in all, this dinner rocked!  Would I make it again... hell yes!!   Would I encourage you to try it?  Most definitely!!

And, just one more word on the vanilla beans.  I seriously thought that for the price of the vanilla beans that they would not be of the best quality.  I was 100% incorrect in that thinking.  So far I have used the "low grade" beans that Whitney sent me and I can say to you, I see no difference in the vanilla beans I have used before - even the expensive, most coveted, Madagascar beans.  So, don't wait any longer, hop on IndriVanilla and order your own beans right now.... seriously, they will package them in how every many beans you want.... but go now... you are going to LOVE not only the price, but the actual beans themselves!!

Vanilla Balsamic Chicken over Pasta with Garlic Vanilla Cream Sauce
Chicken recipe adapted from Cooking Light, Sauce recipe created by Jenn's Food Journey
Printable Recipe 
Ingredients:
1/4 cup chicken broth
1/3 cup balsamic vinegar
2 Tablespoons brown sugar
2 Tablespoons orange juice
1 vanilla bean, split and scraped
pinch of salt
2 boneless, skinless chicken breasts
For the sauce -
1 Tablespoon vanilla balsamic sauce (which you will be making with above ingredients)
1/2 cup chicken broth
1/2 cup heavy cream
1/2 vanilla bean, split and scraped
1 Tablespoon butter
2 Tablespoon flour
2 large garlic cloves, minced
salt and pepper to taste
10oz whole grain penne pasta (or whatever kind of pasta you want to use)

Directions:
In a saucepan over medium heat, add 1/4 cup chicken broth, balsamic vinegar, brown sugar, orange juice, vanilla bean, and salt.  Stir to combine.  Bring to a boil and reduce heat.  Let simmer for 10-15 minutes, or until the sauce thickens.  Remove from heat and allow to cool.  Remove 1 Tablespoon of the sauce and set aside.  Place the chicken in a shallow dish and pour all but 1 Tablespoon (you'll use this to baste the grilled chicken with) of the sauce over the chicken, cover, and refrigerate for at least 2 hours.

Preheat grill to 375 degrees F and oil the grill grates.  Place the chicken directly over the fire and grill for 6-10 minutes per side, or until the chicken is cooked through.  Brush with reserved sauce.  Remove from grill and allow to rest for 5 minutes.  Once cooled a bit, slice into bite size pieces.

Meanwhile, cook the pasta according to package directions; drain.  Mix together 1 Tablespoon of reserved sauce, chicken broth, cream, and vanilla bean until well combined.  In a sauce pan over medium heat, add the butter and let melt.  Add the garlic and allow to cook for 1 minute.  Add the flour and stir to combine everything.  Slowly whisk in the cream mixture.  Allow to come to a slow simmer.  Simmer for 5-10 minutes or until the sauce thickens just a bit.  Season with salt and pepper to taste.

Place pasta on a plate or in a bowl, top with chicken and sauce.  Serve immediately.  Enjoy!

One Year Ago:  Mac & Texas Cheese with Chicken and Roasted Chiles

Monday, November 28, 2011

Beef Roast

Pot Roast Image © Diana Rattray
I'm sorry to say the picture used here, are not mine.  No, I actually wanted to sit down to dinner at the same time Chris did... I mean it was Thanksgiving and all... so I decided not to take a picture, thinking it would be fine, that this wasn't that great of a dish to post anyway.  Well, I was wrong.... once I took a bite of the melt in your mouth roast, I knew I had made a mistake....hence the borrowing of others pictures.  This was too easy and too good not to share.

Chris and I decided to forgo the traditional Thanksgiving meal this year.  With moving into the new house and the fact that it was just the two of us, it just seemed like too much work to put a whole Thanksgiving meal together.  After a quick discussion about it, Chris recommended that we do a roast. And I thought, PERFECT!  I can throw it in the crock pot in the morning and forget about it the rest of the day.  That freed up my entire day to relax, unpack, and frankly, just do whatever the hell I wanted to.  The perfect way to spend Thanksgiving... well, perfect would have included all of my family, but I think you see where I'm going with this :)  This is very simple and could actually be done in a Dutch oven in a low temp oven too, so don't fret if you don't have a crock pot.  Where there is a will, there is a way!

***Just a little extra note - starting tomorrow I will be showcasing recipes that highlight vanilla beans.  And not just any vanilla beans... you might remember I mentioned IndriVanilla a few weeks back and the awesome prices they have on vanilla beans.  Well, I finally got around to testing them out in different recipes ... and trust me, you aren't going to want to miss these!!***

Beef Pot Roast
Created by Jenn's Food Journey
Printable Recipe 
Ingredients:
2 lb beef roast
olive oil
garlic salt
pepper
2 cups beef broth
1 cup water
1 Tablespoon Worcestershire sauce
1 packet onion soup mix (I used Lipton's)

Directions:
Heat a non-stick skillet over medium high heat.  Rub the outside of the roast with olive oil and season liberally with garlic salt and pepper.  Sear all sides of the roast in the heated skillet (this should only take about 5-8 minutes).  Remove from skillet and place in crock pot.  Mix together the broth, water, Worcestershire sauce, and onion soup mix.  Pour over roast and cover.  Cook on high for 30 minutes.  Turn down to low and cook for 8 hours.  For faster cooking time, cook on high for 4-5 hours.  The meat should just fall apart!!  Enjoy!

One Year Ago:  Grilled Chicken with Bacon Balsamic Glaze

Friday, November 25, 2011

So many leftovers......

Most of you probably have more turkey leftovers than you know what to do with... well, never fear, my loyal readers, for I am here to help you with this dilemma!

None of the following recipes are mine (not enough time for me to make all these wonderful dishes, I'm sorry to say), but they are recipes I would look forward to trying if I had lots of leftover turkey (ok, ok, you got me, we had roast for Thanksgiving... yep, that's right, ROAST!!).

Hope you all had a fantastic Thanksgiving and that some of these recipes give you creative ideas on how to use up those leftovers!!


I'll be back on Monday with all new recipes.... see you then!!

Thursday, November 24, 2011

Thanksgiving

Happy Thanksgiving everyone!!

Today, as every day, I am most thankful for my family and Chris.  I am also so very thankful for all my amazing followers, for our new home, for my health, and for so many wonderful things in my life!

I hope everyone is having a fantastic day... may you be with loved ones and may you eat mucho delicious food!

Ciao!

Friday, November 18, 2011

Photo Friday - Our New Digs


We have moved!!!  This is the kitchen where I will be creating more magic... or at least that is the plan!!  To get that magic, I need to take some time away from blogging, but hang tight... I will be back soon with delicious and wonderfully yummy posts - just for you!!

 
(The view from the kitchen window!!!)

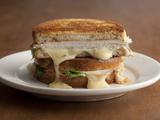
For now, you can stop by Fire Day Friday and tempt your senses with another simple and delicious grilled chicken recipe:


Enjoy your week and plan on seeing me back to my regularly scheduled posts after the turkey holiday.  Have a happy Thanksgiving and I'll see y'all real soon!

Ciao!
Jenn

One Year Ago:  My Mom's Braciole


Thursday, November 17, 2011

Guest Blogger: Cheesy Cornbread

It's guest blogger time, and today is a very special guest blog.  Mary of Food Floozie and I are switching things up today in honor of the Nebraska vs. Michigan game on Saturday.  So, after checking out Mary's yummy little post, stop on by her site and check out my post for Runza Bites  -  You'll have to go there to see what it's all about!! :)
______________________________________________________

I'm not Southern, but I still make a great cornbread! And, believe it or not, this recipe is actually a great way to represent both schools in honor of Saturday's Nebraska-Michigan game. Thanks so much, Jenn, for trading posts with me today as we celebrate what will undoubtedly be an amazing match-up!

Nebraska, of course, is famous for its agriculture, particularly for beautiful corn. So cornbread seemed a perfect choice to offer for tailgating or for watching the game at home; it goes with chili, with soups, with salads ... you name it, it's hard to go wrong with cornbread on the side!

This recipe is not my own, I must admit. It comes from Jo Mathis, a reporter who used to write for The Ann Arbor News before its 2009 demise. I loved reading her columns, in which Jo wrote about daily life with her husband and her daughters; we readers all felt a part of her inner circle as she shared her heart and soul with us.

I remember one column in particular that told a story of travelling and about serendipitously finding great food. I don't know where the original clipping has wandered off to, so I can't tell you all of the details. But Jo managed to find the perfect slice of cornbread and finagle the recipe from the waitress, then she generously shared it with all of her readers.

And what did she ask for in return? Chocolate. Recipes for any kind of chocolate treat. How could you not love this woman???

So today I'm featuring a recipe that pays tribute both to the corn that is so much a part of the state of Nebraska, as well as a recipe that comes from Ann Arbor's history. This is moist, flavorful, has great texture, and it's easy to make - what more do you need, other than lots of butter to slather on the cornbread?

Nebraska at Michigan
Saturday, November 19 at noon EST
GO BLUE!!!

Cheesy Cornbread
(slightly adapted from a recipe provided by Jo Mathis)

1/2 cup butter, at room temperature
1/2 cup sugar
2 eggs
1 cup creamed corn
1/2 cup flour
1/2 cup yellow cornmeal
2 teaspoons aluminum-free baking powder
1/2 teaspoon kosher salt
pinch of freshly ground black pepper
4 oz shredded Colby-Jack cheese

Preheat oven to 350F. Grease an 8"x8" baking pan.

In a large bowl, cream together butter and sugar; mix in eggs, one at a time. Stir in creamed corn. Combine flour, cornmeal, baking powder, salt and pepper; stir into batter. Stir in cheese.

Pour batter into the prepared baking pan. Bake for 30 minutes, until cornbread is golden at the edges and a toothpick inserted into the center comes out clean. Cool, then cut into squares.

Makes 8 servings.

Note: Feel free to substitute sharp Cheddar or Pepper Jack for the Colby Jack, or to use a combination of cheeses. I've offered Jeremy's favorite version of the cornbread, but one of its many charms is its adaptability.

One Year Ago:  Chocolate Sugar Cookies

Wednesday, November 16, 2011

Mustard Herb Sauce

I sure hope no one is getting sick of my sauce recipes :)

Ok, that was a little sarcasm, if you are getting sick of sauce recipes, you should probably find another blog to follow... I do love me some sauces and will continue to post about them as long as I can come up with new and creative ideas....  truth be told, it doesn't even have to be that creative.. just delicious!  And this one screams that.  It uses very few ingredients and packs a major punch in the taste factor.  It works on fish, chicken, or even pork.  It's fresh, simple, and definitely delicious!

Mustard Herb Sauce
Created by Jenn's Food Journey
Printable Recipe 
Ingredients:
3 Tablespoons Dijon mustard
1 1/2 Tablespoons mayonnaise
1 Tablespoon sour cream
1 Tablespoons fresh chives, chopped
1 Tablespoons fresh parsley leaves, chopped

Directions:
Mix all ingredients together until well combined.  Cover and refrigerate until ready to use.  Can be store in an airtight container for up to 2 weeks.  Enjoy!

One Year Ago:  Chicken Nacho Bake

Tuesday, November 15, 2011

Peruvian Grilled Chicken

While preparing for our big move, I have tried to keep dinners simple - Ok, as most of you know, I try to do that all the time, but the last two weeks have been even more on the simple side each and every night.  Some dinners aren't post worthy, but that's ok, you have to have a few of those every now and then, right?  But this one.. this one is definitely worth posting.  It's simple and full of flavor - my favorite type of meal!

And, just in case you are not aware (because, trust me, I was not) Peruvian cuisine reflects local cooking practices, ingredients, and through immigration influences from Spain, China, Italy, West Africa, and Japan.  A big mix there to equal amazing flavors!

Peruvian Grilled Chicken
Adapted from Epicurious.com
Printable Recipe 
Ingredients:
2 boneless, skinless chicken breasts
1/4 cup soy sauce
2 Tablespoons lime juice
1 Tablespoon vegetable oil
2 cloves of garlic, minced or crushed
1/2 teaspoon cumin
1/2 teaspoon paprika
1/2 teaspoon dried oregano

Directions:
Rinse chicken and pat dry with paper towel.  In a measuring cup, add the remaining ingredients and stir to combine.  Place the chicken in a resealable bag and pour the marinade over the chicken.  Seal and refrigerate for at least 2 hours, preferably 4.

Preheat grill to 375 degrees and oil grill grates.  Remove the chicken from the bag and discard the marinade.  Place the chicken directly over the fire and grill for 6-10 minutes per side depending on how thick your pieces are.  Chicken is done when internal temperature reaches 165 degrees.  Remove from grill and allow to rest for 3 minutes before serving.  Enjoy!

One Year Ago:  Creamy Taco Mac

Monday, November 14, 2011

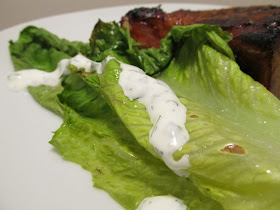
Grilled Romaine Lettuce with Creamy Herb Dressing

A simple and delicious side dish that should have been made a LONG time ago.... I have grilled Romaine lettuce before, but not since Chris and I met.  I guess I thought he might not enjoy it - I don't know why I thought that - no matter - I made it, he loved it, I'll definitely be making it again!

Grilled Romaine Lettuce with Creamy Herb Dressing
Created by Jenn's Food Journey
Printable Recipe 
Ingredients:
1 small head Romaine lettuce (leaves separated, rinsed and dried)
olive oil
salt and white pepper
2 Tablespoons sour cream
1 Tablespoon milk or cream
1 Tablespoon mayonnaise
1 teaspoon white wine vinegar
1/8 teaspoon garlic powder
1 1/2 teaspoon freshly minced chives
1 Tablespoon freshly chopped parsley

Directions:
Preheat grill to 325 degrees F.  Drizzle lettuce with olive oil and season with salt and pepper.  Place on the grill and allow to grill for about 3 minutes per side or until the lettuce just starts to wilt.  Remove from grill.  Serve with cream herb dressing.

To make the dressing:  In a small bowl or measuring cup, add the sour cream, milk, mayo, vinegar and garlic powder; stir until smooth.  Gently stir in herbs.  Season with salt and white pepper to taste.  Cover and refrigerate until ready to use.  Enjoy!

One Year Ago:  Tilapia with Hash Browns

Friday, November 11, 2011

Pomegranate Balsamic Pork Chops

Before I get into this delicious recipe, I want to say just two thing :)

I want to extend a HUGE thank you to all the veterans out there.  (My dad especially!!!)  It's Veteran's day and I thought it would be the perfect time to thank those that have served and are still serving this country.  You are amazing people in my book!  Thank you!!

I also want to quickly draw your attention to this fantastic website that has the best vanilla beans around for the most amazing price you will ever find.  Whitney, with IndriVanilla, contacted me a few weeks ago to see if I would be interested in some vanilla bean samples.  Well, considering how much vanilla beans cost, and she was willing to send them to me for free, how could I pass them up, right?  Whitney proceeded to tell me that she sells these wonderful vanilla beans for 50cents to $1.00 EACH!  WHAT?  Ok, what's the catch, right?  Vanilla beans for 50cents???  Come on....  Seriously, though, that's how much they are and they are every bit as wonderful as other vanilla beans that sell for $5-$10 each!  Whitney also told me that she is located right here in Arizona... In Tempe, Arizona to be exact... and well, any chance I can get to help out local merchants, I'm all over that.... especially with something so wonderful as vanilla beans!!  Now, I haven't actually cooked with these beans yet, I know that might sound cheesy, but it's true.  But, that's how confident I am in these beans.. I'm willing to tell you about them without actually ever using them.  I have seen them, I have smelled them... I know you'll be just as amazed as I was with the quality of them.  So, hang in there until we get moved in and I plan on not only making a few deliciously sweet dishes, but I also plan on trying my hand at adding the vanilla beans into more savory dishes....  You'll definitely want to hang around for that :)

Finally, I will tempt you with this fantastic piece of meat.  Behold the thick cut pork chop!  I couldn't believe that I actually found two packed THICK cut chops.  And bone in, nonetheless.  So, when I saw these beauties sitting in the meat department at my local grocery store, I could not help but get just a tad bit excited.... Oh the possibilities!!!  And, although there were a ton of possibilities, I kept this very simple.  No need to go too over board, you want to taste the meat too sometimes :)  If you find yourself with no pomegranate balsamic vinegar, you can use regular balsamic in its place... it will work just as well, I promise.  One thing you don't want to change or skip, though, is the brining.  You must brine, it will make all the difference in the world with these wonderfully thick chops!  Plan ahead with this recipe, but I not only have you brining the chops, but I have you marinating them too!!  Oh the flavor!!!!

Pomegranate Balsamic Pork Chops
Created by Jenn's Food Journey
- Serves 2 -
Printable Recipe 
Ingredients:
2 bone-in 1" (or more) thick pork loin chops
For the brine -
3 cups water
1 1/2 Tablespoons kosher salt
1 Tablespoon sugar
2 garlic cloves, minced or chopped
1 teaspoon black pepper
For the marinade -
1 garlic clove, smashed
1 Tablespoon pomegranate balsamic vinegar
1 Tablespoon brown sugar
1/4 teaspoon cayenne pepper
For the glaze -
2 Tablespoons pomegranate balsamic vinegar
1 1/2 Tablespoons brown sugar
1 Tablespoon water

Directions:
In a large measuring bowl, add all the ingredients for the brine and stir to combine.  Place the pork in a resealable bag set in a bowl or dish and pour the brining liquid over it.  Seal and place in refrigerator for 2 hours.  Remove from brine and rinse pork thoroughly under cool running water.  Pat with towel to dry and place pork in a shallow dish.

In a small bowl, add all the ingredients for the marinade and stir until the sugar has dissolved.  Pour mixture over the pork and cover.  Refrigerate for at least 1 hour.

Meanwhile, in a small saucepan over medium heat, add the remaining ingredients for the glaze.  Stir to dissolve the sugar.  Allow mixture to come to a bowl and thicken; stirring often.  When sauce has thickened, remove from heat and allow to cool.

Preheat grill to 375 degrees and oil the grill grates using long tongs to soak a wad of paper towels in oil.  Place the pork chops directly over the fire; brush with glaze.  Allow to grill for 5 minutes and flip; brushing the other side with the glaze.  Allow to grill another 5 minutes and flip again; brush with glaze.  Turn down the heat and continue to grill until the pork is cooked through and the internal temperature reads 145 degrees.  Remove from gill and allow to rest for 3-5 minutes before serving.  Enjoy!

One Year Ago:  Potato and Chipotle Chowder

Thursday, November 10, 2011

Grilled Jalapeno Tartar Sauce - And Giveaway Winner!

You knew it was only a matter of time before I figured out a way to create a "grilled" sauce, didn't you??

I guess you could say that I aim to please!!

And speaking of pleasing - the winner of the Bertolli olive oil giveaway is:

Miss Meat and Potatoes (aka Alisa) - "Eek! I almost missed your giveaway!! And yes please - count me in for a chance to lasso that lovely liquid gold!!"

Congratulations to Alisa!  Thanks to everyone for participating and of course, thanks to Bertolli for supplying the giveaway winnings!

Grilled Jalapeno Tartar Sauce
Created by Jenn's Food Journey
Printable Recipe 
Ingredients:
1 medium to large jalapeno, stem removed, cut in half and seeds removed
1/4 cup mayonnaise
1 teaspoon jalapeno hot sauce (I used Arizona Gunslinger)
1 1/2 teaspoon white wine vinegar
1/8 teaspoon garlic powder
white pepper
kosher salt

Directions:
Preheat grill to 400 degrees.  Place the jalapeno halves directly over the fire and allow to grill for 3-4 minutes per side, or until the jalapeno is softened but not completely charred (you might need to adjust your flame).  Remove from grill and allow to cool.  Once cooled enough to handle, chop or mince.

In a small bowl, mix all the ingredients together until well combined.  Taste for seasoning.  Cover and refrigerate until ready to use.  Use on fish, chicken, sandwiches, whatever you want... just make sure to Enjoy!

One Year Ago:  Chorizo and Eggs

Wednesday, November 9, 2011

Spicy Chipotle Shrimp Stir Fry

Back in July, I posted a Fire Day Friday recipe for chicken with orange chipotle glaze, and ever since, I have wanted to use that flavor combination again.  Enter my spicy chipotle shrimp stir fry.  It combines that heat of the chipotle and that tangy flavor of the orange juice to create the perfect sauce for this simple stir fry.

***The Bertolli extra virgin olive oil giveaway ends tonight at 11pm (EST) - don't forget to enter - you have two chances to win - Click here for details***

Spicy Chipotle Shrimp Stir Fry
Created by Jenn's Food Journey
Printable Recipe 
Ingredients:
1/4 cup barbecue sauce
1 Tablespoon chipotle puree (to make puree, pour entire content of chipotle in adobo sauce can into a food processor and pulse until pureed)
3 Tablespoons orange juice
1 teaspoon sour cream
1 teaspoon vegetable oil
48 large frozen shrimp, thawed and tails removed
1 red pepper, chopped
1 jalapeno, chopped
5-6 slices of bacon, cooked and crumbled

Directions:
In a measuring cup or small bowl, add the barbecue sauce, chipotle puree, and orange juice; stir to combine.  Fold in the sour cream; set aside.

In a wok or large, deep skillet, heat the vegetable oil over medium high heat.  Add the red pepper and jalapeno.  Stir fry until just starting to soften, about 3 minutes.  Add the shrimp and stir fry until the shrimp is heated through, about another 3 minutes.  Once the shrimp and veggies are cooked to your liking - add the sauce and stir to coat.  Allow to cook another 1-2 minutes, or until the sauce is heated.  Add the bacon and stir to combine.  Serve over rice.  Enjoy! 

One Year Ago:  Ranch Chicken Pizza

Tuesday, November 8, 2011

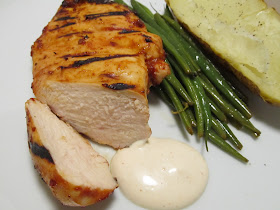
Lemon Sage Chicken

Simple, savory, and delicious.  Need I say more?  I'm hoping not, because honestly, I don't know what else to say about it.....  Well, except that I included a lemon sage aioli, which just made the chicken that much better!!

I seem to be short on words lately, and I apologize for that... once we finally get moved and I get settled into a new kitchen and a new routine, I know that will change... so hang in there with me for just a bit longer :)

***There is still a chance to enter to win a free 17oz bottle of Bertolli extra virgin olive oil.  Click here for details.  Giveaway ends 11pm Wednesday, November 9th, so hurry!!***

Lemon Sage Chicken
Created by Jenn's Food Journey
- Serves 2 -
Printable Recipe 
Ingredients:
zest of 1 lemon (about 1/2-1 Tablespoons)
juice of 1 lemon (about 1/4 cup)
2 Tablespoons olive oil
1 garlic clove, finely minced
1 Tablespoon honey
1 Tablespoon dried sage
1/4 teaspoon salt
1/8 teaspoon pepper
2 boneless, skinless chicken breasts
For the lemon sage aioli -
1/4 cup mayonnaise
1 Tablespoon lemon juice
1/4 teaspoon lemon zest
1/4 teaspoon lemon pepper seasoning
1/2 - 1 teaspoon dried sage

Directions:
Mix together the lemon juice, zest, oil, garlic, honey, sage, salt and pepper until combined.  Rinse the chicken and pat dry.  Place in a resealable bag and pour the mixture over it.  Massage it to coat the chicken, seal the bag, and place in refrigerator for at least 2 hours.

Meanwhile, in a small bowl, mix together all the ingredients of the aioli until well combined.  Cover and place in refrigerator until ready to use.

Preheat grill to 375 degrees F.  Oil grill grates.  Remove the chicken from the marinade and place directly over the fire.  Grill 8-10 minutes per side or until the chicken is cooked through (165 degrees F.)  Remove from grill and allow to rest for 4 minutes.  Serve with aioli.  Enjoy! 

One Year Ago:  Tequila Lime Chicken

Monday, November 7, 2011

A New iPhone App and Bertolli Olive Oil Giveaway

I find it unusual that I am about to talk about iPhone app, considering I don't even own an iPhone.  BUT, I do love olive oil and I do love free stuff, so here I am talking about something I can't honestly give you my opinion on one way or another.  Is that selling out?  lol  Well, if so, I guess I'm a sell out.  Sometimes, you do selfish things... I think this might be one of those times for me! :)

A few weeks ago, I was contacted by a representative of Bertolli products asking me if I'd be interested in testing out the new iPhone app that featured chef Fabio Viviani along with some incredible recipes, videos, and photos.  I, of course, had to turn them down because as I said previous, I do not own an iPhone.  Regardless of my lack of technological gadgets, they sent me a sample bottle of their olive oil anyway.  They also have been kind enough to offer YOU, my loyal readers, a 17oz bottle of their extra virgin olive oil too!!  So, not only was I selfish in wanting a bottle, but I was also very generous, cause I got one for you too :)

The only thing you have to do.... leave a comment here on my site telling me you want this bottle.  I'm going to also go out on a limb and give you an extra chance to win by leaving me a comment on my facebook page too.  You have until 11:00pm (eastern standard time) Wednesday, November 9th to enter.  Winners will be announced the morning of Thursday, November 10th.  Good luck!

Oh.. and before I go... if you are interested in checking out this new app - here are some details (this information comes directly from a press release dated 8/24/11):

Celebrity chef, restaurateur and Top Chef fan favorite, Fabio Viviani, has partnered with Bertolli Olive Oil to offer an engaging and enlightening app, “Let’s Cook!”, to at-home chefs, now available for download on the App Store SM for iPad, iPhone and iTouch®. “Let’s Cook!” brings Chef Fabio’s famously infectious style right into the kitchen and has all the tools to learn to cook with passion, skill and confidence in an easy, personalized way.
 
“Let’s Cook!”, available for $.99, features 16 step-by-step video recipes by Chef Fabio in stunning full-screen, HD video, with no streaming required. Watch and cook alongside Chef Fabio as he brings flavors to life in some of his favorite dishes featuring Bertolli Olive Oil. In more than five hours of video, Chef Fabio also gives menu suggestions, cooking and entertaining tips, and more. There’s a special section devoted solely to the wonders of olive oil and more than 100 recipes hand-selected by Chef Fabio, which feature Bertolli Olive Oil.  Additional features include:
  • Elegant, intuitive design
  • Full screen photography
  • Full recipes with prep and cooking times and serving sizes
  • Wine pairings
  • Recipe searchability
  • Favorites list
  • E-mail ingredients for easy shopping
  • Links to share via Facebook and Twitter
  • No Internet connection required once downloaded


One Year Ago:  Frosted Sour Cream and Chocolate Drops

Friday, November 4, 2011

Guest Blogger - Healthy Meal Plans: Good for You, Good for Your Taste Buds

Today I'm stepping away from my usual Photo Friday post - instead, I am featuring a new guest blogger.  Say hello to Sean.  Sean contacted me a few weeks ago and asked if I would be interested in featuring a post from him.  He talked about healthy eating and how important it is and how "not so boring" it can truly be.  Because I believe in a lot of what he is writing about, and because I think this is a reminder we all need... I immediately agreed to post his writings.  So, without further ado, Sean - take it away:

Healthy Meal Plans: Good for You, Good for Your Taste Buds

Often, it's hard to shake a first impression.  For many people, their first introduction to health food was something like a wilted celery stick, a bland rice cake, or an unappetizing iceberg lettuce salad.  So, for them, healthy meal plans conjure up the simple "do not want," a completely understandable instinct.  But you can alter your first impression.  Eating well does not require a diet devoid of flavor.  Once you decide to try healthy eating, you'll soon realize that "delicious" and "healthful" can coexist.  Here are some ideas to get you started.

1.  Share, Share, Share

One simple way to start on the road to healthy meal plans is to eat less.  You do not have to worry about adding or subtracting foods from your diet, just notice how much you are eating.  Divide dessert with a friend.  Share you entree with your date.  Split popcorn with your movie companion.  As you do this, you begin to appreciate that you don't need to eat as much as you thought you did.  Where before you'd finish that entire dessert, now you get the same enjoyment from the smaller portion.

2.  Monitor Portion Sizes

You have proven to yourself that you can survive on less food.  Now it is time to get more specific about portion size.  The best way to monitor portion size is a food scale.  But sometimes it is not feasible to measure your food that way.  It is helpful to learn some quick comparisons for portion size: a serving of meat is equivalent to a deck of cards, a serving of pasta is like a tennis ball, and a tablespoon is about a poker chip.

3.  Fill up the Extra Space on your Plate with Healthy Foods

As you implement these changes, you will start to notice that your plate is beginning to change.  Where before a large slab of fatty meat took up the entire space, now you have an appropriate portion and plenty of blank space.  Great!  Fill that blank space up the right way.  Add some vegetables, a scoop of rice or potatoes, and a fruit salad.

Look at your new plate - so many colors and textures and tastes!  Without really trying to, you have managed to create a meal that includes various nutrients and vitamins.  Just by trying out these three tips, you are well on your way to a lifetime of healthy eating.  You've learned to be more mindful of how much you eat and about the importance of variety.  Use these lessons as a foundation as you explore the delicious world of healthy meal plans.
-------------------------------------------------------------------------
Thanks so much to Sean - Hope you all enjoyed the little tid bits about healthy eating!  I know we can all use the reminders every now and again!

Oh.. and speaking of not so healthy :) - don't forget to check out what's cookin' over at Fire Day Friday - It's another spin on my favorite sandwich:


One Year Ago:  Chipotle Cheddar Corn Bread